Billing
Who can use this feature
Anyone with Administrator and Accounting Manager role can access all the Accounting pages
Introduction to Billing Submodule
The Billing Module within Voyadores is purposefully crafted to streamline and automate billing and invoicing procedures within your organization. This submodule plays a pivotal role in the Voyadores ecosystem, seamlessly merging various business functions and processes into a unified platform for optimal efficiency.
Definition of Terms
This section elucidates the key pages under the Billing submodule:
- Invoices. Invoices, the cornerstone of financial transactions, are formal documents generated either automatically or manually. They serve the purpose of requesting payment from customers or clients for the products or services rendered by your organization.
- Sales Quotation. Sales Quotation, a pivotal document in the sales process, is a formal record generated by your business. It is provided to potential customers or clients, outlining the terms and details of a proposed transaction.
- Customers. Customers represent the core of your business's success. They encompass entities or individuals who procure goods or services from your organization. Customers can range from individuals to other businesses or organizations, forming the lifeblood of your operations.
Roles and Permissions
The table below shows the defined standard roles and permissions when accessing pages and features under the Billing submodule.
| Functions | Administrator | Accounting Manager | Accounting Staff | Employee |
|---|---|---|---|---|
| Invoices | ||||
| Create | ||||
| Edit | ||||
| Cheques | ||||
| Sales Quotation | ||||
| Create | ||||
| Customers | ||||
| Create | ||||
| Edit | ||||
| Upload | ||||
Roles and Permissions
Enhance access control and refine user privileges by effortlessly adding and configuring additional roles and permissions. This aligns system functionality with the organizational structure and security requirements, ensuring that users are appropriately given levels of access and responsibilities.
To do so, contact [email protected]
Invoices
Introduction to Invoices
The Invoice Page enables the user to generate invoices for products or services delivered to customers. The user is offered the flexibility to select from predefined templates or create custom invoices as required. This page serves a pivotal role in managing the financial aspects of their business transactions. It furnishes a user-friendly interface for creating, customizing, and monitoring invoices, thus significantly enhancing the efficiency of financial management.
To access this page, navigate to the Accounting Module and click “Invoices” under Billing Submodule as shown in the image below:
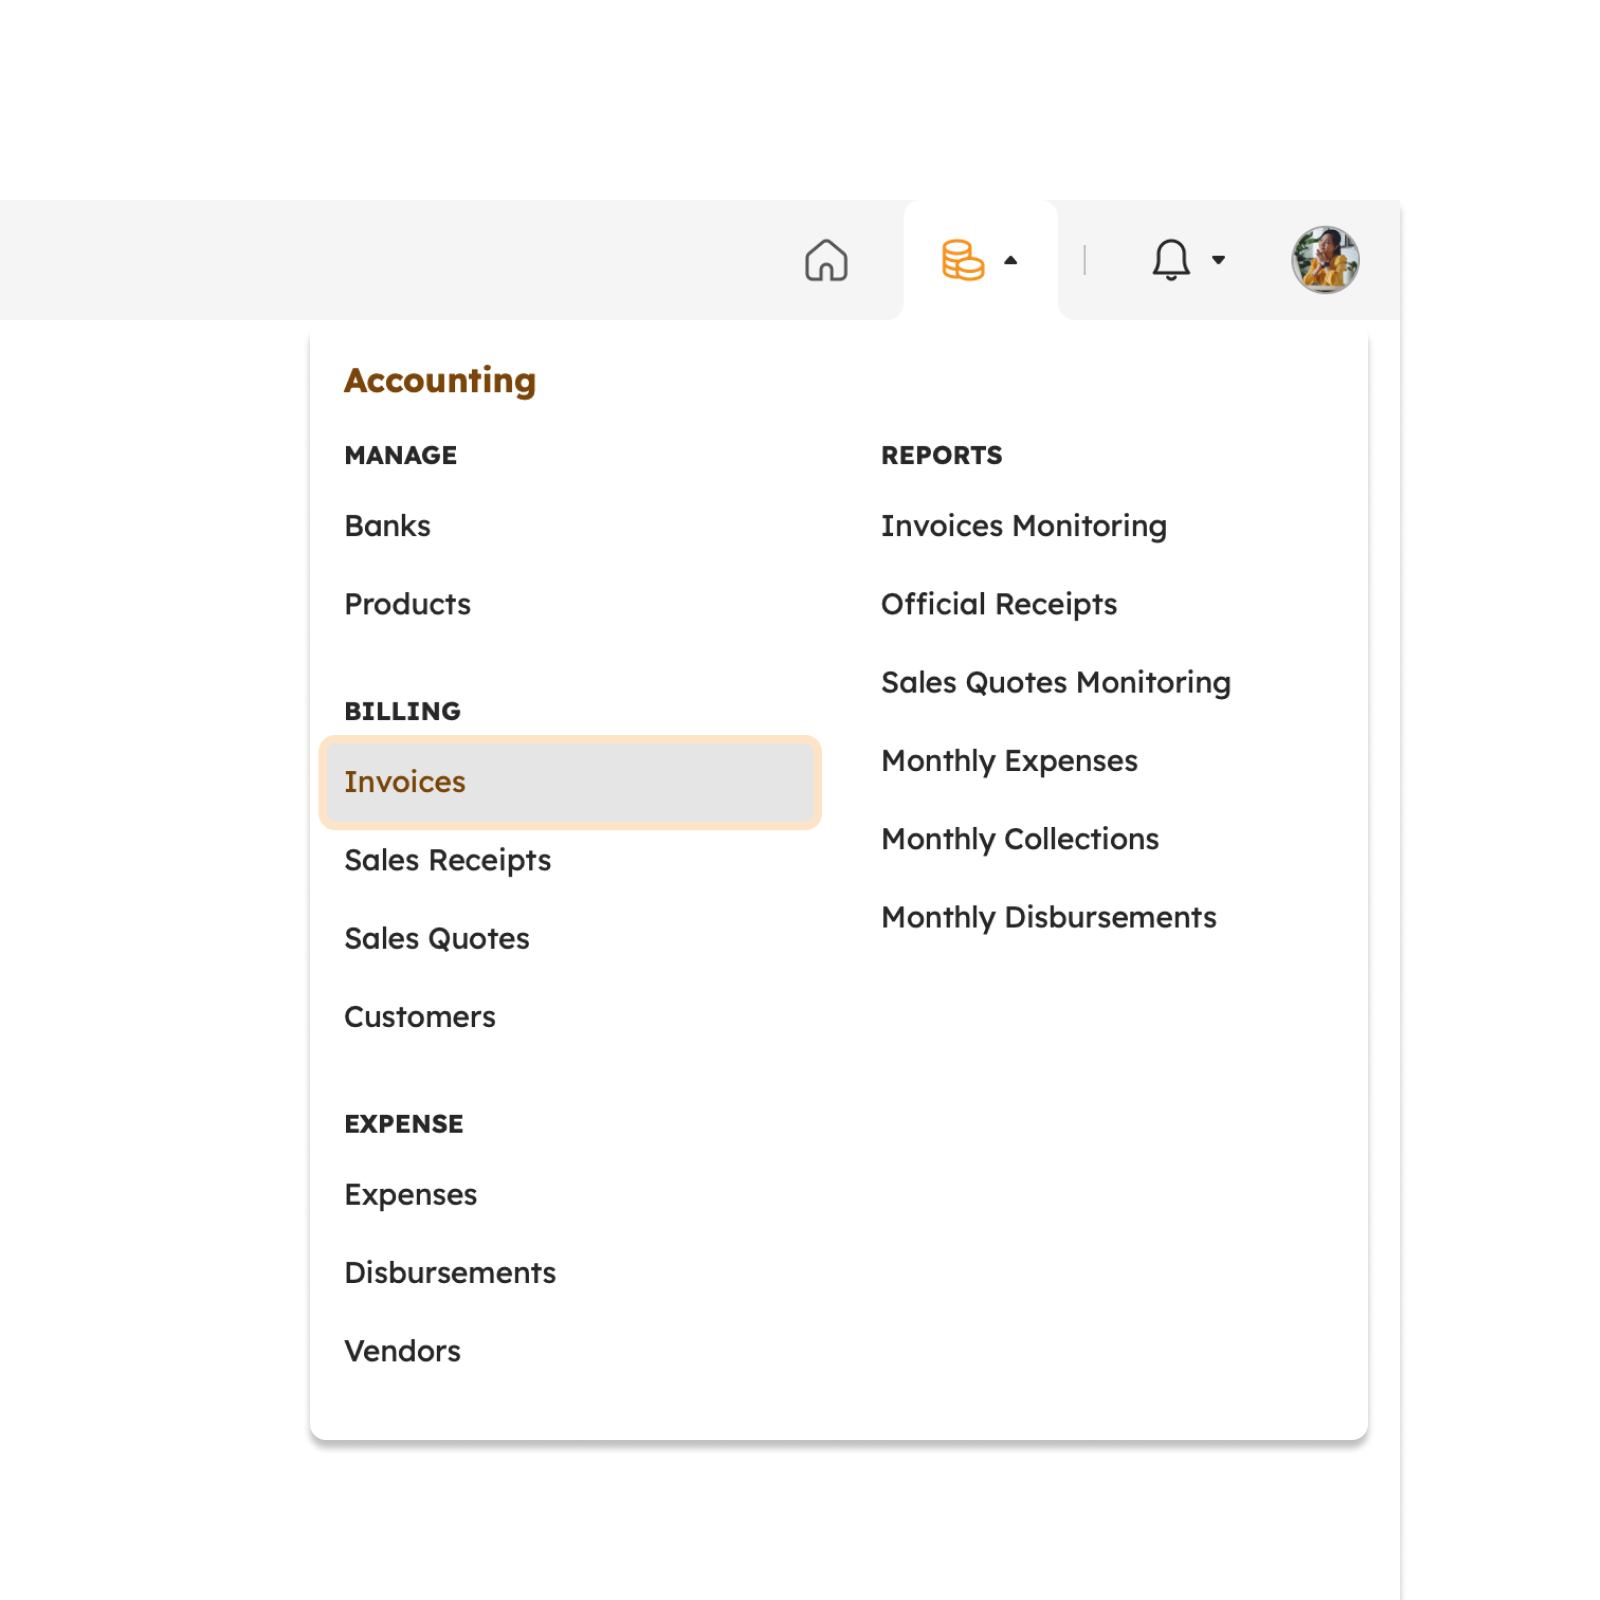
The screen will redirect to the Invoices page, showing several features to use that will be discussed in this section.
Features in Invoices Page
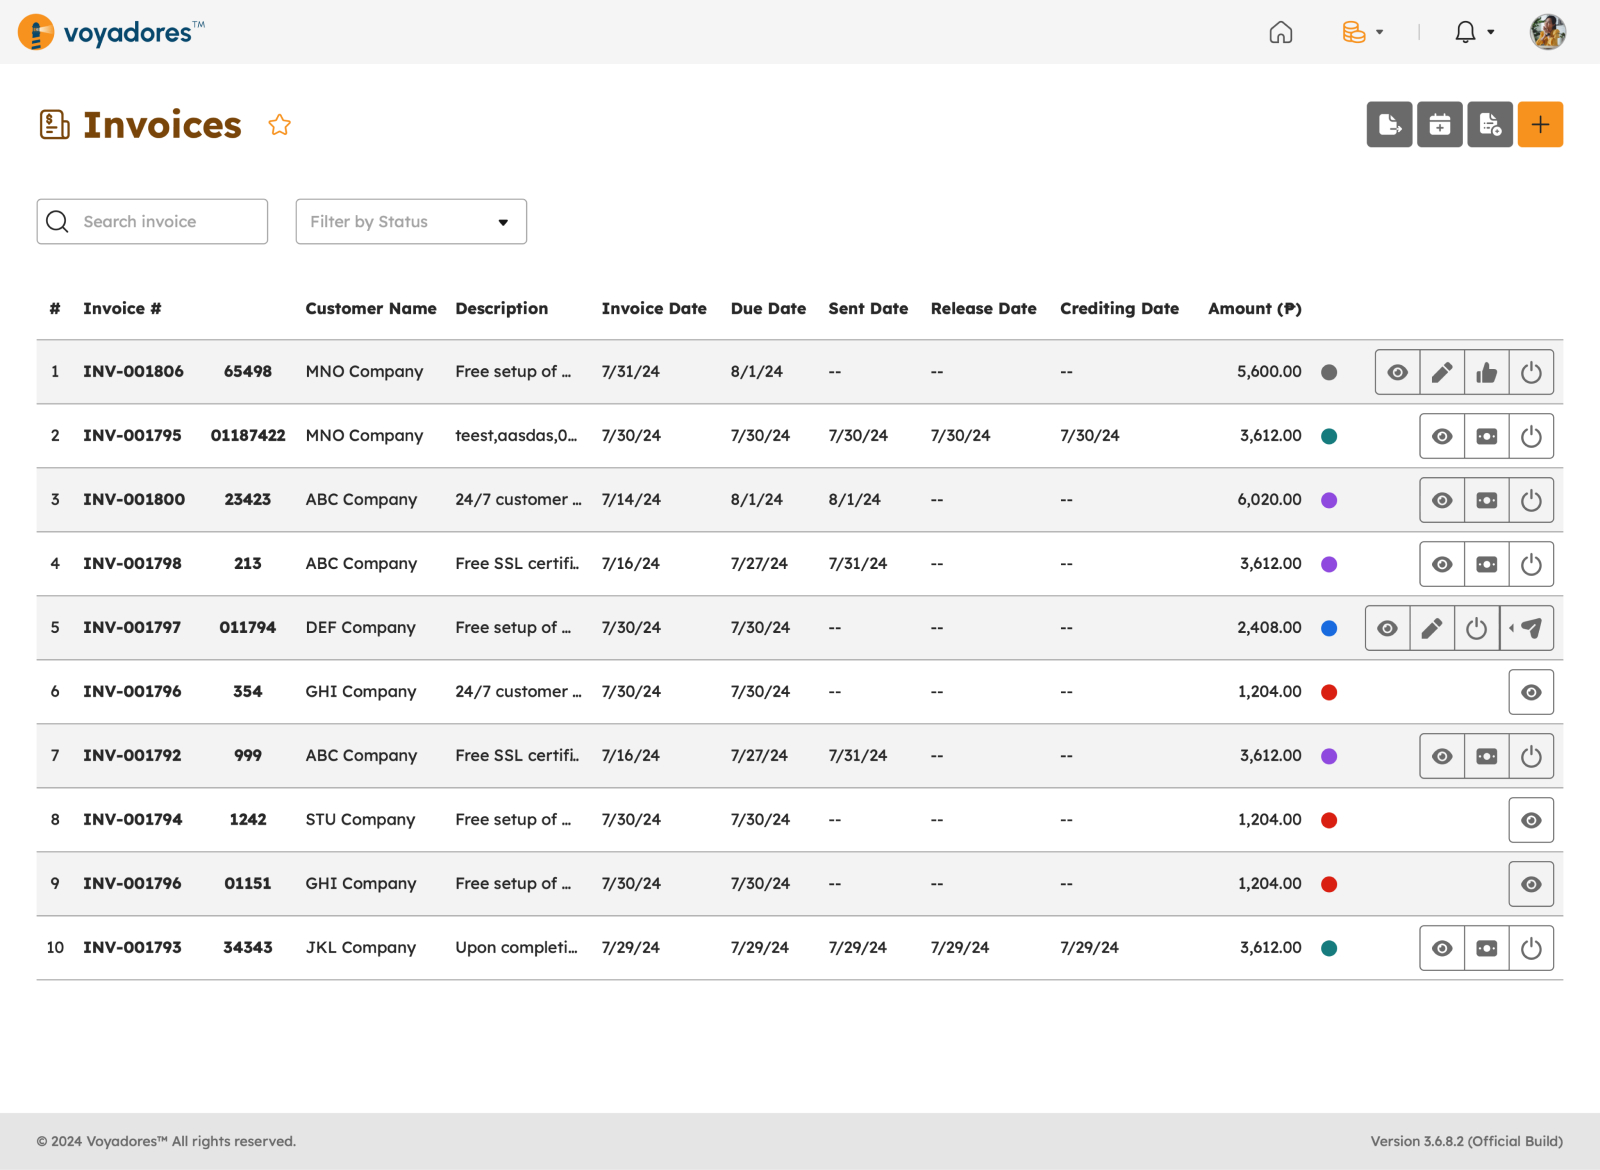
The image below is a high-level view of Invoices page along with its built-in features.
Summary Table
The summary table displays the list of invoices created with the following columns:
- Item number “#”
- Invoice Number
- Custom Invoice Number
- Description
- Invoice Date
- Due Date
- Sent Date
- Release Date
- Crediting Date
- Amount
-
Actions
- Preview PDF
- Edit Invoice
- Approve Invoice
- Set Invoice as Collected
- Set Invoice as Void
Search Invoice
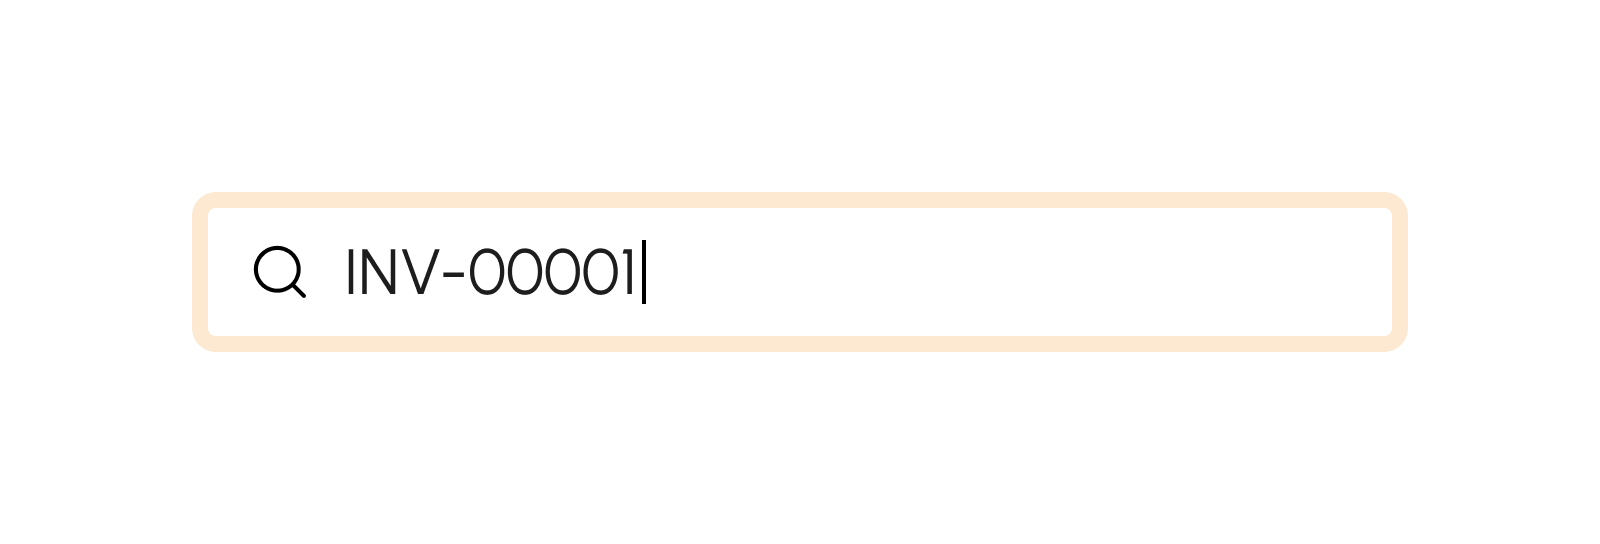
To search for a particular invoice, key in the Customer Name, Invoice Number, Custom Number or Description in the Search Bar, as shown in the image below.
Filter by Invoice Status
This feature gives the option to filter Invoices by Status.
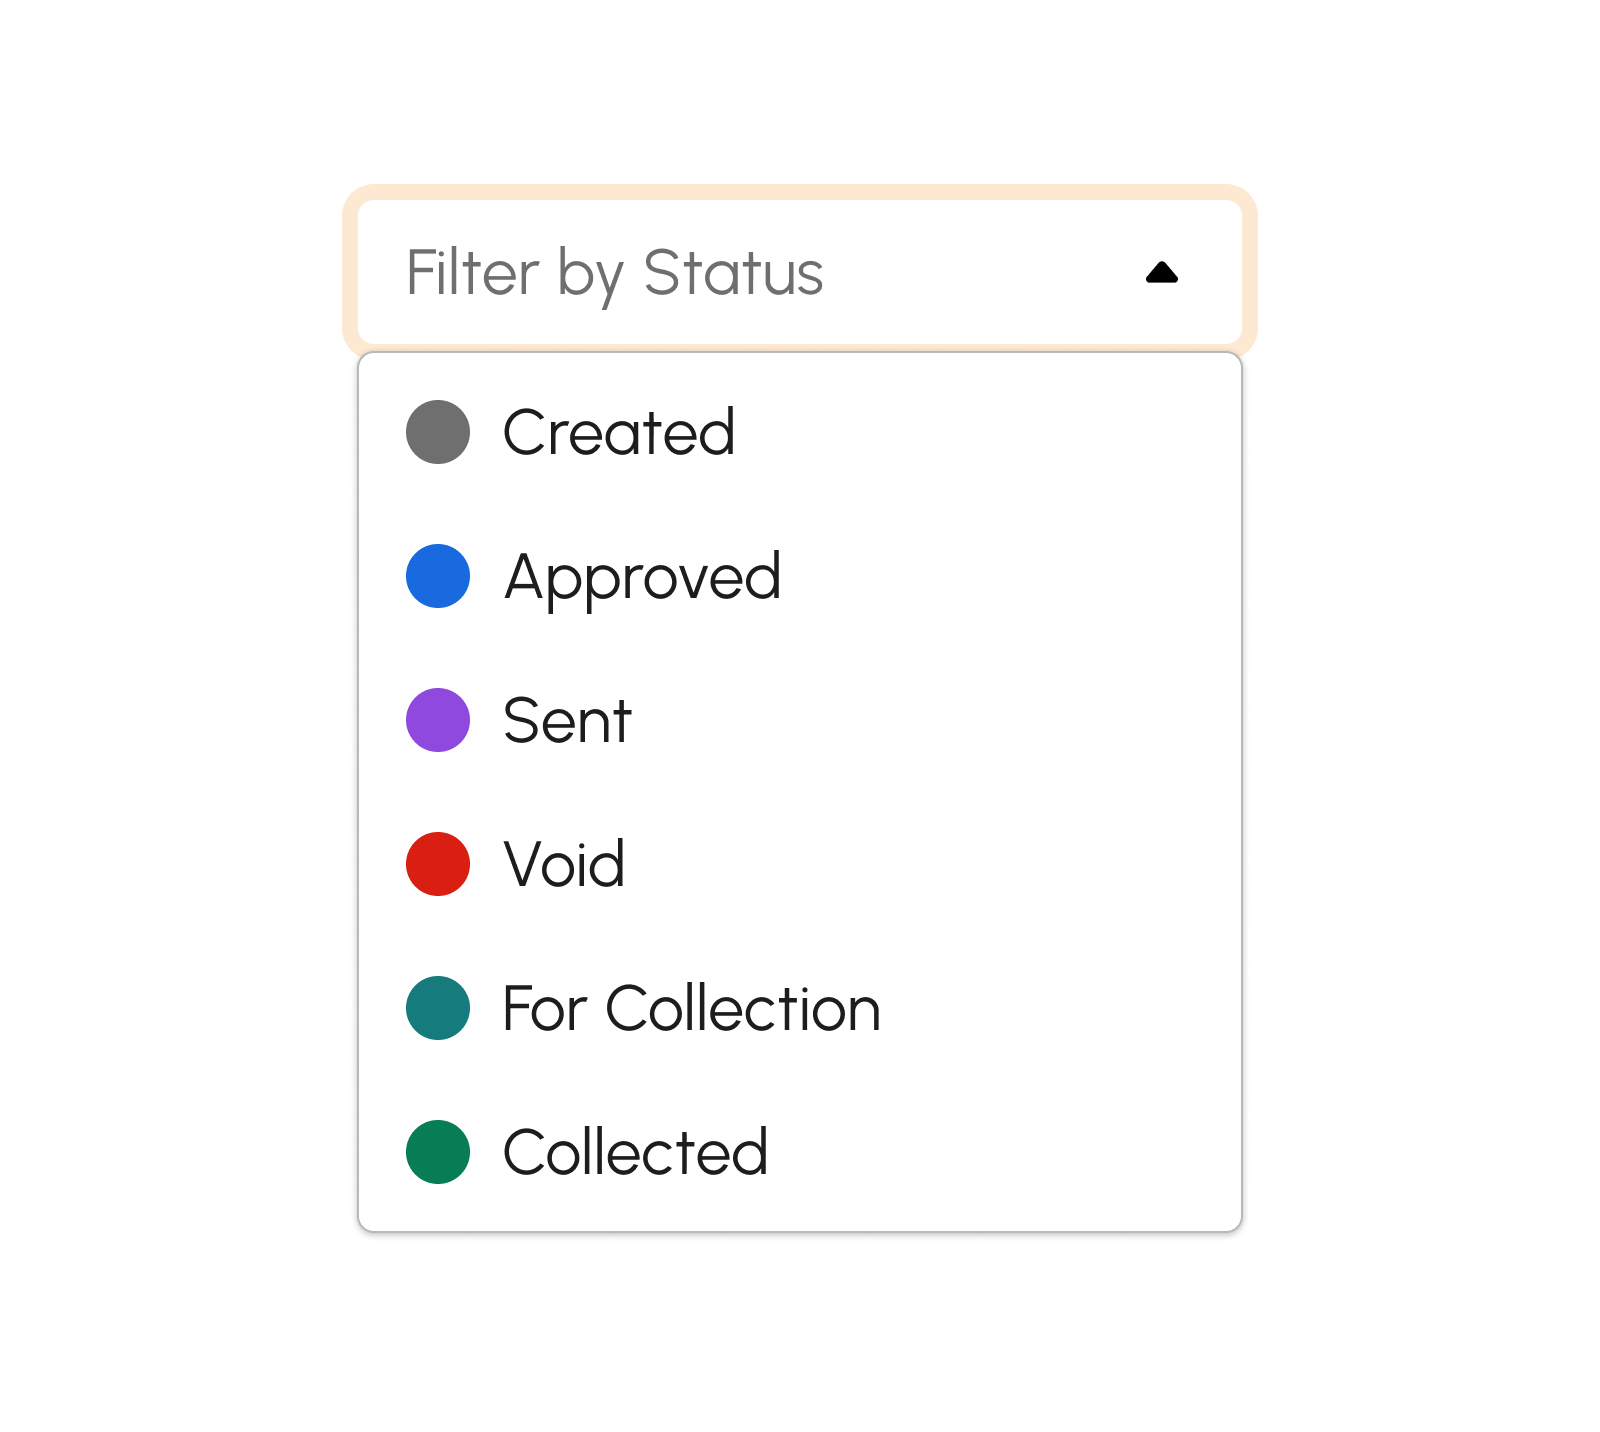
- Draft. An invoice is in "Draft" status when it has been created but has not been finalized or sent to the customer yet. Draft invoices are typically used for internal review and editing before they are approved and sent.
- Approved. An "Approved" invoice status indicates that the invoice has been reviewed and authorized for sending to the customer. It means that the content and details of the invoice have been verified and are ready for formal submission.
- Sent. An invoice marked as "Sent" indicates that it has been transmitted to the customer.
- Void. Invoices can be marked as "Void" when there is a need to cancel or nullify the invoice. This status is typically used in situations where an invoice was issued in error or when the transaction is no longer valid.
- For Collection. "For Collection" status means that the invoice has been sent to the customer, but payment has not been received yet. It serves as a reminder that the payment is outstanding and needs to be collected.
- Collected. An invoice is marked as "Collected" when the payment has been received in full. This status confirms that the financial transaction associated with the invoice has been successfully completed and there are no outstanding payments.
Create Invoice
- Click the Create Invoice button. A modal will display upon clicking this button.
-
Fill in the Invoice details.
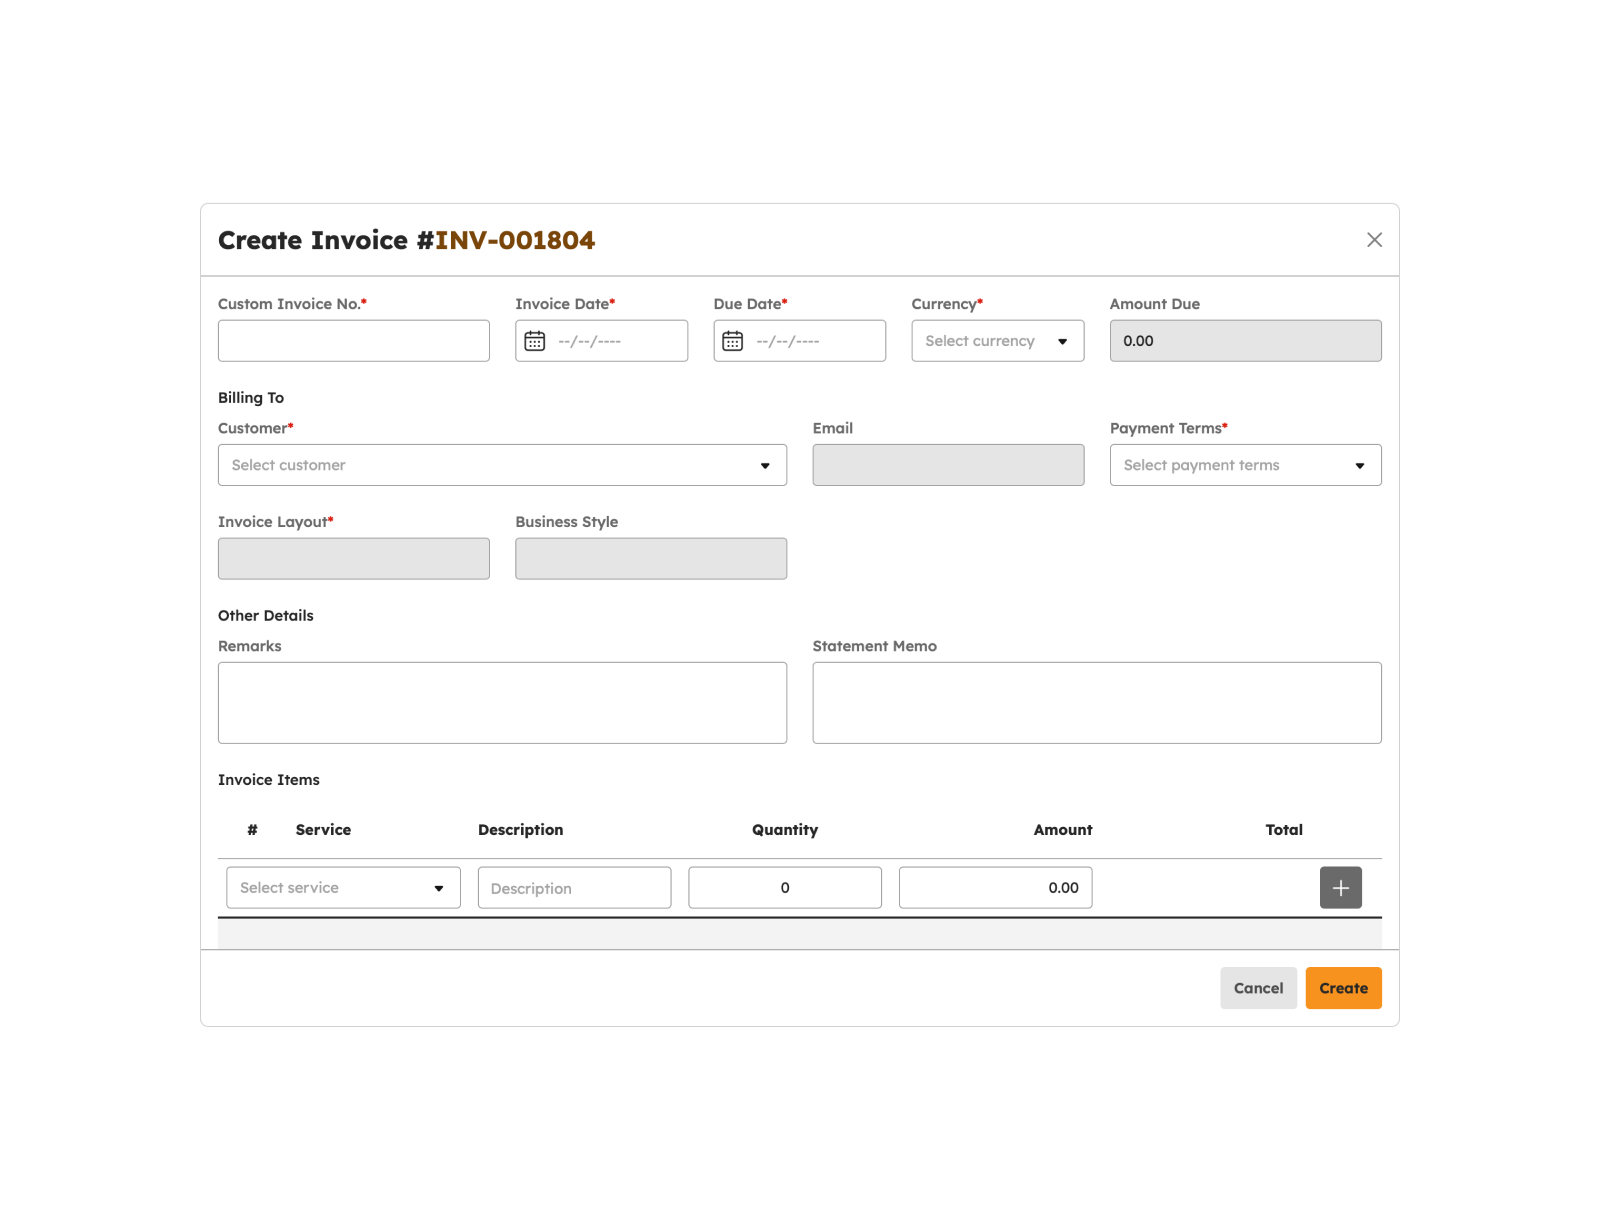
- Invoice Number – Auto generated
- Custom Invoice Number
- Amount Due
- Currency
- Customer
- Term
- Invoice Date
- Due Date
- Business Style
- Invoice Layout
- Invoice Items
- Attachments
Note
Fields with (*) are required.
-
Click the Create button.
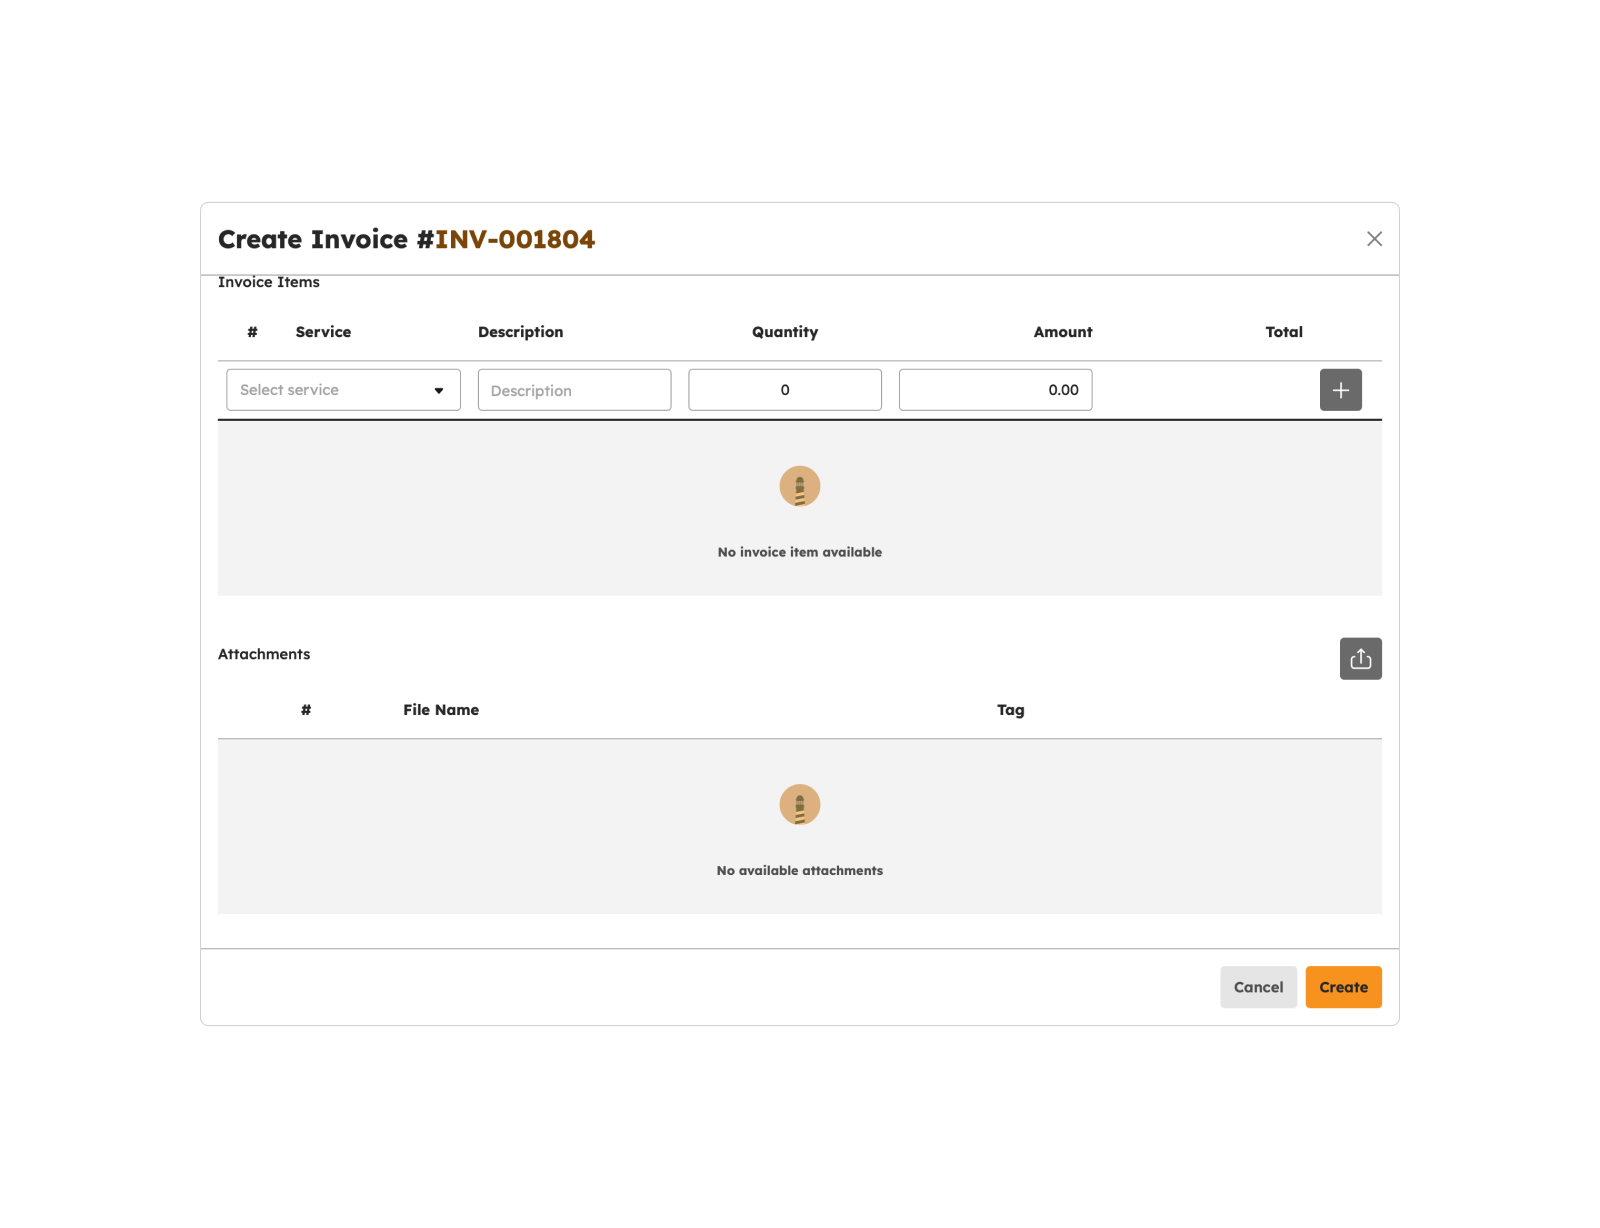
-
A successful notification will show.
Invoice successfully created
- Step 3 will successfully create a new invoice otherwise, proceed to Step 6.
- Click the Cancel button.
- The screen closes the modal.
- The system will not proceed with the creation of a new invoice.
Edit Invoice
- Click the Edit Invoice button. A modal will display upon clicking this button.
-
Update invoice details.
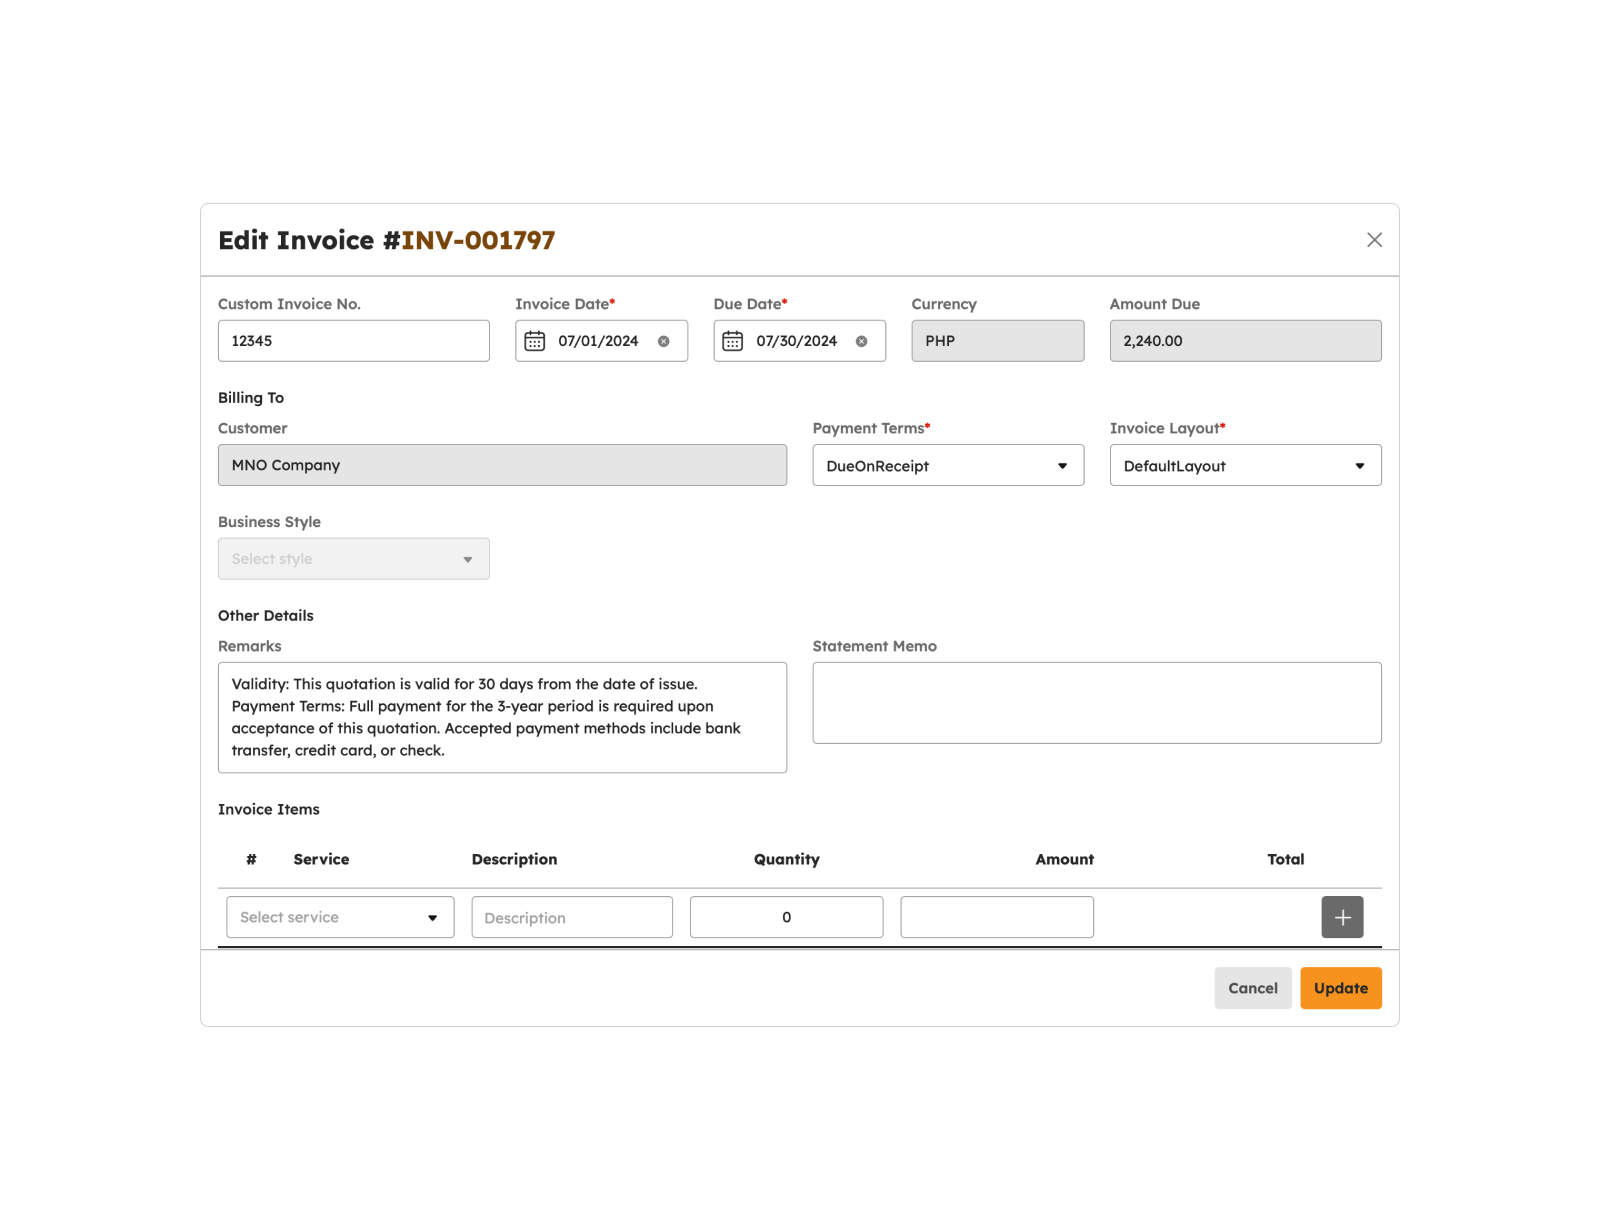
- Invoice Number – Auto generated. This is a unique identifier assigned to each invoice. It is typically automatically generated by the system for tracking and reference.
- Custom Invoice Number. This field allows you to input a custom or manually assigned invoice number if needed.
- Amount Due. This field represents the total amount of money that the customer owes for the products or services listed on the invoice.
- Currency. It specifies the currency in which the invoice is denominated, indicating the monetary unit for the amounts listed on the invoice.
- Customer. This field is used to identify and specify the customer or client to whom the invoice is addressed.
- Email. This field may be used to provide or update the email address associated with the customer or recipient.
- Term. This refers to the payment terms agreed upon for the invoice.
- Invoice Date. This is the date when the invoice is issued to the customer.
- Due Date. This field may specify the date by which the payment is expected to be received.
- Business Style.
- Invoice Layout. This field refers to the visual layout or design of the invoice.
- Invoice Items. These are the specific products, services, or items for which the customer is being billed.
- Attachments. This field may allow for attaching additional documents or files to the invoice, such as receipts, contracts, or any relevant supporting documents.
Note
Fields with (*) are required.
-
Click the Update button.
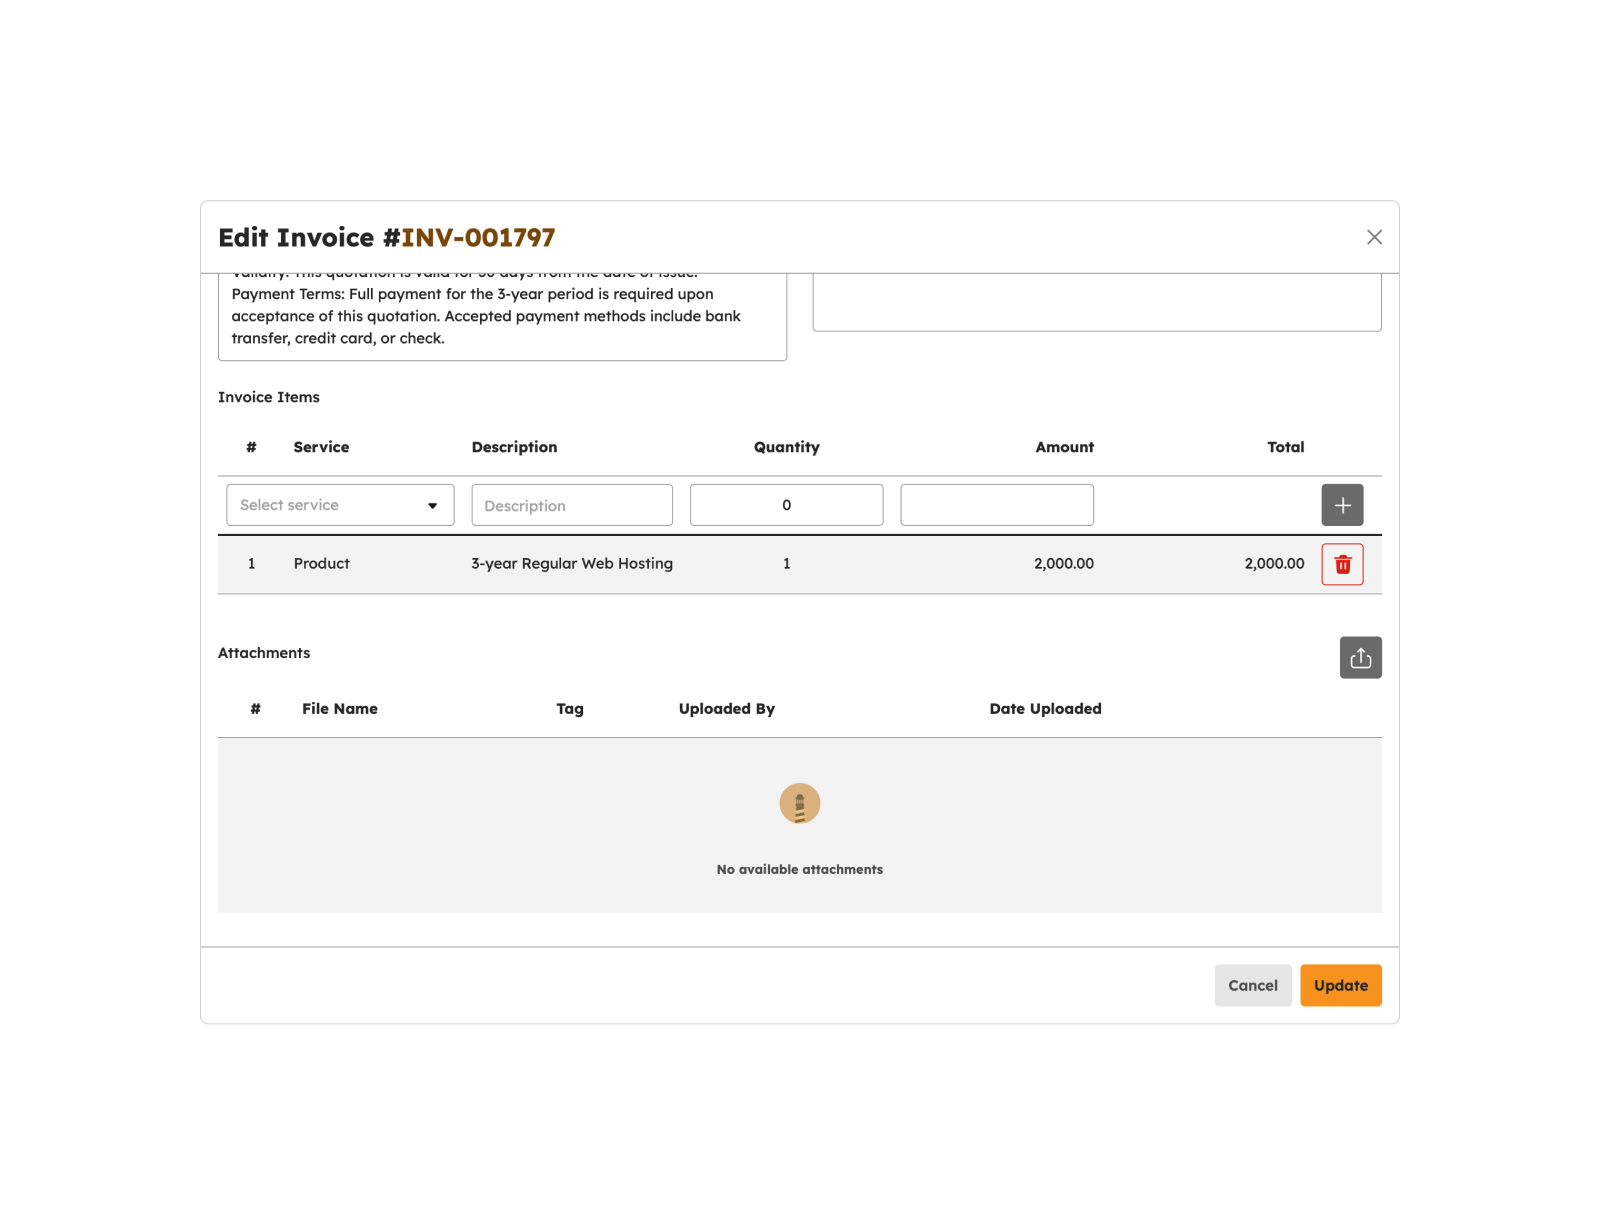
-
A successful notification will show.
Invoice successfully updated
- Step 3 will successfully update invoice record otherwise, proceed to Step 6.
- Click the Cancel button to cancel updating invoice details.
- The screen closes the modal.
- The system will not proceed with the update of an invoice.
Download Invoice

- Click on the Download button.
- The invoice will be automatically downloaded.
- Open the downloaded file.
View Invoice
- Click on the Preview button.
- The invoice preview will open on a separate file viewer page.
- Click the "Download" or "Print" button if needed.
Approve Invoice
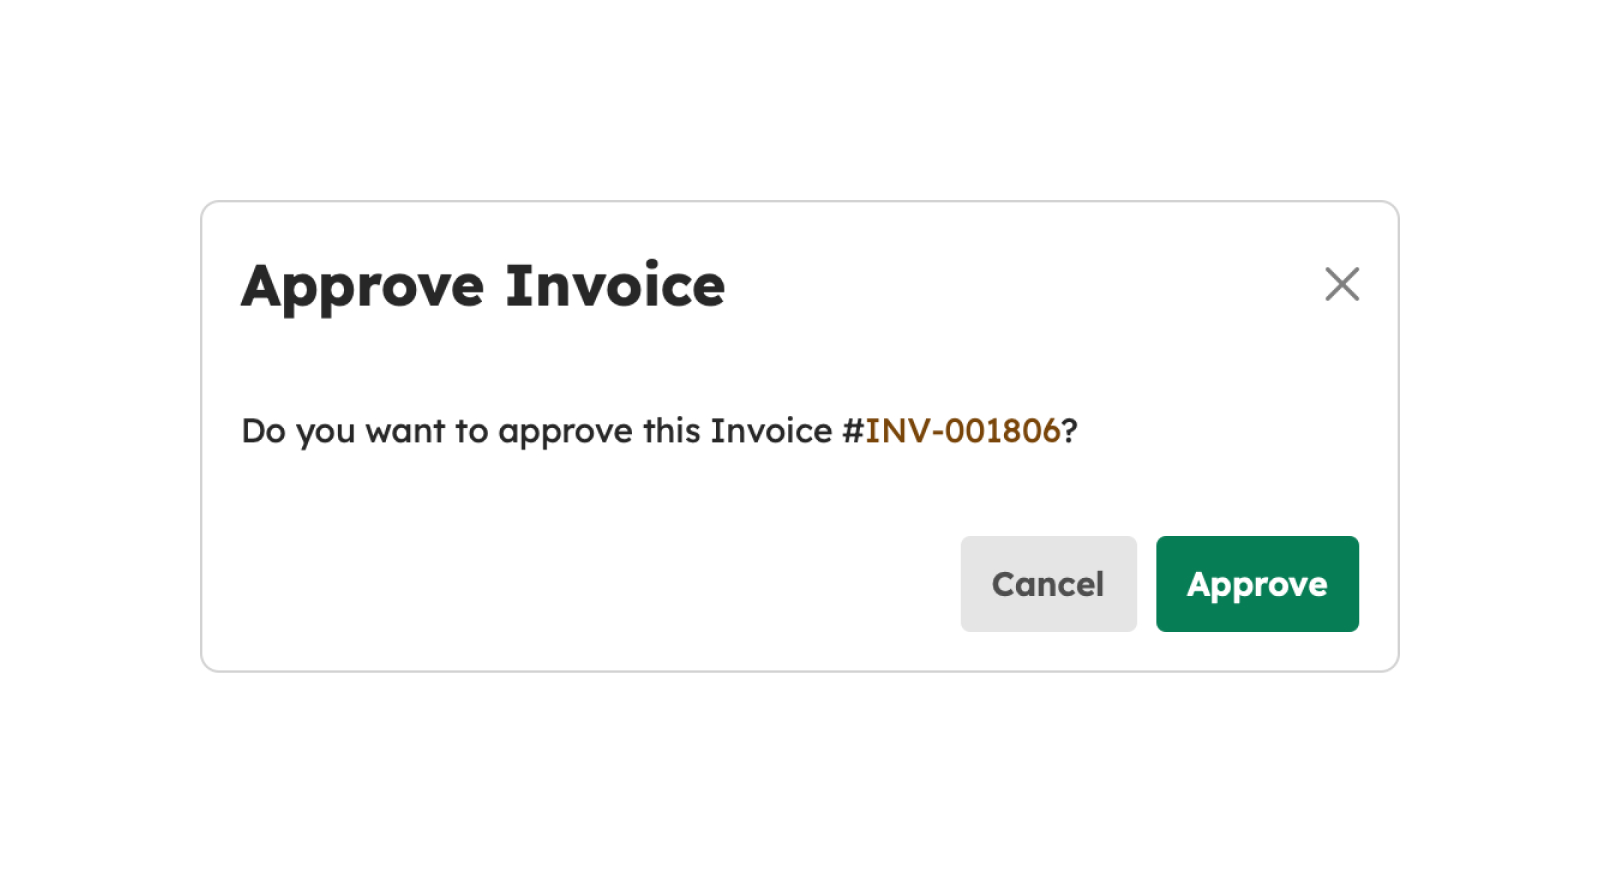
- Click the Approve Invoice button.
- In the approval confirmation modal, click Approve.
-
A successful notification will be displayed.
Invoice successfully approved
- The invoice status will be updated to "Approved".
Send Invoice
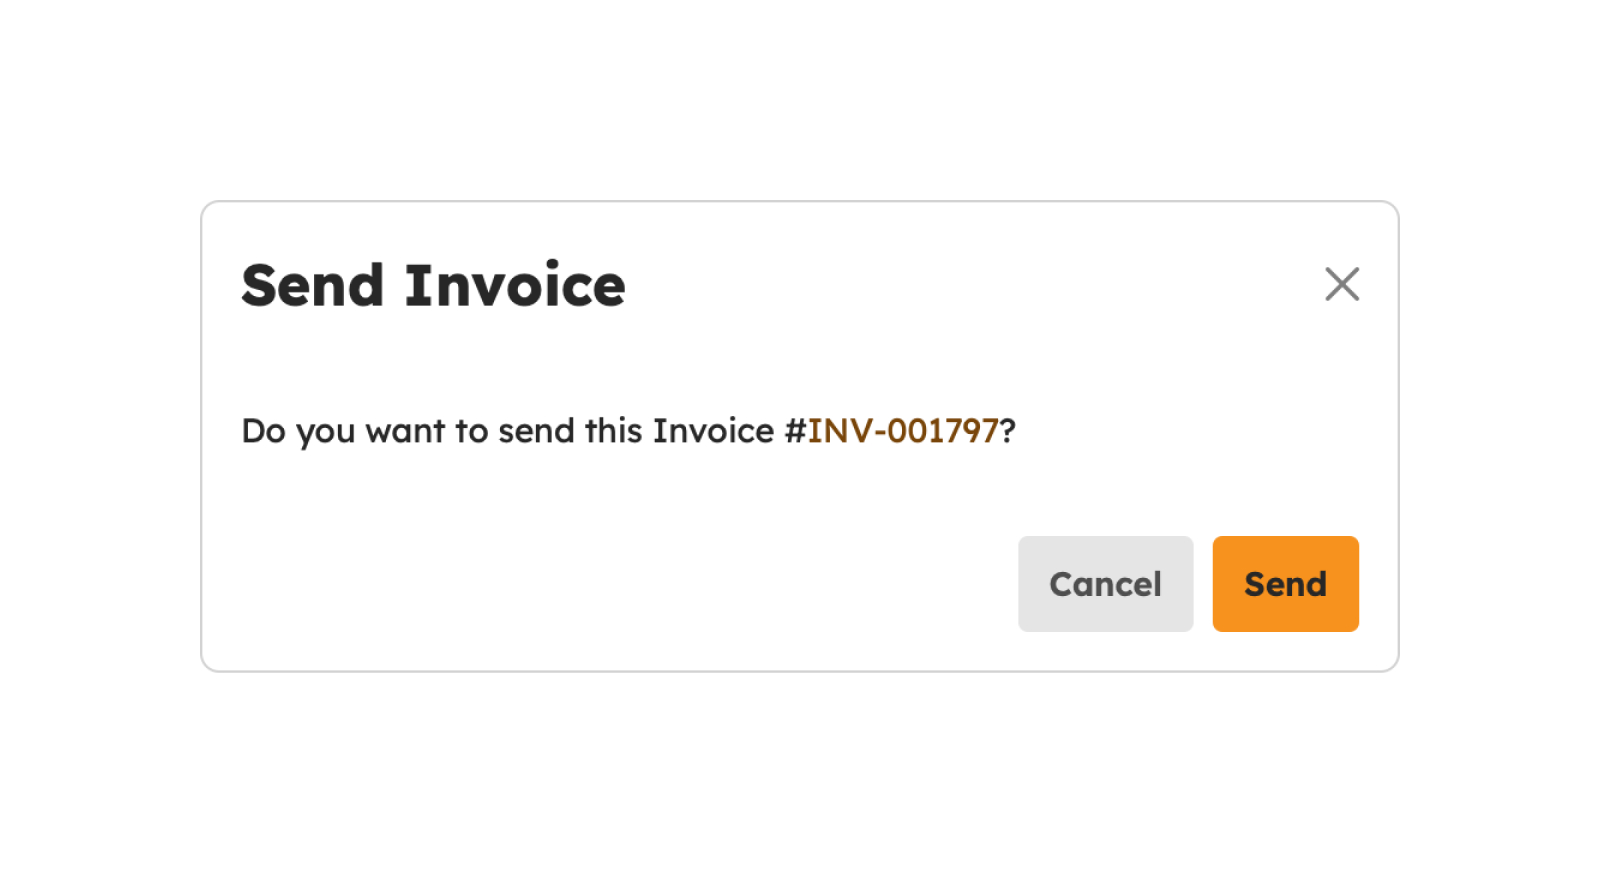
- Click the Send Invoice button.
- In the send confirmation modal, click Send.
-
A successful notification will be displayed.
Invoice successfully sent
- The invoice status will be updated to "Sent".
Void Invoice
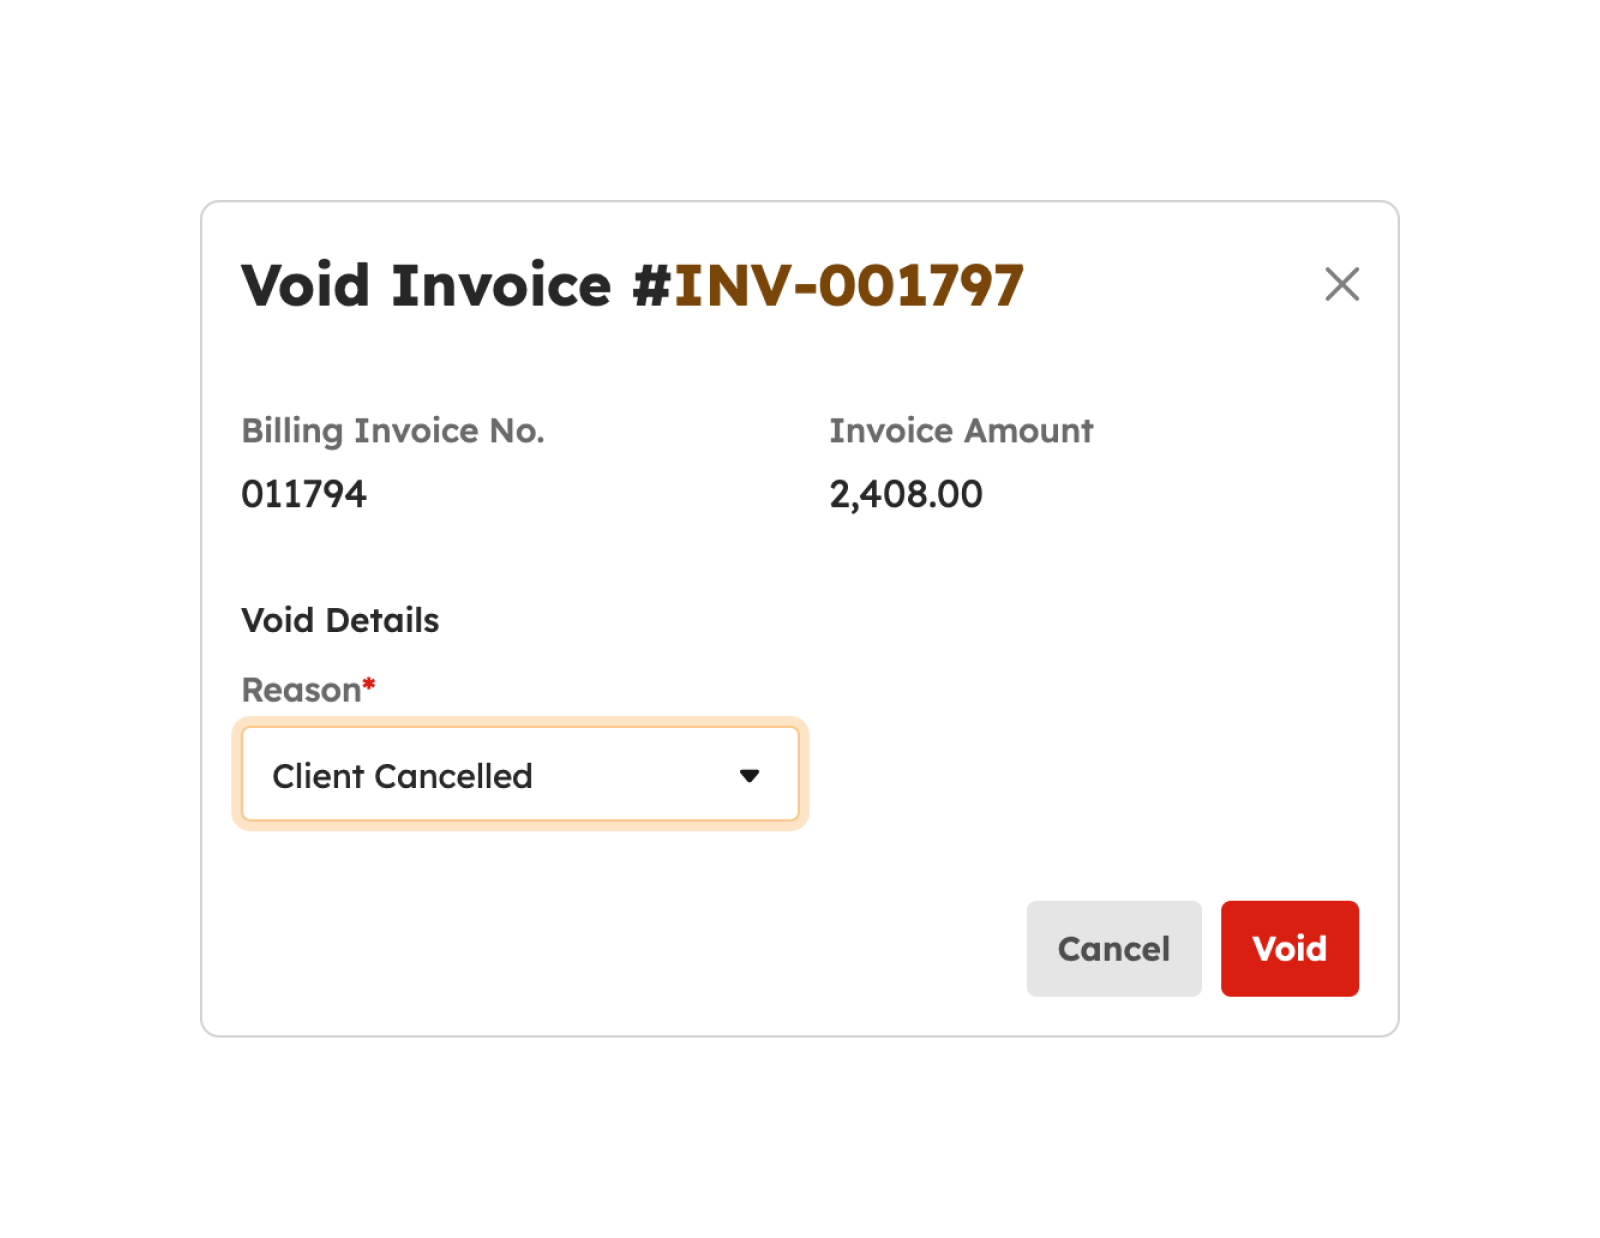
- Click the Set Invoice as Void button.
- In the confirmation modal for voiding, select the reason.
- If "Others" is chosen, provide the necessary remarks in the required field.
-
A successful notification will be displayed.
Invoice successfully void
- The invoice status will be updated to "Void".
Set Invoice For Collection
- To set an invoice for collection, click the Set Invoice For Collection button.
-
In the "For Collection Invoice" modal, input the following fields.
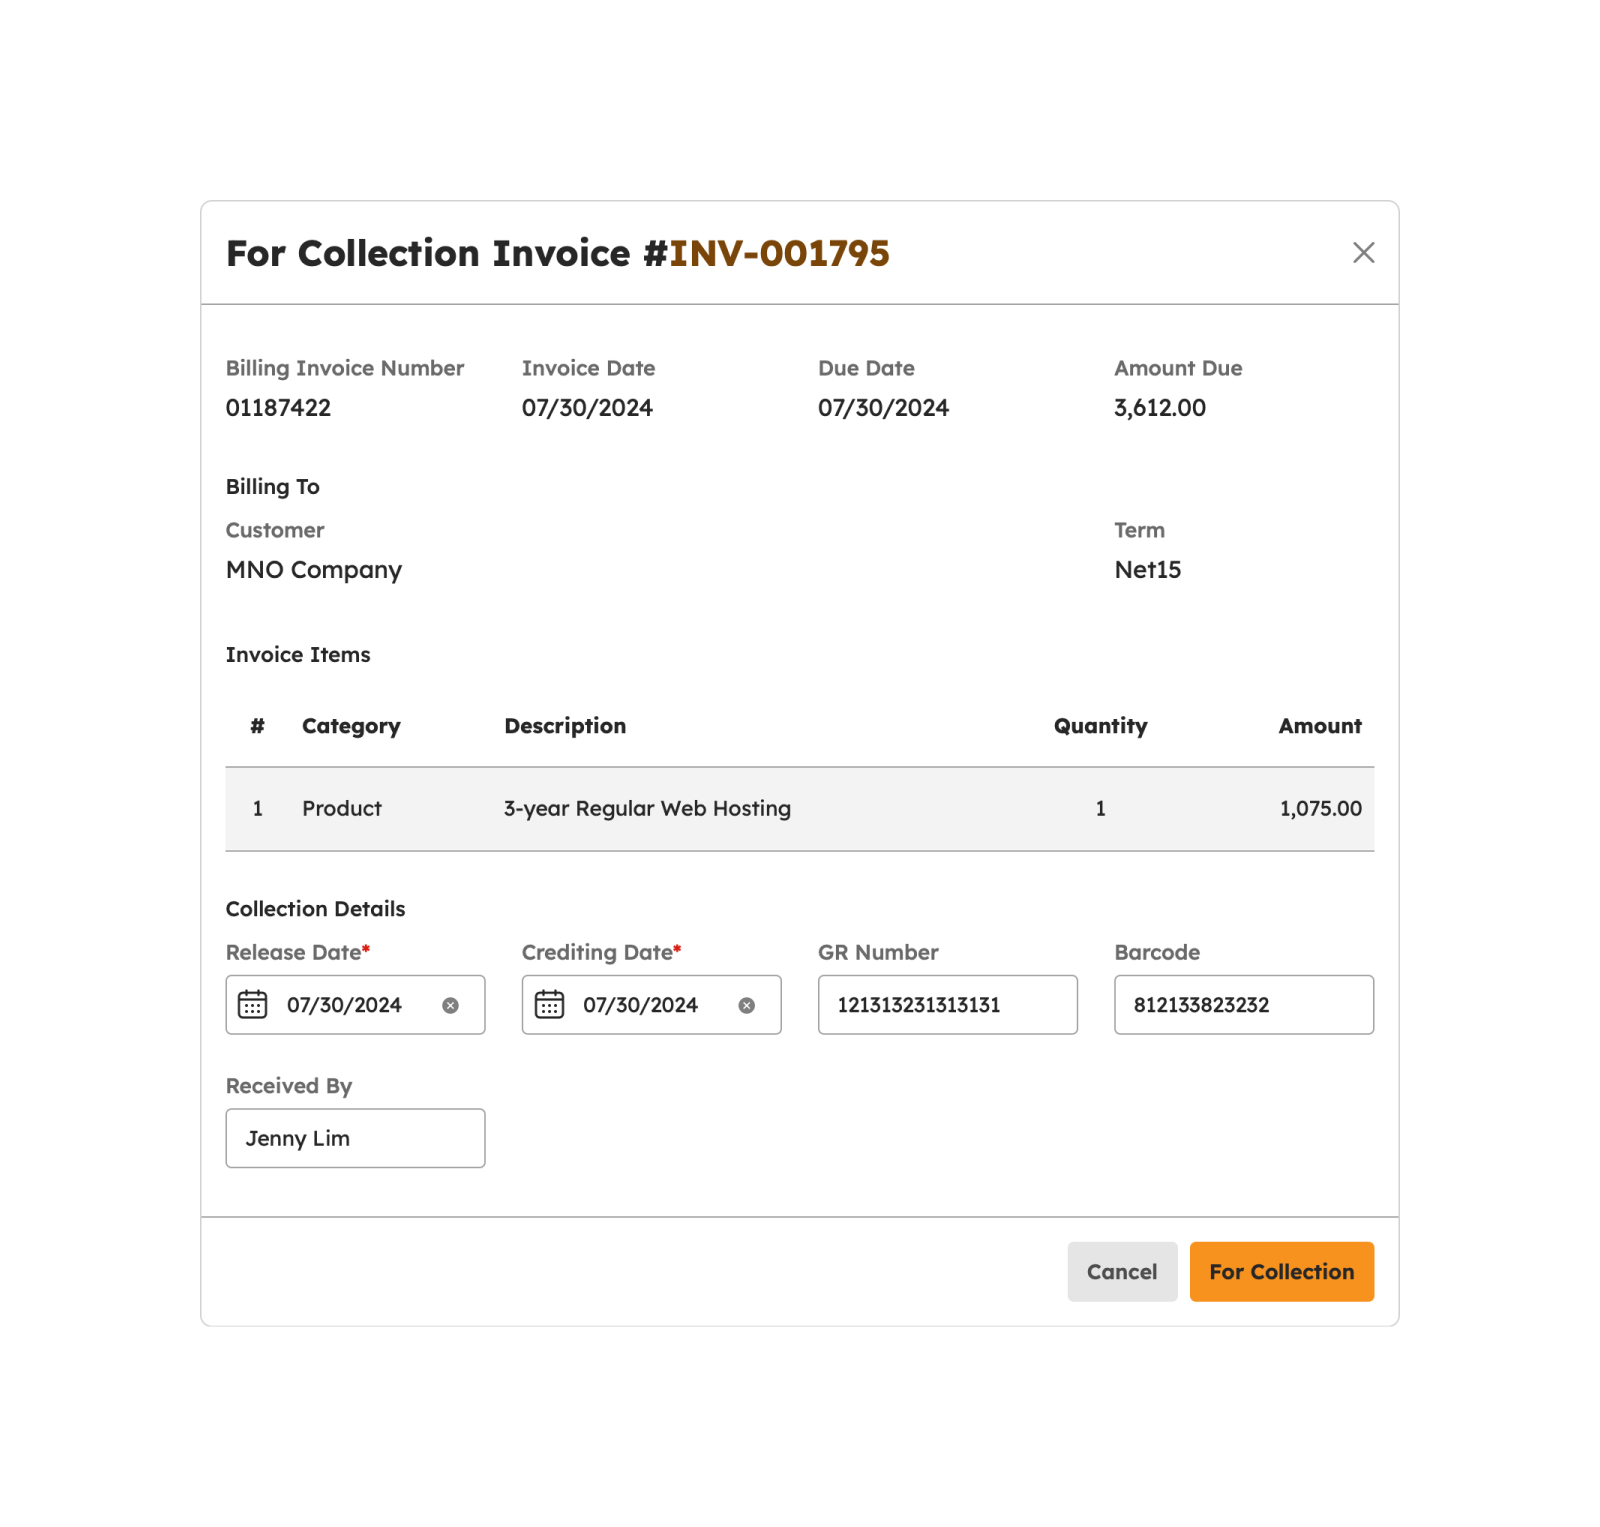
- Release Date. The "Release Date" is the date when the invoice becomes available for collection.
- Crediting Date. The "Crediting Date" is when the received payment for the invoice will be credited or recorded.
- GR Number. "GR" stands for "Goods Received." The "GR Number" is a reference number associated with the goods or services delivered to the customer.
- Barcode. This field may contain a unique barcode or tracking number linked to the invoice.
- Received By. This field indicates the person or entity responsible for receiving the invoice or payment.
Note
Fields with (*) are required.
- Click the For Collection button.
- The screen closes the modal.
- The invoice status will be updated to For Collection.
Set Invoice As Collected
- To mark an invoice as collected, click the Set Invoice As Collected button.
-
In the "Collect Invoice" modal, input the following fields.

- Bank. Refers to the financial institution where a payment, typically in the form of a check or bank transfer, is deposited or processed.
- Official Receipt Number. The "OR Number" or "Official Receipt Number" is a unique identifier assigned to an official receipt issued for a financial transaction.
- Official Receipt Date. The "OR Date" or "Official Receipt Date" is the specific date on which an official receipt is issued.
- Collected Date. The "Collected Date" is the date on which the payment associated with the invoice was actually received and collected by the organization.
- Collected Amount. The "Collected Amount" is the total amount of money that was received and collected for the invoice. It represents the payment made by the customer.
- Withheld Amount. The "Withheld Amount" is an amount that might be retained or withheld from the total payment.
- Withheld Percentage. The "Withheld Percentage" represents the percentage of the total payment that is withheld or retained.
Note
Fields with (*) are required.
- Click the Yes button to proceed.
- A successful notification will be displayed.
- The invoice status will be updated to "Collected"
Create from Sales Quote
- Click the Create Invoice from SQ button. A modal will display upon clicking this button.
- Select the customer and the associated approved Sales Quotation to create the invoice.
-
Fill in the Invoice details.

- Invoice Number – Auto generated
- Custom Invoice Number
- Amount Due
- Currency
- Customer
- Term
- Invoice Date
- Due Date
- Business Style
- Invoice Layout
- Invoice Items – Prepopulated from the selected Sales Quotation.
- Attachments
Note
Fields with (*) are required.
- Click the Create button.
-
A successful notification will show.
Invoice successfully created
- If completed successfully, Step 3 will create the invoice from the particular sales quotation; otherwise, proceed to Step 6.
- Click the Cancel button to abort the creation of the invoice.
- The screen will close the modal.
- The system will not proceed with the creation of a new invoice.
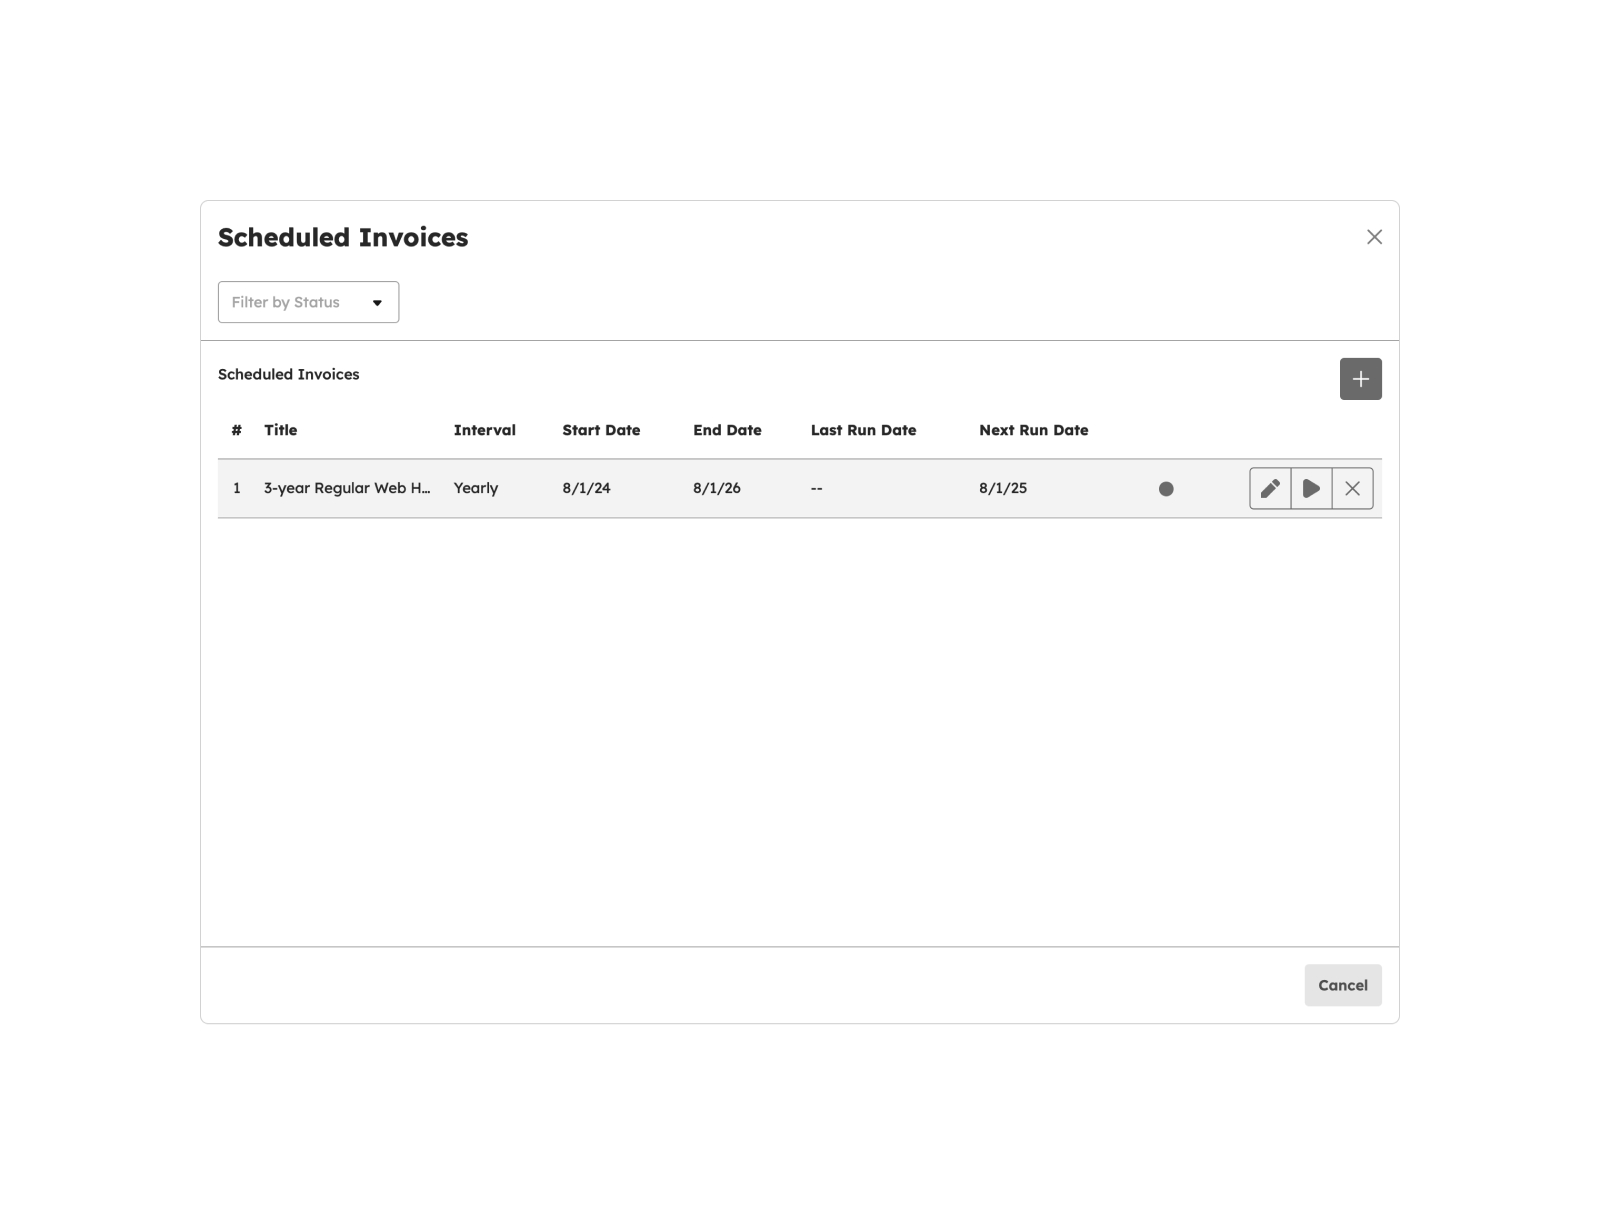
Scheduled Invoice
This feature allows for the automatic generation and sending of invoices on a predefined schedule or recurring basis.
-
To create a scheduled invoice, click th Scheduled Invoice button.
-
In the Scheduled Invoice modal, complete the following fields:
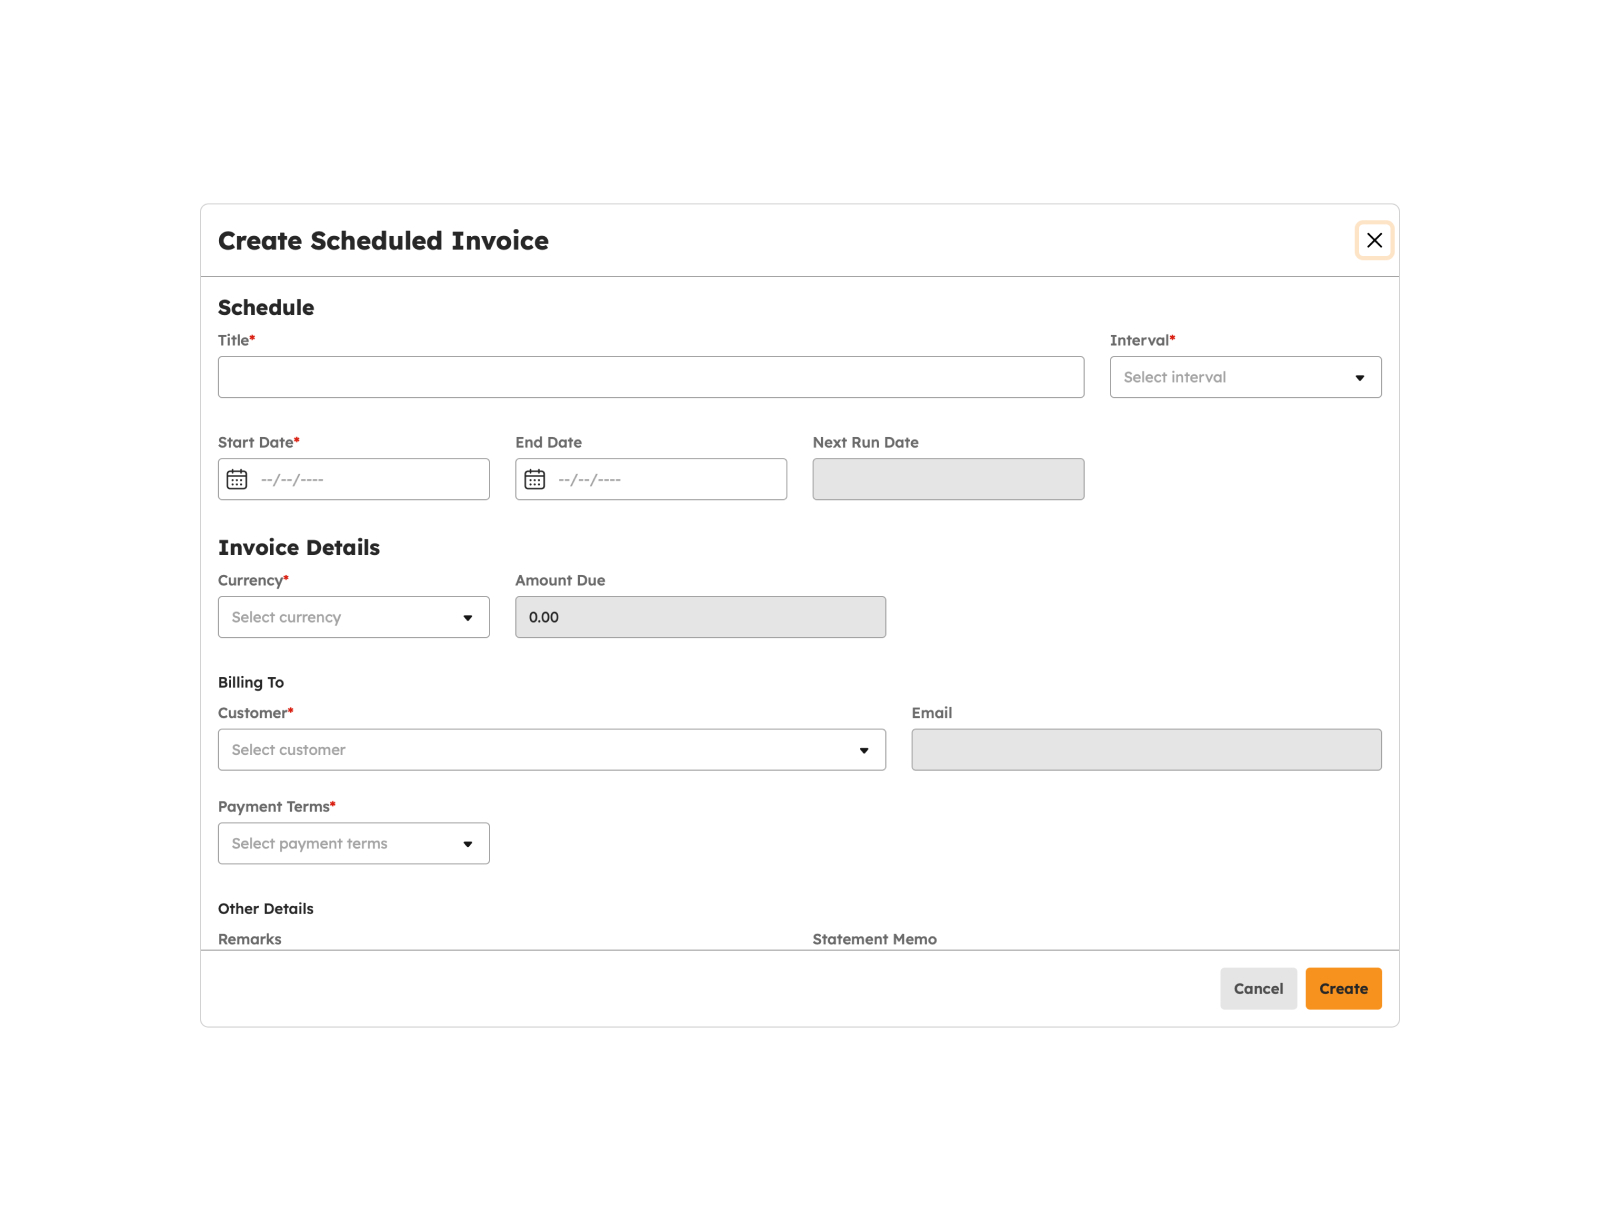
- Title
-
Interval
- Daily
- Weekly
- Monthly
- Quarterly
- Yearly
- Custom (if "Custom" is selected, input the preferred number of days and start date for when the invoice will recur).
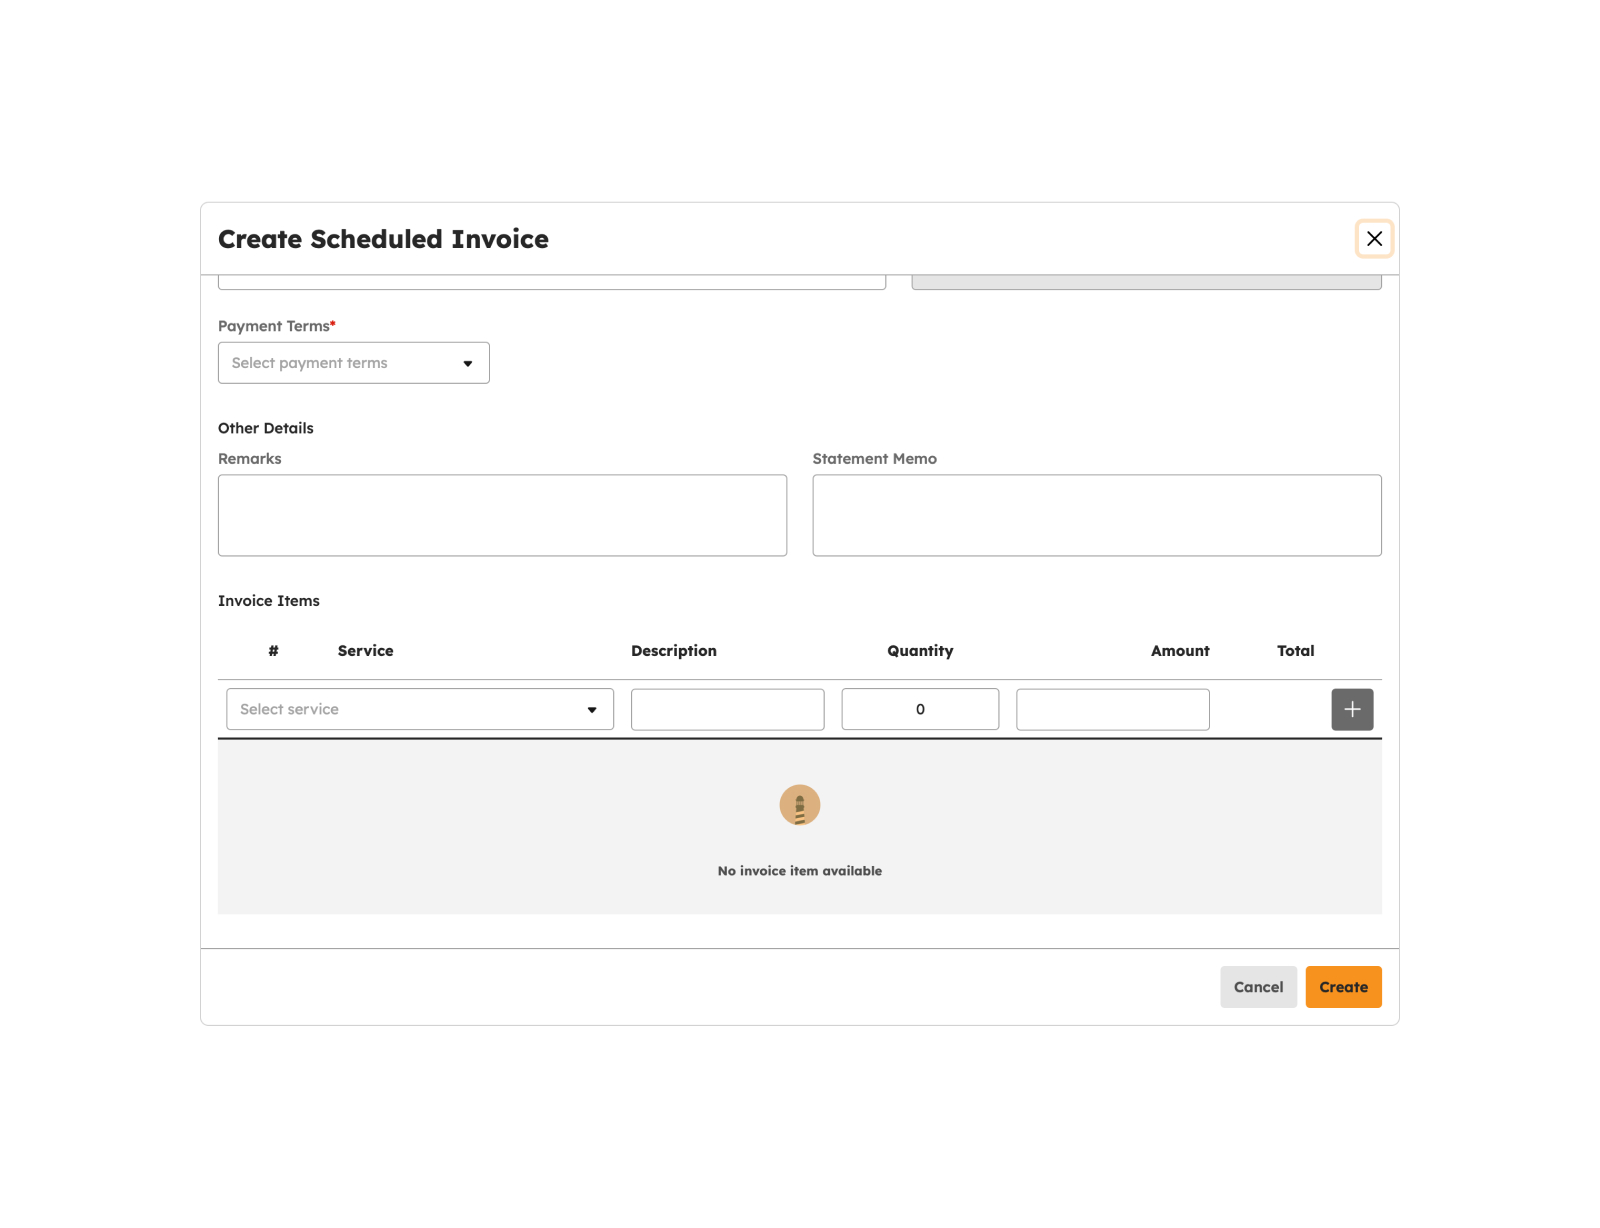
Note
Fields with (*) are required.
- Click the Done button.
-
Then click the Save button to create the scheduled invoice.
- Click the Start Scheduled Invoice button to initiate the scheduled invoice, and it will be created on the specified start date.
- The status of the scheduled invoice will be "Started."
- Users have the option to pause the scheduled invoice by clicking the Pause Scheduled Invoice button.
- Users may also terminate the recurring invoice by clicking the Terminate button.
Load More Invoices
To verify if there are more than 20 invoices created, click the Load More button to display other invoices since the default item number displayed in the screen is from count 1-20.
Sales Quotes
Introduction to Sales Quotes
The Sales Quote Page is dedicated to managing and generating sales quotations. This page is solely for creating and managing sales quotations. Within this page, users can input customer information, select products or services, define pricing and discounts, specify quantities, and set terms and conditions.
To access this page, navigate to the Accounting Module and click “Sales Quotes” under the Billing Submodule as shown in the image below:
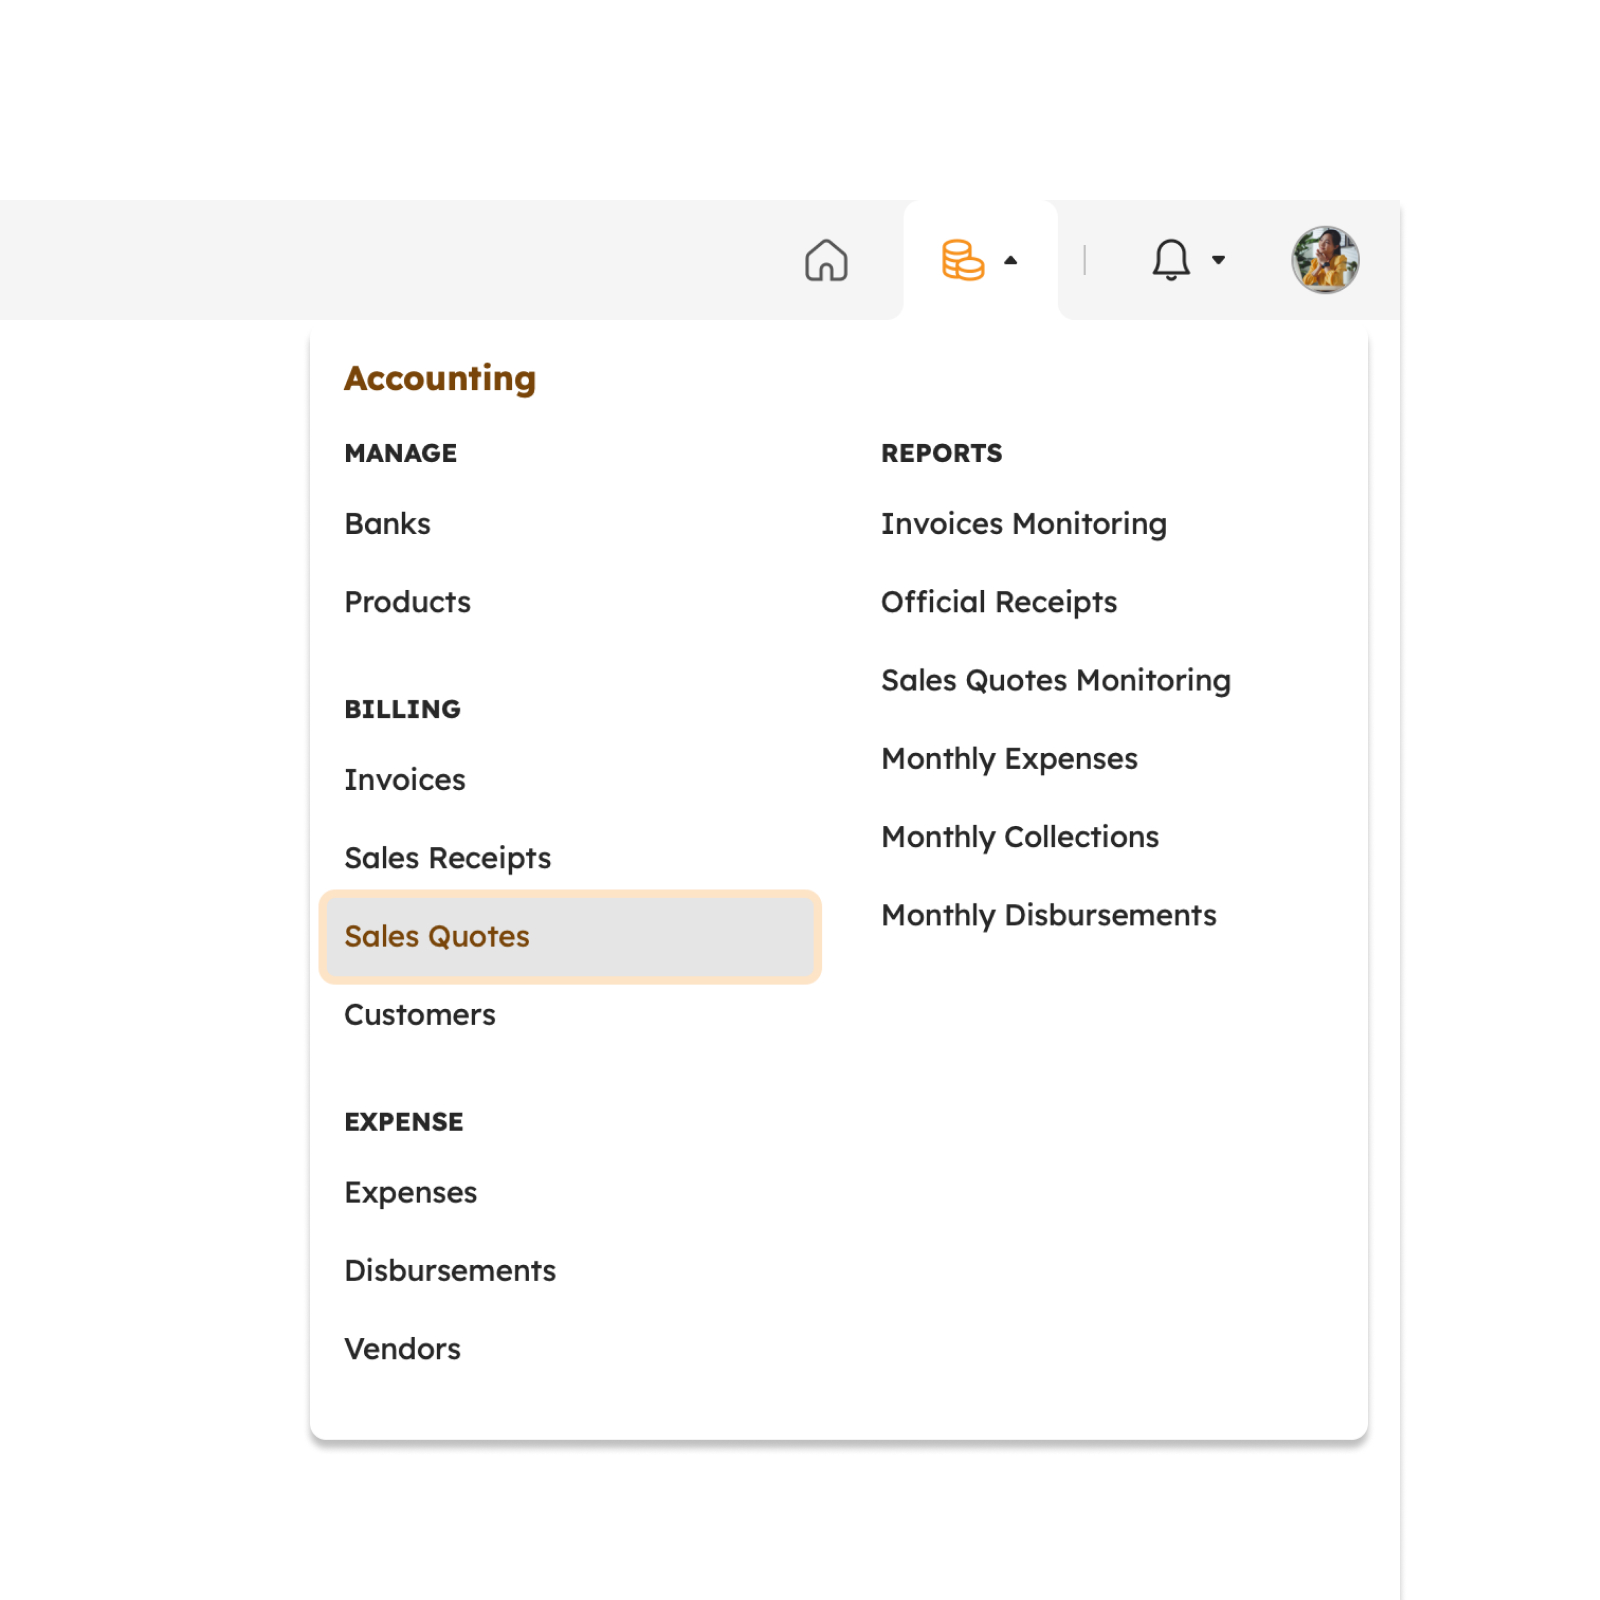
The screen will redirect to the Sales Quotes page, showing several features to use that will be discussed in this section.
Features in Sales Quotes Page
The image below is a high-level view of Sales Quotes page along with its built-in features.
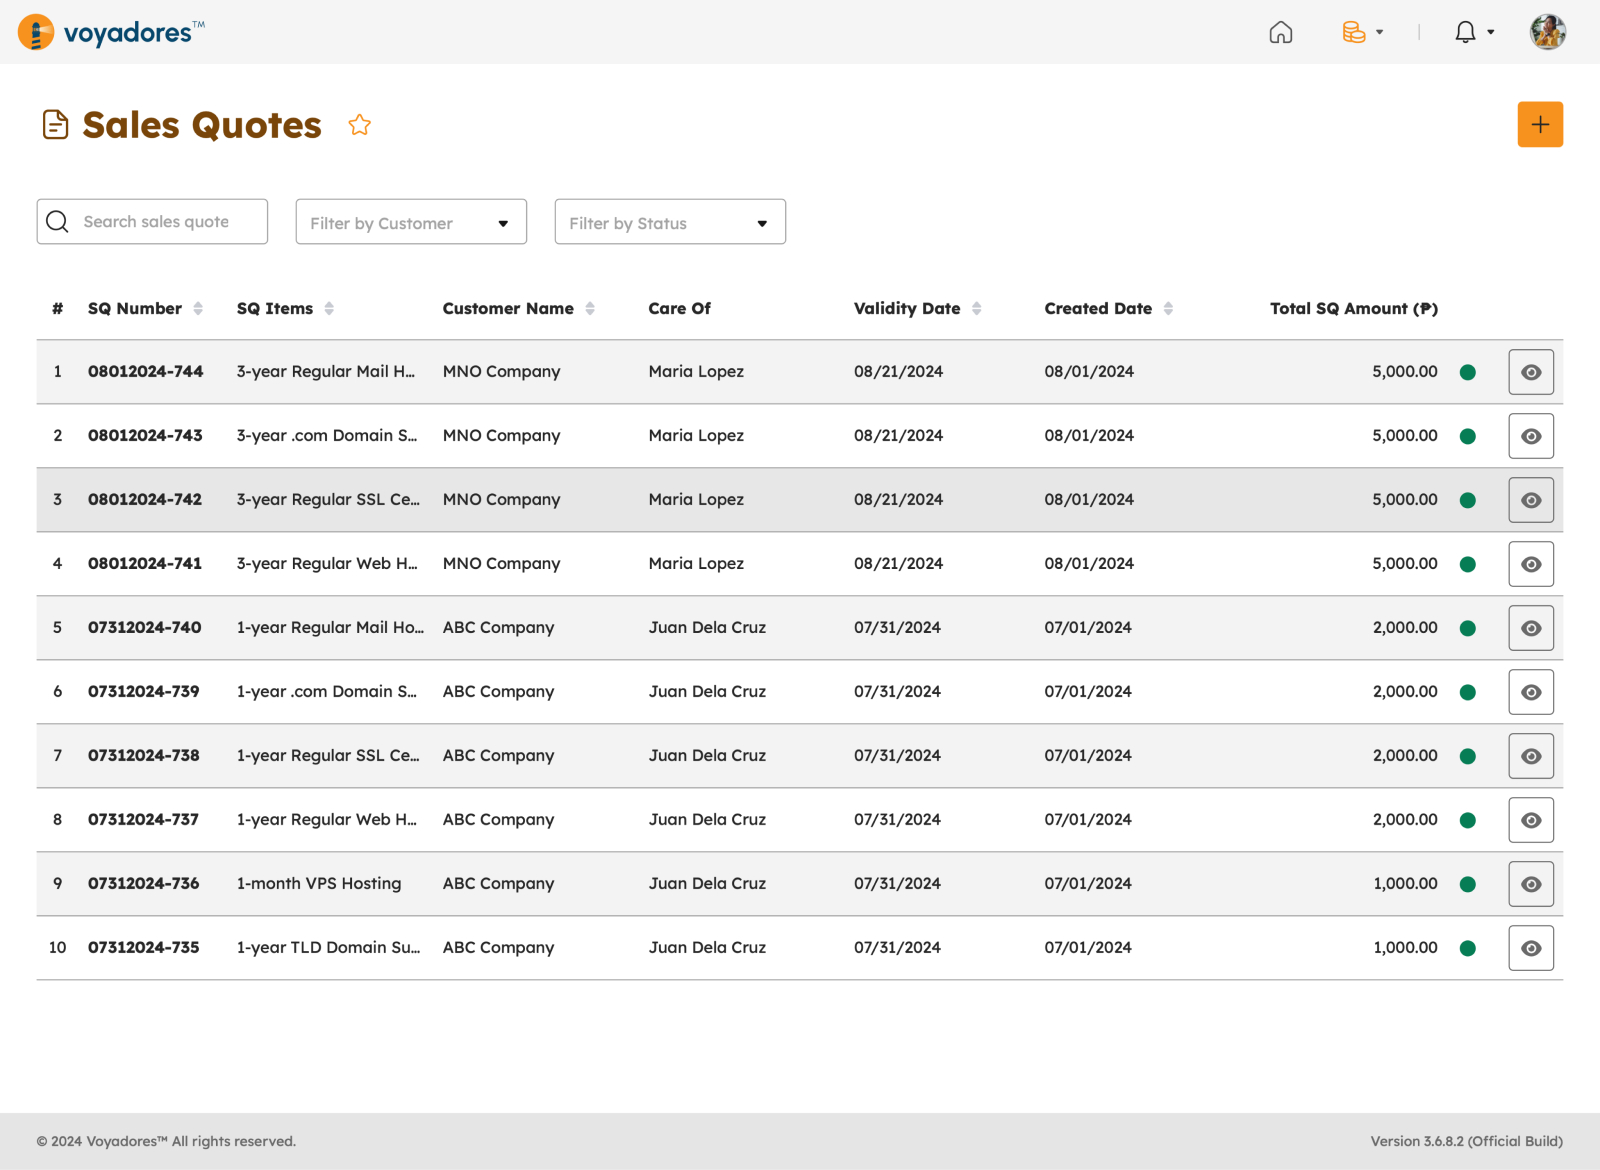
Summary Table
The summary table displays the list of invoices created with the following columns:
- Item number “#”
- SQ Number
- SQ Items
- Customer Name
- Care Of
- Validity Date
- Created Date
- Total SQ Amount
- Status
-
Actions
- Preview PDF
- Edit Invoice
- Approve Invoice
- Set Invoice as Collected
- Set Invoice as Void
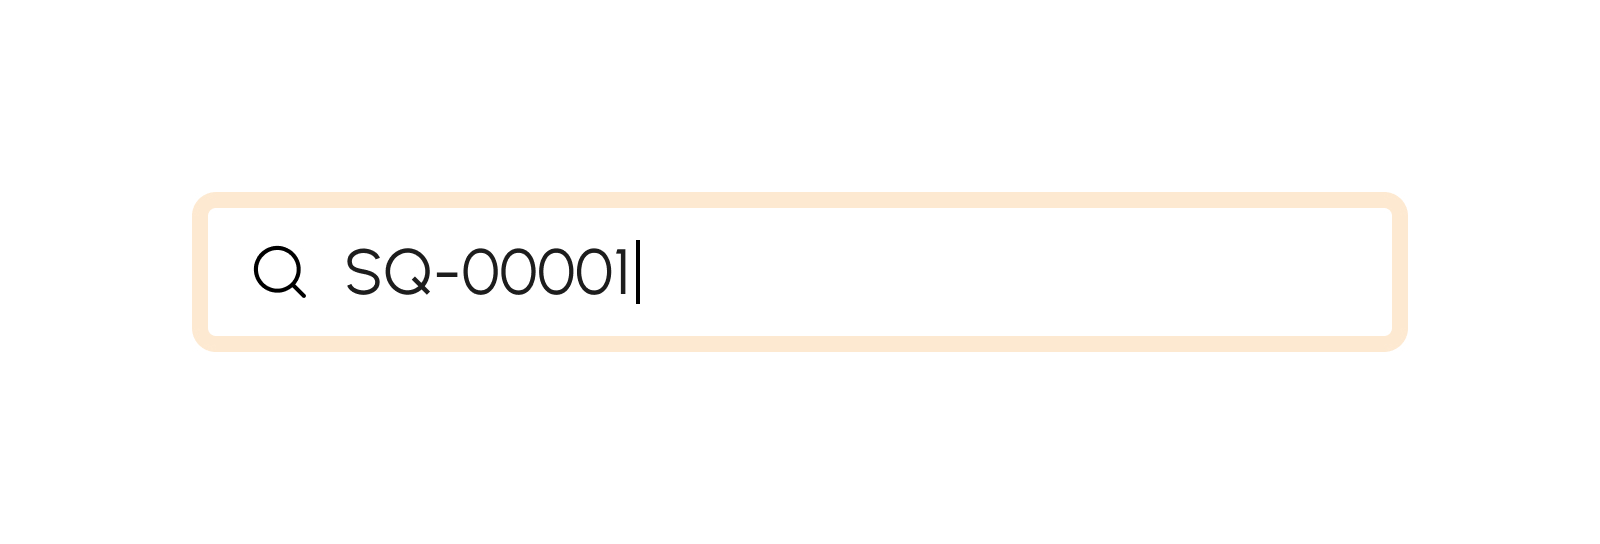
Search by SQ Number or Item
To search for a particular sales quote, key in the SQ Number or SQ Items in the Search Bar as shown in the image below.
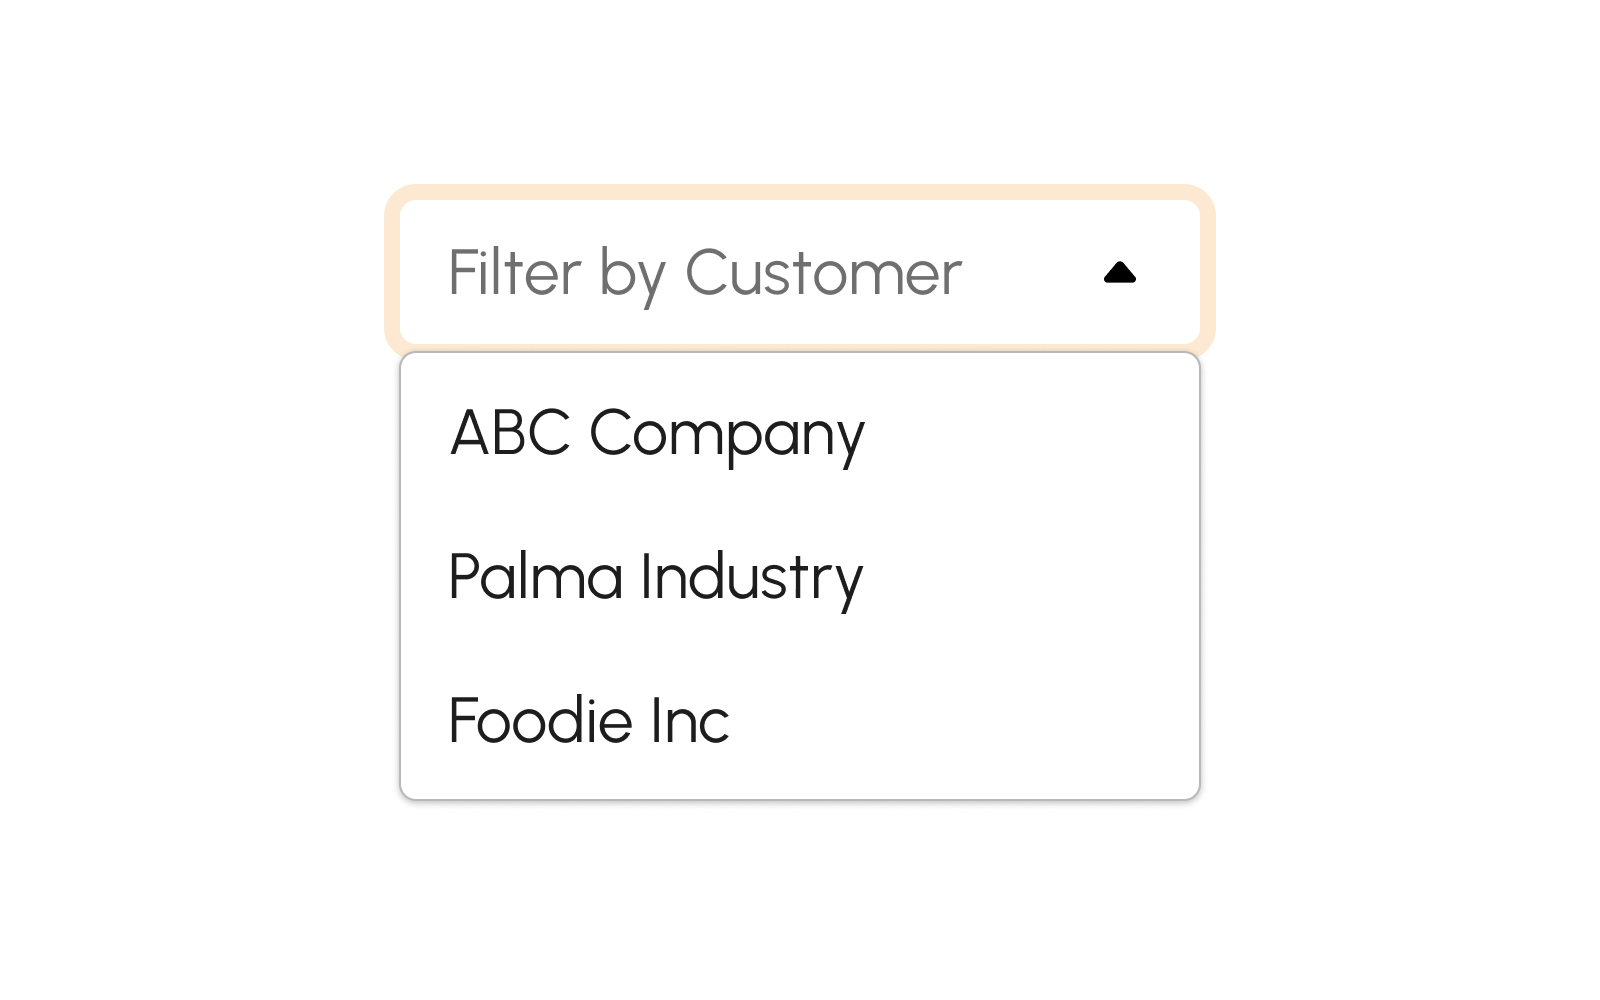
Filter by Customer
This feature gives the option to filter Sales Quote by Customer.
To filter Sales Quotations by customer, simply select the customer's name to view quotations related to them.
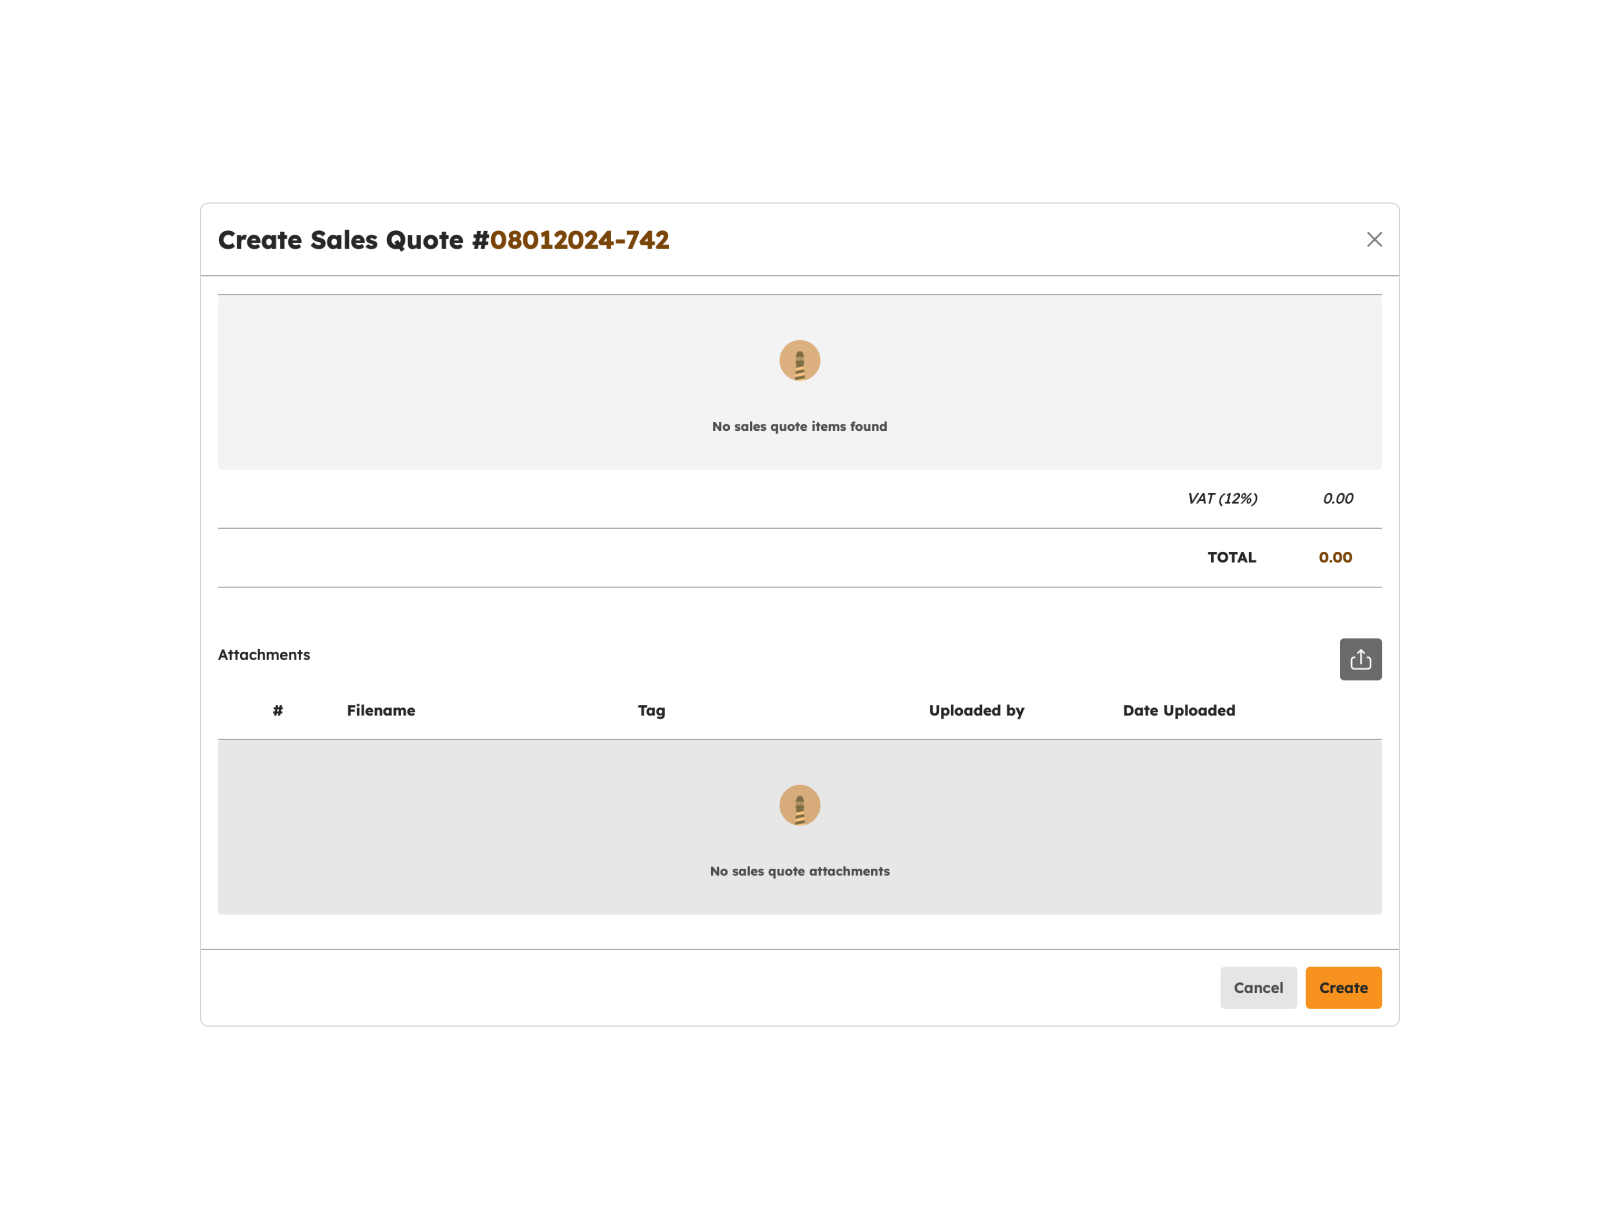
Create Sales Quote
- Click the Create Sales Quote button.
-
Fill in the quotation details.
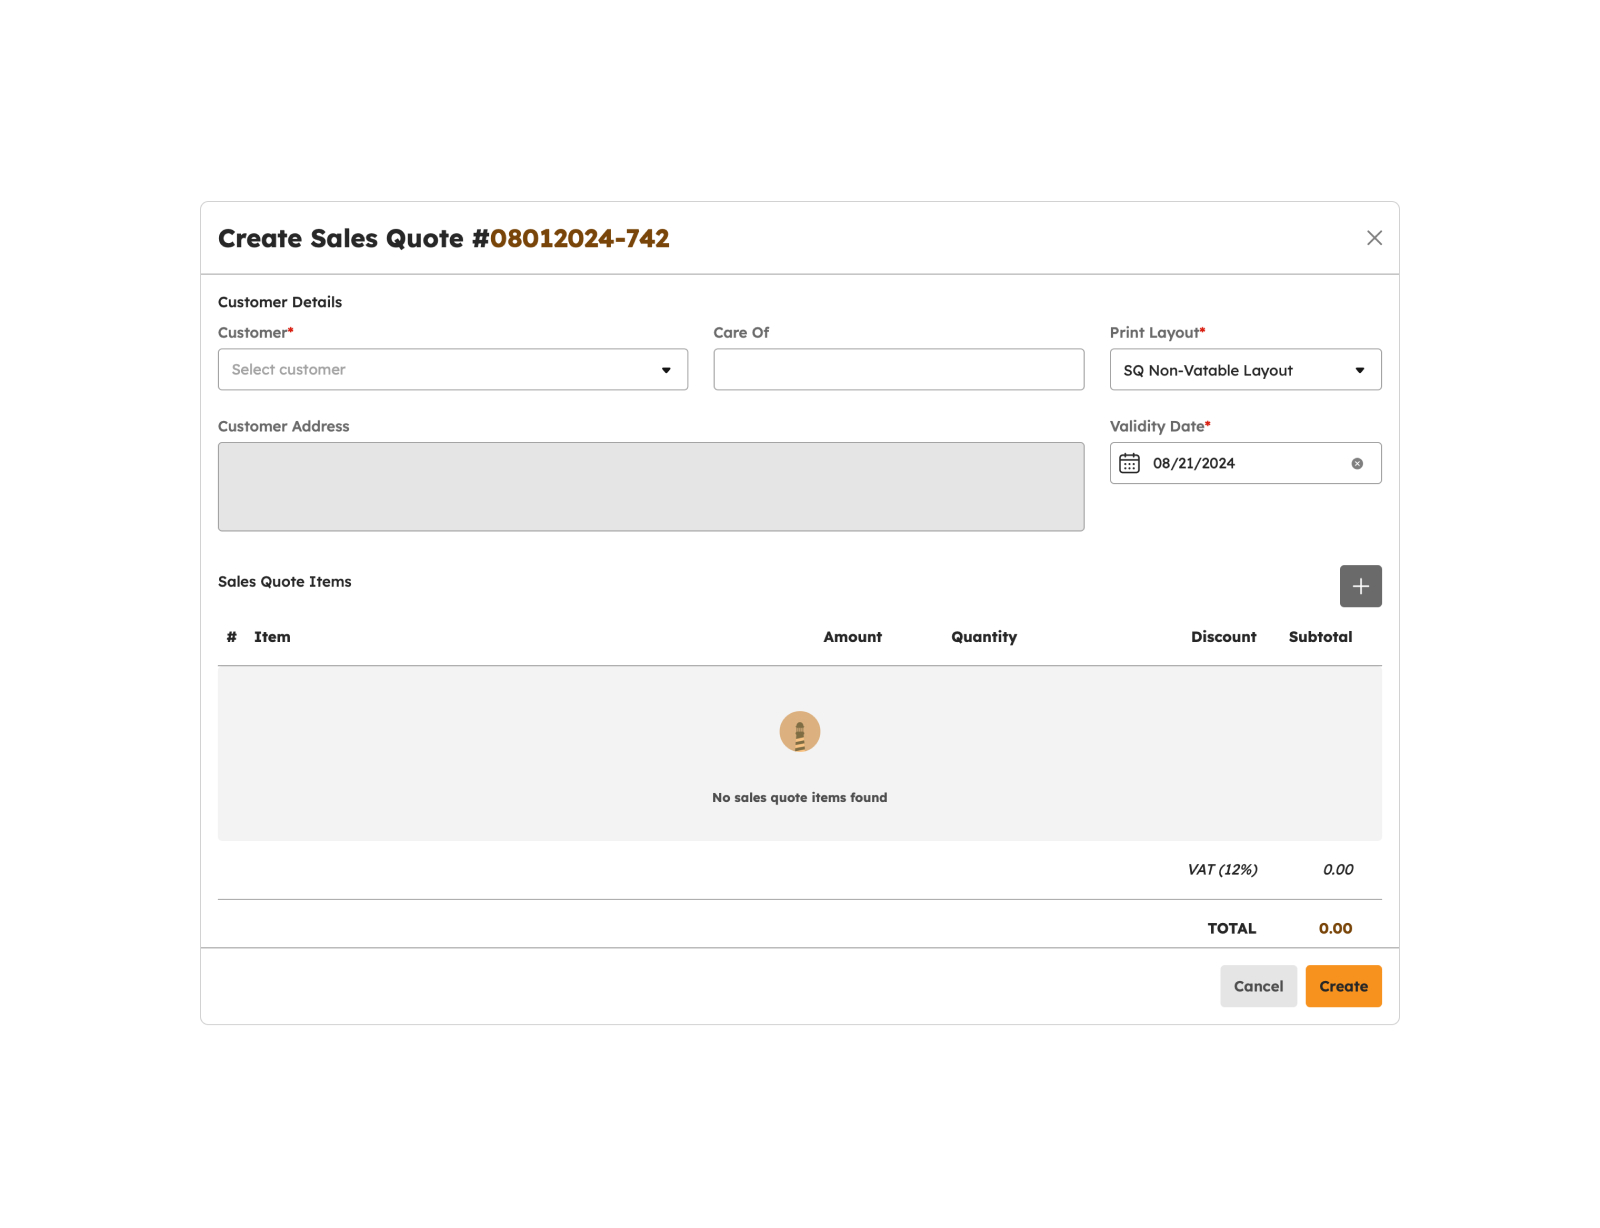
- Invoice Number – Auto generated
- Custom Name
- Validity Date - Auto generated
- Care Of
- Print Layout
-
To update sales quotation items, on edit sales quote modal click “edit item” button, fill out required fields (*)
- Type
- Type label
- Amount
- Discount
- Total Amount
- Inclusions
- Terms
- Click Add button
Note
Fields with (*) are required.
-
Click the Save button on Edit Sales Quote modal .
-
A successful notification will show.
Invoice successfully created
- Step 3 will successfully create a new sales quotation otherwise, proceed to Step 6.
- Click the Cancel button to cancel the creation of sales quotation.
- The screen closes the modal.
- The system will not proceed with the creation of a new sales quotation.
Edit Sales Quotes
- Click the Edit Sales Quote button.
-
Update Quotation details.
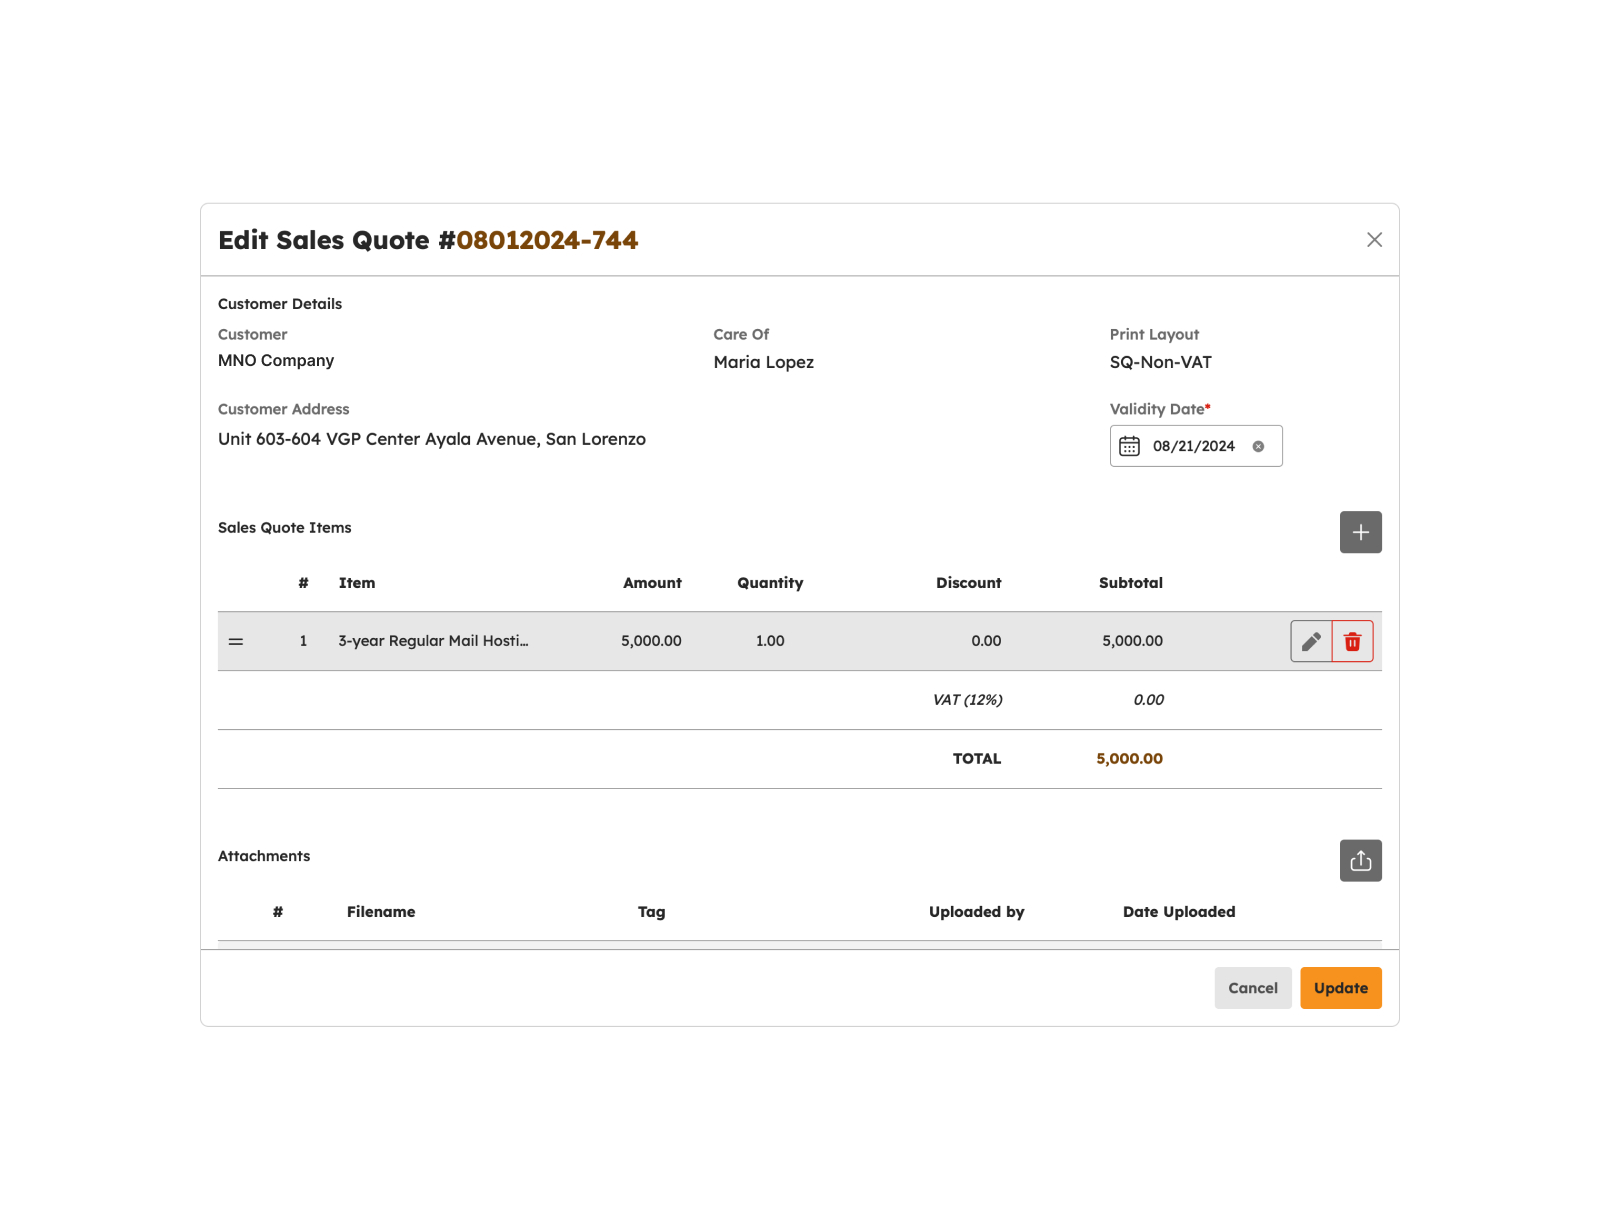
- Invoice Number – Auto generated
- Custom Name
- Validity Date - Auto generated
- Care Of
- Print Layout
-
To update sales quotation items, on edit sales quote modal click “edit item” button, fill out required fields (*)
- Type
- Type label
- Amount
- Discount
- Total Amount
- Inclusions
- Terms
- Click Update button
- User may opt to delete the created sales quote item by clicking the delete button
Note
Fields with (*) are required.
- Click the Update Update button on Create Sales Quote modal.
-
A successful notification will show.
Invoice successfully created
- Step 3 will successfully update sales quotation details otherwise, proceed to Step 6.
- Click the Cancel button to cancel the update of sales quotation.
- The screen closes the modal.
- The system will not proceed with the update of a sales quotation.
Download Sales Quote
- Click on the Download button.
- The quotation will be automatically downloaded.
- Open the downloaded file.
View Sales Quote
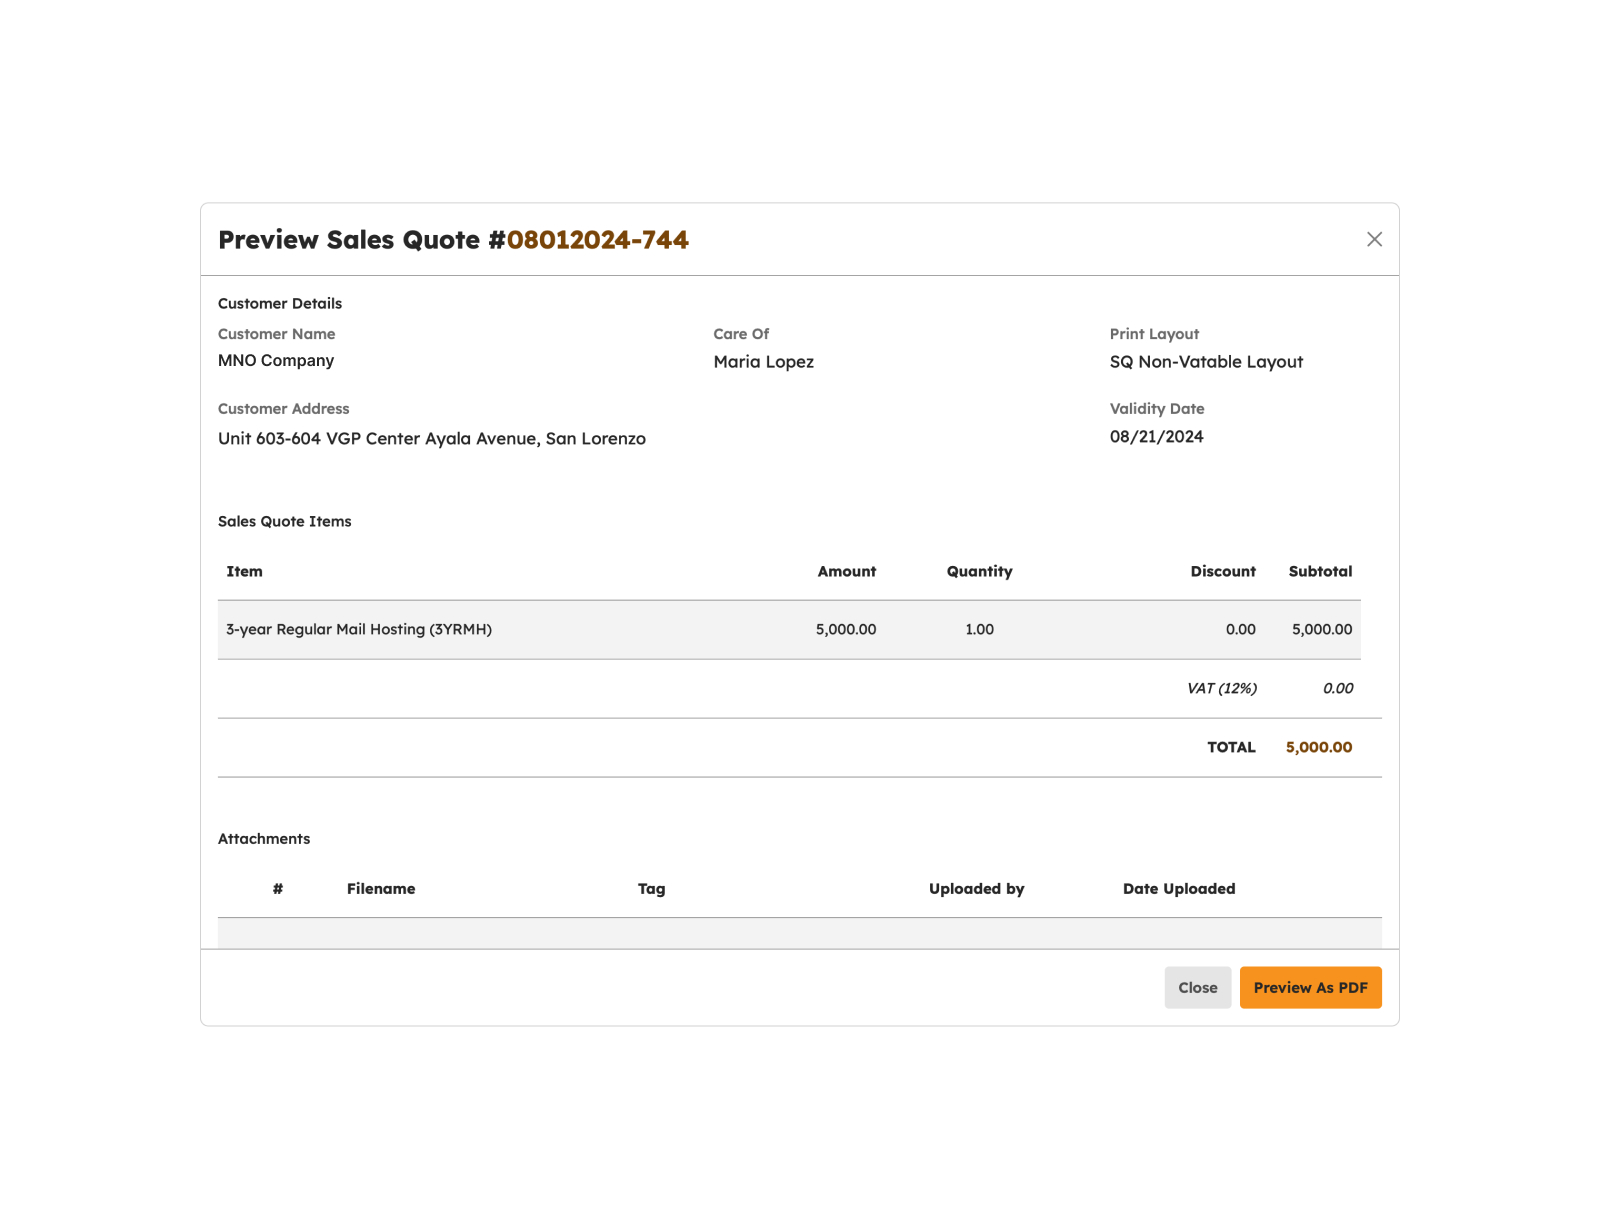
- Click on the Preview button.
- The sales quotation preview will open on a separate file viewer page.
- Click the "Download" or "Print" button if needed.
Approve Sales Quote

- Click the Approve button.
- In the approval confirmation modal, click Approve.
-
A successful notification will be displayed.
Sales Quote successfully approved
- The invoice status will be updated to "Approved - Client"
Send Sales Quote
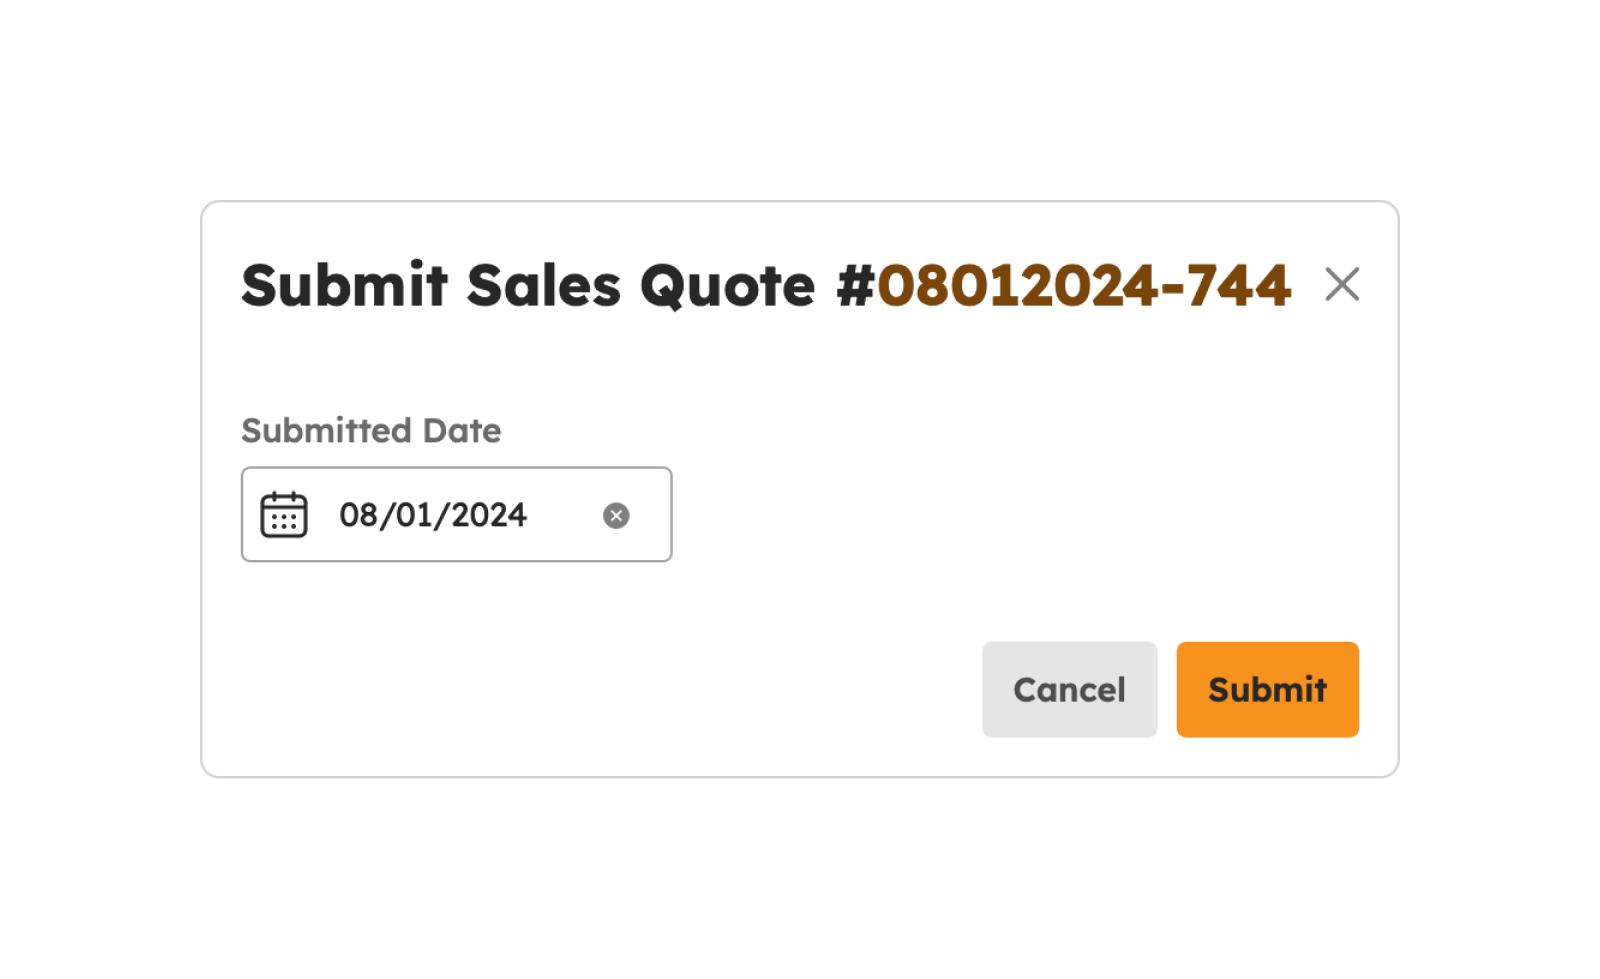
- Click the Send button.
- In the send confirmation modal, click Send.
-
A successful notification will be displayed.
Sales Quote successfully sent
- The invoice status will be updated to "Submitted"
Decline Sales Quote
- Click the Decline button.
- In the send confirmation modal, click Decline.
-
A successful notification will be displayed.
Sales Quote successfully declined
- The invoice status will be updated to "Declined"
Load More Sales Quotes
To verify if there are more than 20 sales quotations created, click the Load More button to display other sales quotations since the default item number displayed in the screen is from count 1-20.
Customers
Introduction to Customers
This page is dedicated to handling and managing information related to customers. It provides a centralized location to view and manage details about each customer, including their contact information and preferred invoice layout for accounting transactions.
The screen will redirect to the Customers page, showing several features to use that will be discussed below.

Features in Customers Page
The image below is a high-level view of Customers page along with its built-in features.
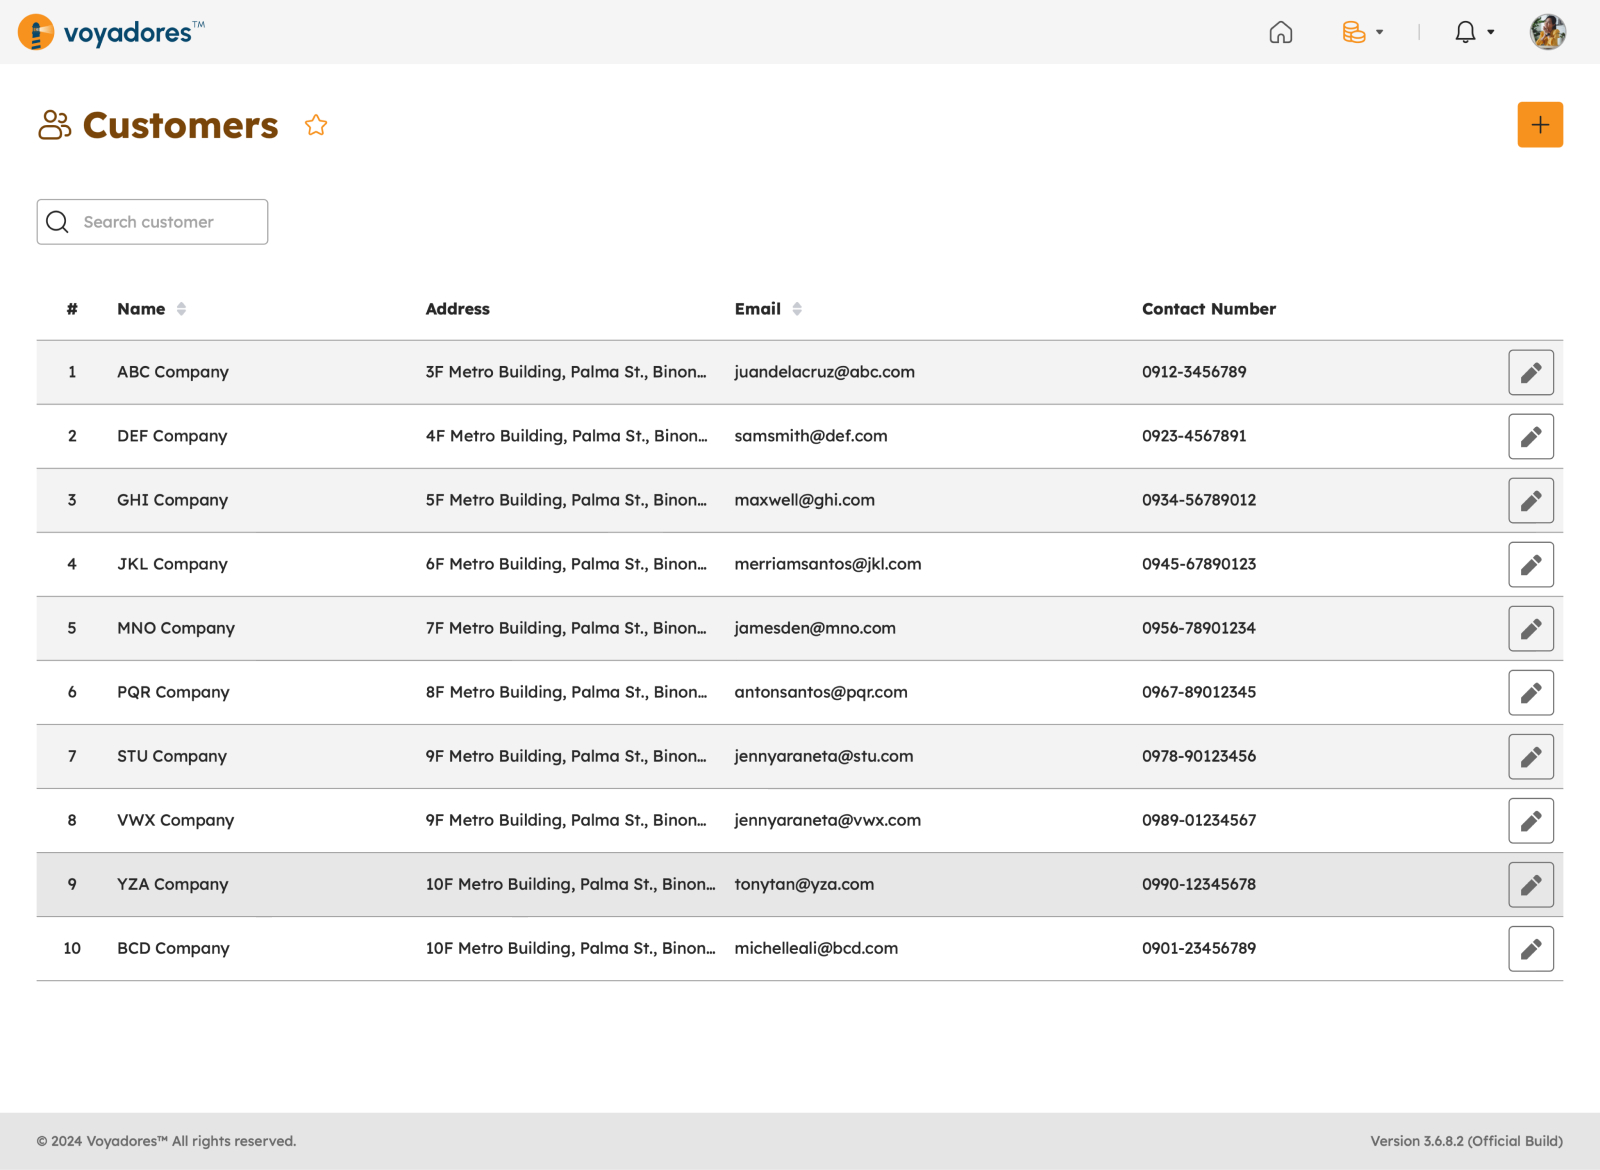
Summary Table
The summary table displays the list of customers with the following columns:
- Name - The customer's full name or business name, which identifies them uniquely.
- Address - The physical location where the customer is located. This could include the street address, city, state/province, postal code, and any additional address-related information.
- Email - The email address of the customer. Email is a primary mode of communication in business interactions.
- Contact Number - The phone number(s) through which the customer can be reached. This may include mobile, office, or other relevant contact numbers.
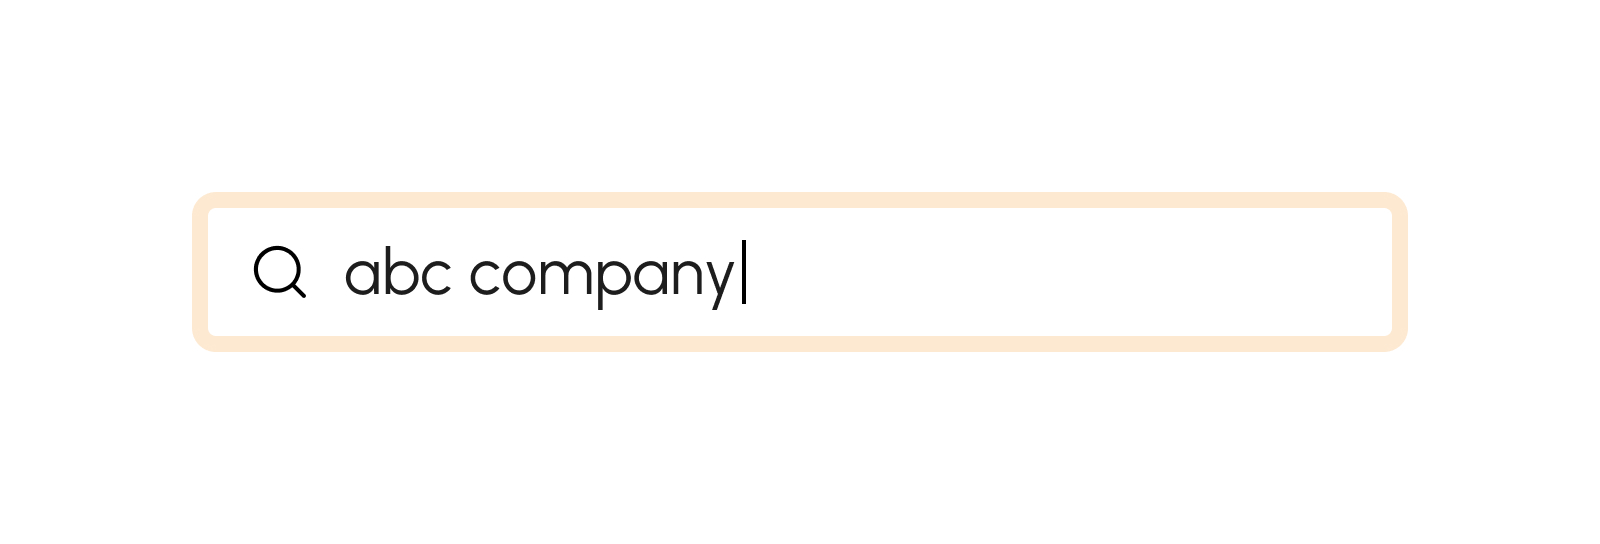
Search by Customer Name
To search for specific Customer, enter the Customer Name in the Search Bar, as shown in the image below:
Create Customer
To create a new customer record, follow these steps:
- Click on the Create Customer button.
-
Fill in the required customer details in the provided fields.
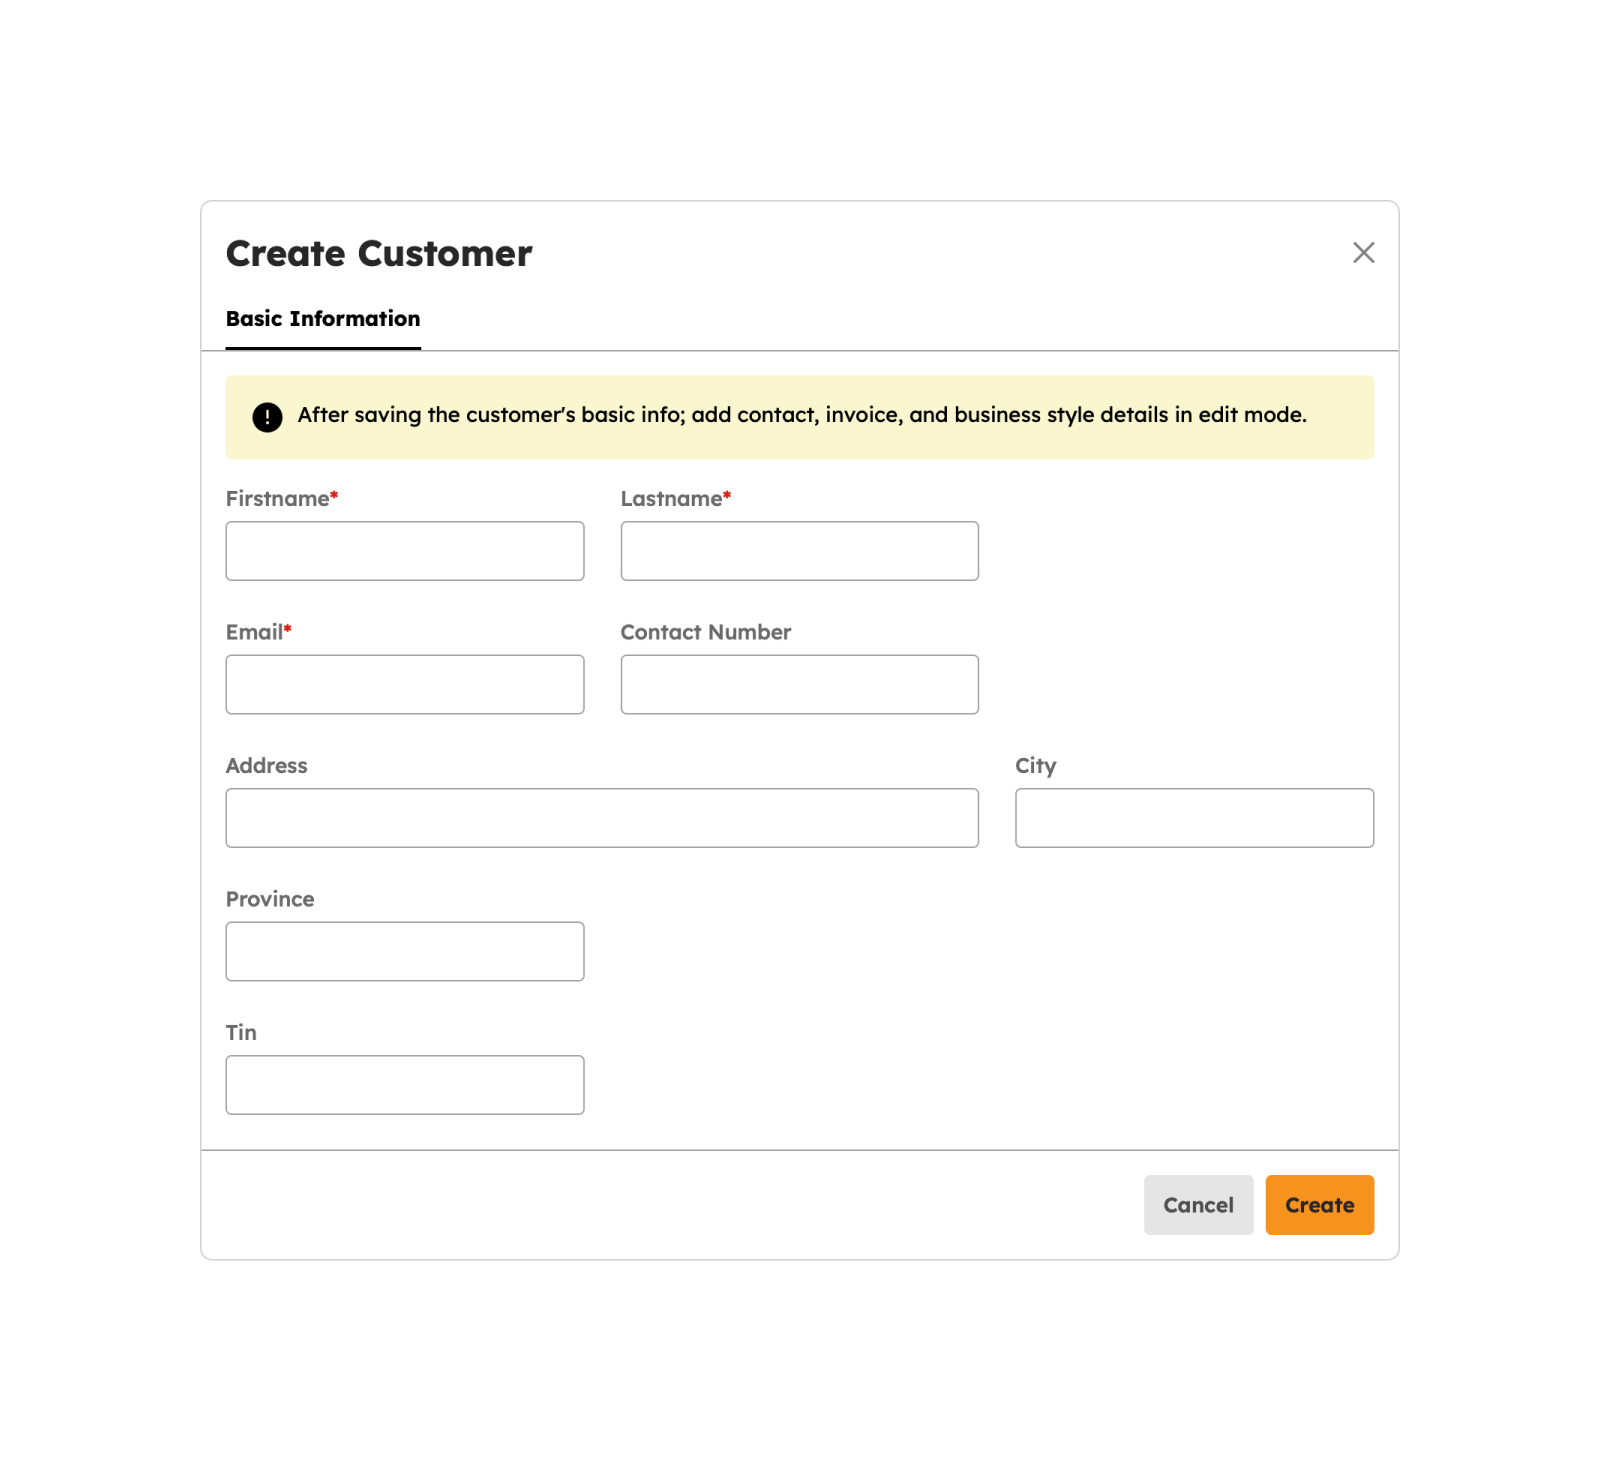
- First Name
- Last Name
- Contact Number
- Address
- City
- Province
- TIN Number
Note
Fields with (*) are required.
- Once the details are filled in, click the Create button.
-
A successful notification will be displayed to confirm the creation.
Customer successfully created
- Step 3 will successfully create a new customer record otherwise, proceed to Step 6.
- Click the Cancel button to cancel the creation of customer
- The screen closes the modal.
- The system will not proceed with the creation of a new customer.
Edit Customer
To update new customer record, follow these steps:
- Click on the Edit Customer button.
-
Update customer details in the provided fields.
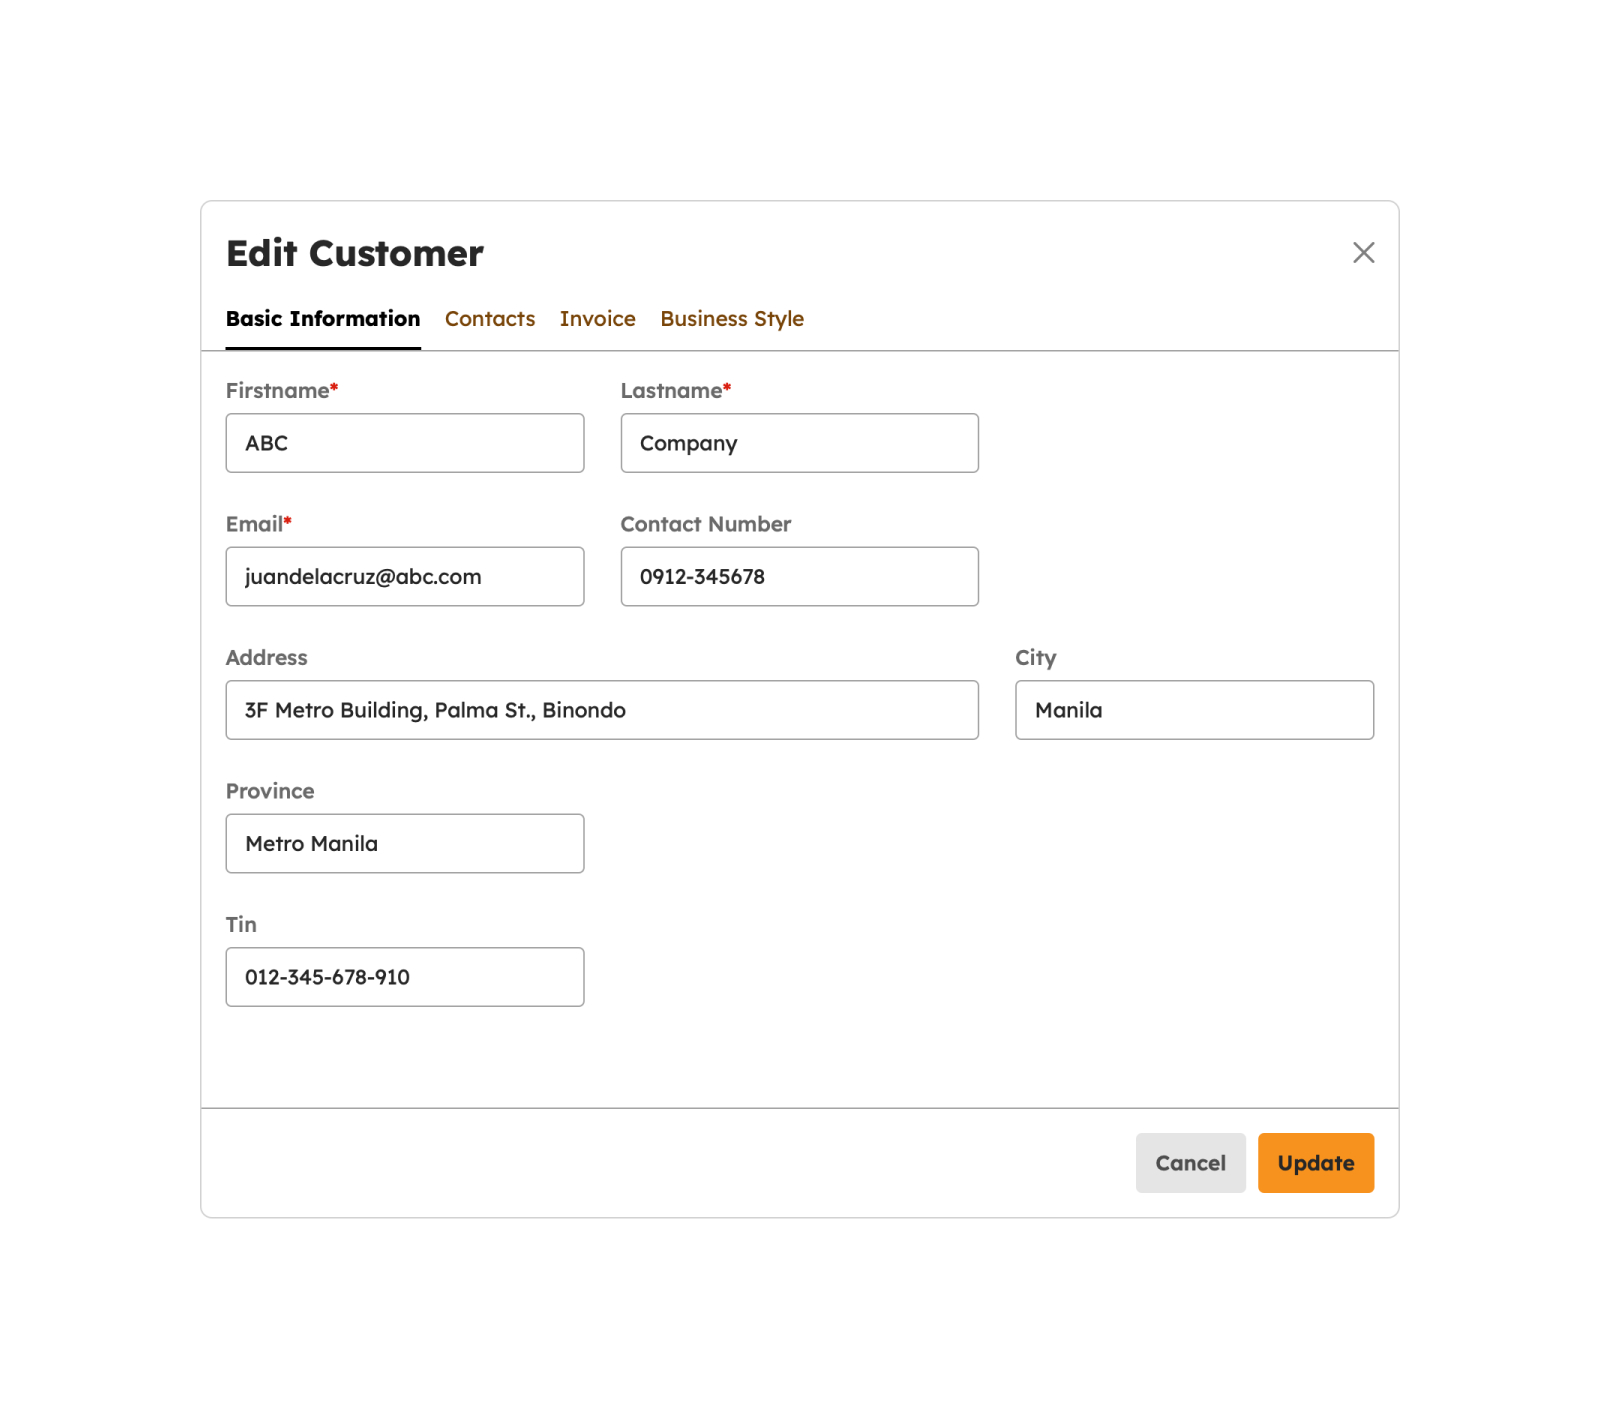
- First Name
- Last Name
- Contact Number
- Address
- City
- Province
- TIN Number
Note
Fields with (*) are required.
- Once the details are filled in, click the Update button.
-
A successful notification will be displayed to confirm the update.
Customer successfully updated
- Step 3 will successfully create a new customer record otherwise, proceed to Step 6.
- Click the Cancel button to cancel the update of customer
- The screen closes the modal.
- The system will not proceed with updating the customer's details.
Edit Customer Contacts
To update customer contact, follow these steps:
- Click on the Edit Customer button.
-
Update customer details in the provided fields.
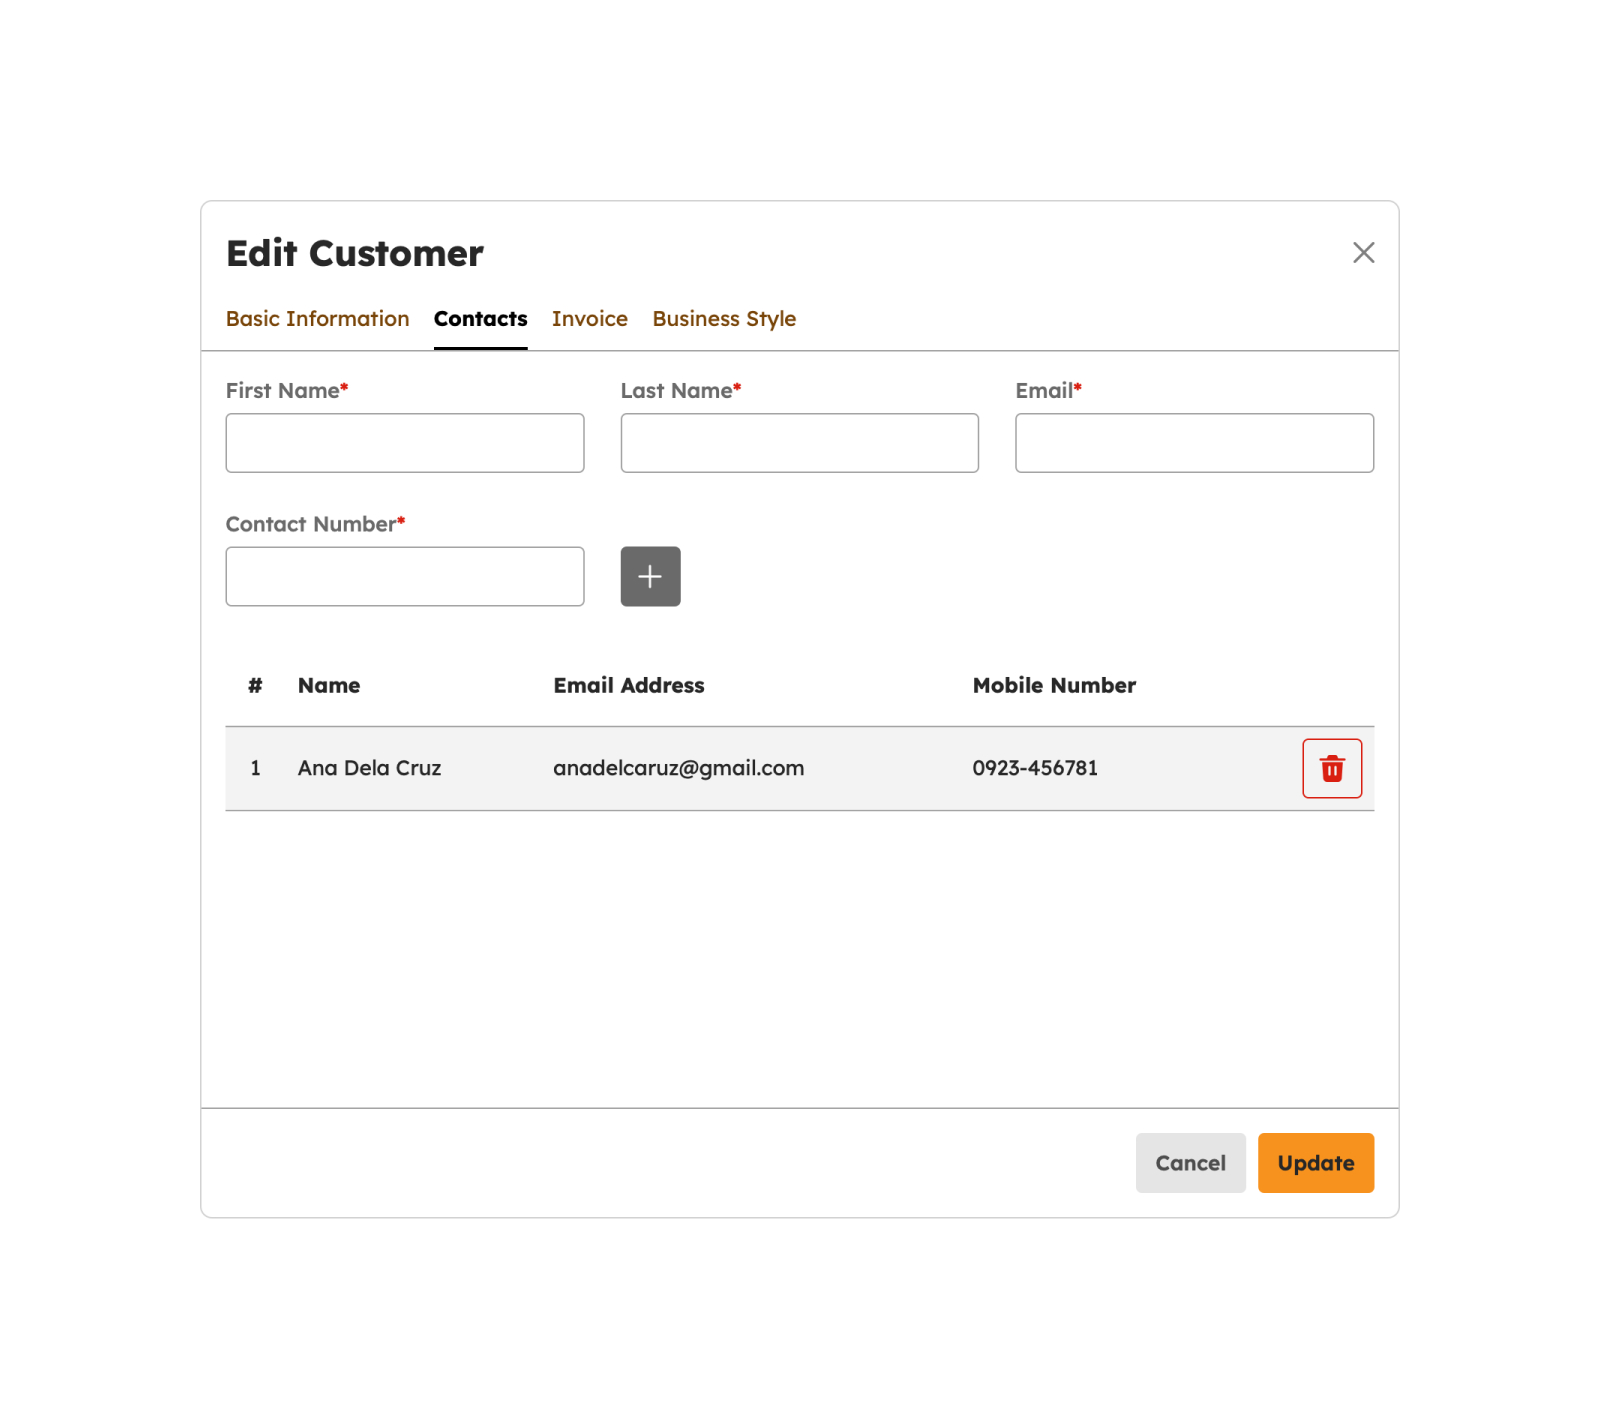
- First Name
- Last Name
- Contact Number
Note
Fields with (*) are required.
- Click the Add Contact button
- Customer contact will be successfully added and displayed on the Customer contact table.
- Click the Update button to successfully add the Contact to the Customer Information.
-
A successful notification will show.
Customer successfully updated
- To cancel the update of customer contact details, click the Cancel button.
- The system will not proceed with updating the customer's contact information.
Edit Customer Invoice
To update invoice terms and layout, please follow these steps:
- Click on the Edit Customer button and navigate to the Invoice tab.
-
Select the appropriate term for your company. The term specifies the period within
which the buyer is expected to make payment after receiving the invoice.
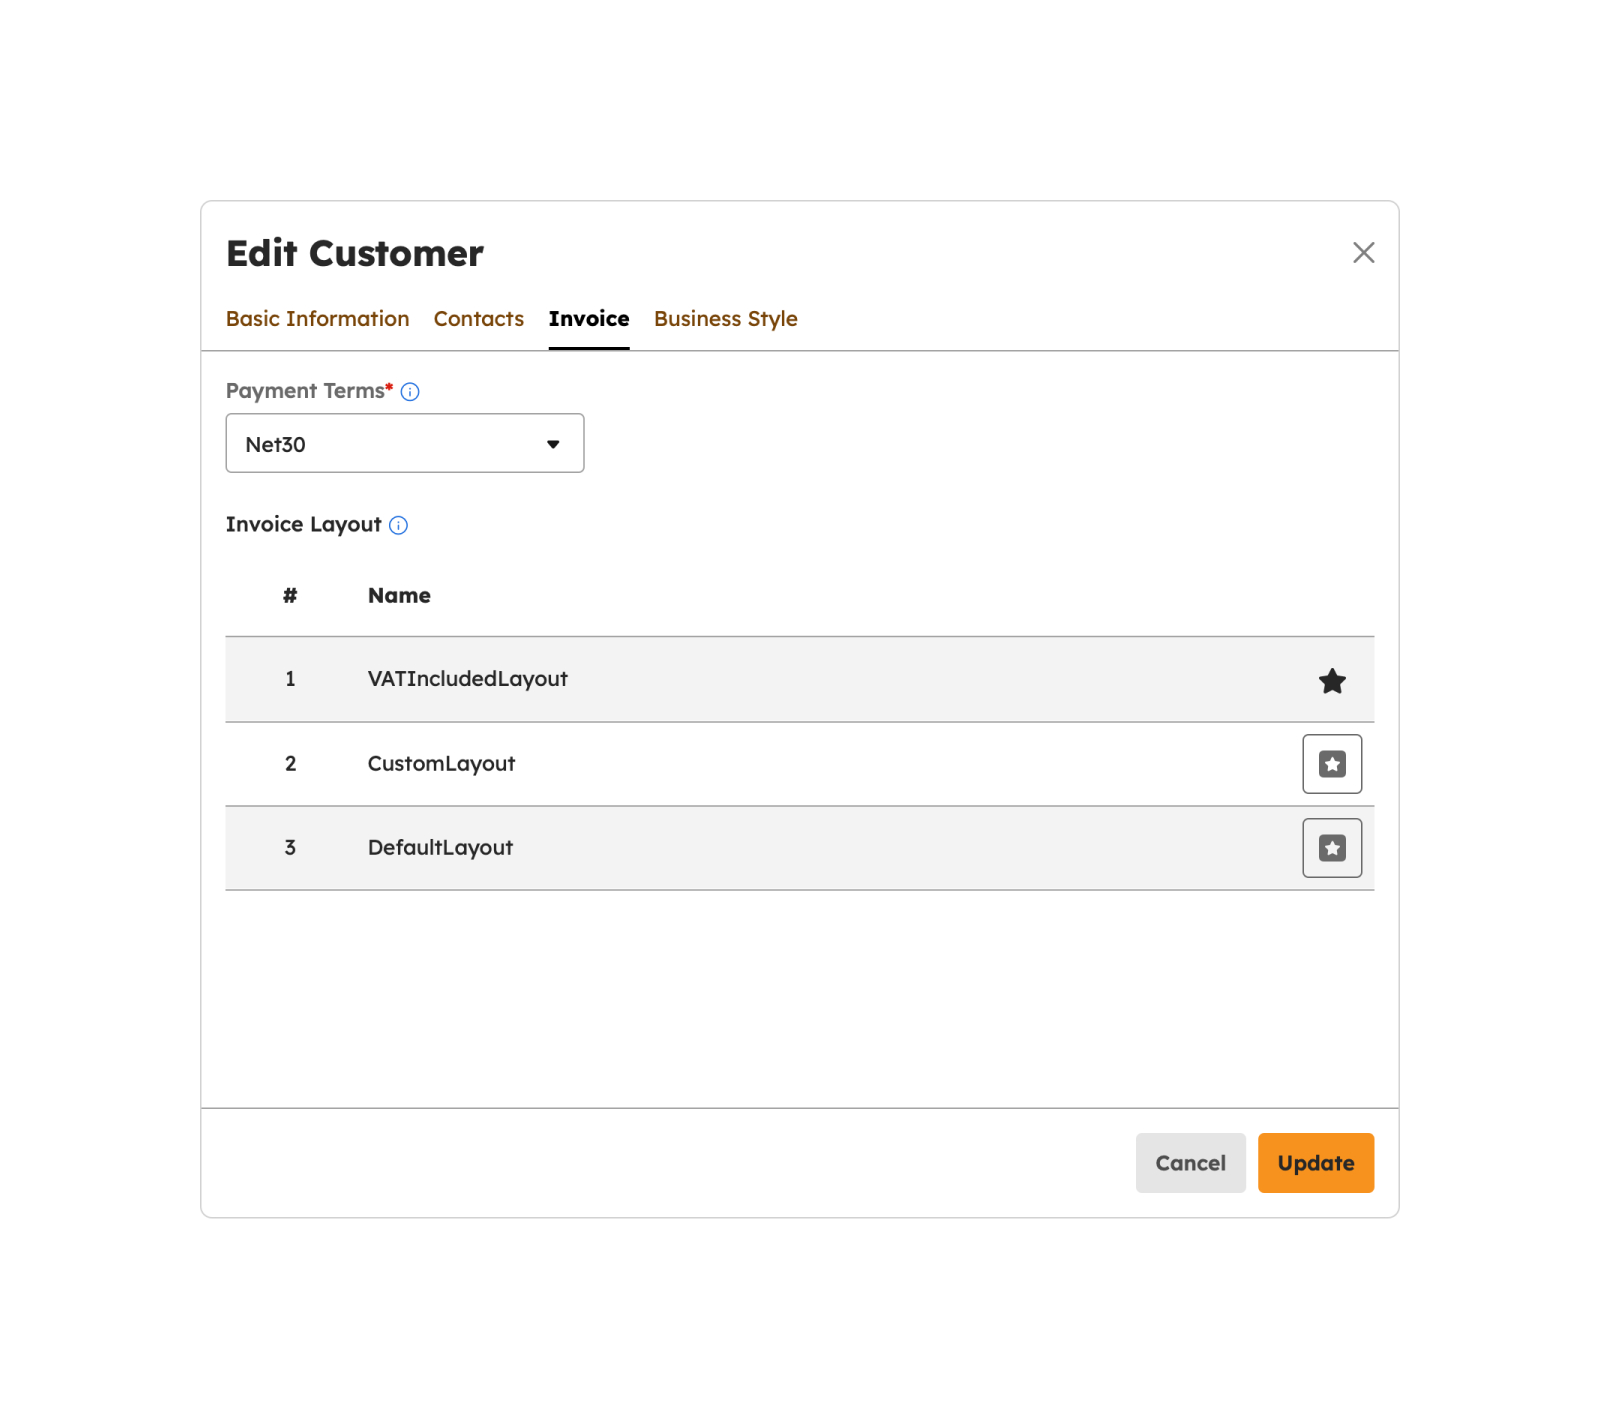
- Due On Reciept
- Net15
- Net30
- Net45
- Net60
-
Choose an Invoice Layout. This refers to the visual and structural design of the invoice
document, encompassing how information is organized, presented, and formatted.
- Default Layout
- VAT Included Layout
- Custom Layout
- Click the Update button to save your changes.
-
A confirmation message will appear to indicate the successful update.
Customer successfully updated
- To cancel the update of customer invoice details, simply click the Cancel button.
- The system will not proceed with updating the customer's invoice details.
Load More
If you wish to check for more than 20 customers, you can click the Load More button. This will display additional customers beyond the initial 20 displayed on the screen.