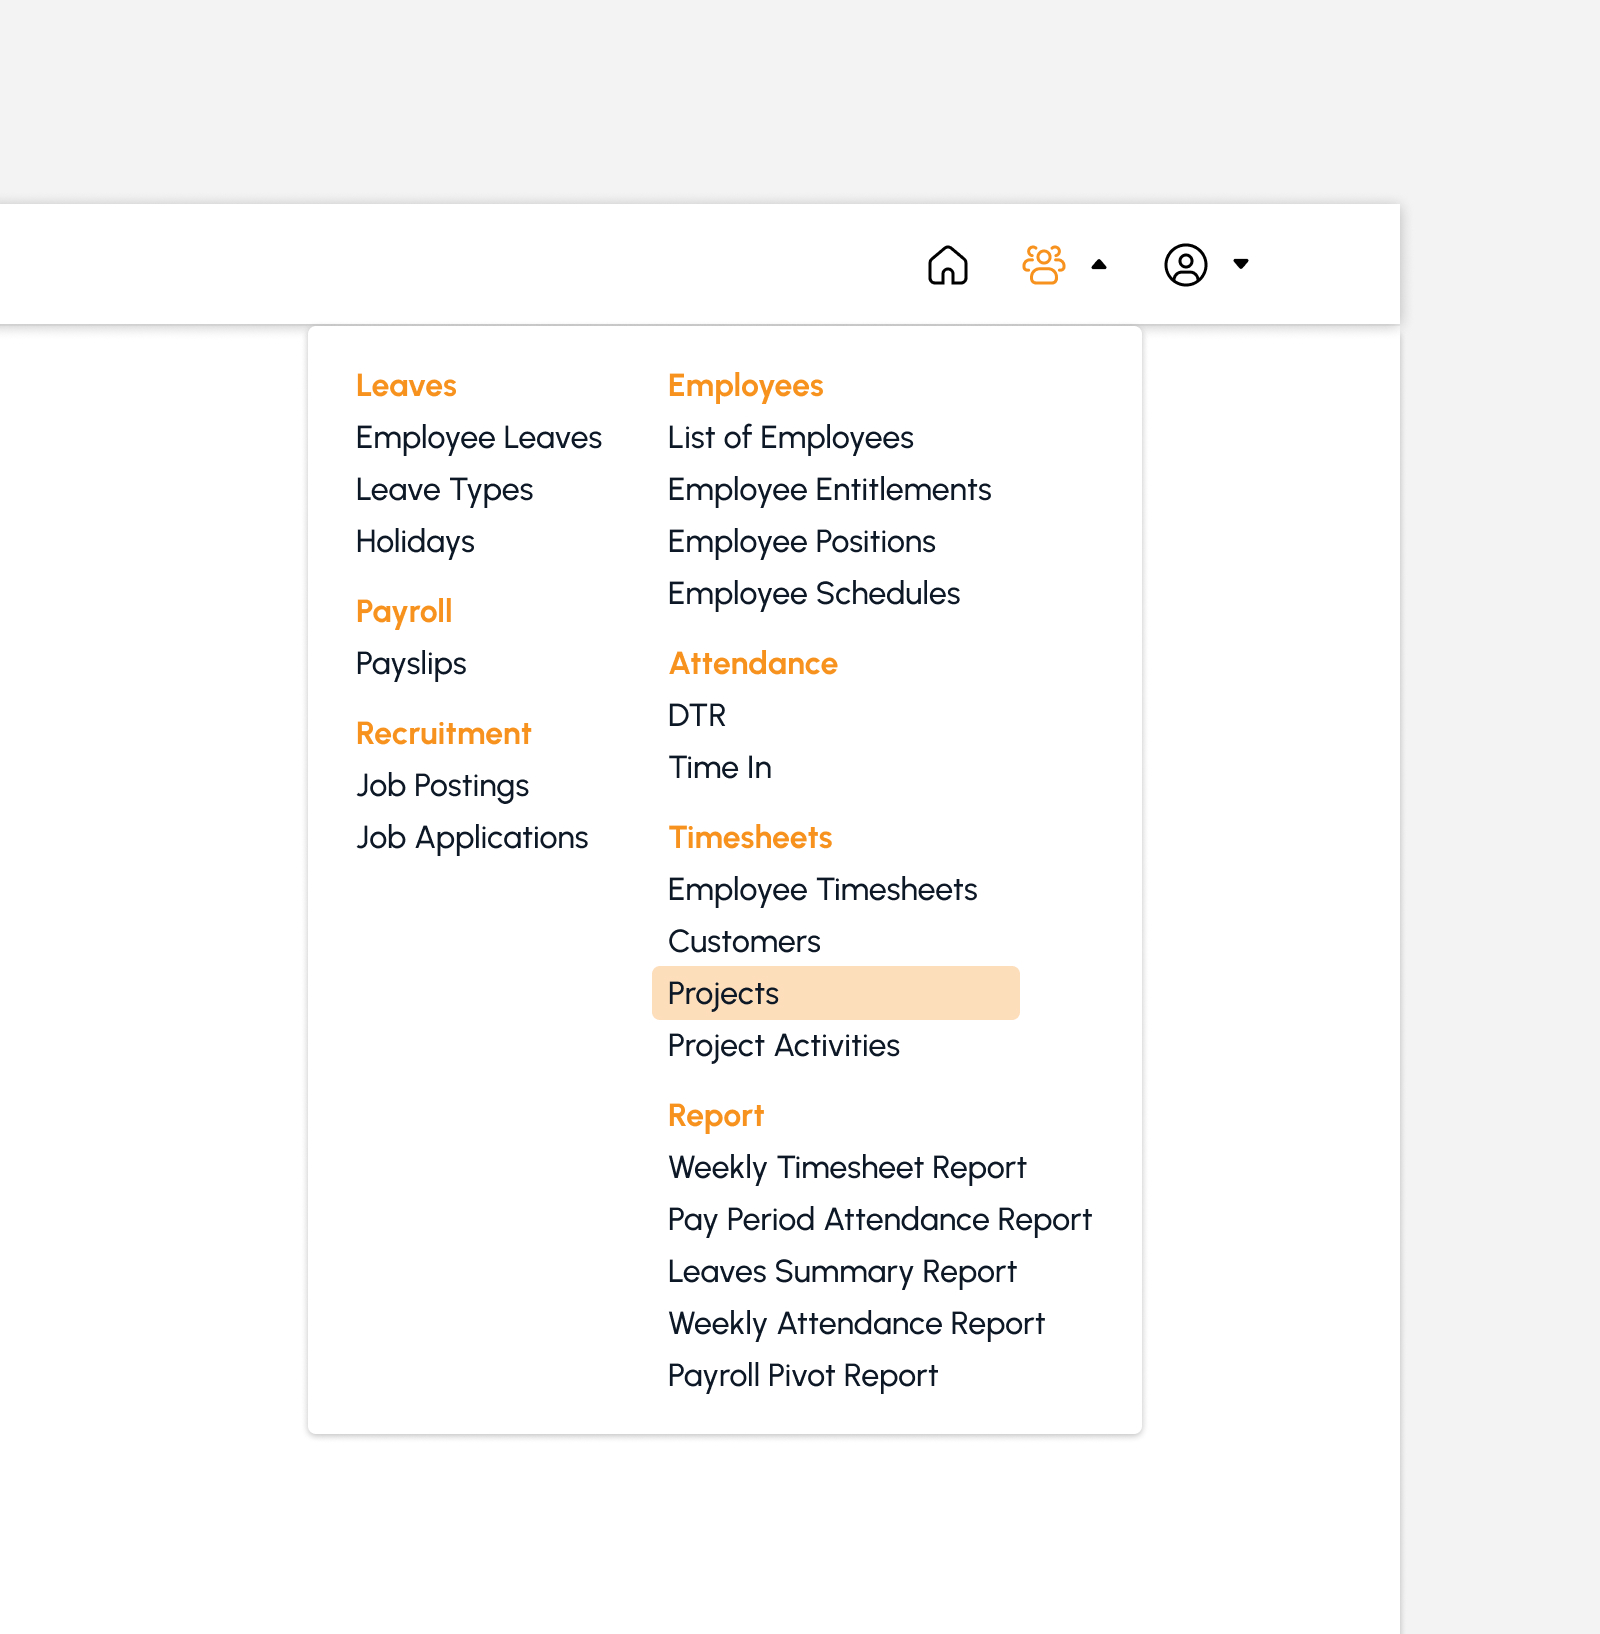
Timesheets
Who can use this feature
Anyone with Administrator and HR Manager role can access all the Timesheets pages
Anyone with Payroll Manager and Employee role can only access the Employee Timesheets page
Introduction to Timesheets
With this submodule, employees can track and record working hours and activities. It provides a systematic and organized way for employees to document the time they spend on various tasks, projects, or activities within the organization.
Definition of Terms
Defined in this section are the available pages under the Timesheets submodule as follows:
- Employee Timesheets. Refers to tracking and recording the working hours and activities of individual employees within an organization. It allows employees to log and report time spent on different tasks, projects, or activities.
- Customers. Refers to the entities or individuals for whom the employee is performing work or providing services.
- Projects. Refers to the unique identifier or project name assigned to a specific project.
- Project Activities. Refers to the specific tasks or activities that employees record time against for a particular project.
Roles and Permissions
The table below shows the defined roles and permissions when accessing pages and features under Timesheet Submodule.
| Functions | Administrator | HR Manager | Payroll Manager | Employee |
|---|---|---|---|---|
| Employee Timesheets | ||||
| Create | ||||
| Edit | ||||
| Customers | ||||
| Search | ||||
| Create | ||||
| Edit | ||||
| Projects | ||||
| Search | ||||
| Create | ||||
| Edit | ||||
| Activate/Deactivate | ||||
| Projects | ||||
| Search | ||||
| Create | ||||
| Edit | ||||
| Activate/Deactivate | ||||
Roles and Permissions
Note that users have the flexibility to enhance access control and refine user privileges by effortlessly adding and configuring additional roles and permissions. This aligns system functionality with the organizational structure and security requirements, ensuring that users are assigned appropriate levels of access and responsibilities.
To do so, contact [email protected]
Employee Timesheets
Introduction to Employee Timesheets
This page allows tracking of the hours worked by an employee and the projects and activities involved.
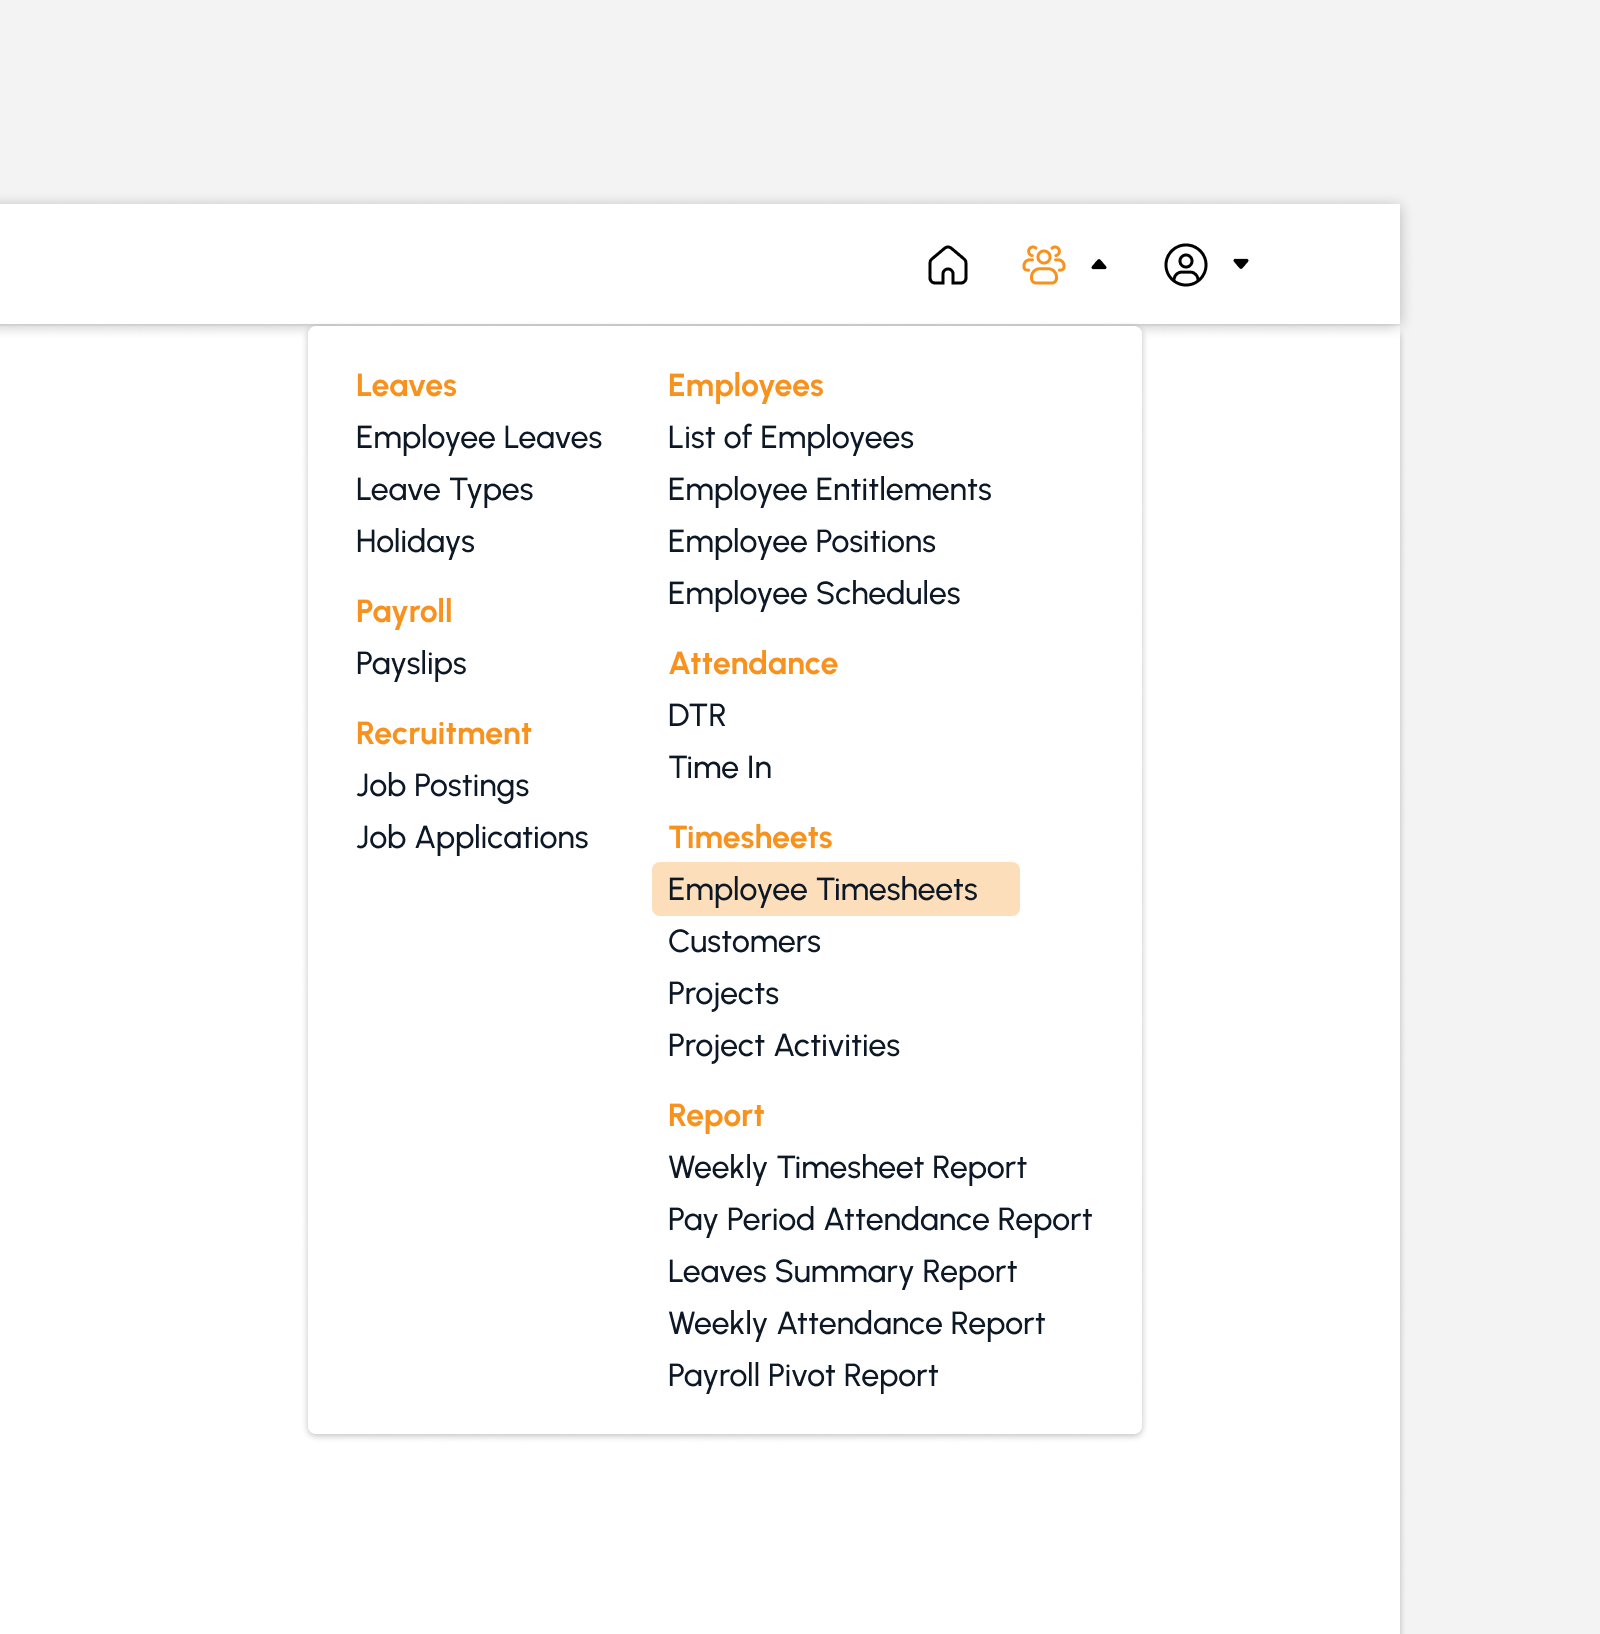
To access this page, navigate to the Human Resources Module and click on 'Employee Timesheets' under the Timesheets Submodule, as shown in the image below:
Once redirected, a range of features will be discussed in detail in the following section.
Employee Timesheets Features
The snip below is the high-level view of Employee Timesheets page along with its built-in features.
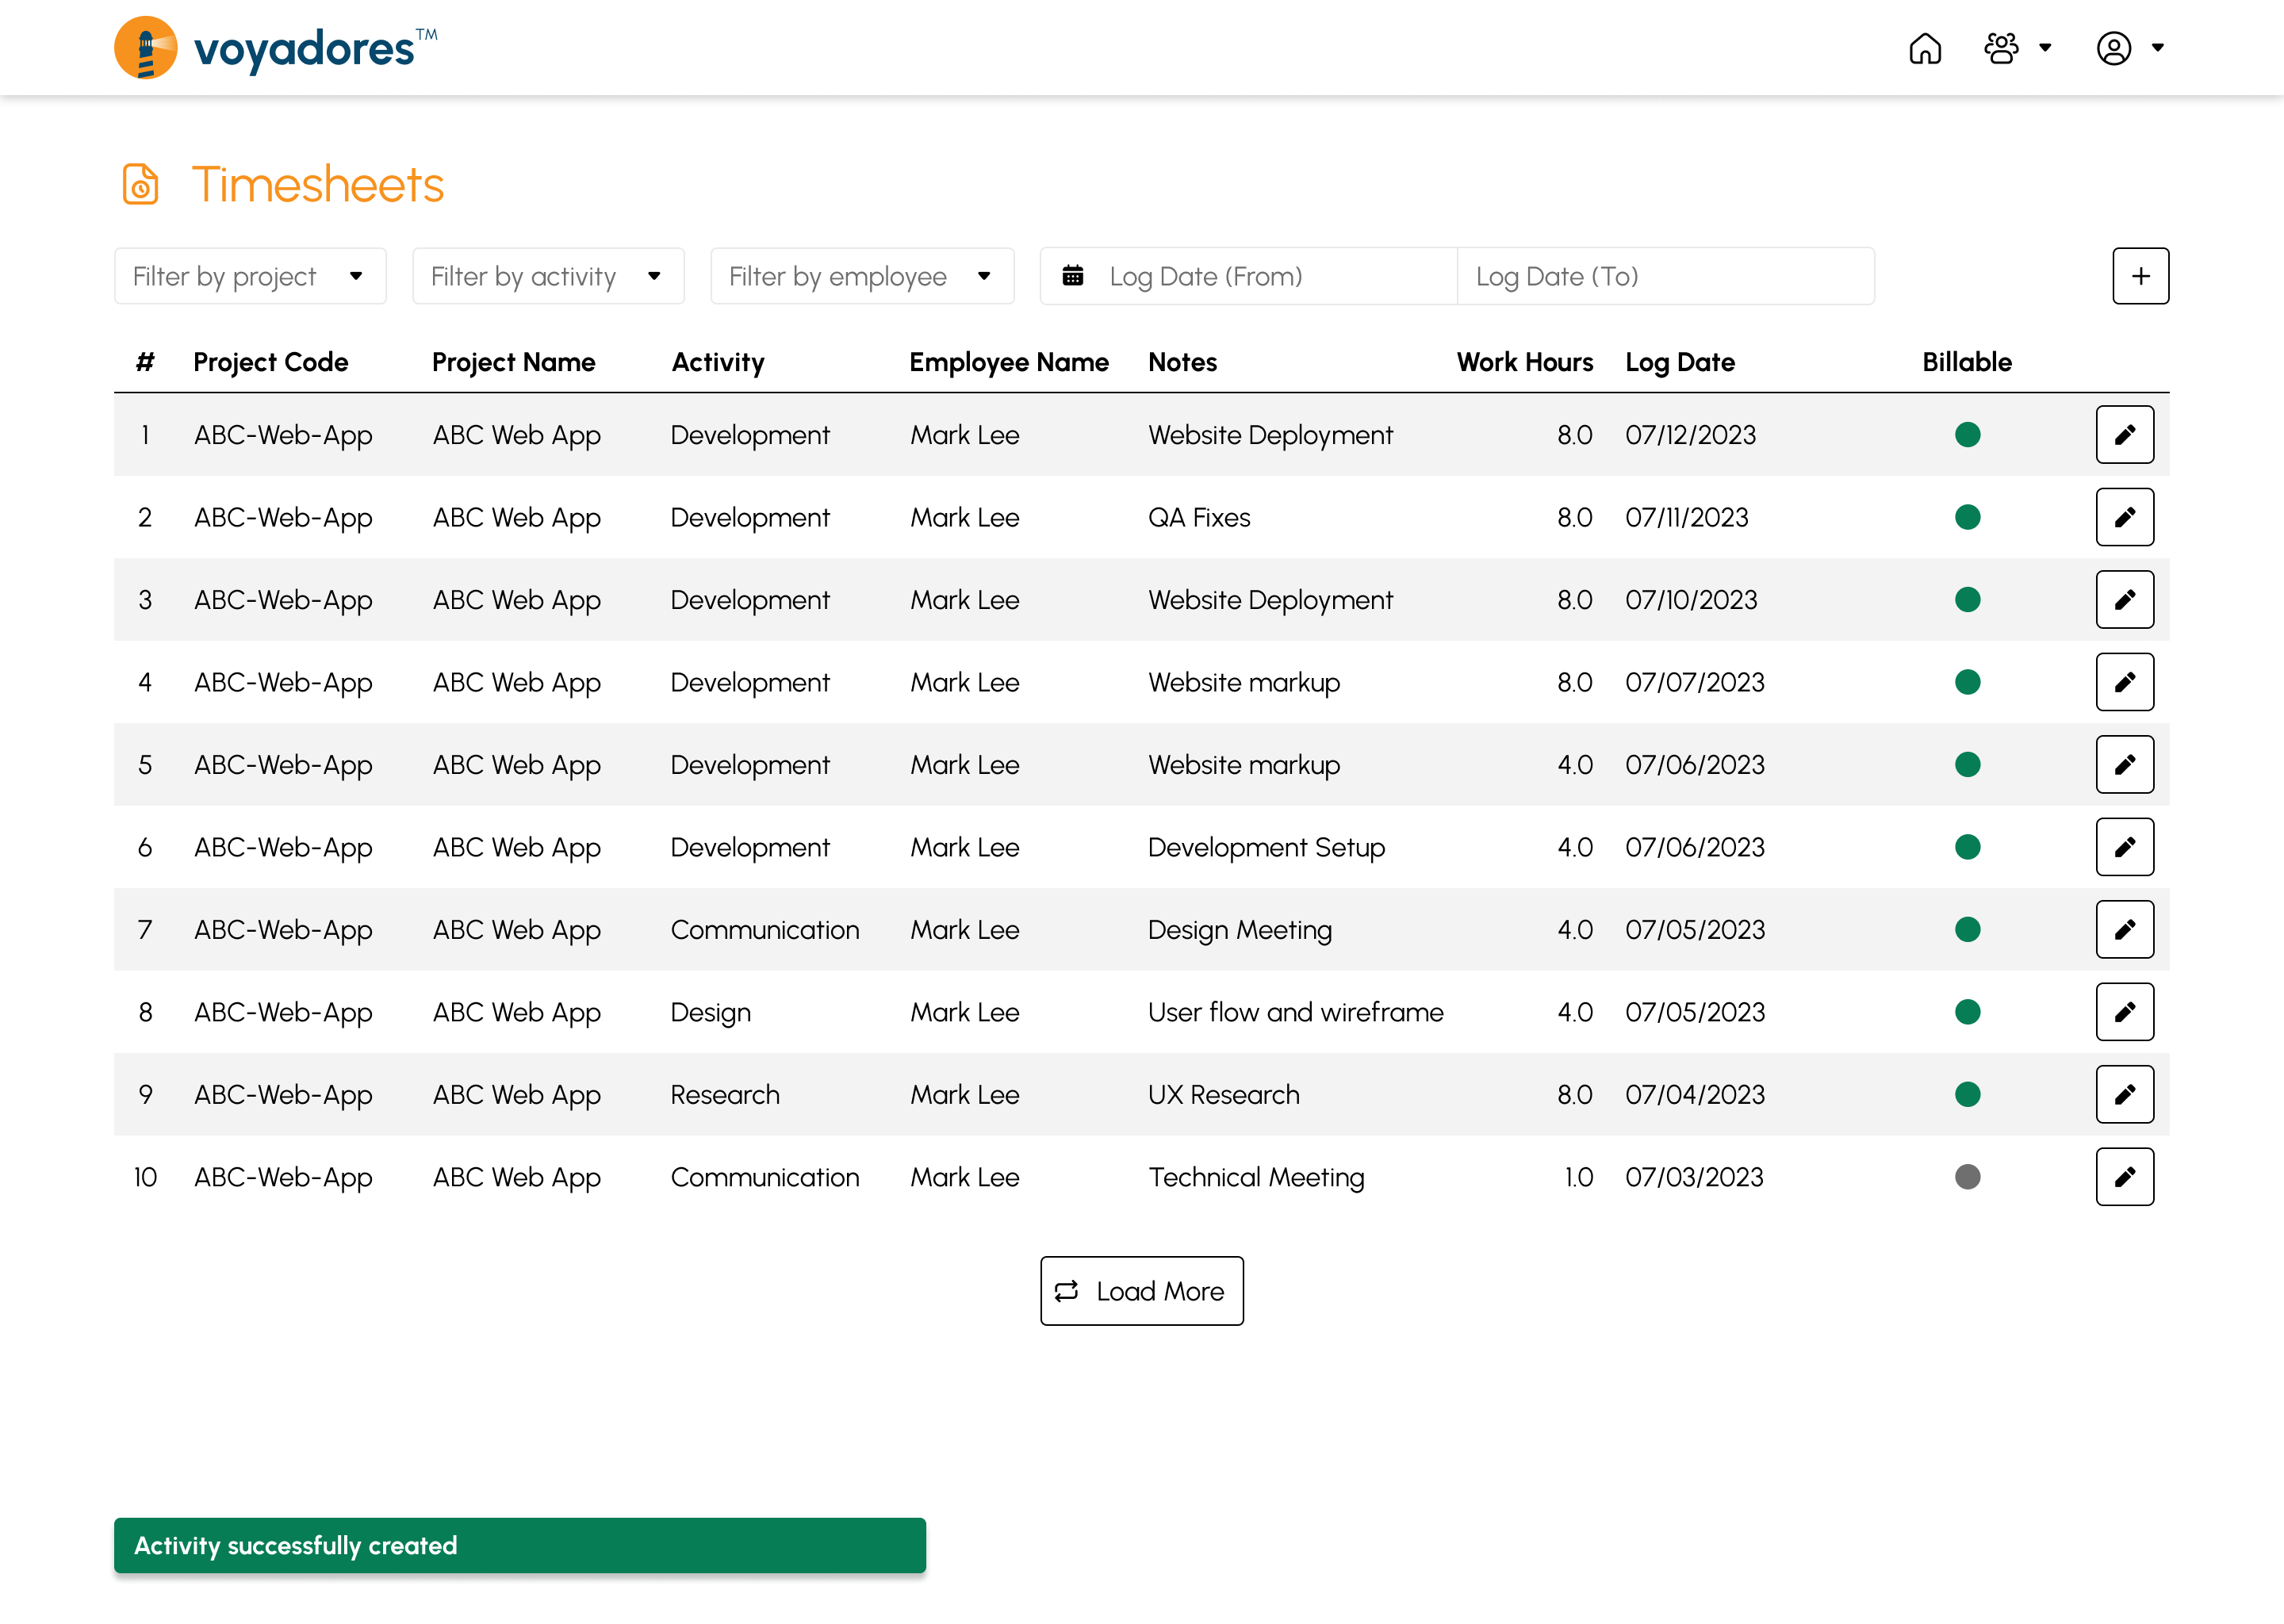
Employee Timesheets Summary Table
The summary table displays the list of created timesheet with the following columns:
- Item number “#”
- Project Code
- Project Name
- Activity
- Employee Name
- Notes
- Work Hours
- Log Date
- Billable
-
Actions
- Edit Timesheet
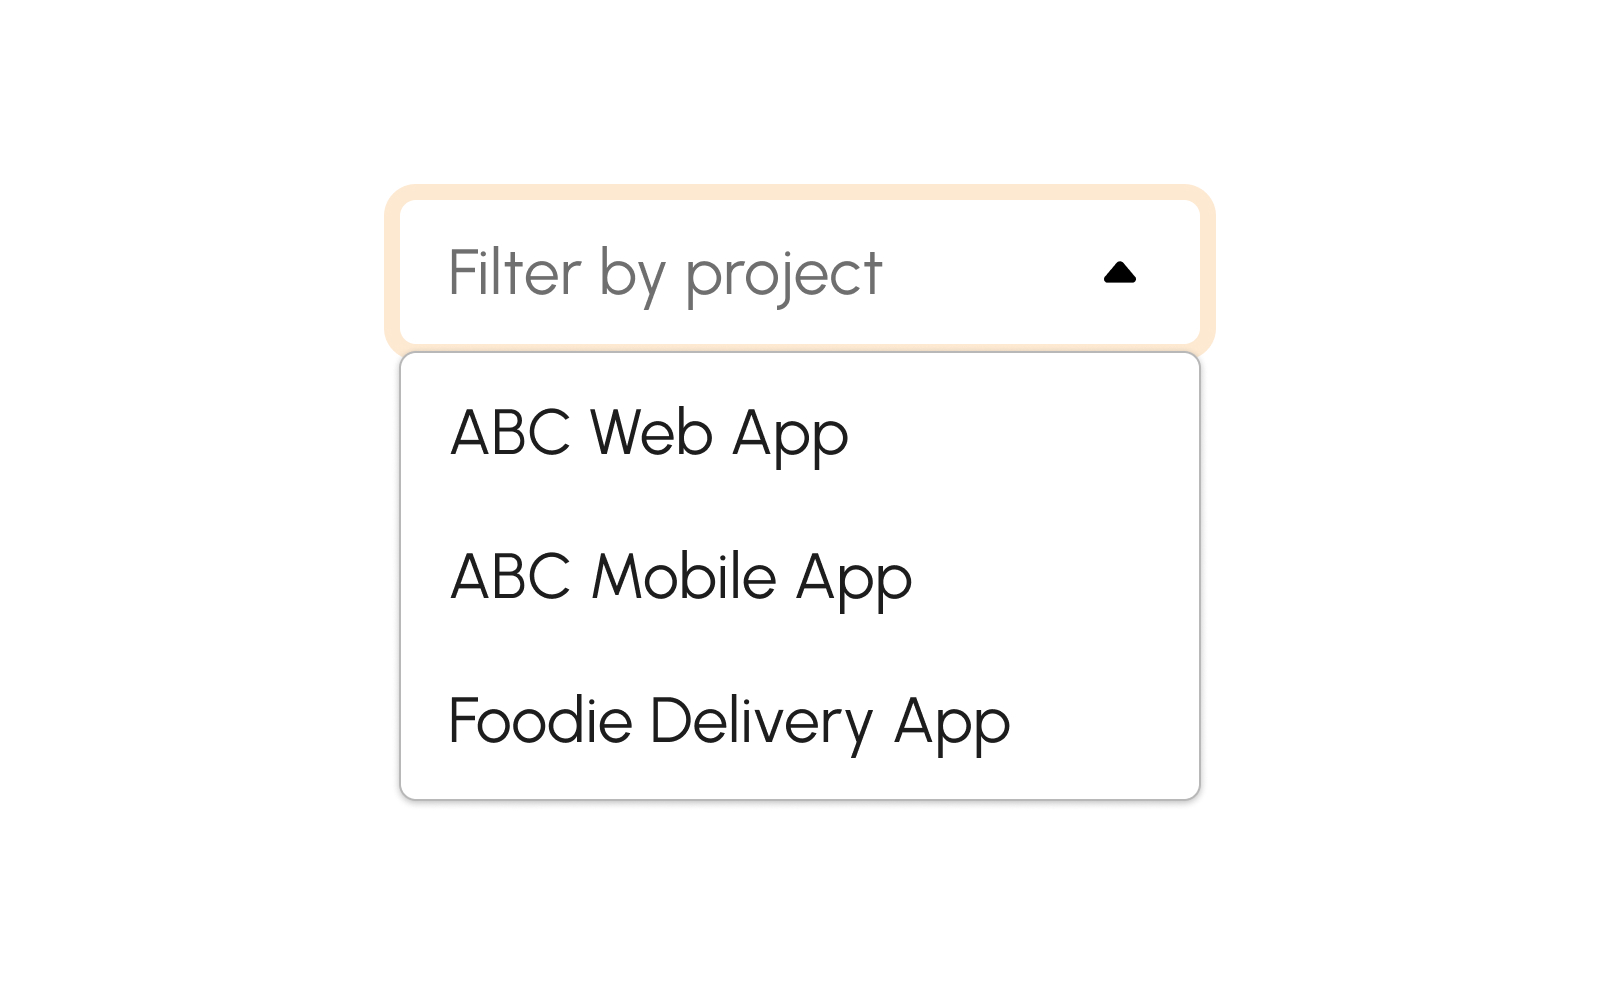
Filter by Project
To search for the Employees' log for a specific project, choose the desired project name from the Project dropdown.
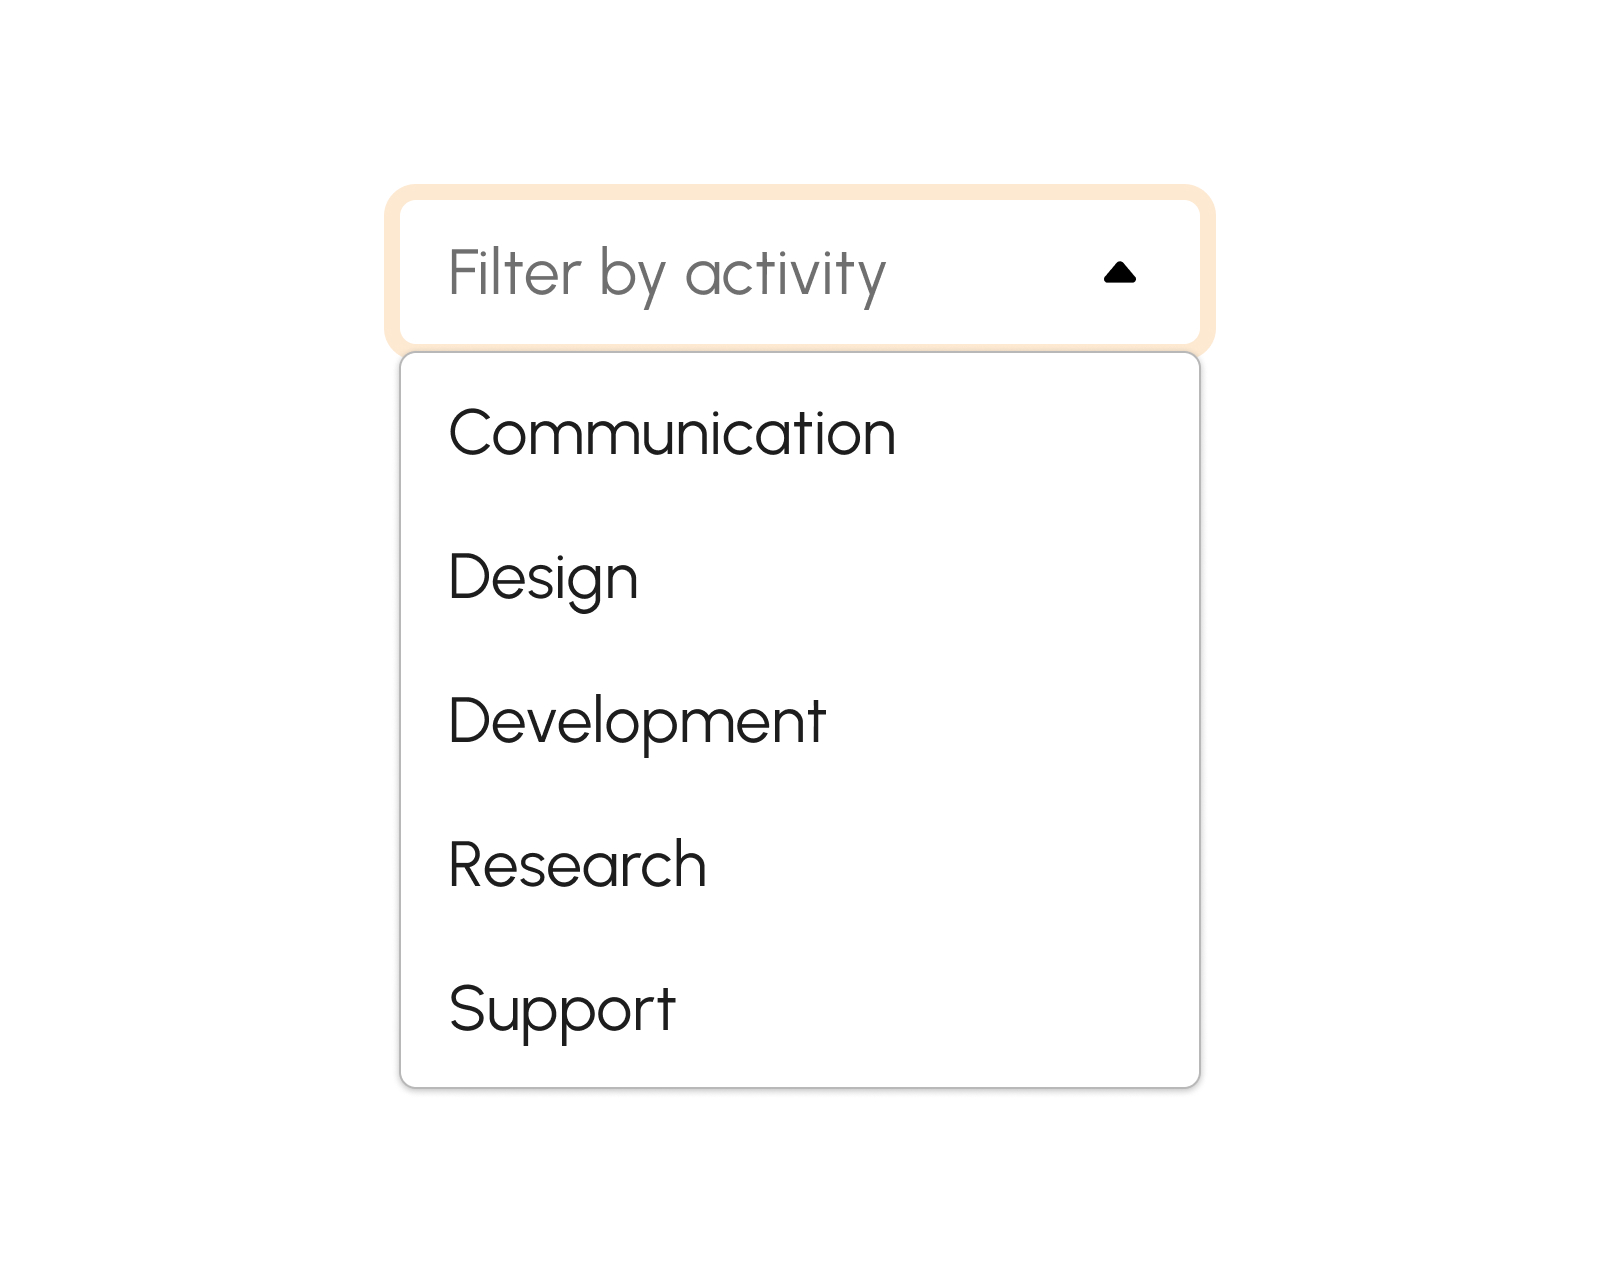
Filter by Activity
To search for the log of employees for a specific project and activity, select the desired project name from the Project dropdown and the corresponding activity from the Activity dropdown.
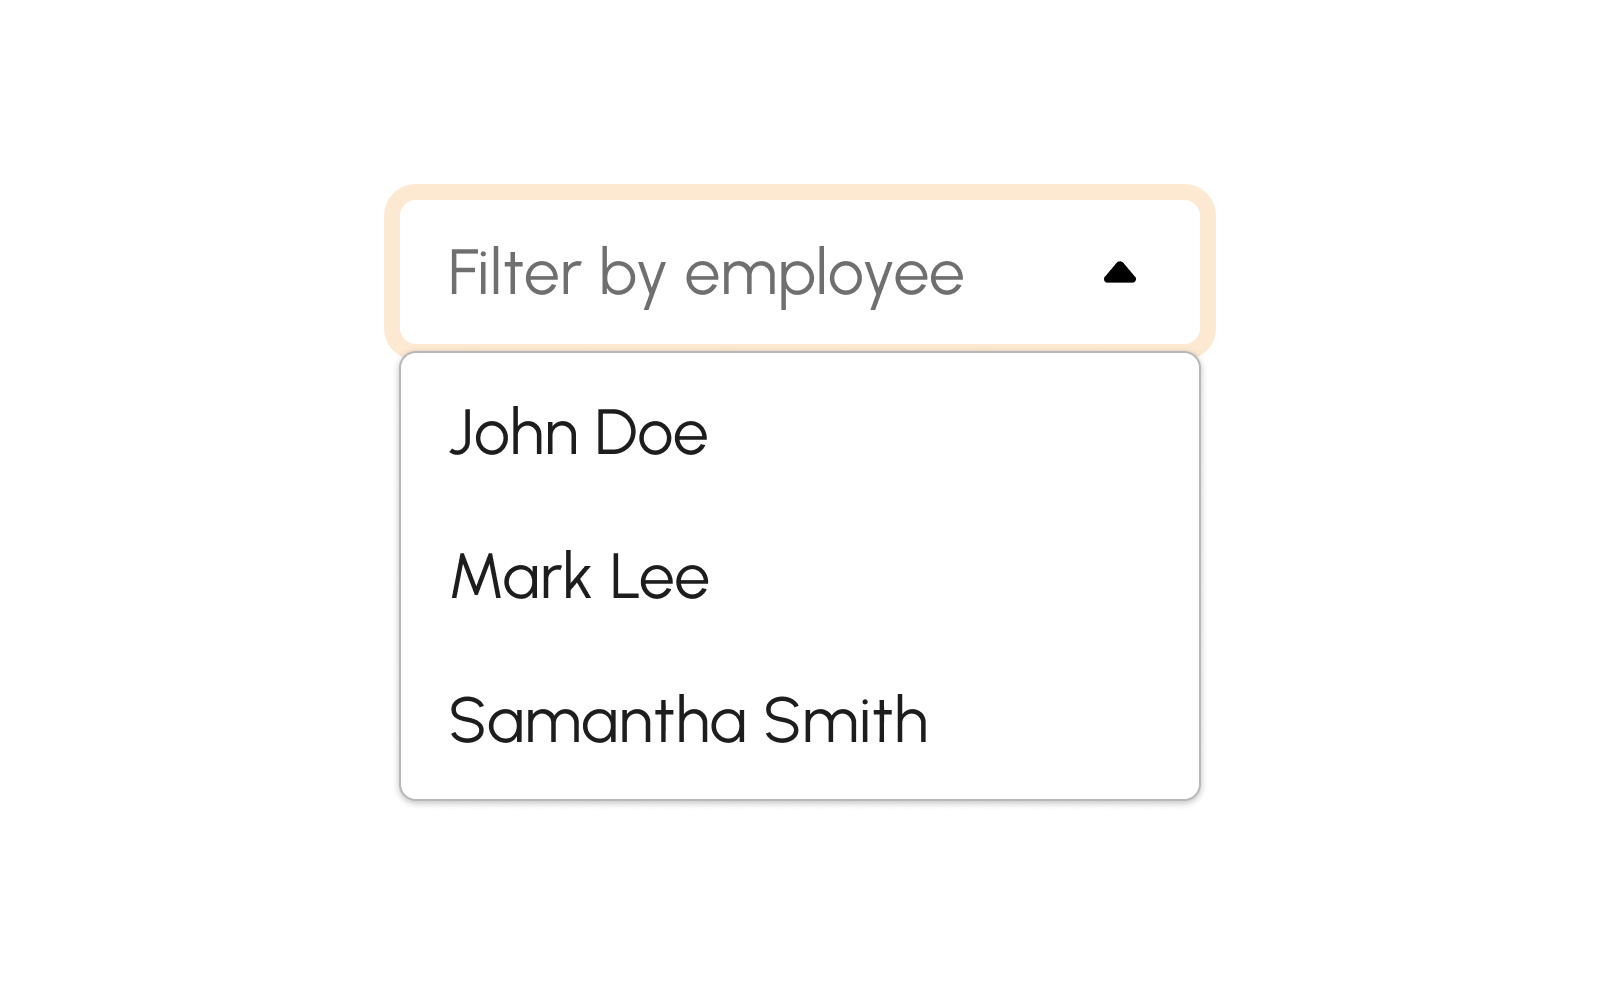
Filter by Employee Name
This feature gives the option to filter the specific logs of a certain employee on a specific project and corresponding activity.
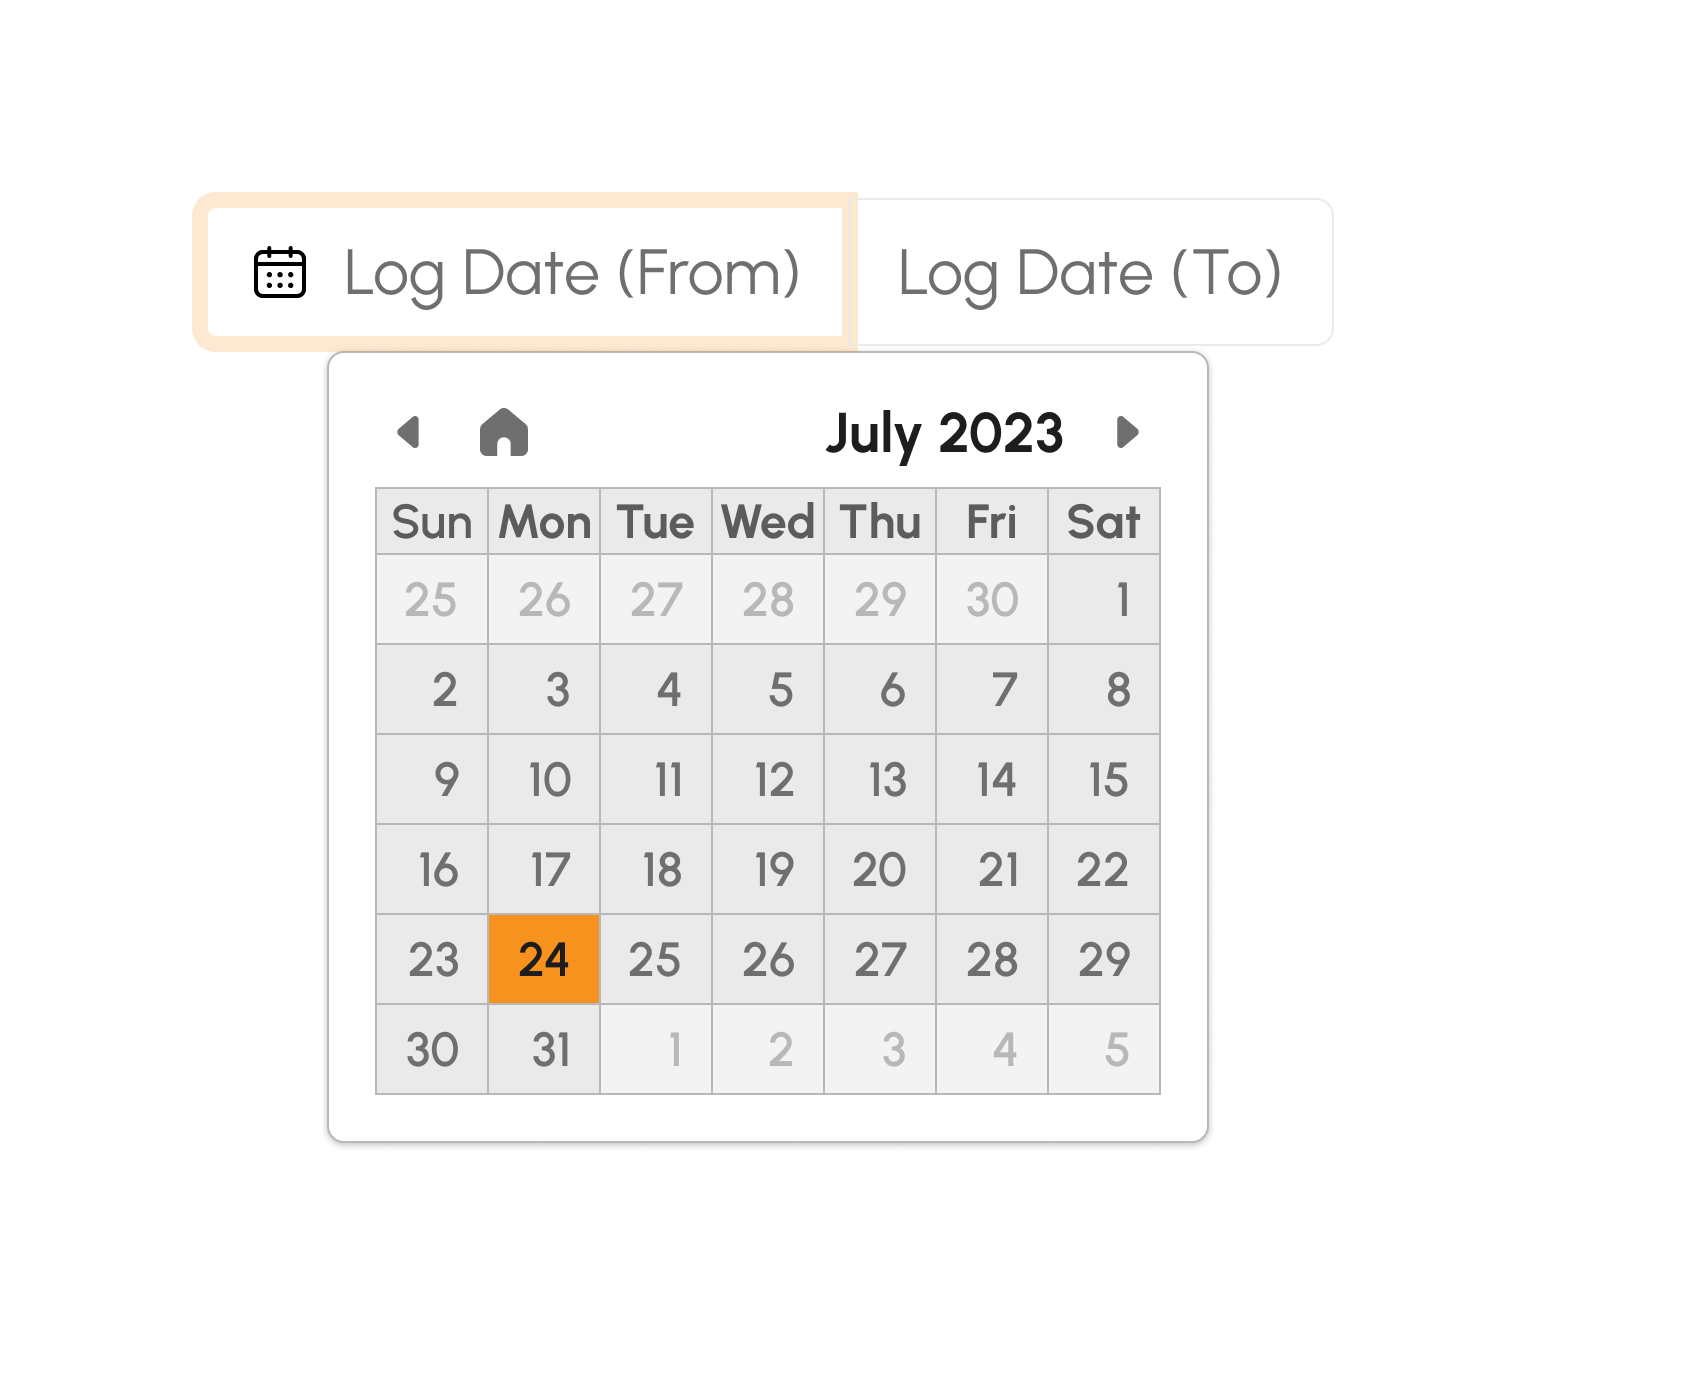
Filter by Date Range
This feature gives the option to filter the specific logs of a certain employee on a specific project and corresponding activity on a particular dates.
Create Timesheet
- Click the Create button.
-
Fill in required fields.
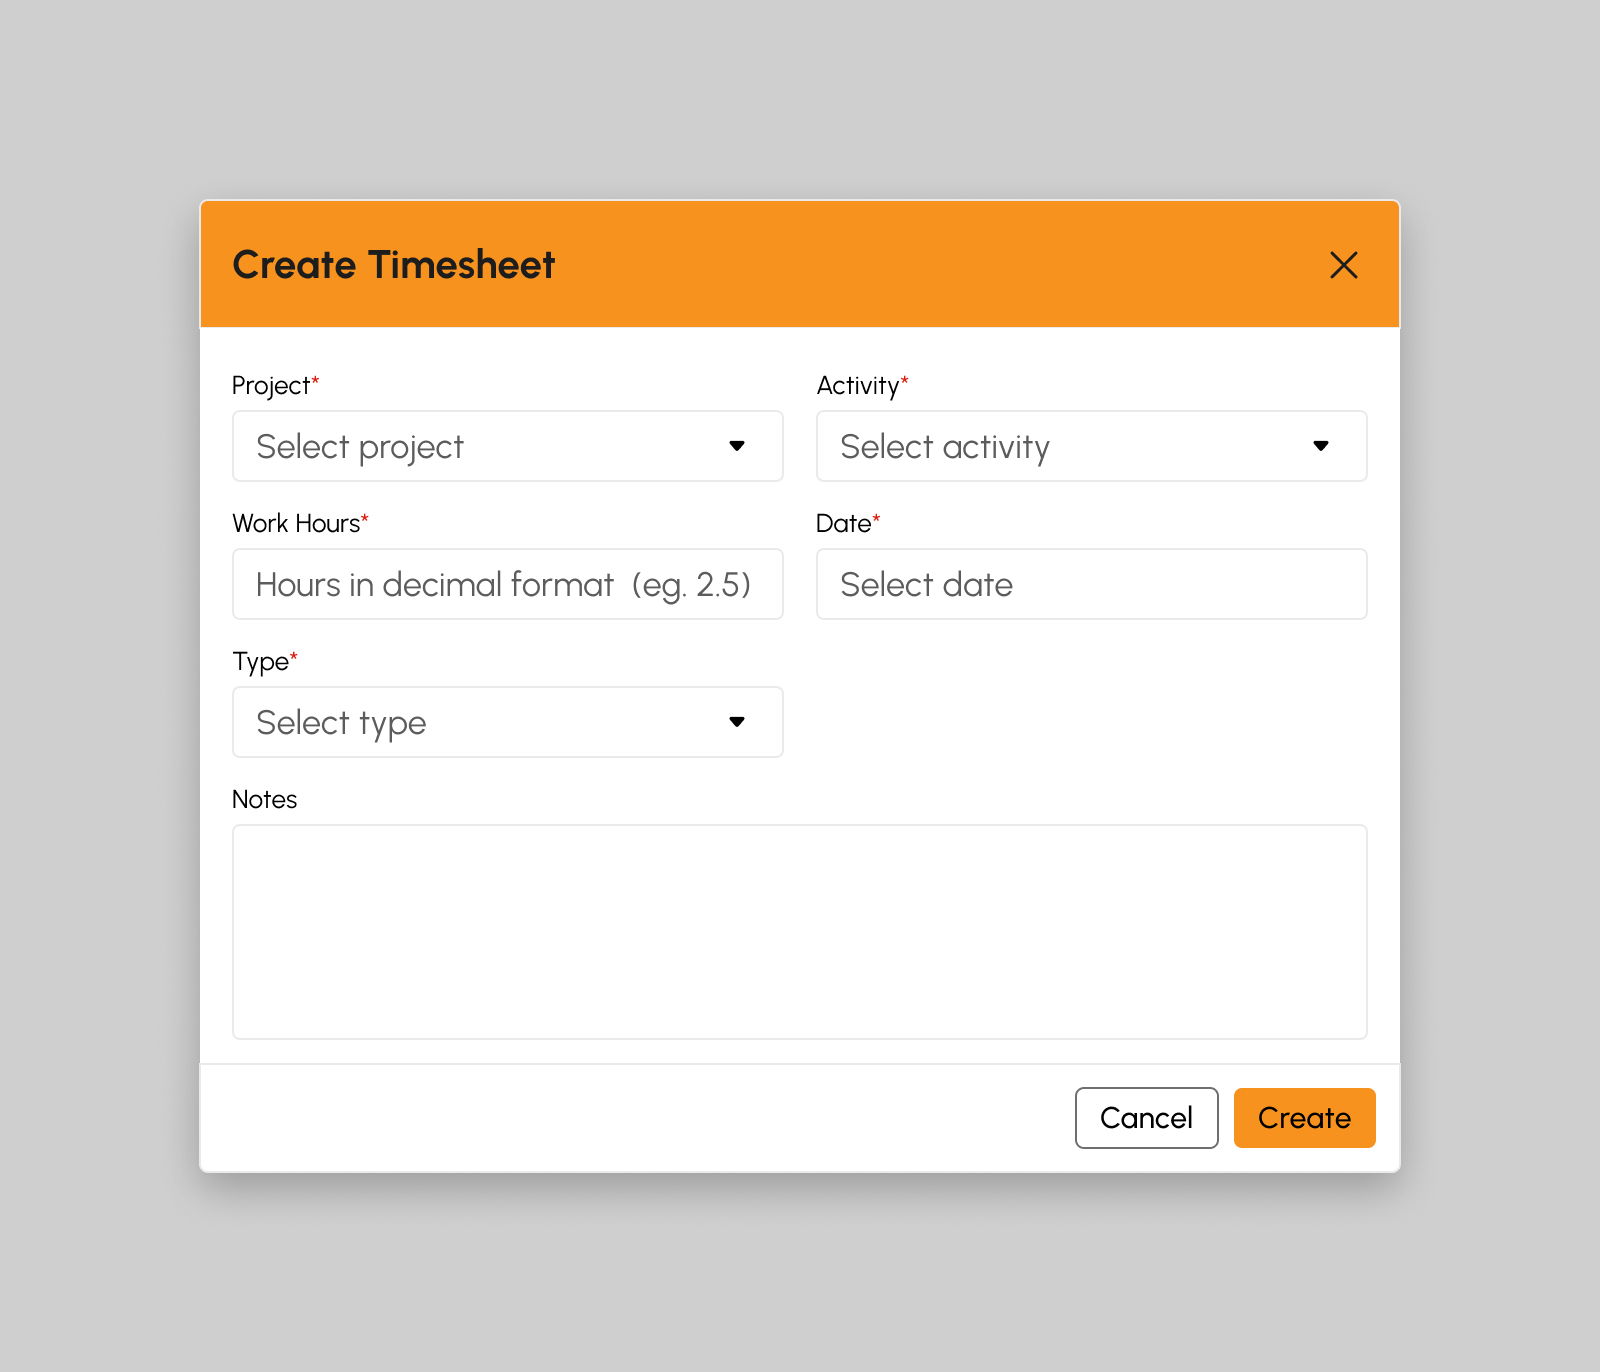
- Project
- Activity
- Work Hours
- Date
- Type
- Notes
- Click the Create button.
-
A successful notification will show.
Timesheet successfully created
- Step 3 will successfully add timesheet log, otherwise proceed to Step 6.
- Click the Cancel button to cancel adding of new timesheet log.
- The screen closes the modal.
- System will not proceed on creation of new timesheet log.
Edit Timesheet
- Click the Edit button.
-
Update the fields as necessary. Fields marked with * are required.
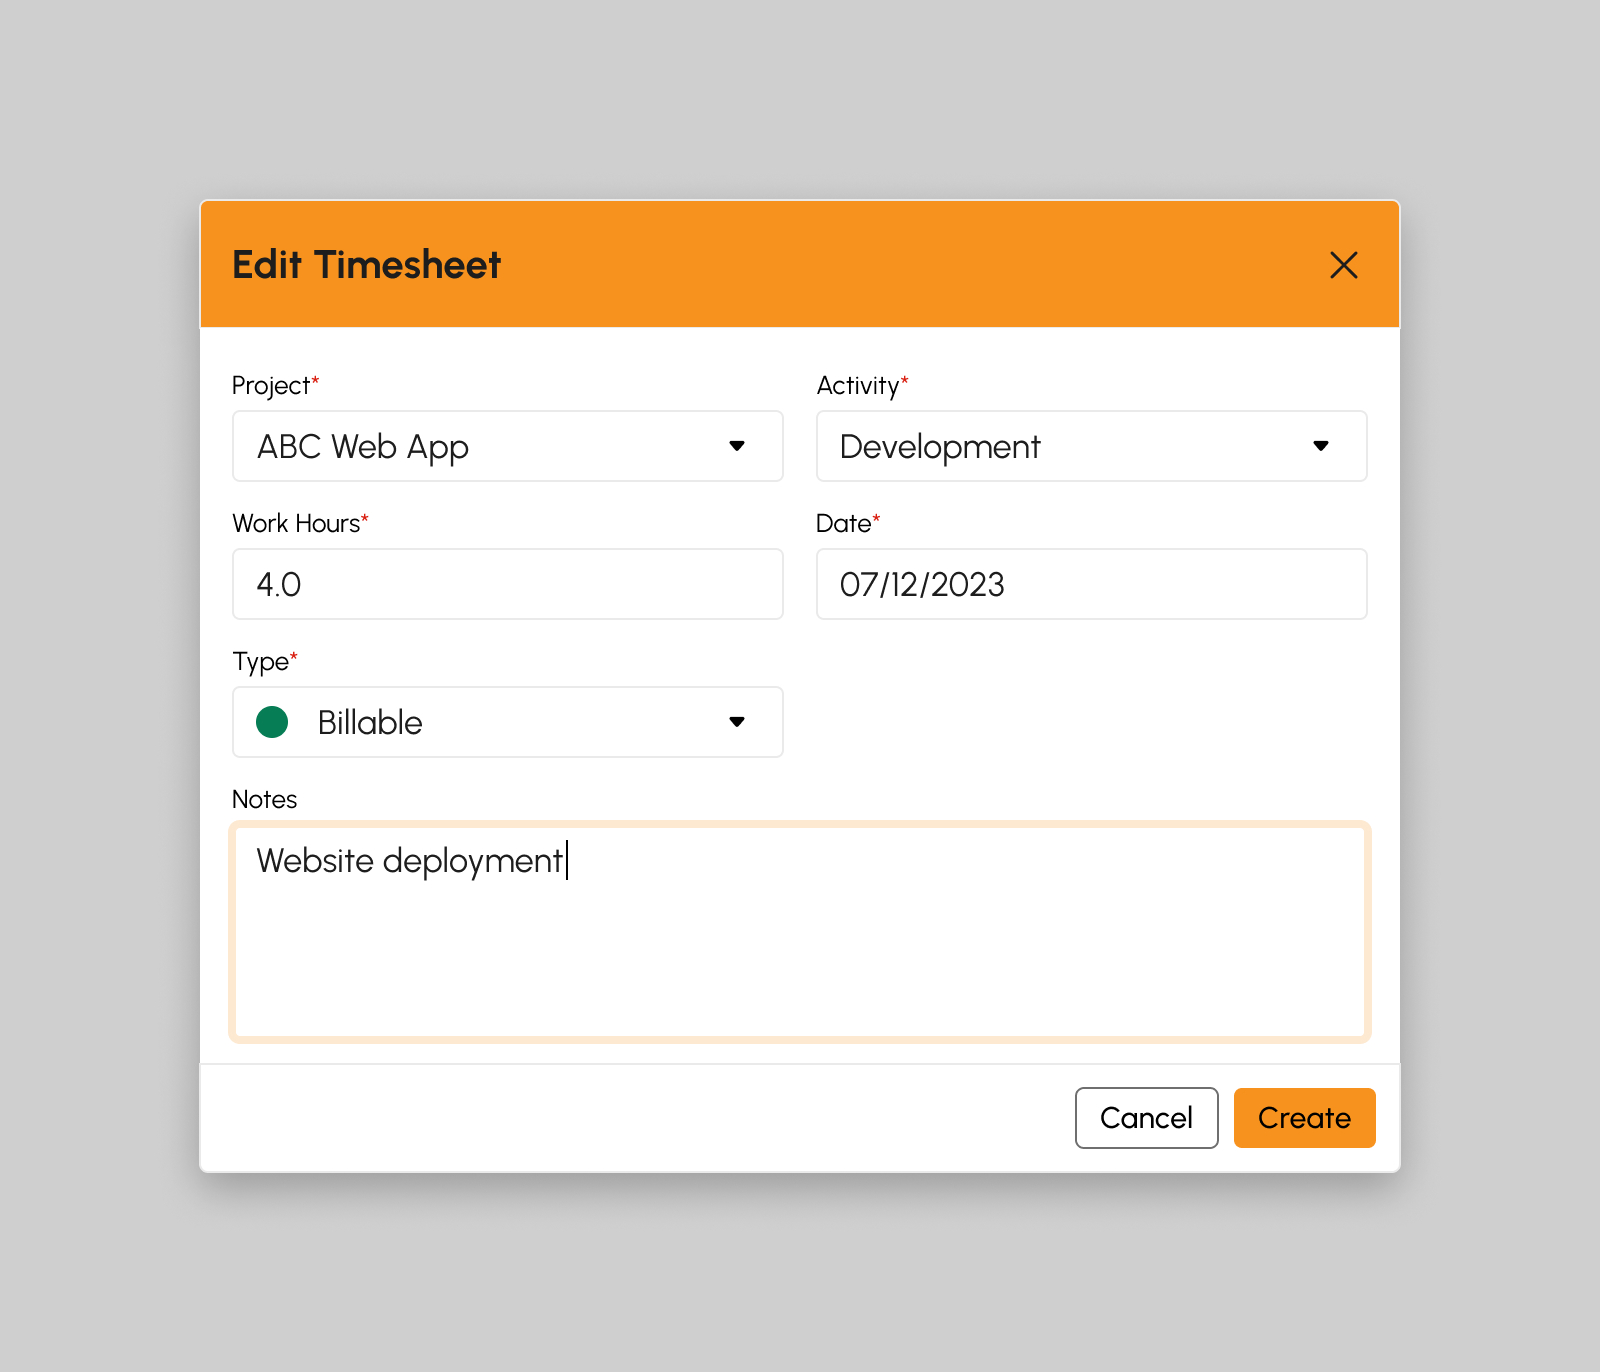
- Project
- Activity
- Work Hours
- Date
- Type
- Notes
- Click the Update button.
-
A successful notification will show.
Timesheet successfully updated
- Step 3 will successfully update timesheet log, otherwise proceed to Step 6.
- Click the Cancel button to cancel updating timesheet log.
- The screen closes the modal.
- System will not proceed on updating timesheet log.
Customers
Introduction to Customers
This page allows employees to indicate the client associated with work. The term "customer" typically refers to a client, organization, or entity for whom the work is performed.
To access this page, navigate to the Human Resources Module and click “Customers” under Timesheets Submodule as shown in the image below:

The screen will redirect to the Customers page, showing several features to use that will be discussed in the following section.
Customers Features
The snip below is the high-level view of Customers page along with its built-in features.
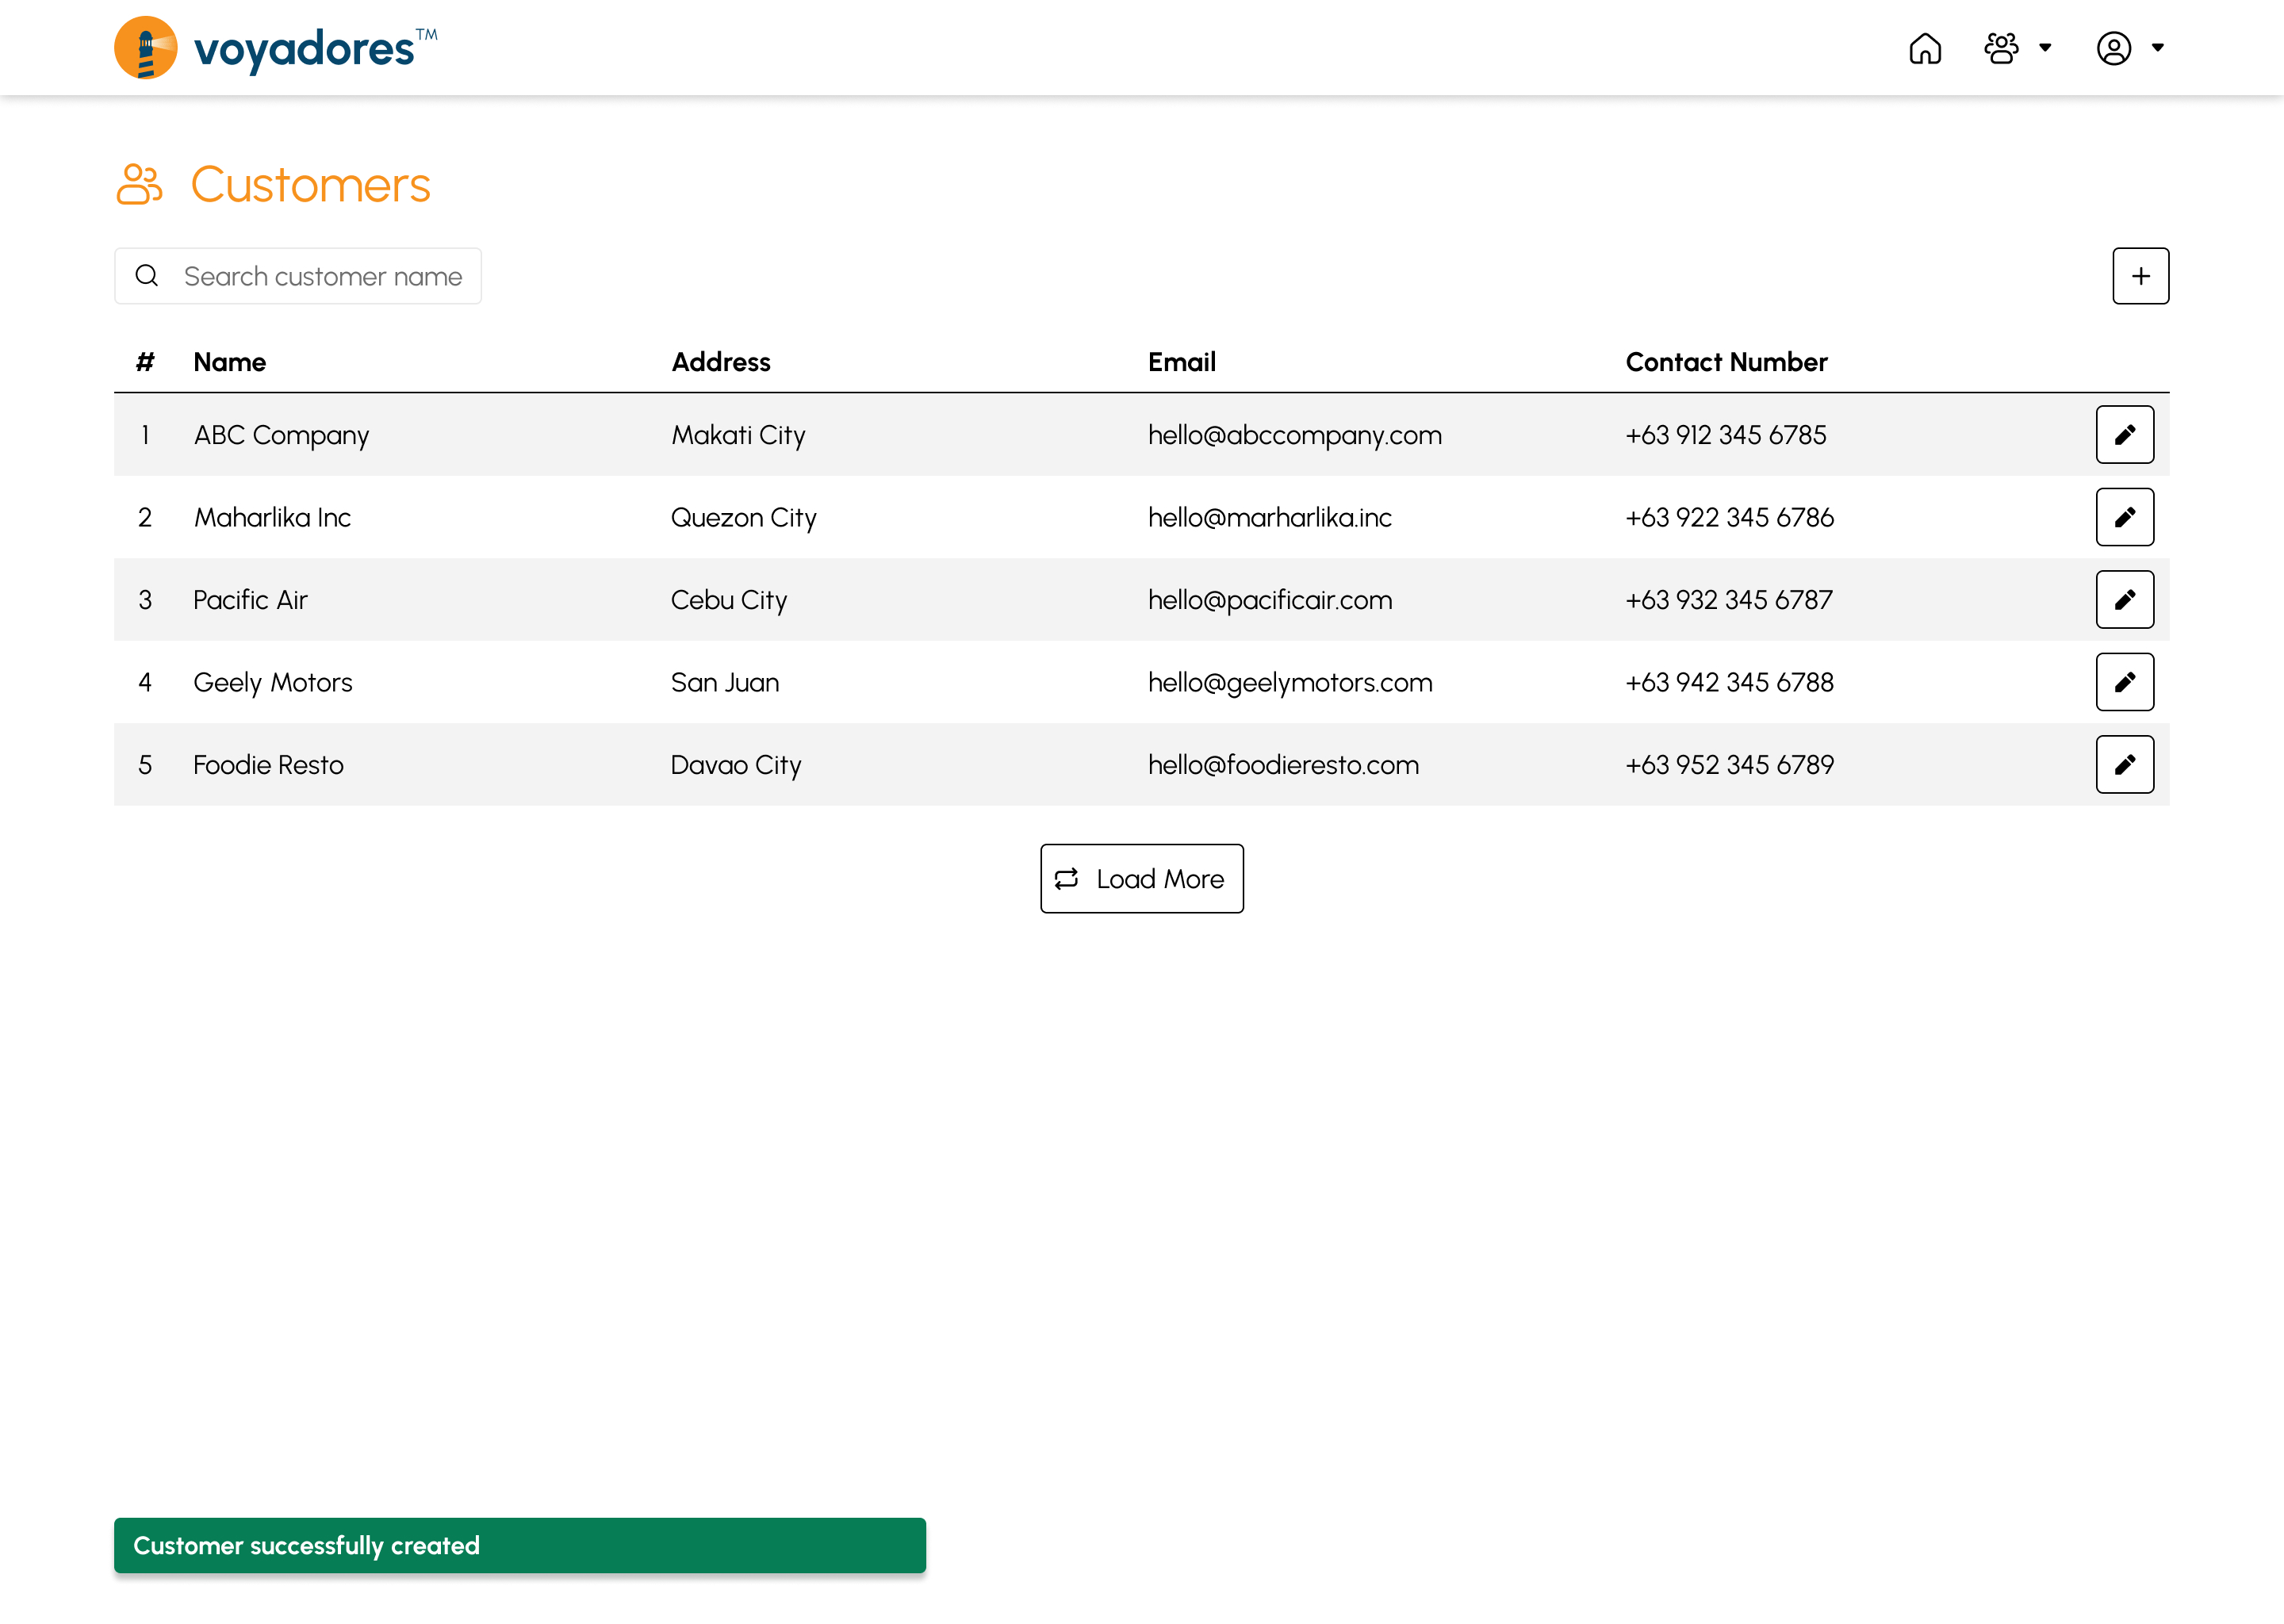
Customers Summary Table
The summary table displays the list of Customers with the following columns:
- Item number “#”
- Name
- Address
- Contact Number
-
Actions
- Edit Timesheet
Search by Customer Name
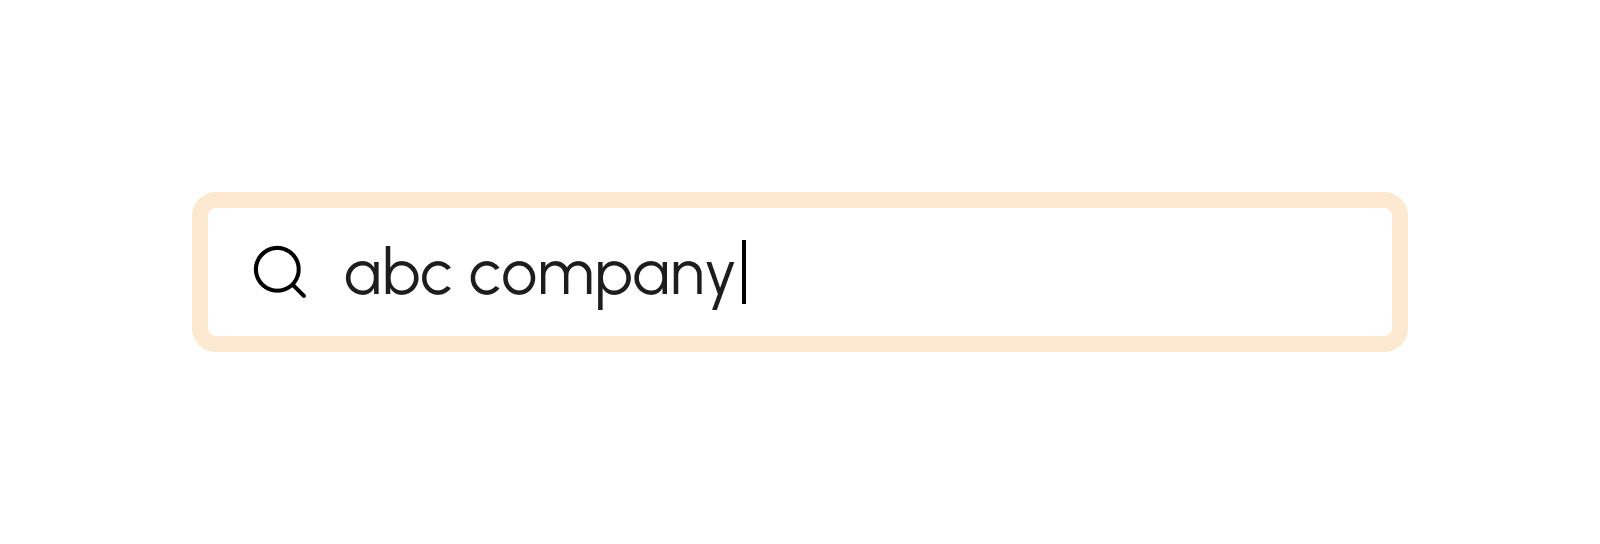
To search for a particular customer, key in the customer name in the search bar as shown in the snip below:
Create Customer
-
Click the Create button.
 Create modal has 2 tabs namely:
- Customer Info
- Invoice
-
On Customer Info tab, fill in the following fields. Fields marked with * are required.
- First Name
- last Name
- Contact Number
- Address
- City
- Province
- TIN
-
On Invoice tab, fill in the following fields. Fields marked with * are required
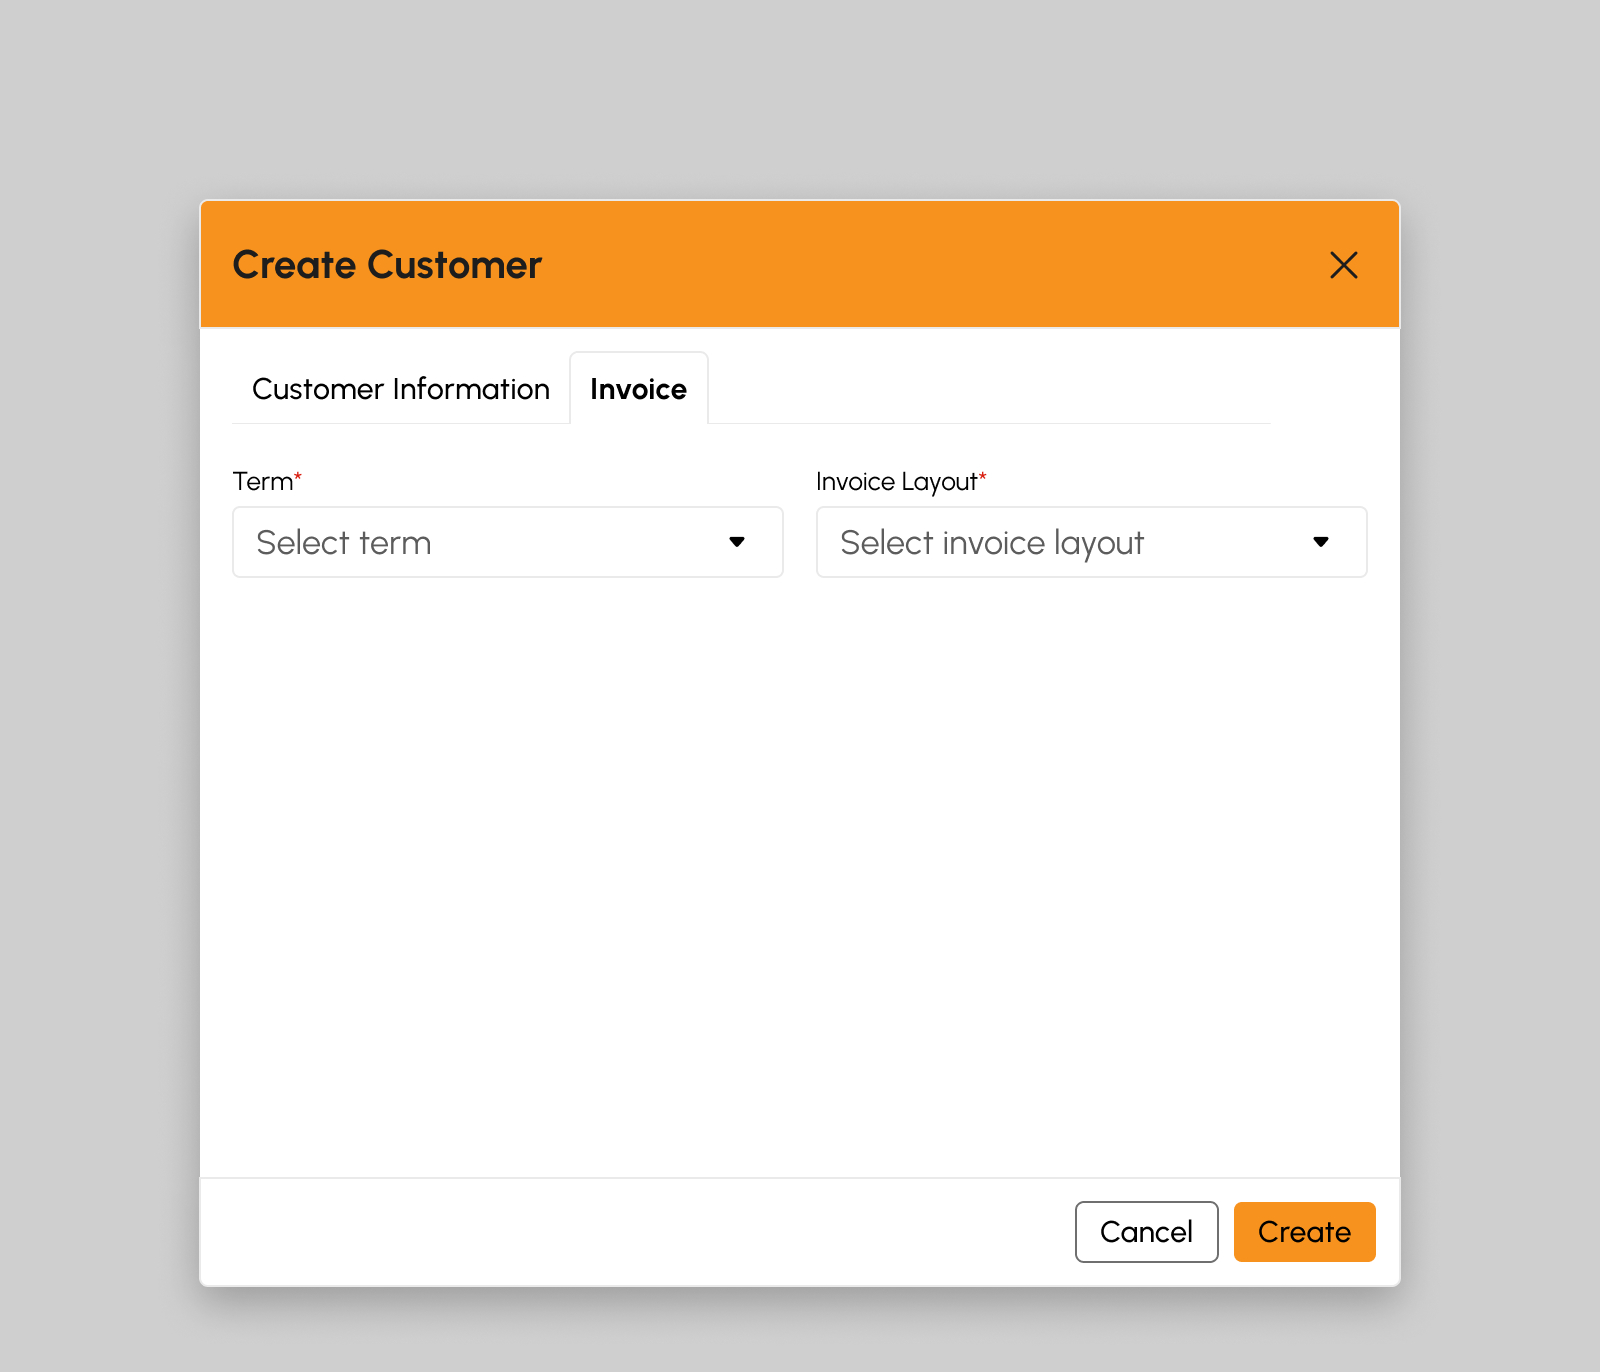
- Term
- Invoice Layout
- Click the Create button.
-
A successful notification message will show:
Customer successfully created
- Step 4 will successfully create new customer otherwise, proceed to Step 7.
- Click the Cancel button to cancel the creation of new customer.
- The screen closes the modal.
- System will not proceed on creation of new customer.
Edit Customer
-
Click the Edit button.
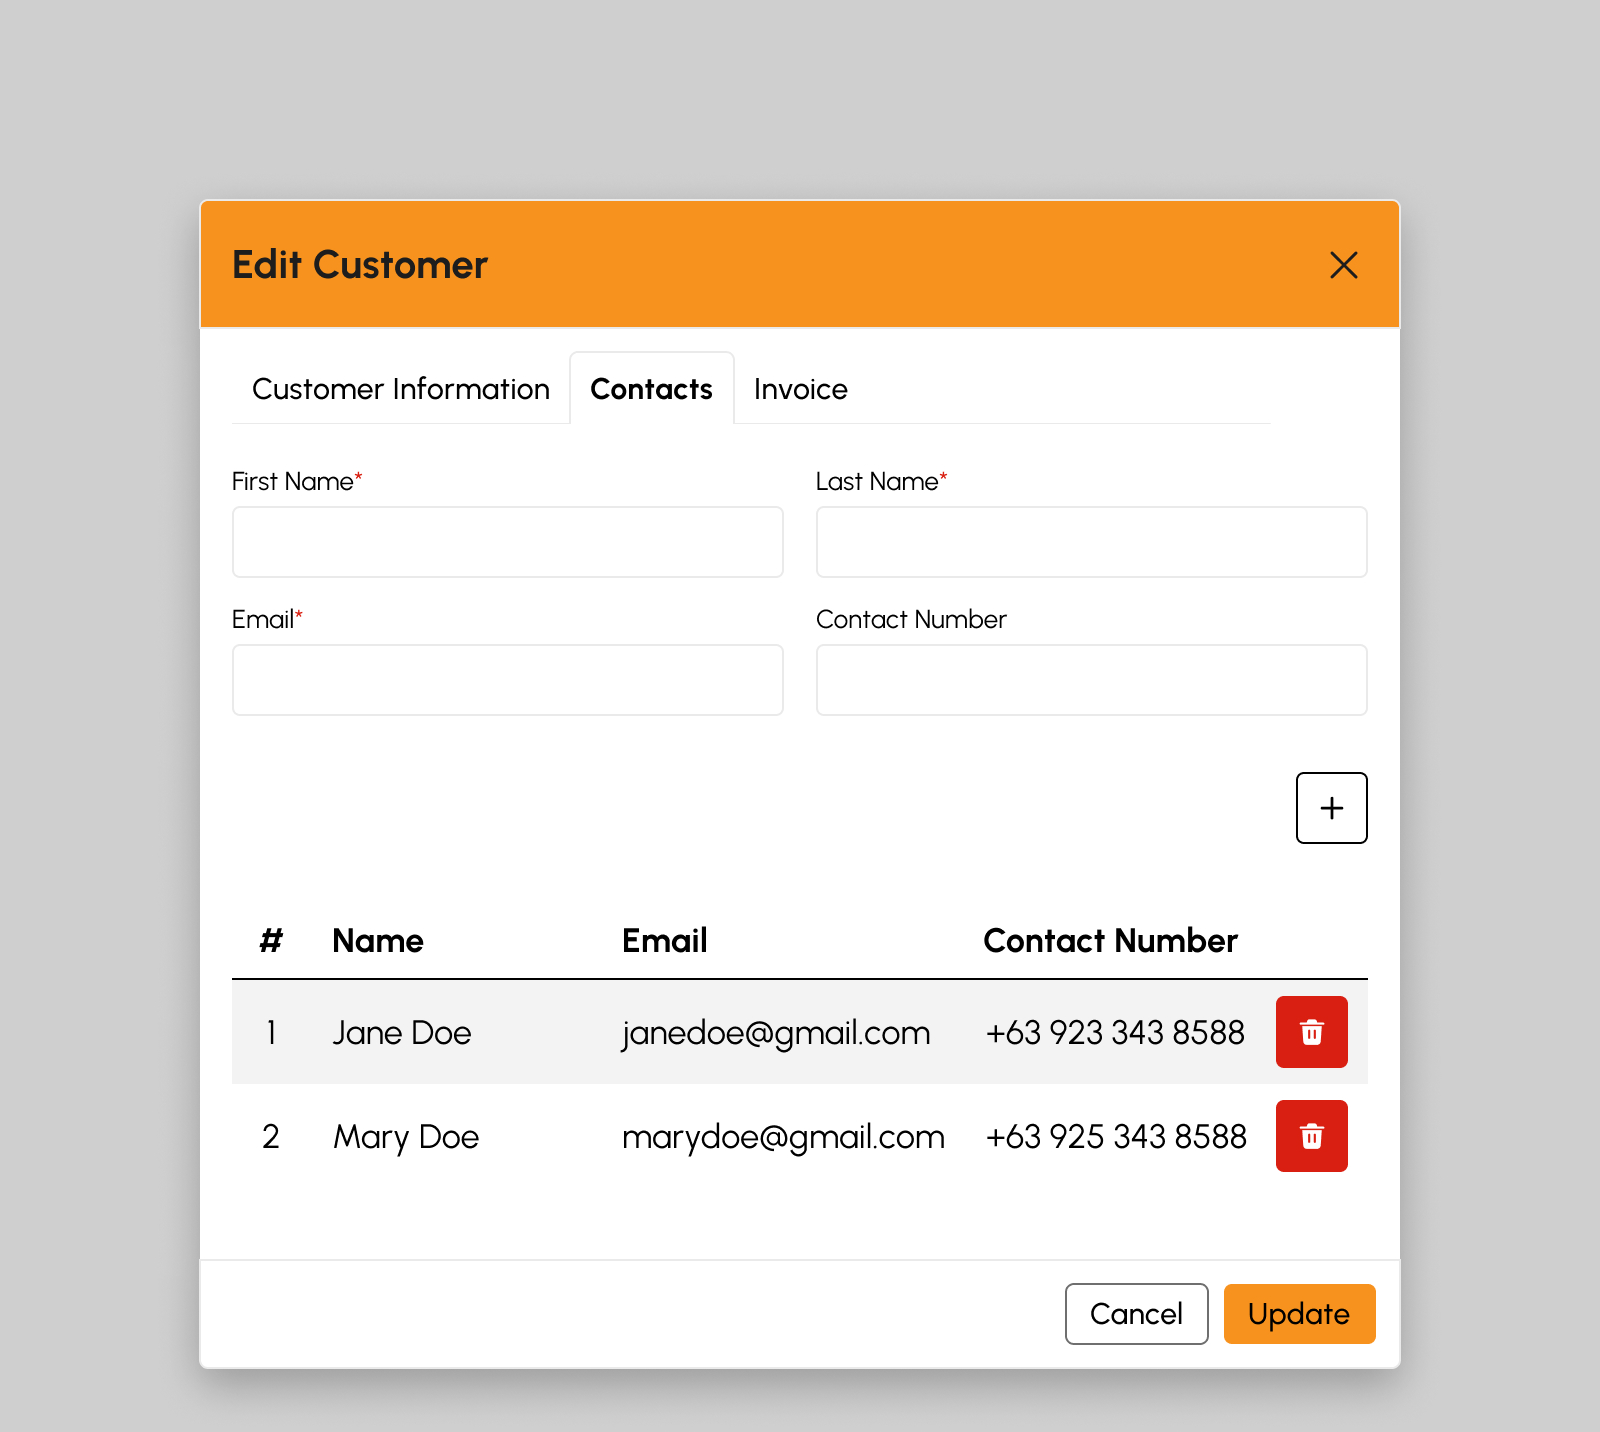 Edit Customer modal has 2 tabs namely:
- Customer Info
- Invoice
-
On Customer Info tab, update the following fields as necessary. Fields marked with * are required.
- First Name
- last Name
- Contact Number
- Address
- City
- Province
- TIN
-
On Invoice tab, update the following fields as necessary. Fields marked with * are required.
- Term
- Invoice Layout
- Click the Update button.
-
A successful notification message will show:
Customer successfully updated
- Step 4 will successfully update customer details otherwise, proceed to Step 7.
- Click the Cancel button to cancel the update.
- The screen closes the modal.
- System will not proceed on updating customer details.
Load More Customers
To verify if there are more than 20 Customers created, click the Load More button to display other Customers since the default item number displayed in the screen is from count 1-20.
Projects
Introduction to Projects
This page allows users to manage the projects on which employees are working and for which time tracking is needed.
To access this page, navigate to the Human Resources Module and click “Projects” under Timesheets Submodule as shown in the image below:
The screen will redirect to the Projects page, showing several features to use that will be discussed in the following section.
Projects Features
The snip below is the high-level view of Projects page along with its built-in features.
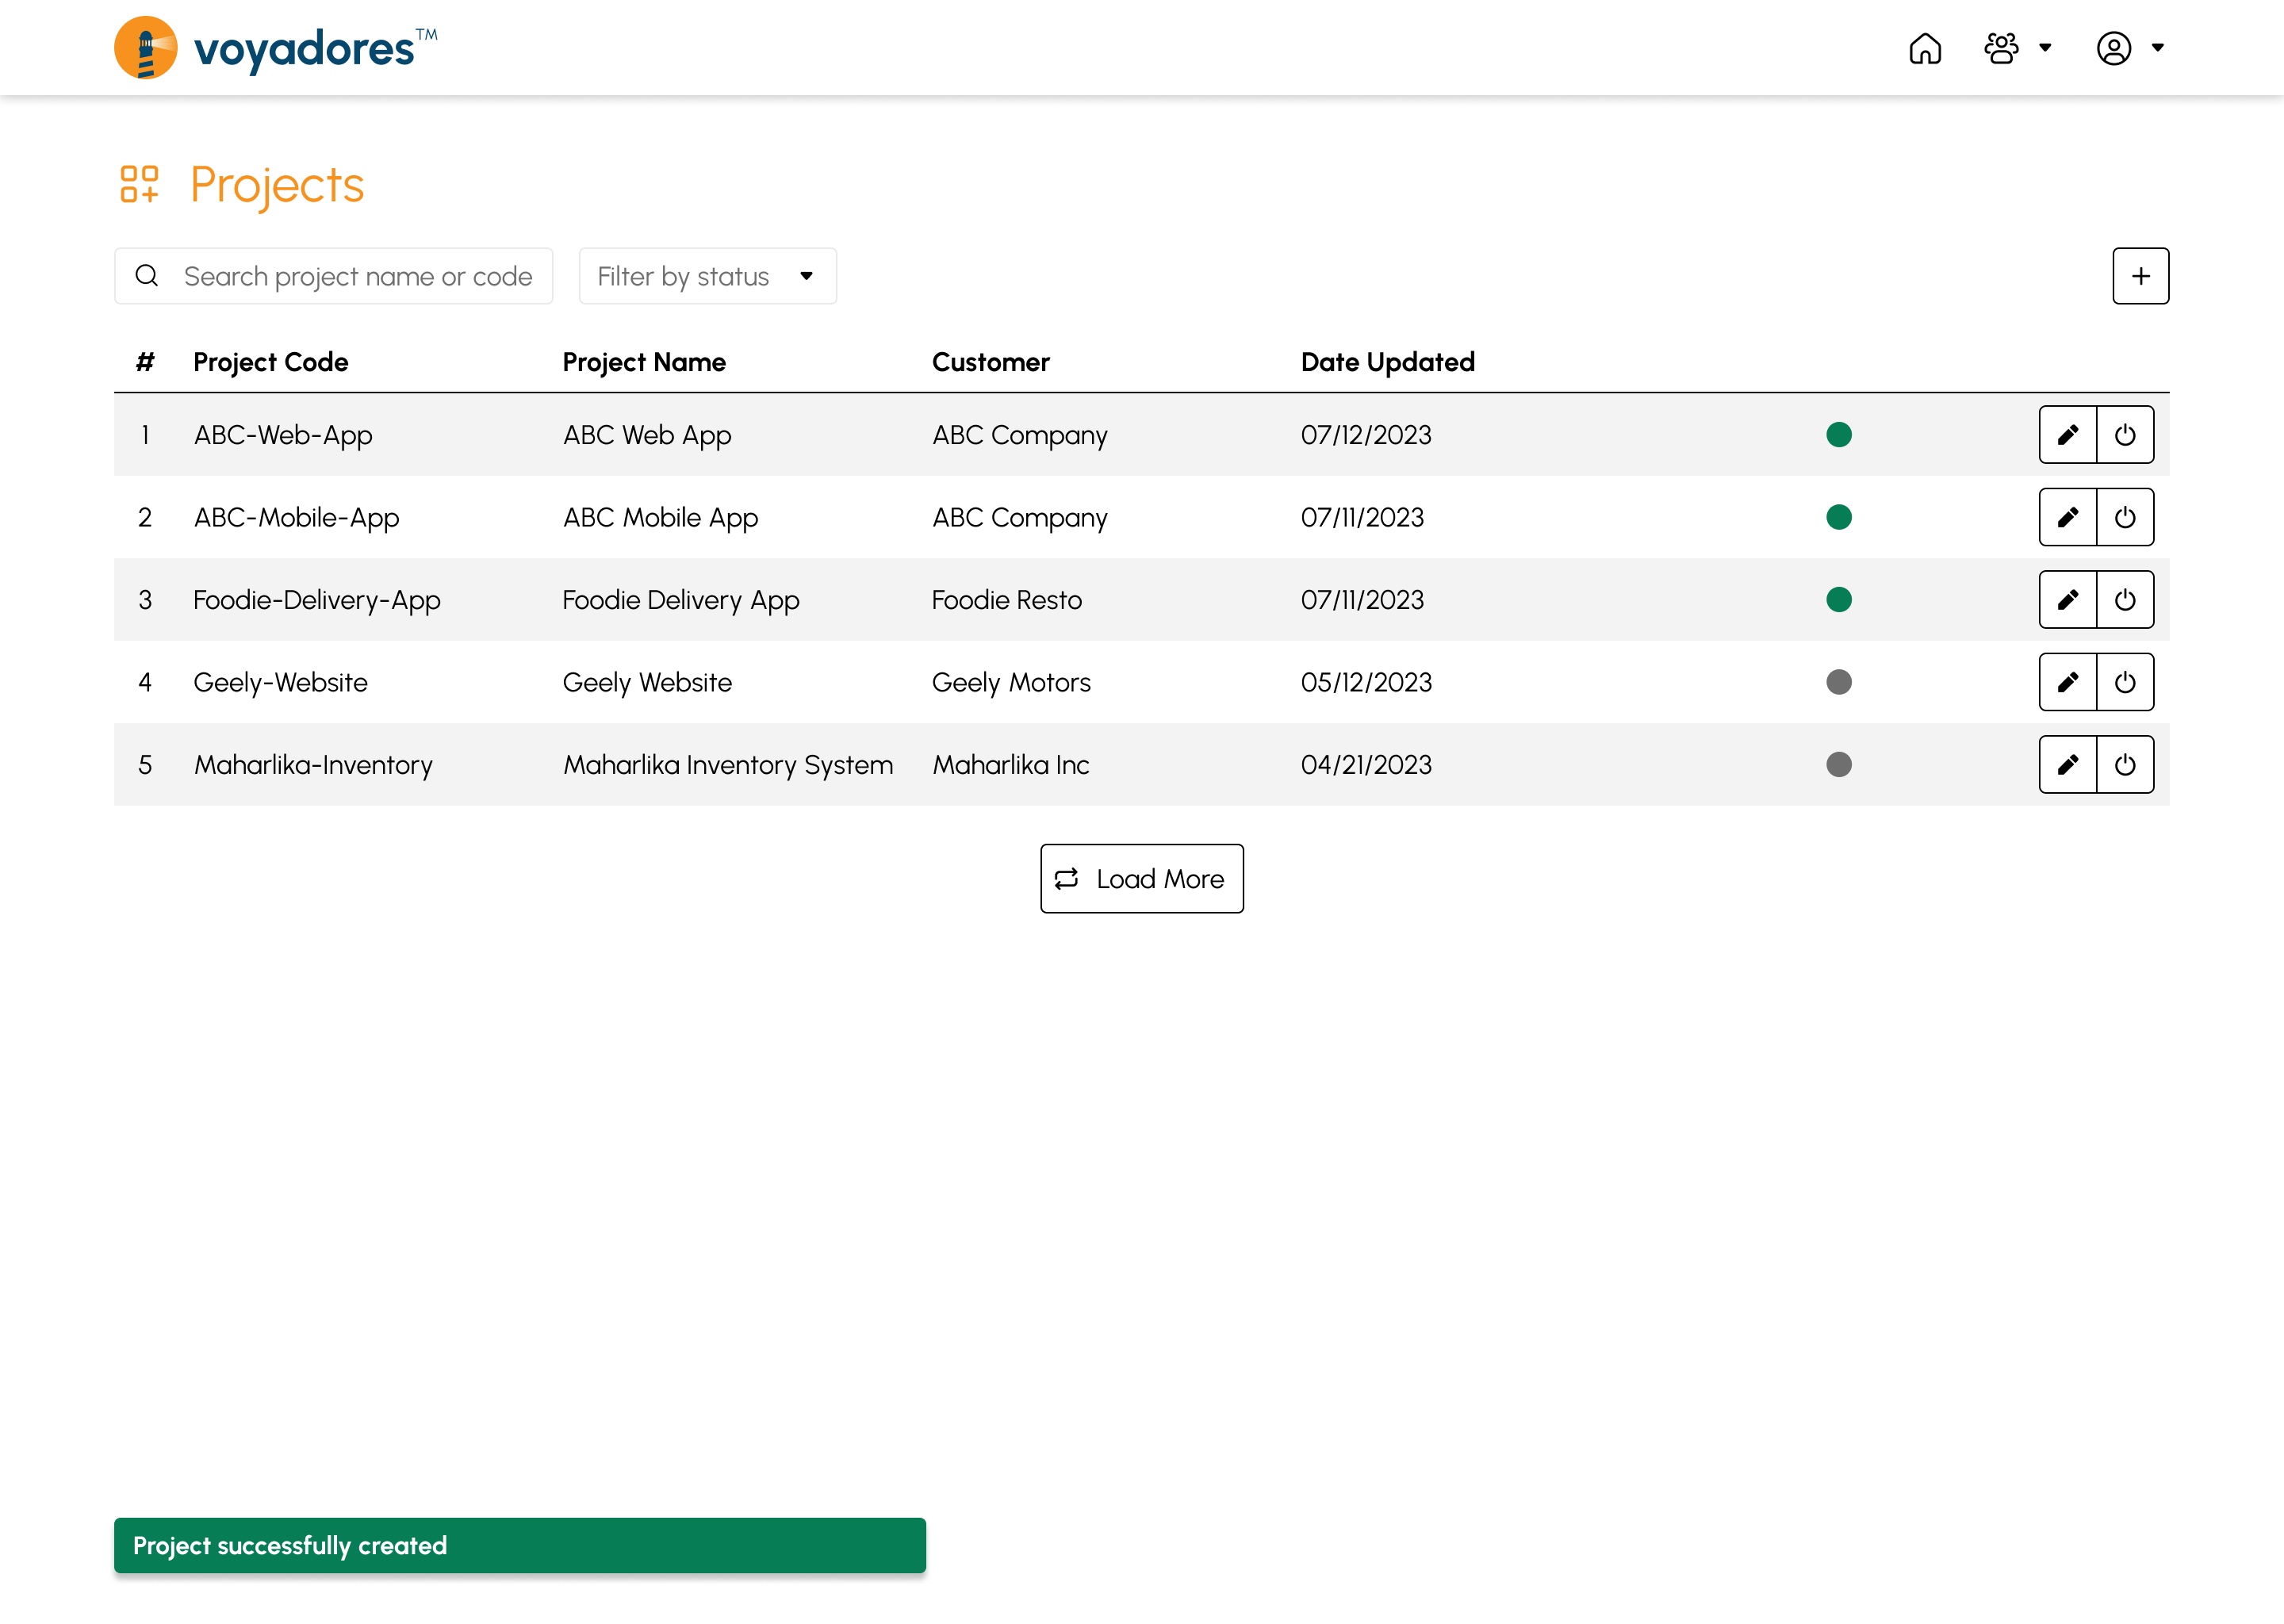
Projects Summary Table
The summary table displays the list of projects with the following columns:
- Item number “#”
- Project Code
- Project Name
- Customer
- Date Updated
- Status
-
Actions
- Edit Project
- Activate/Deactivate Project
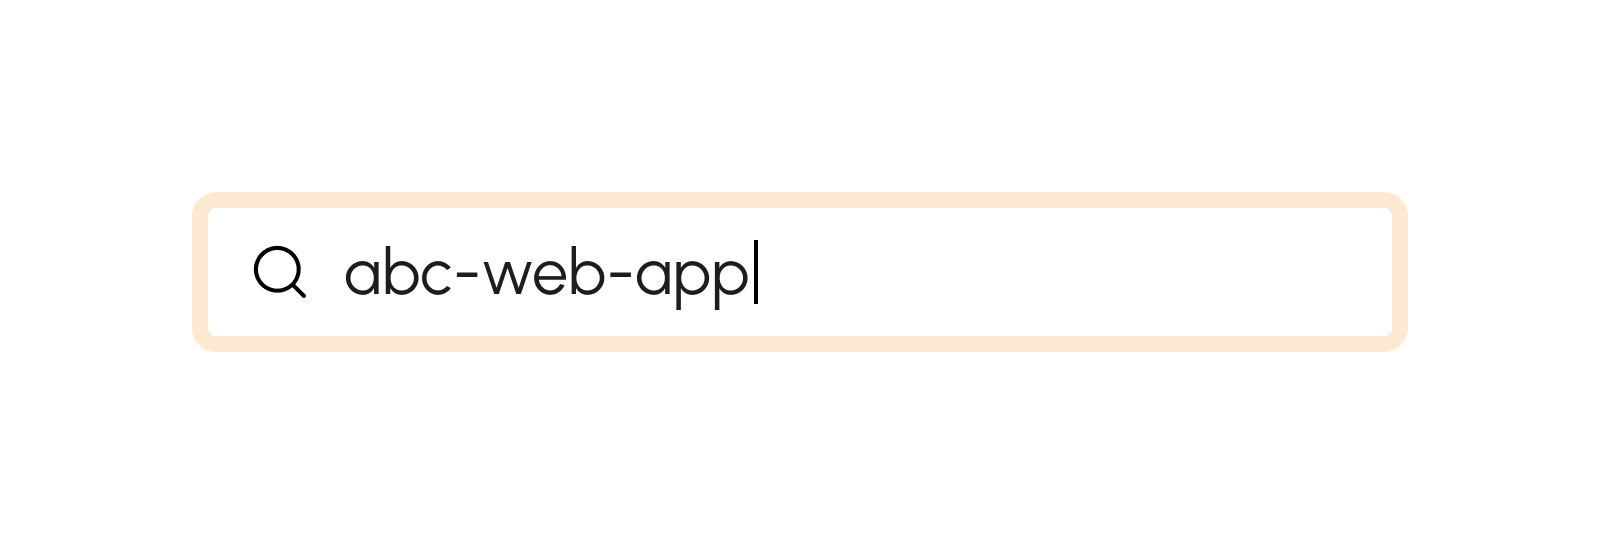
Search by Project Name or Code
To search for a particular project, key in the project name or code in the search bar as shown in the snip below:
Filter by Status
To filter projects, select a project status from the dropdown as shown in the snip below:

Create Project
-
Click the Create button.
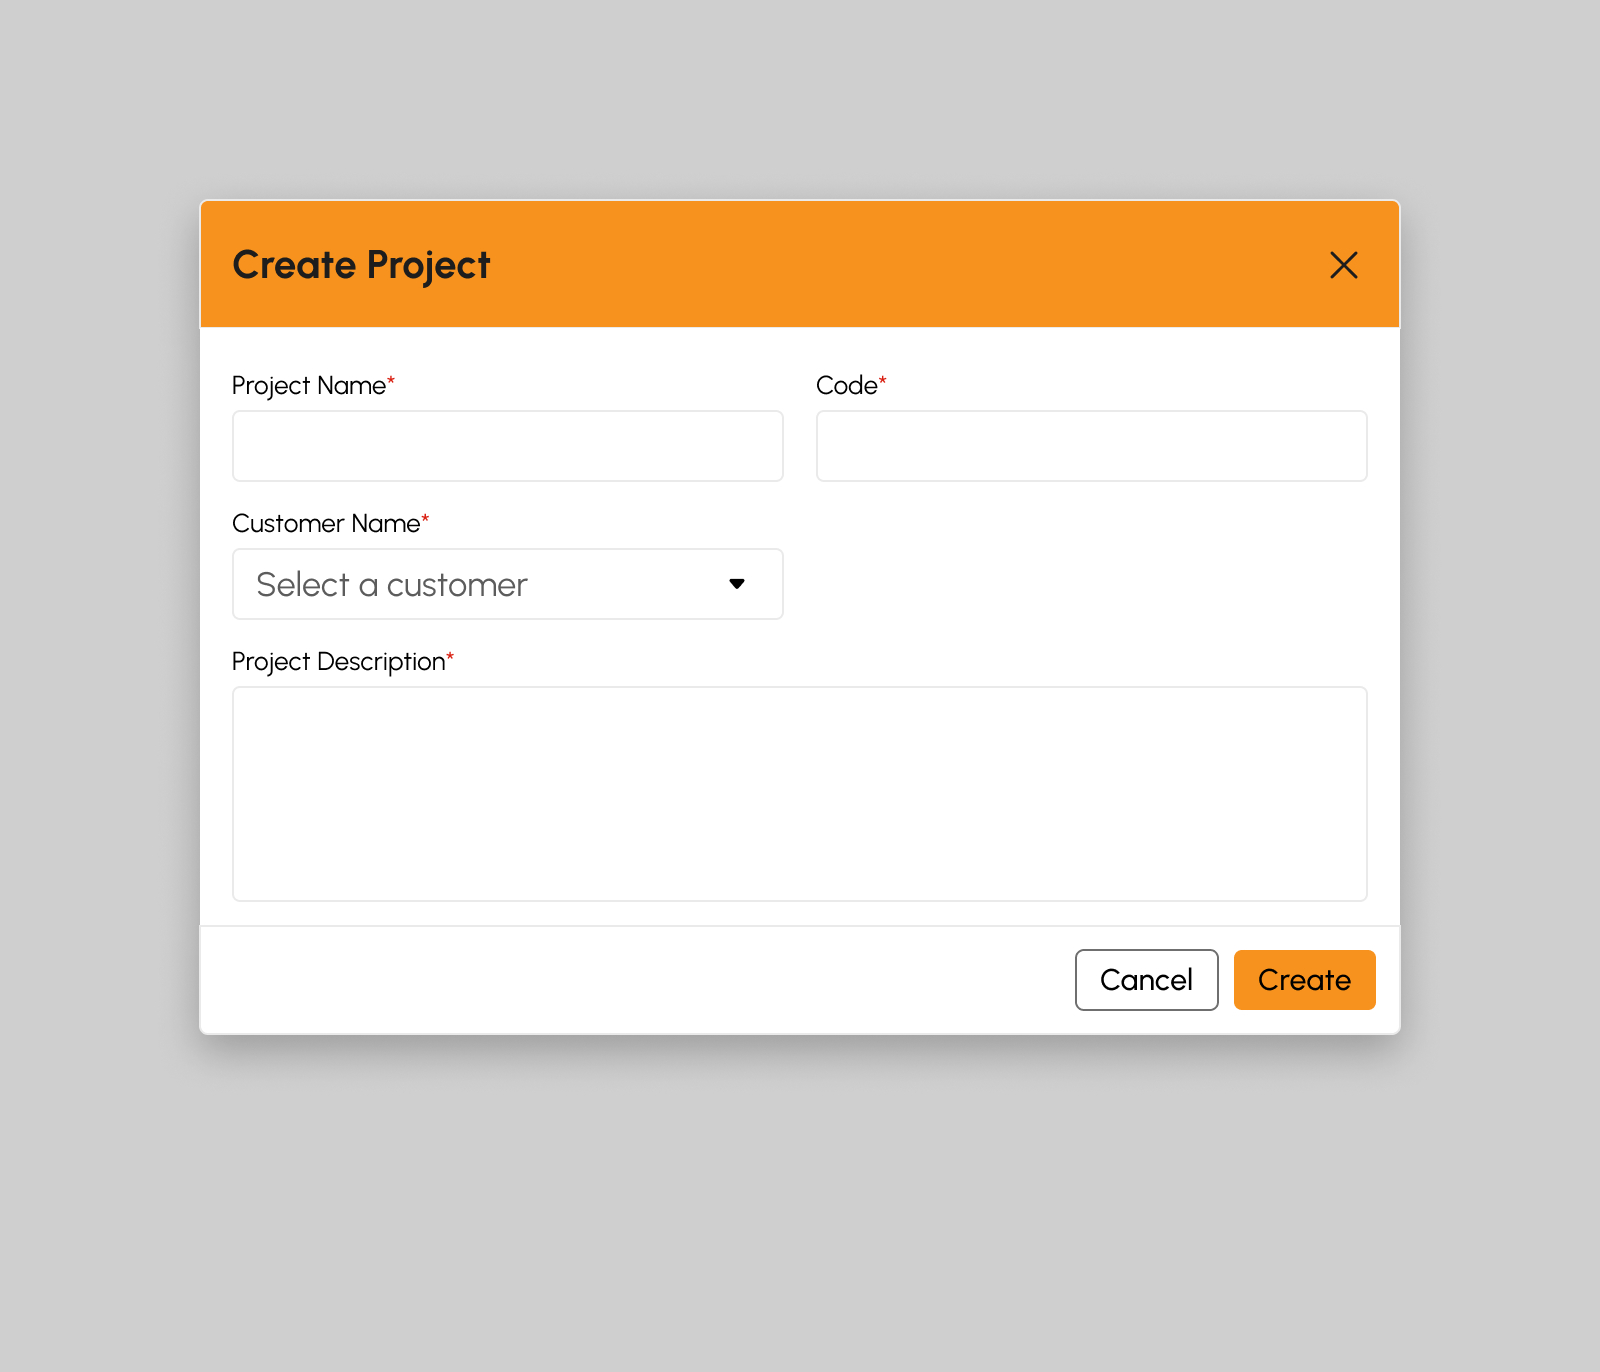 Fields with * remarks are required
- Project Name
- Code
- Customer Name
- Project Description
- Click the Create button.
-
A successful notification message will show:
Project successfully created
- Step 2 will successfully create new project otherwise, proceed to Step 5.
- Click the Cancel button to cancel the creation of project.
- The screen closes the modal.
- System will not proceed on creation of new project.
Edit Project
-
Click the Edit button.
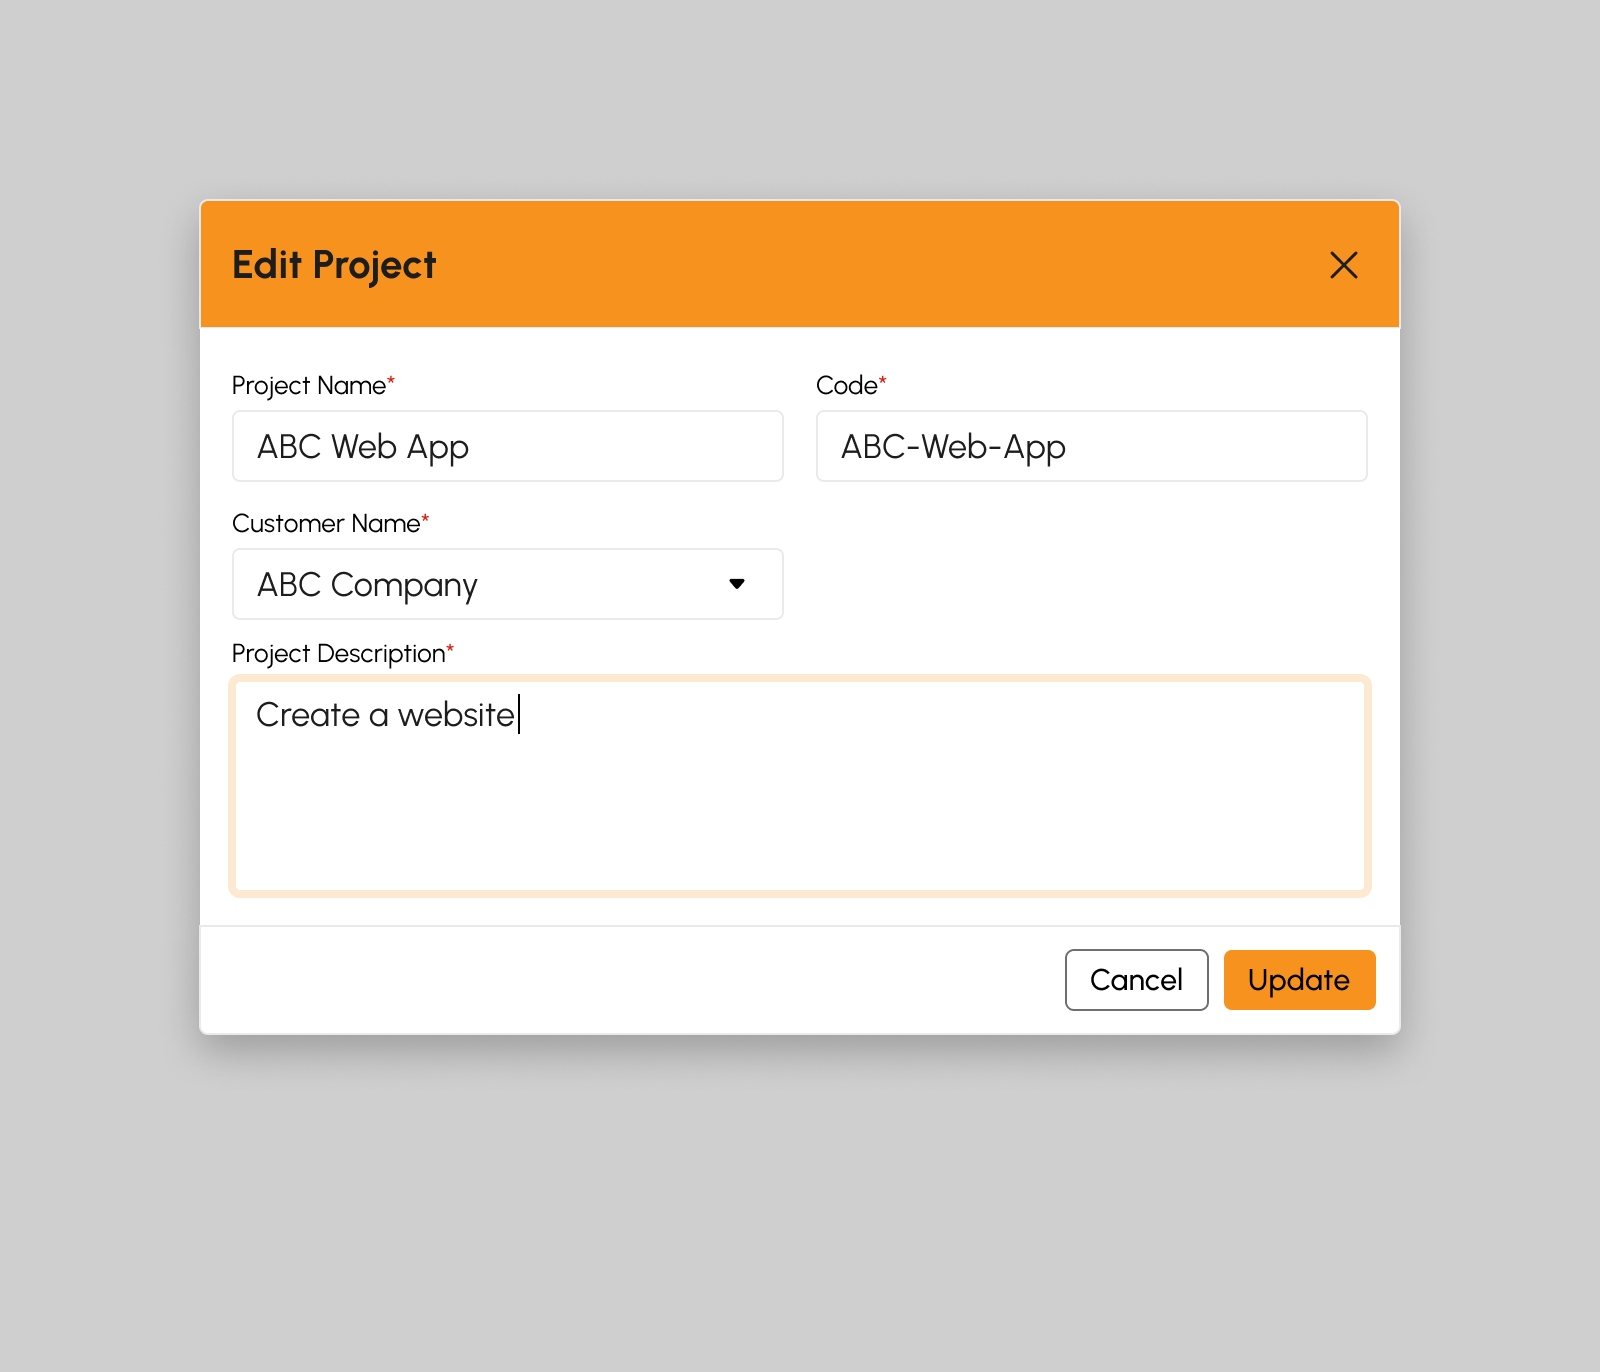 Fields with * remarks are required.
- Project Name
- Code
- Customer Name
- Project Description
- Click the Update button.
-
A successful notification message will show:
Project successfully updated
- Step 2 will successfully update project details otherwise, proceed to Step 5.
- Click the Cancel button to cancel the update.
- The screen closes the modal.
- System will not proceed on updating project details.
Project Activities
Introduction to Project Activities
This page allows users to manage the projects on which employees are working and for which time tracking is needed.
To access this page, navigate to the Human Resources Module and click “Projects Activities” under Timesheets Submodule as shown in the image below:

The screen will redirect to the Projects Activities page, showing several features to use that will be discussed in the following section.
Project Activities Features
The snip below is the high-level view of Projects page along with its built-in features.
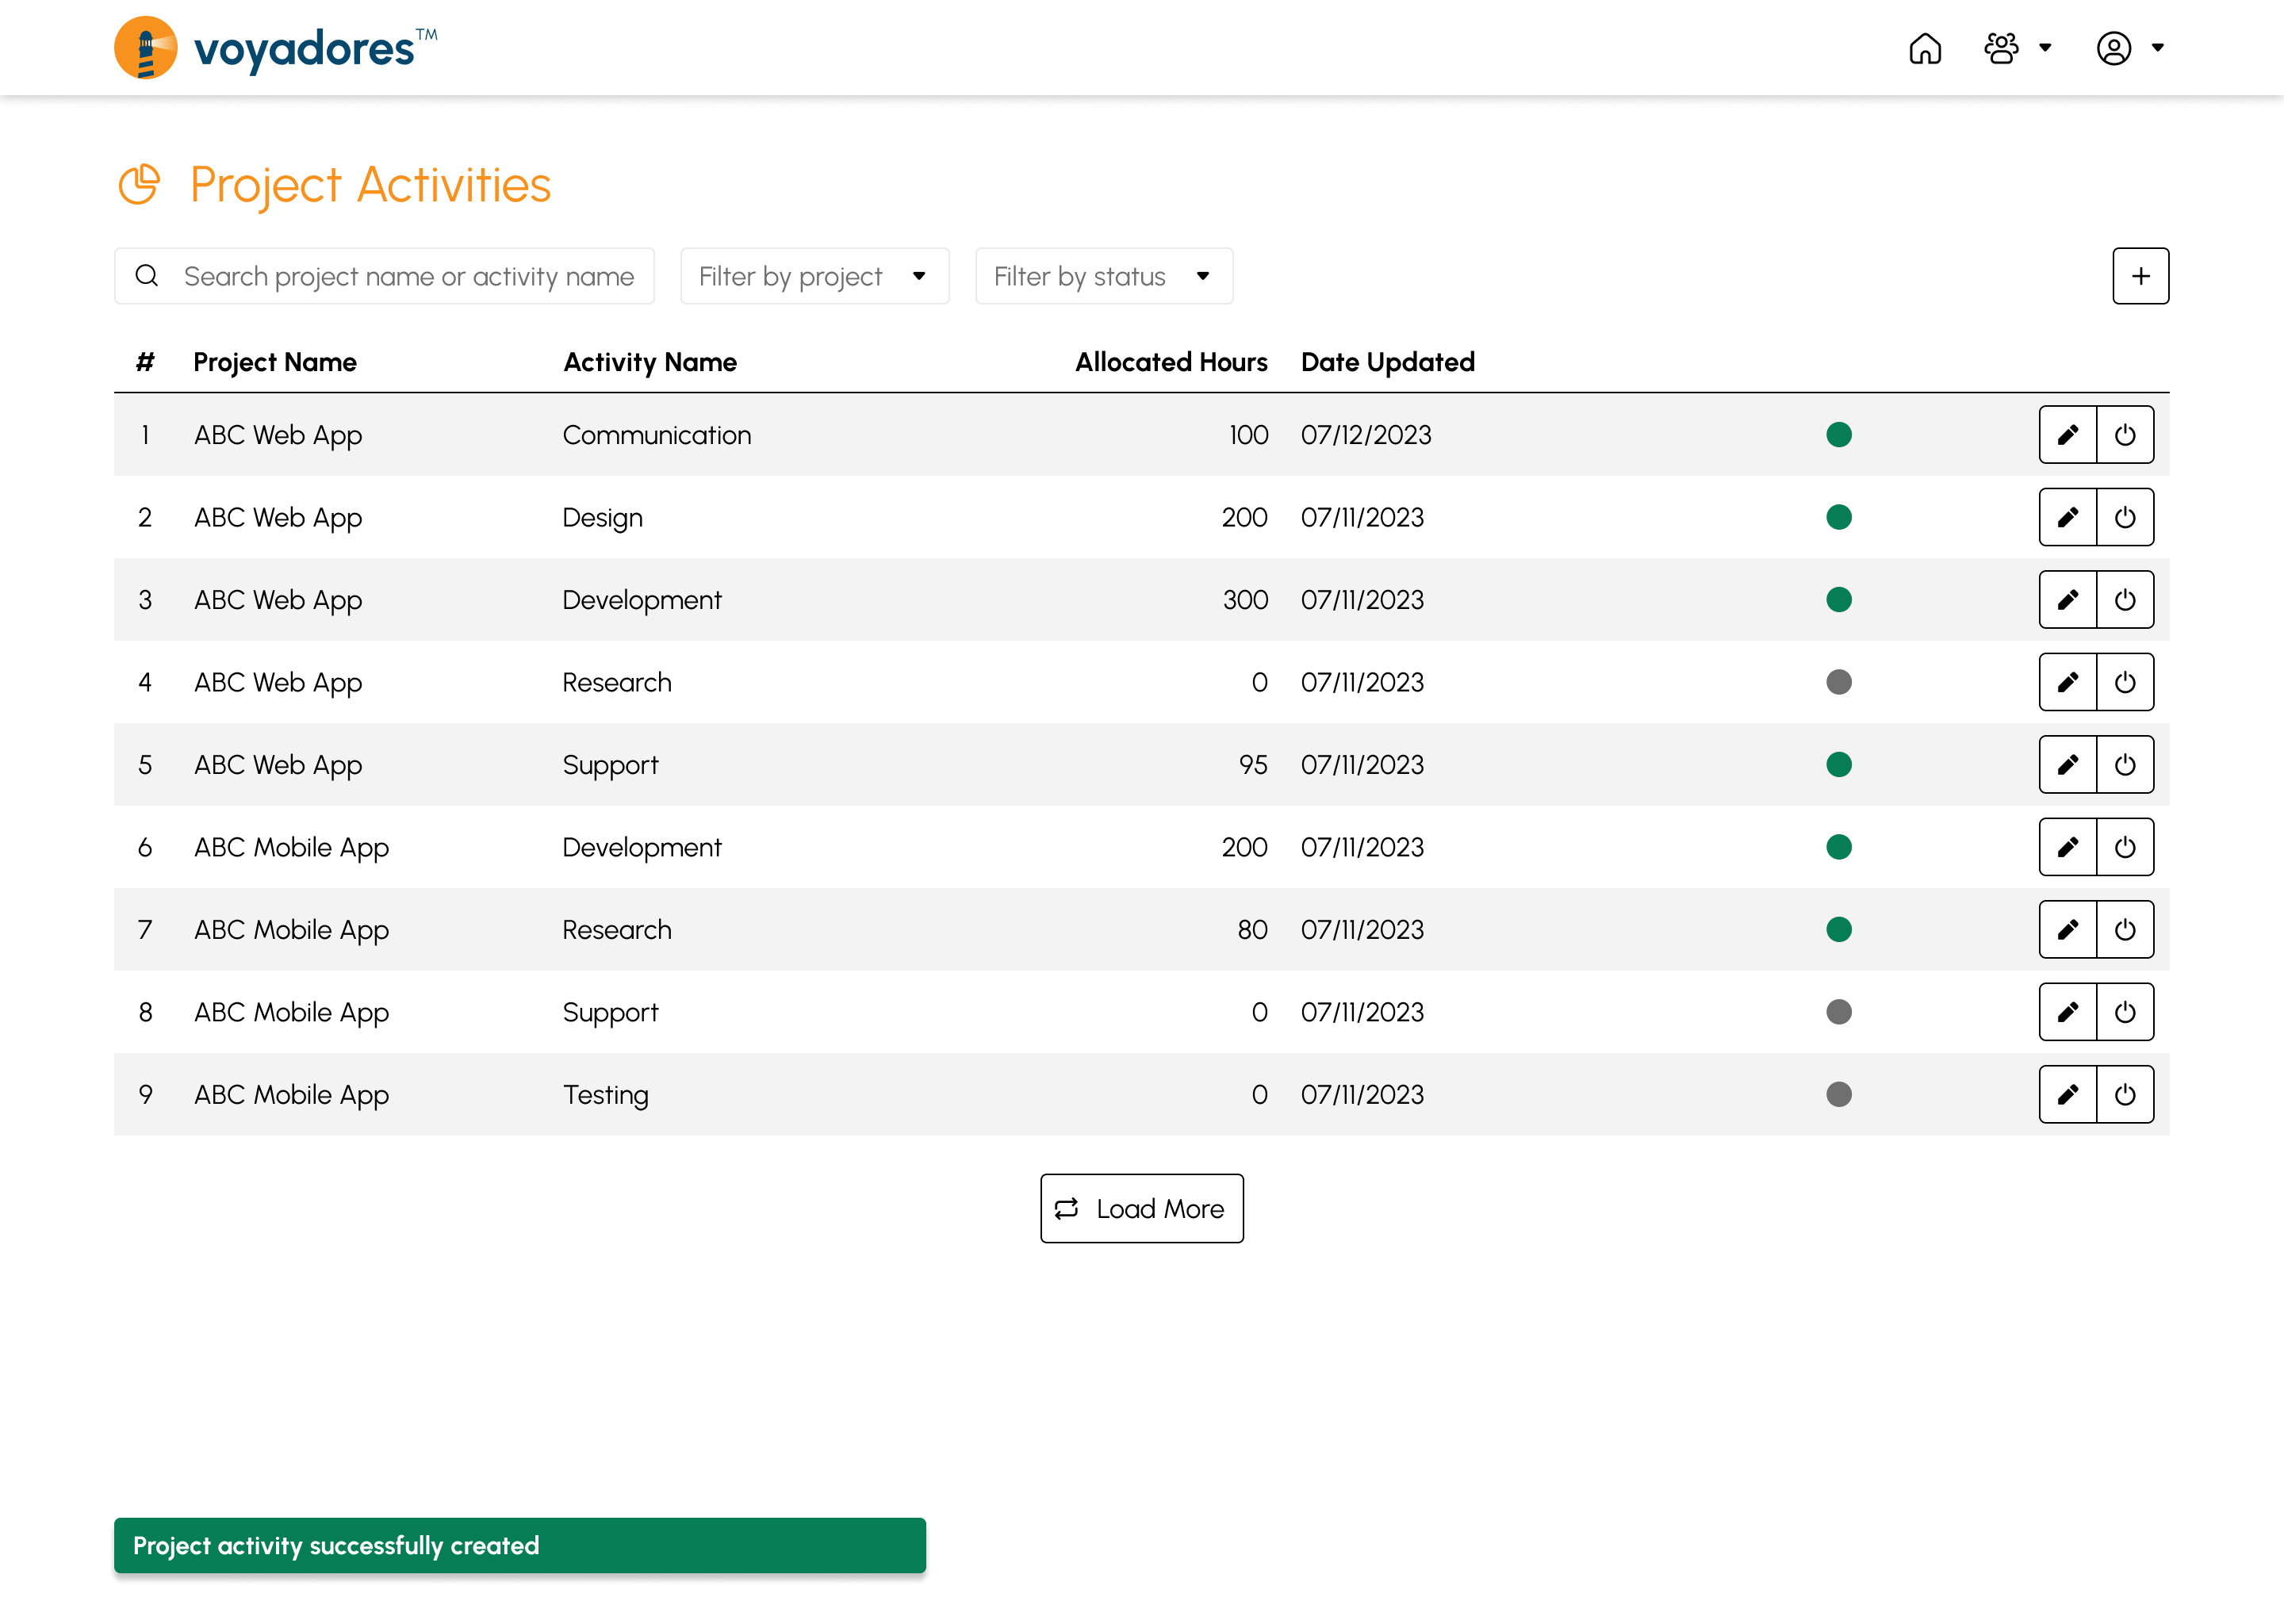
Project Activities Summary Table
The summary table displays the list of projects with the following columns:
- Item number “#”
- Project Name
- Activity Name
- Allocated Hours
- Date Updated
- Status
-
Actions
- Edit Project Activity
- Activate/Deactivate Project Activity
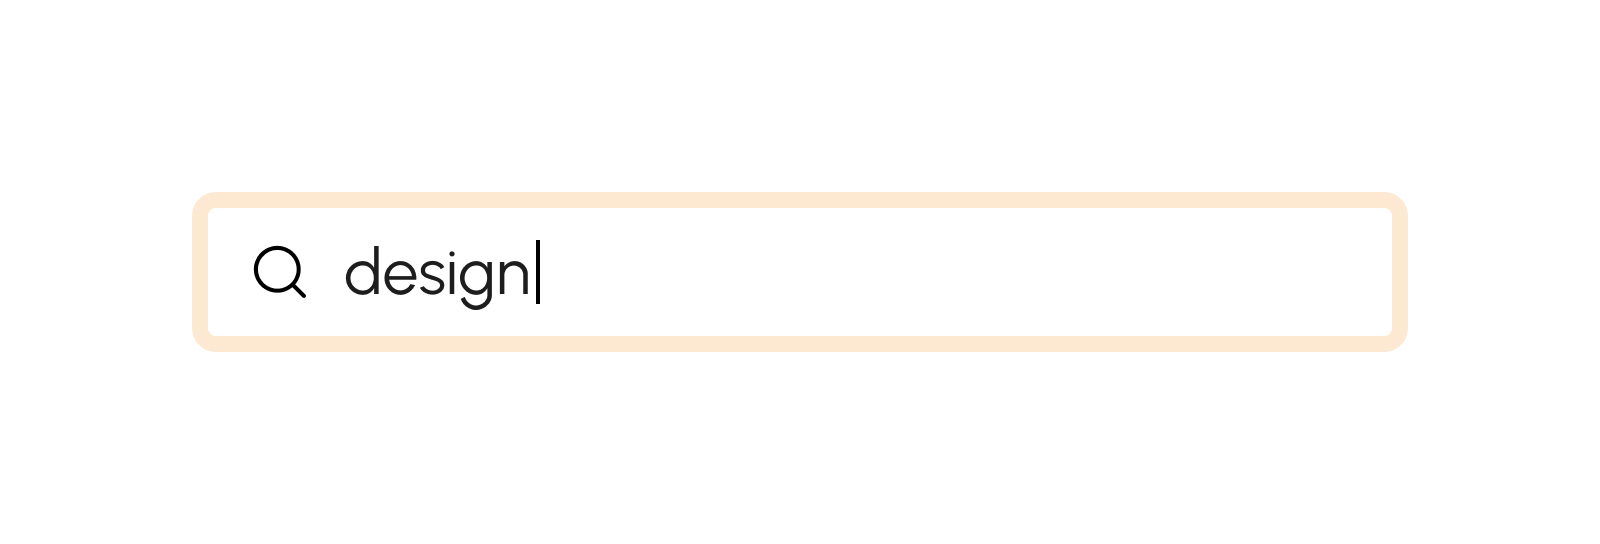
Search by Project Name or Activity Name
To search for a particular project, key in the project name or activity name in the search bar as shown in the snip below:
Filter by Project Name
To filter project activities by project name, select the desired project name from the dropdown.

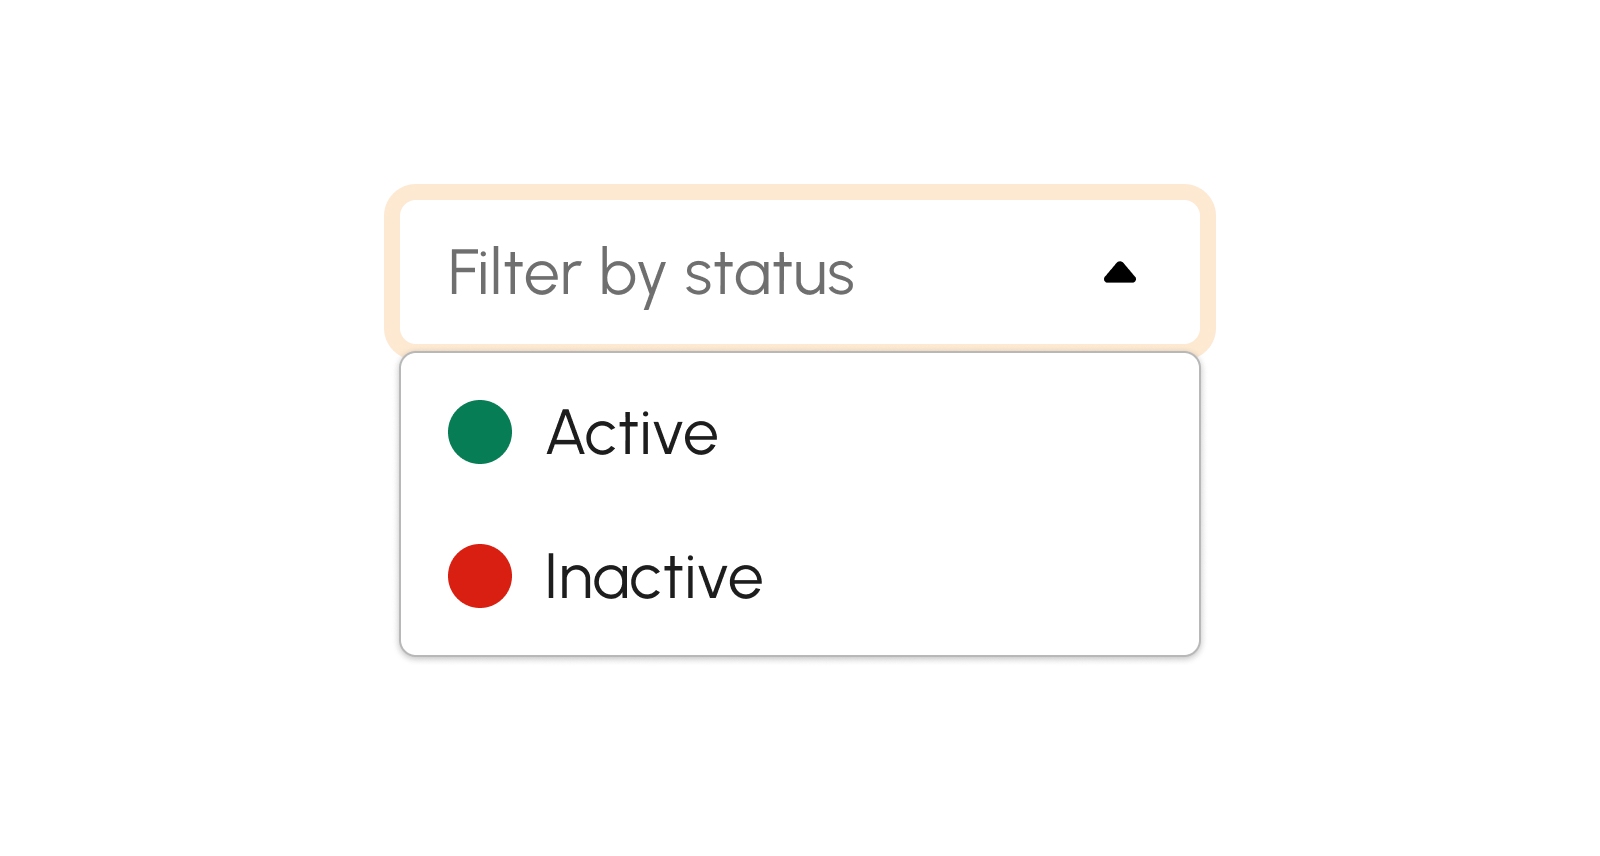
Filter by Status
To filter project activities by status, select the desired status from the dropdown.
Create Project Activity
-
Click the Create button.
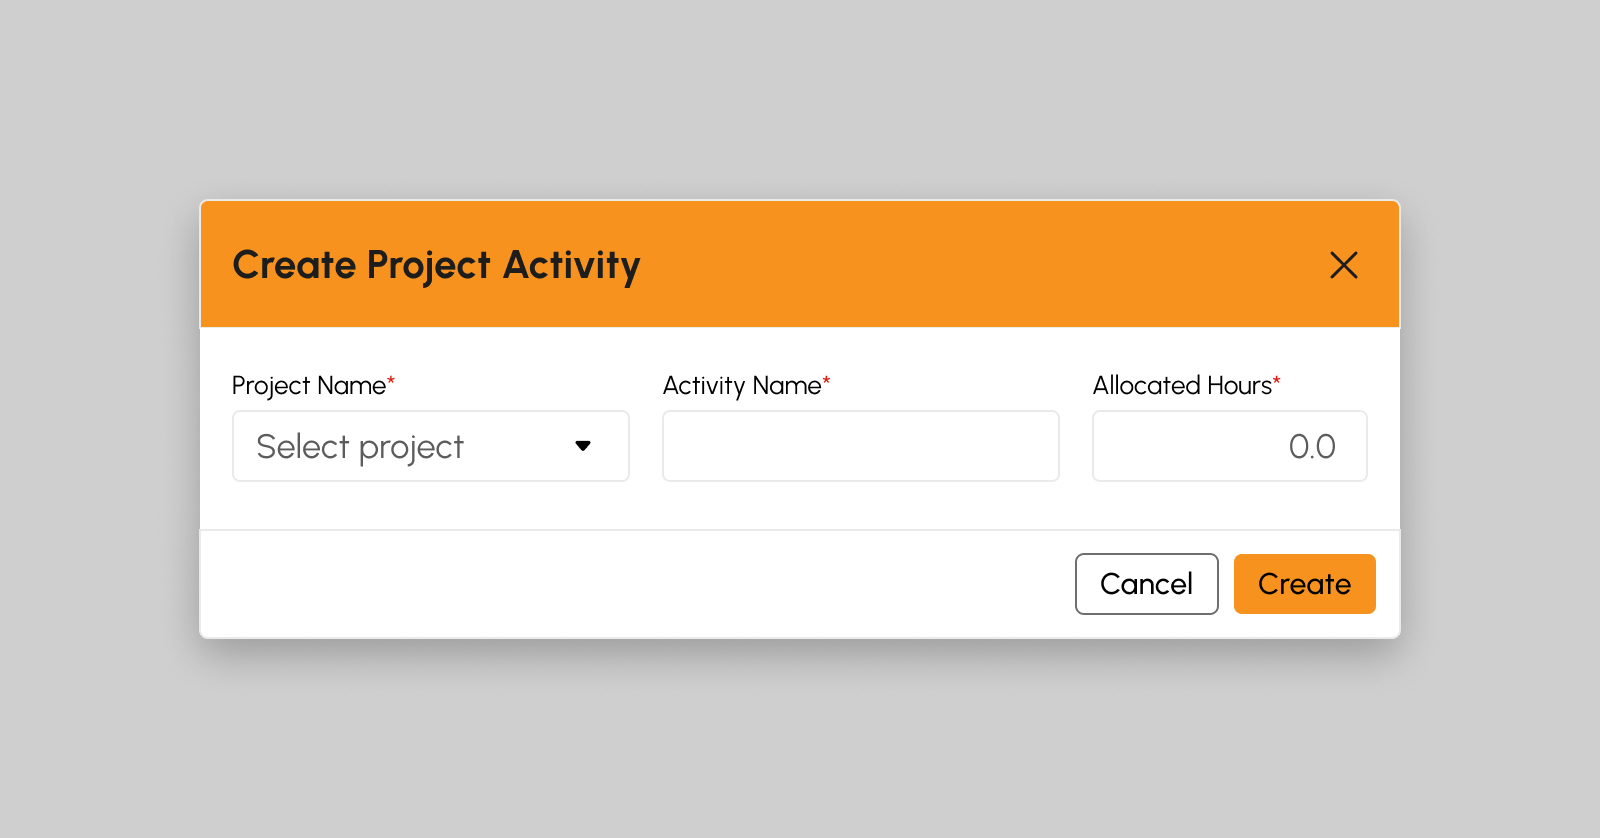 Fields with * remarks are required
- Project Name
- Activity Name
- Allocated Hours
- Click the Create button.
-
A successful notification message will show:
Project activity successfully created
- Step 2 will successfully create new project activity otherwise, proceed to Step 5.
- Click the Cancel button to cancel the creation of project activity.
- The screen closes the modal.
- System will not proceed on creation of new project activity.
Edit Project Activity
-
Click the Edit button.
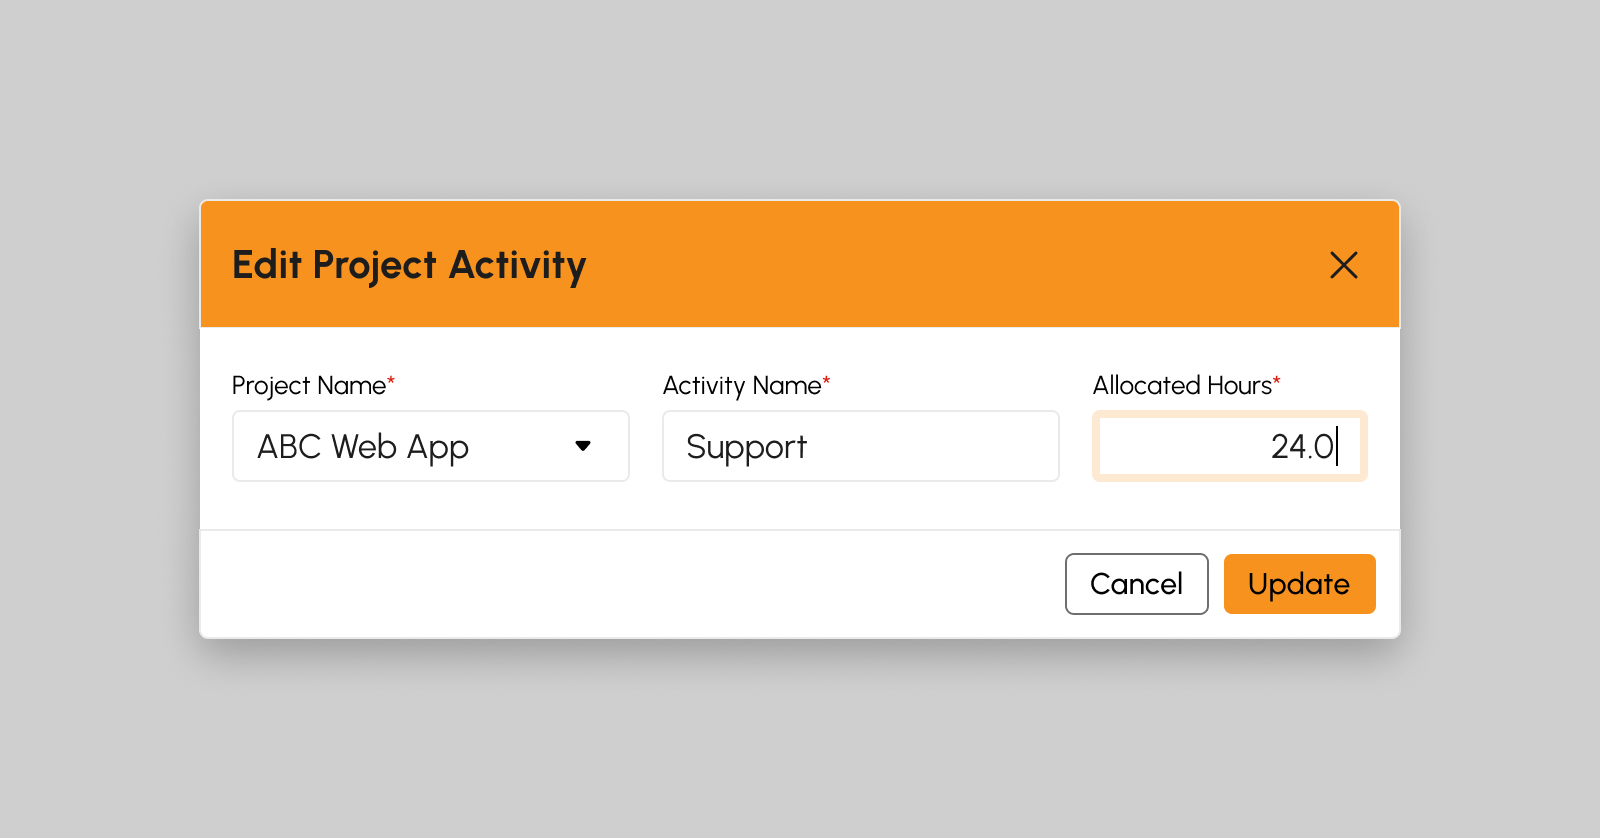 Fields with * remarks are required.
- Project Name
- Activity Name
- Allocated Hours
- Click the Update button.
-
A successful notification message will show:
Project activity successfully updated
- Step 2 will successfully update project activity otherwise, proceed to Step 5.
- Click the Cancel button to cancel the update.
- The screen closes the modal.
- System will not proceed on updating project details.
Load More Project Activities
To verify if there are more than 20 Project Activities created, click the Load More button to display other Project Activities since the default item number displayed in the screen is from count 1-20.