Daily Time Record (DTR)
Introduction to DTR
The View by Employees tab is used to manage and review employees' daily attendance records. It displays time-in, time-out, and total hours worked, allowing attendance records to be reviewed and verified.
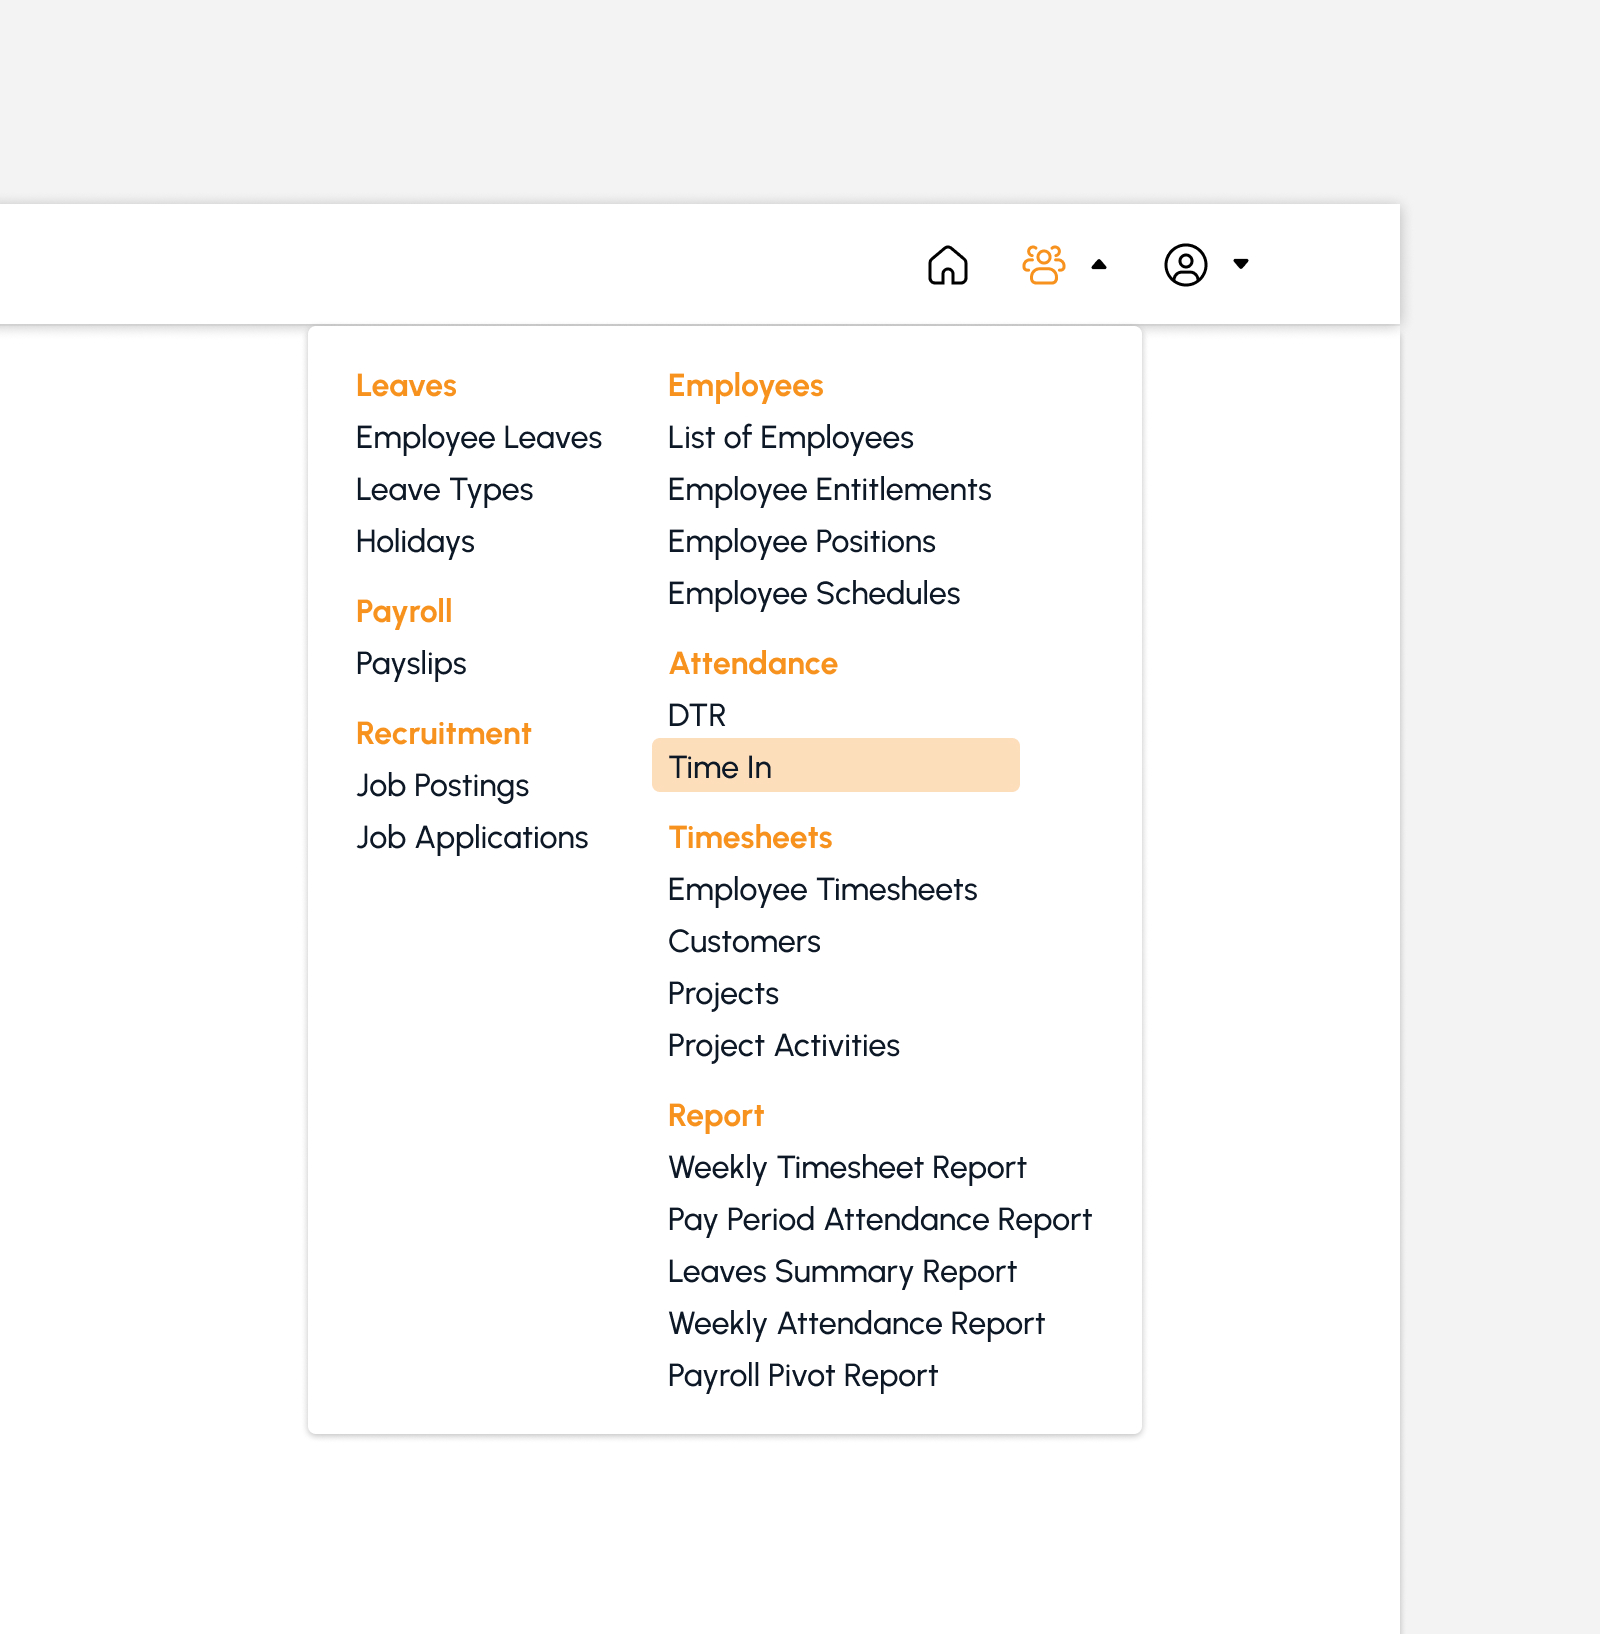
To access this page, navigate to the Attendance Submodule within the Human Resources Module. Click on "DTR" as depicted in the image below.
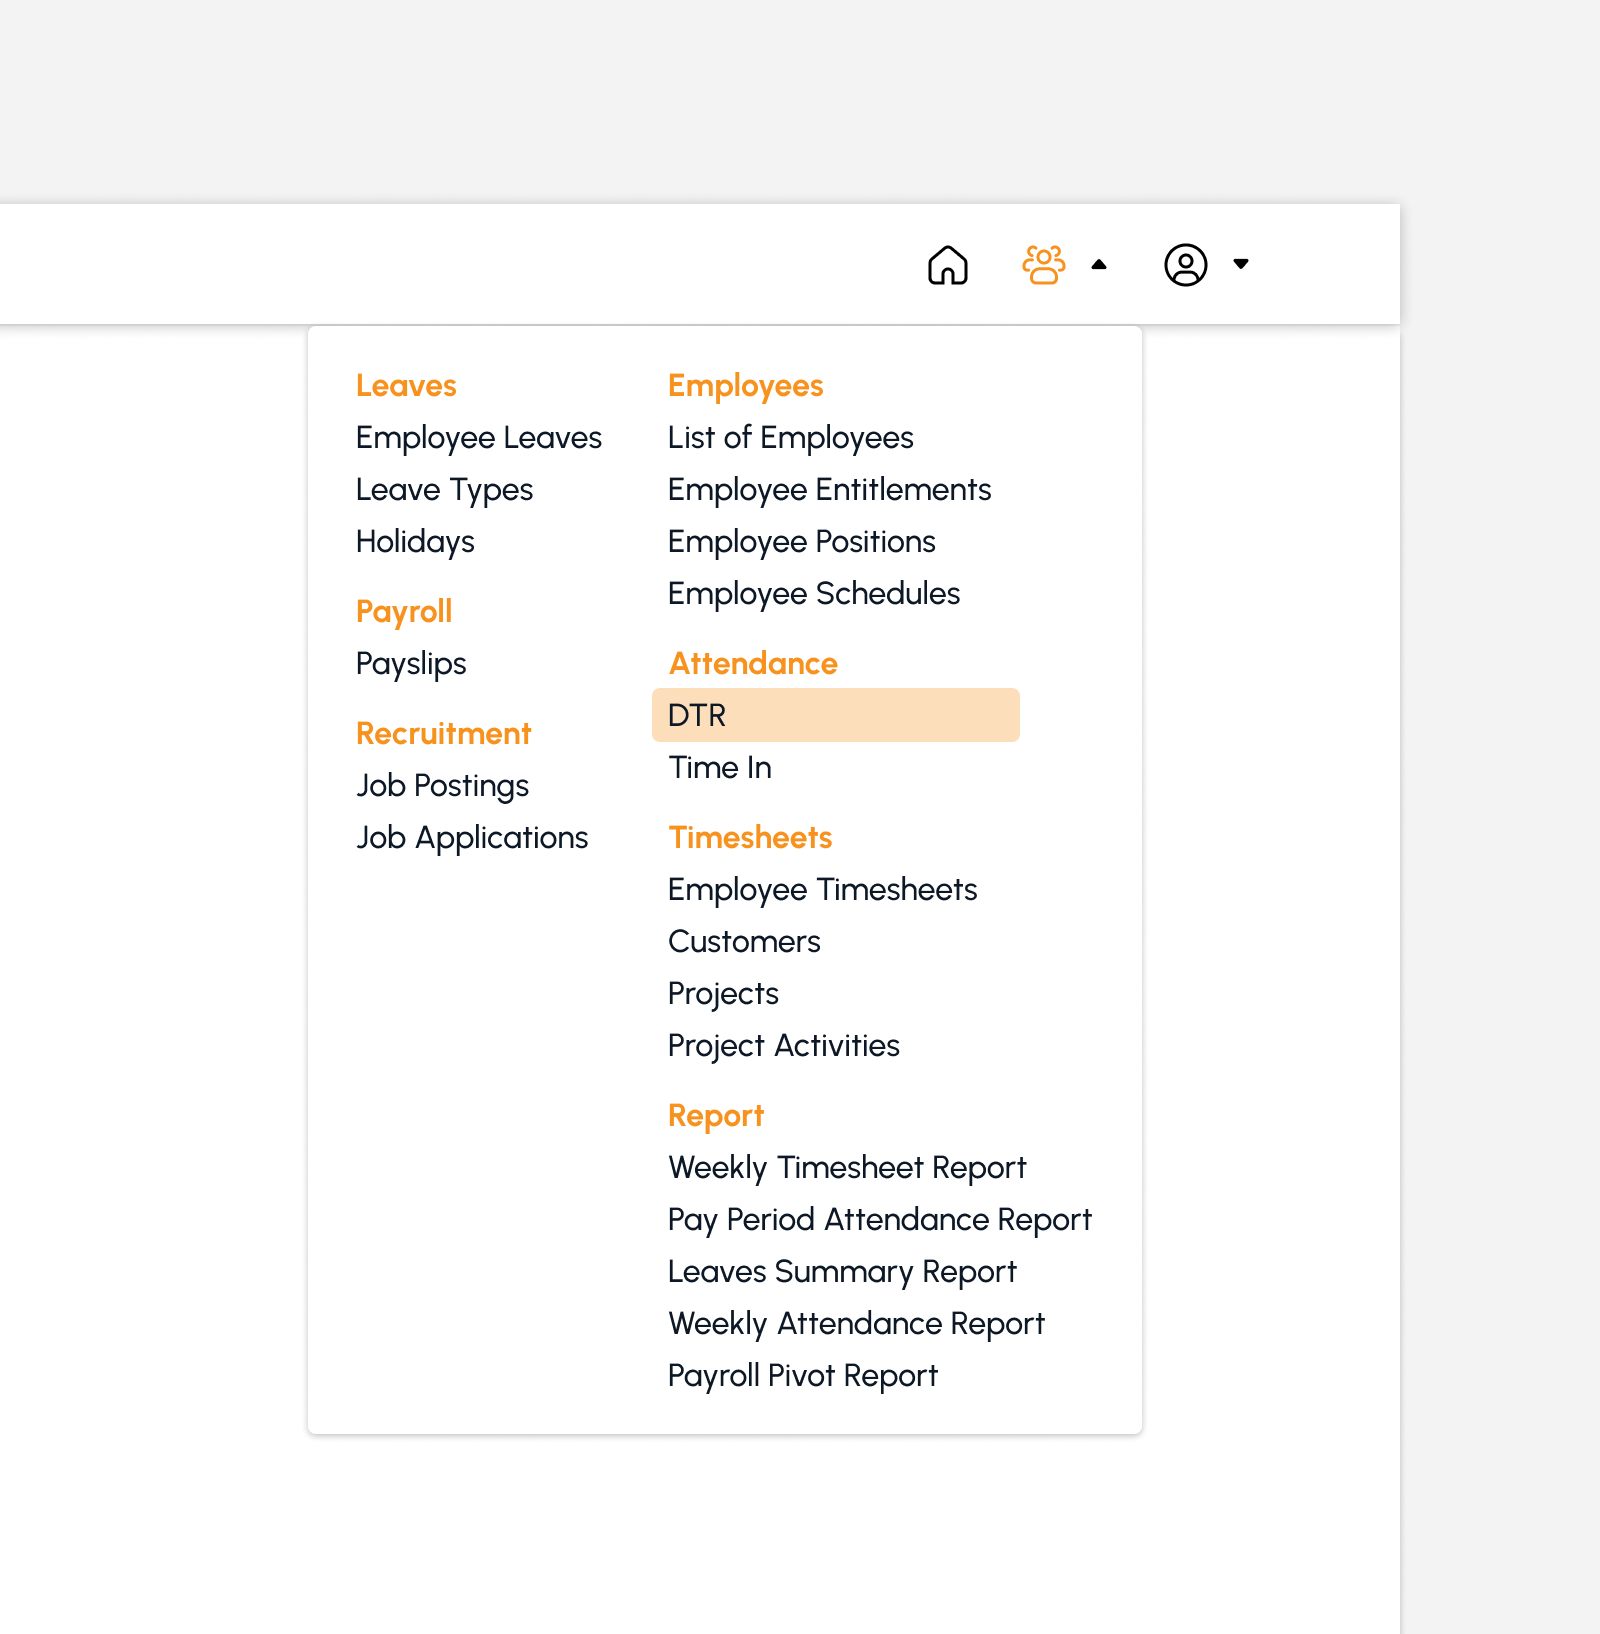
DTR Approval Type
The DTR Approval Type refers to the structure or method used for the approval workflow of an employee's Daily Time Record. The approval workflow may follow either a hierarchical or flat structure, depending on the organization's requirements.
-
Hierarchical. The DTR approval follows the employee's organizational or reporting hierarchy. The request passes through designated approvers based on their level or position within the organization.
Example: Employee Immediate Supervisor Manager HR -
Flat. The DTR approval is routed directly to the designated approver without following multiple levels of the organizational hierarchy.
Example: Employee Designated DTR Approver
View by Employees Tab
The View by Employees tab displays employees and their basic employment information. It provides access to each employee's Daily Time Record for reviewing attendance details.
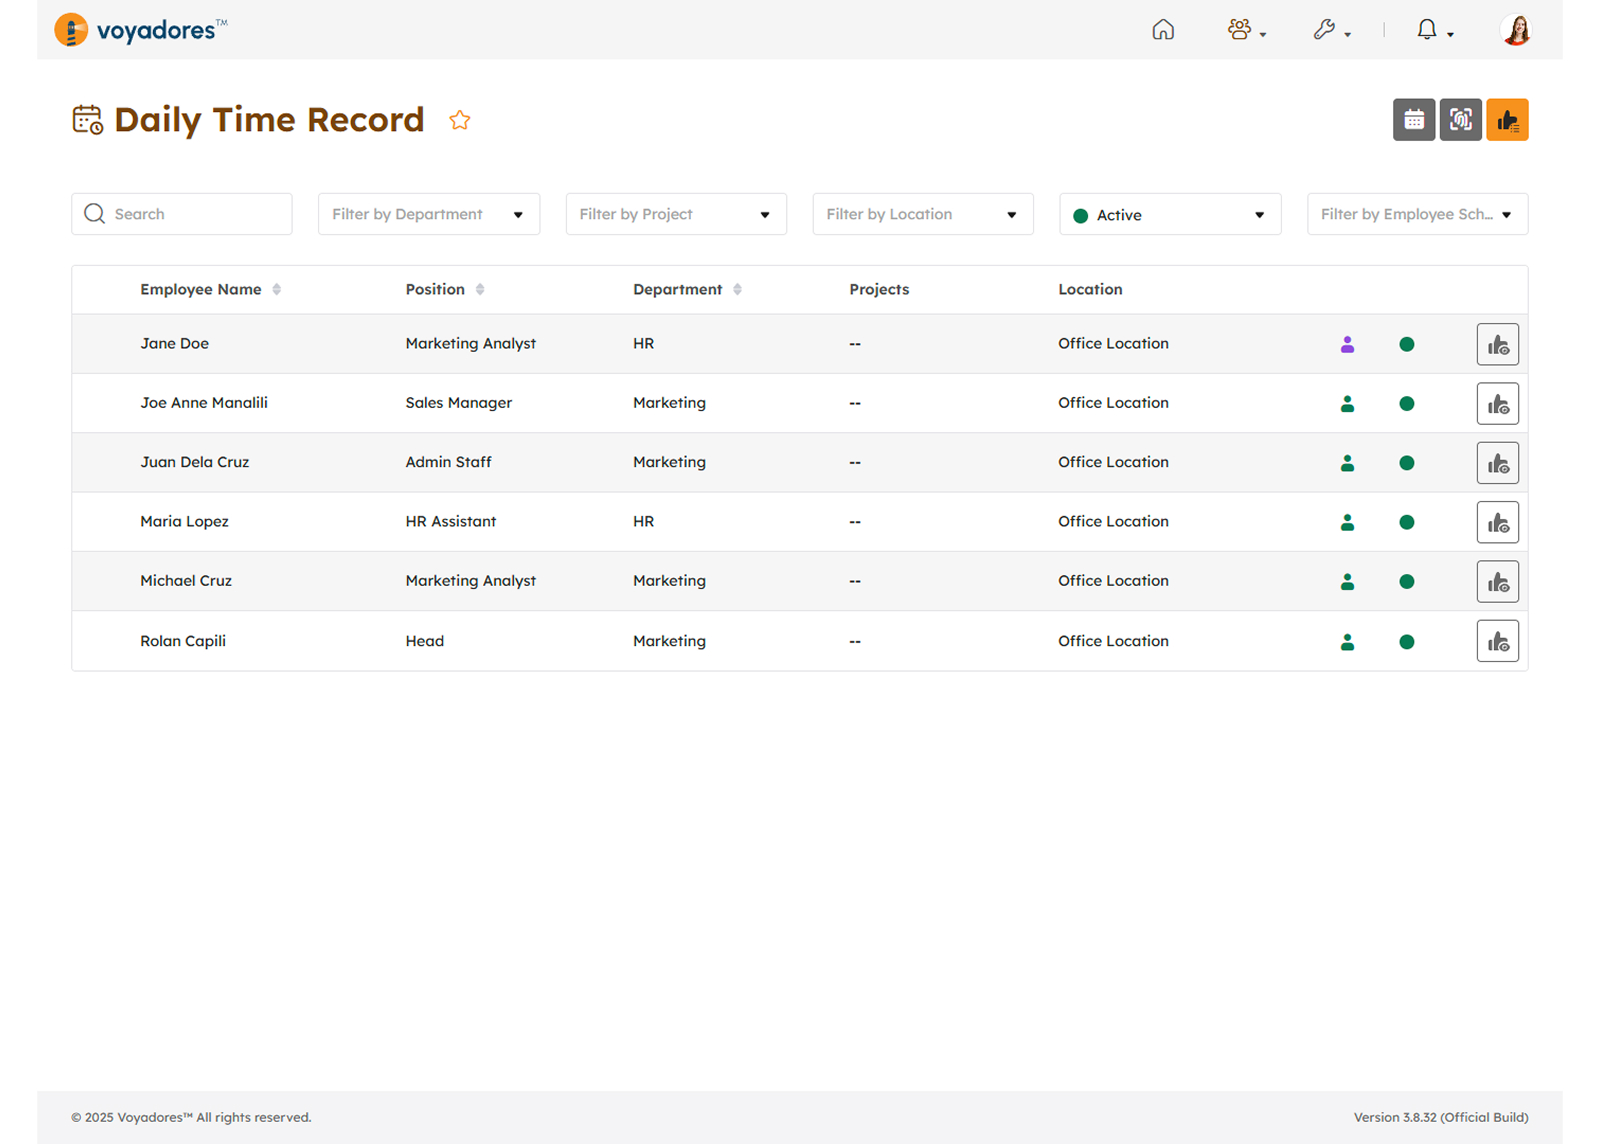
View by Employees Page Header Actions
- Set as Default Page
- Add to Quick Links
- Import Biometrics Data
- Import Attendance Summary
- Preview DTRs
View by Employees Tab Summary Table
The summary table displays the list of Employee Name with the following columns:
- Employee Name
- Position
- Department
- Projects
- Location
- Employment Status
- Employee Status
-
Action
- View and Approve DTR
Search by Employee
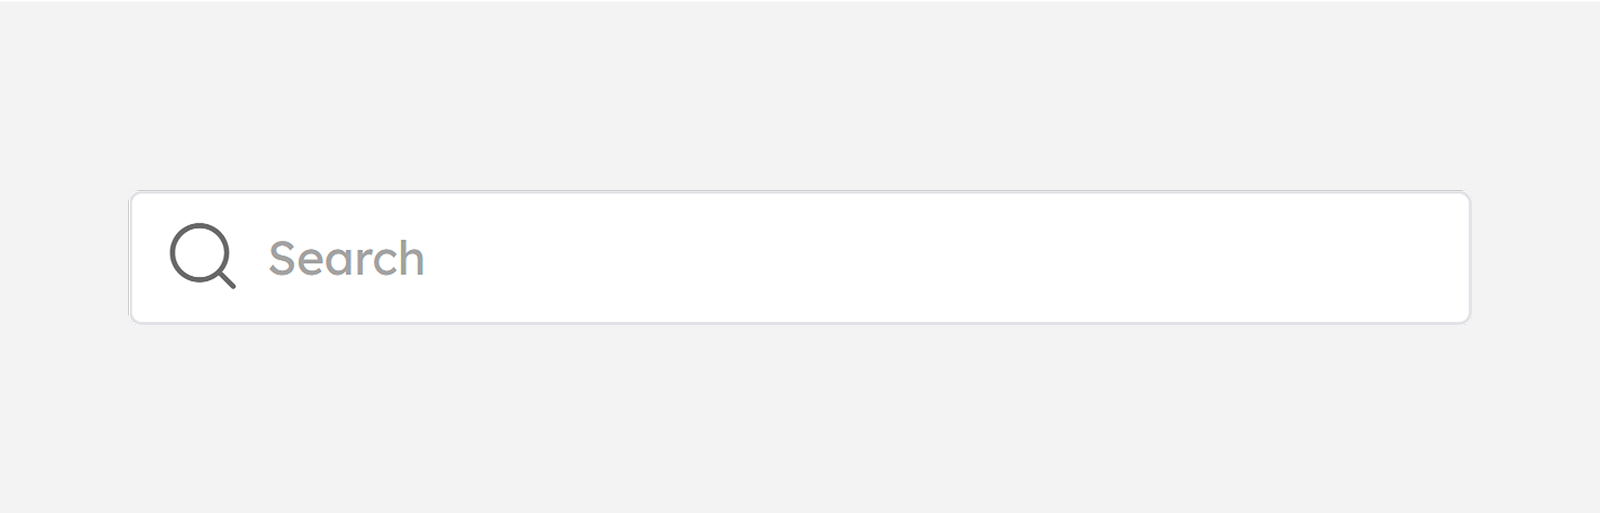
The search feature allows a specific employee to be located using their name. Enter the employee's name in the Search Bar, as shown in the screenshot below.
Filter Employee by Department
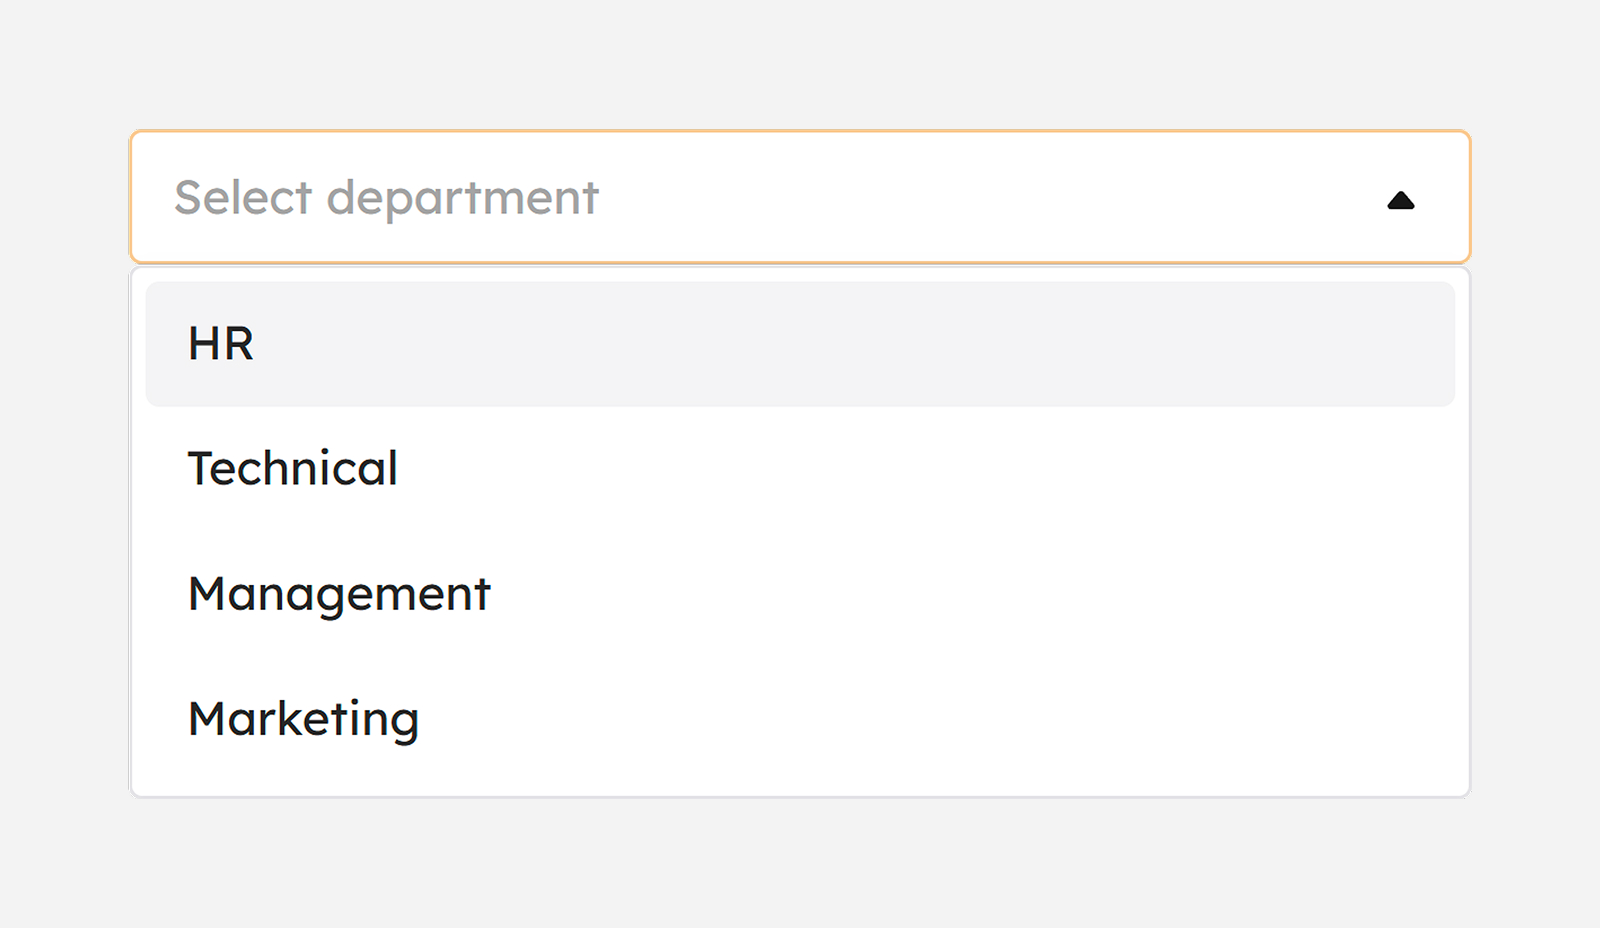
The Department filter allows employees to be displayed according to their assigned department. Select the appropriate department from the available filter options to display matching employees.
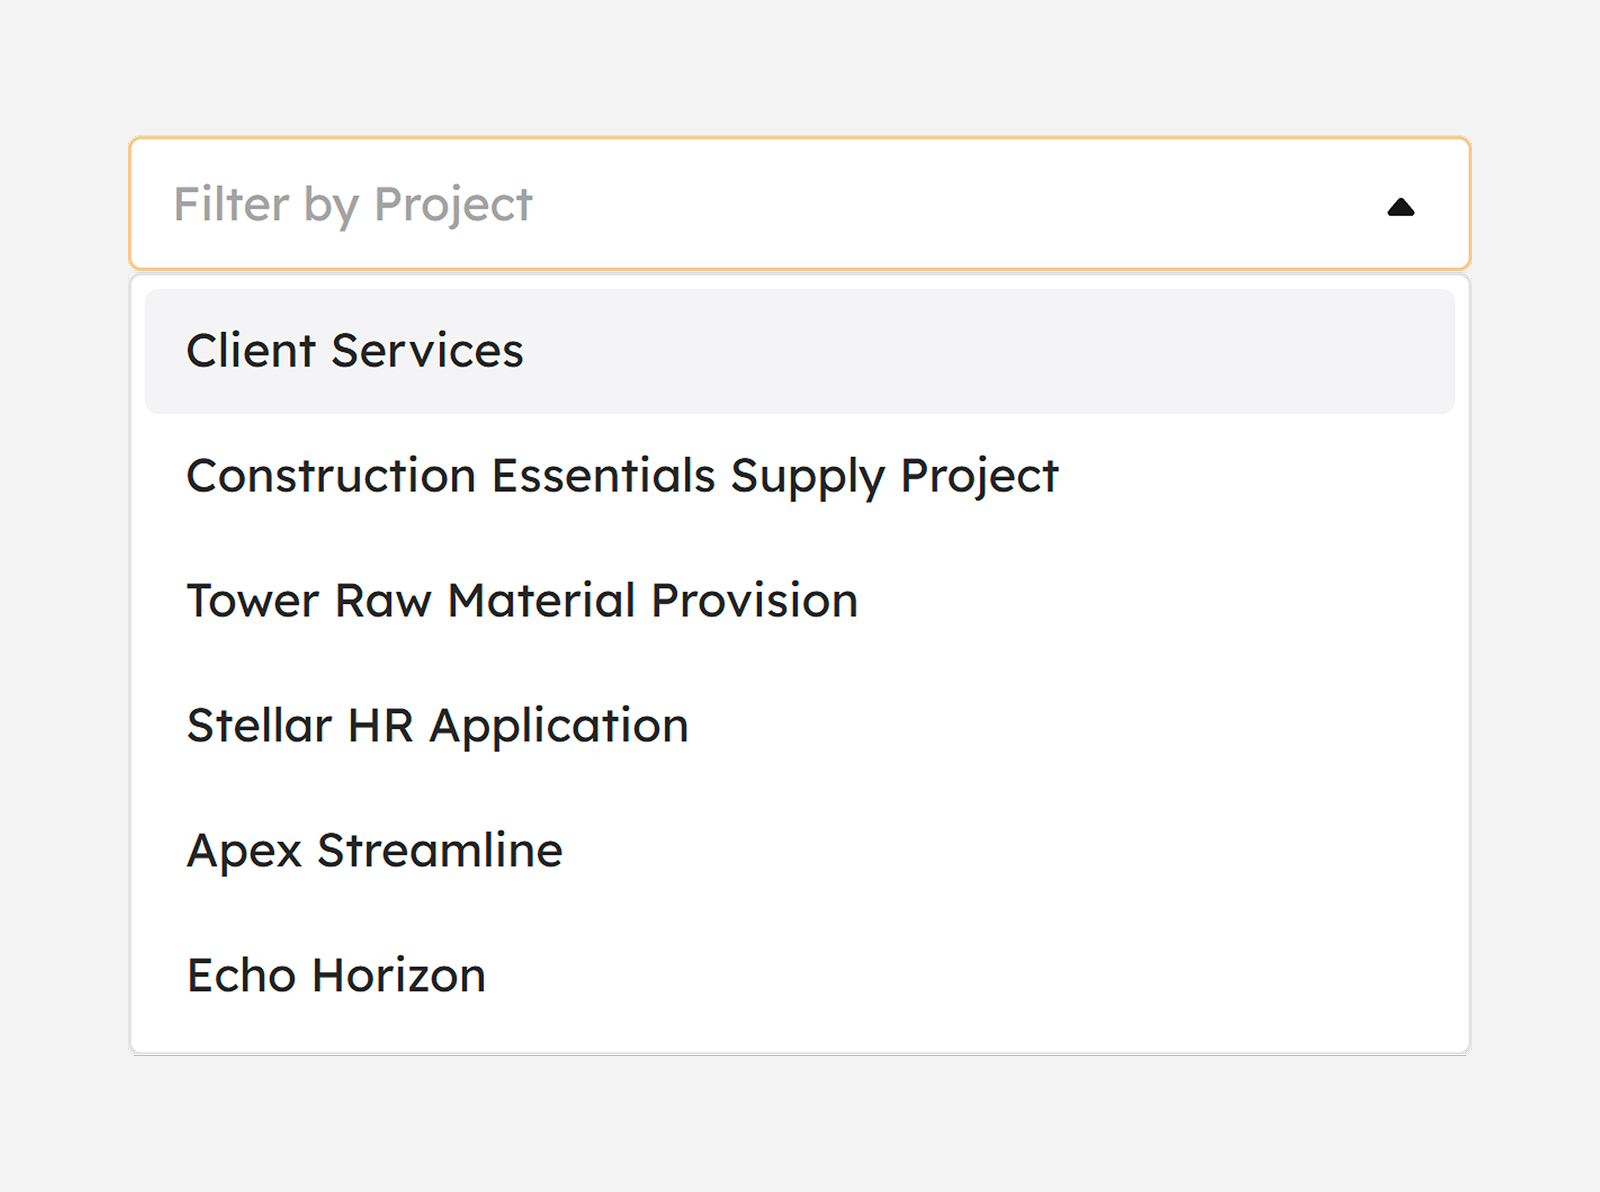
Filter Employee by Project
The Project filter allows employees to be displayed according to their assigned project. Select the appropriate project from the available filter options to display matching employees.
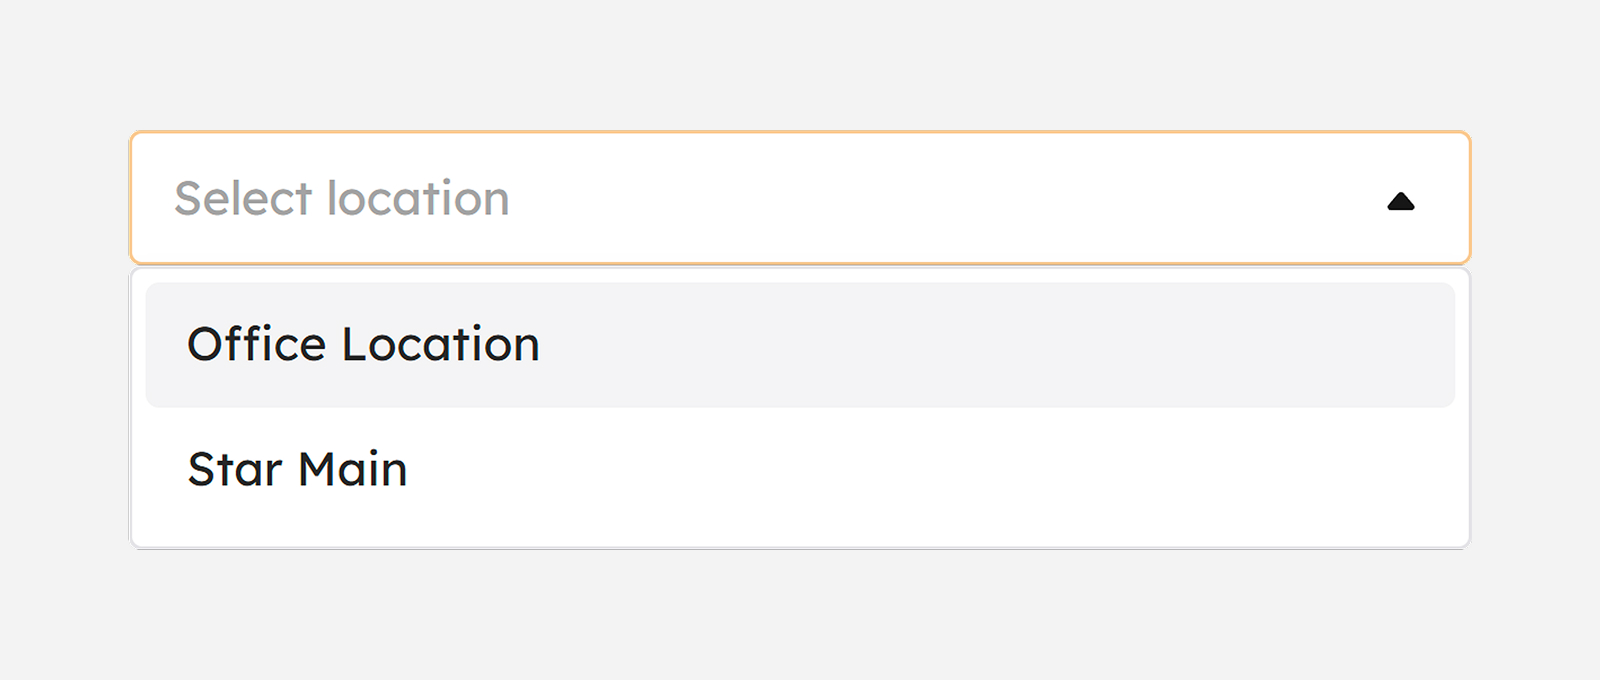
Filter Employee by Location
The Location filter allows employees to be displayed according to their assigned work location. Select the appropriate location from the available filter options to display matching employees.
Filter Employee by Employee Status
The Employee Status filter allows employees to be displayed according to their current employment status. Each status is identified by a corresponding color.
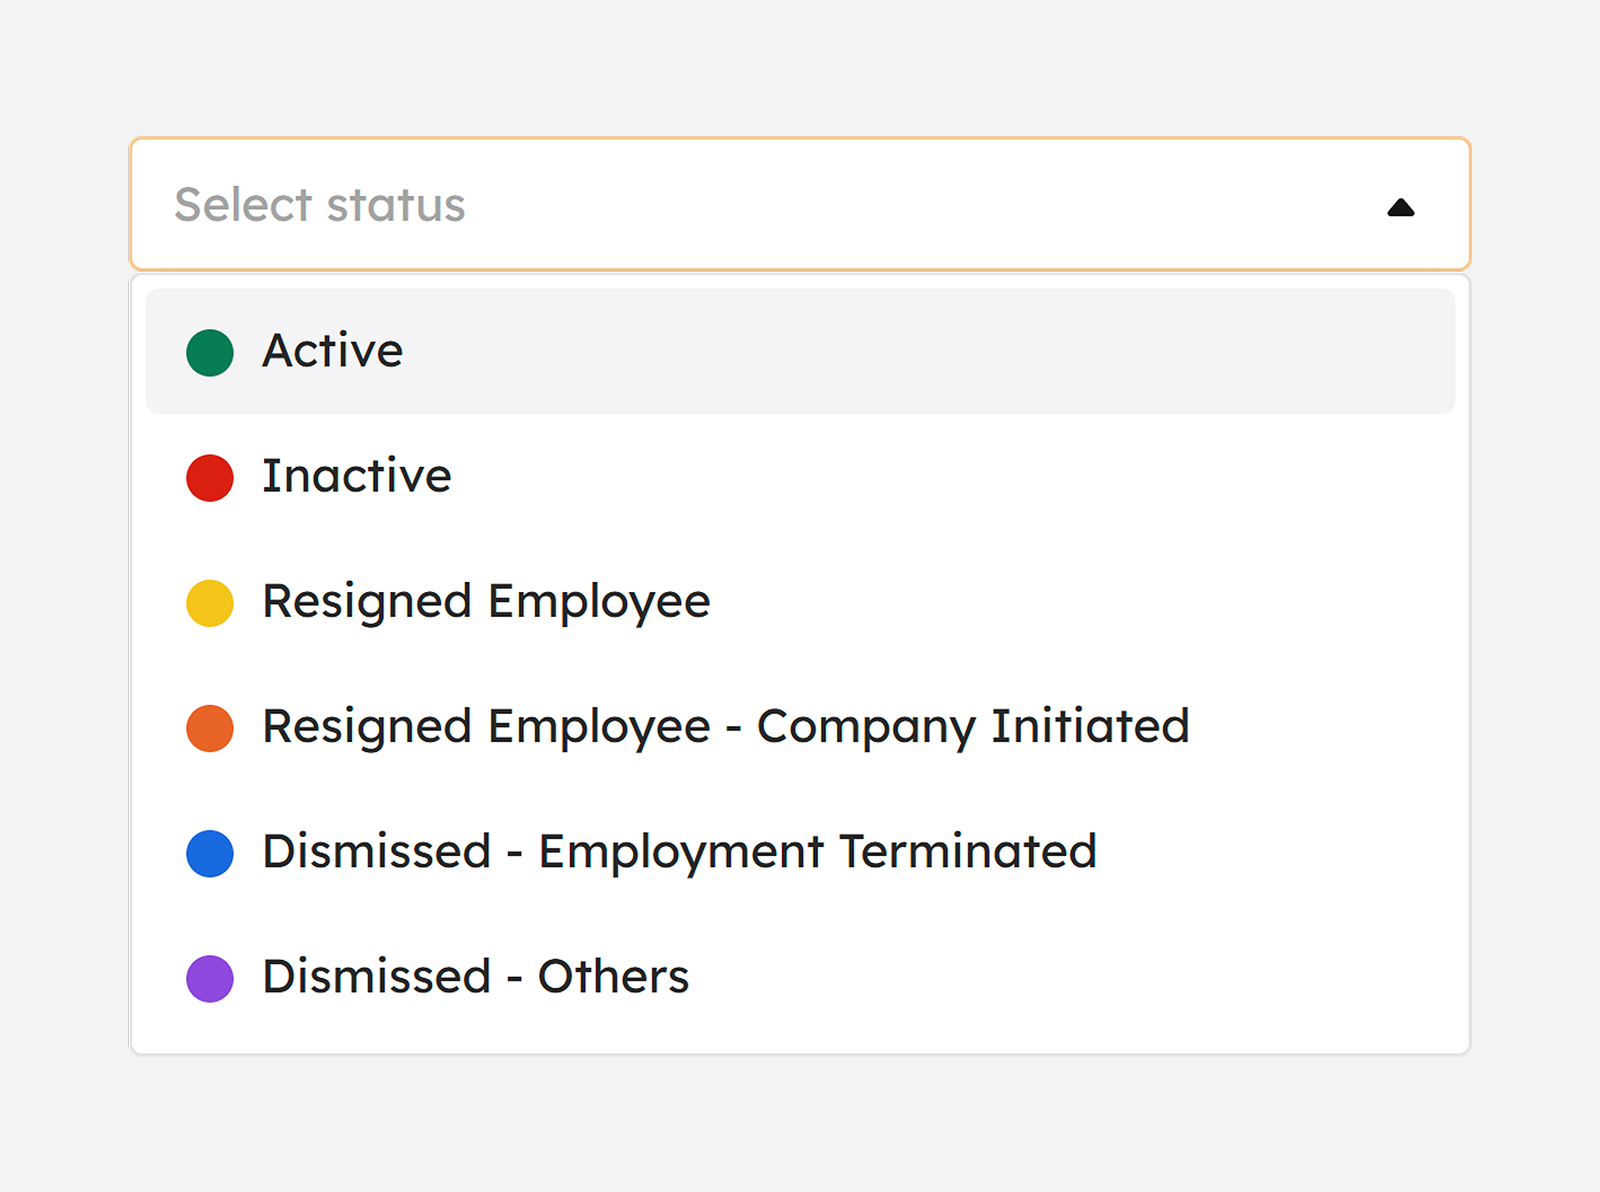
- Active. This green status indicates employees who are currently active in the system.
- Inactive. This red status indicates employees who are no longer active in the system.
- Resigned Employees. This yellow status indicates employees who voluntarily resigned from their positions.
- Resigned Employees (Company Initiated). This orange status indicates employees whose resignation was initiated by the company.
- Dismissed (Employment Terminated). This dark blue status indicates employees whose employment was terminated by the company.
- Dismissed (Others). This purple status indicates employees whose employment was terminated for other reasons.
View DTR
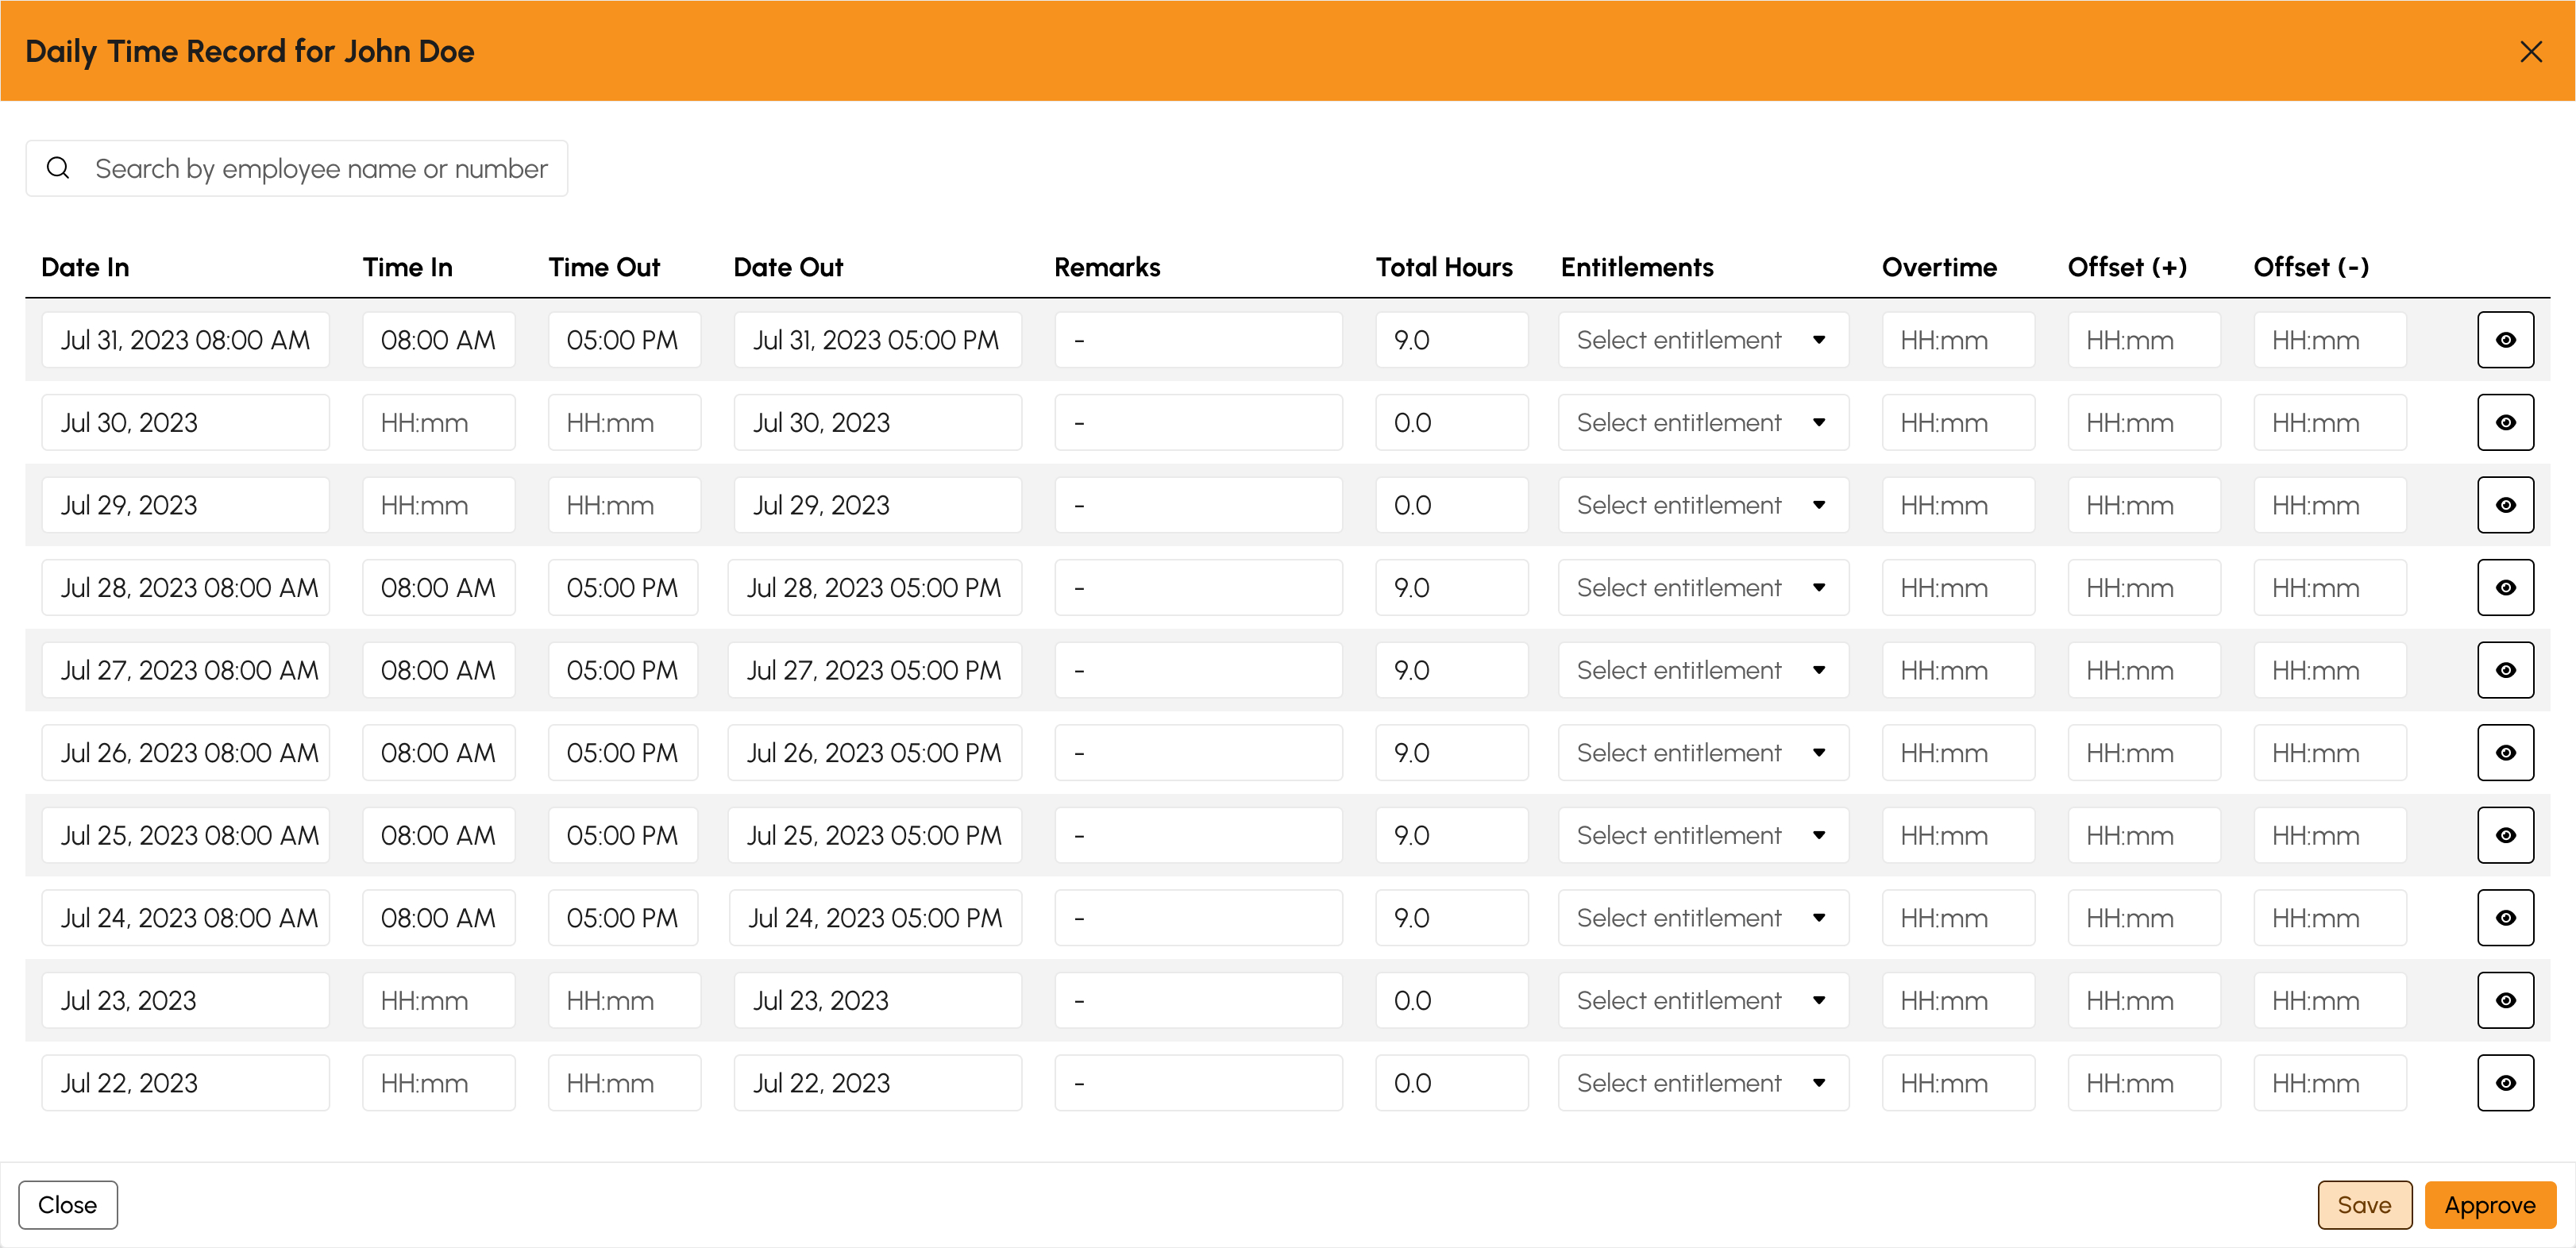
The View DTR modal allows authorized users to review employee DTR records. In addition to approving DTRs, the modal also provides options to edit attendance entries and reset DTR records when corrections are required.
To start, click the button to open the view modal.
Approve DTR
-
Choose date range.
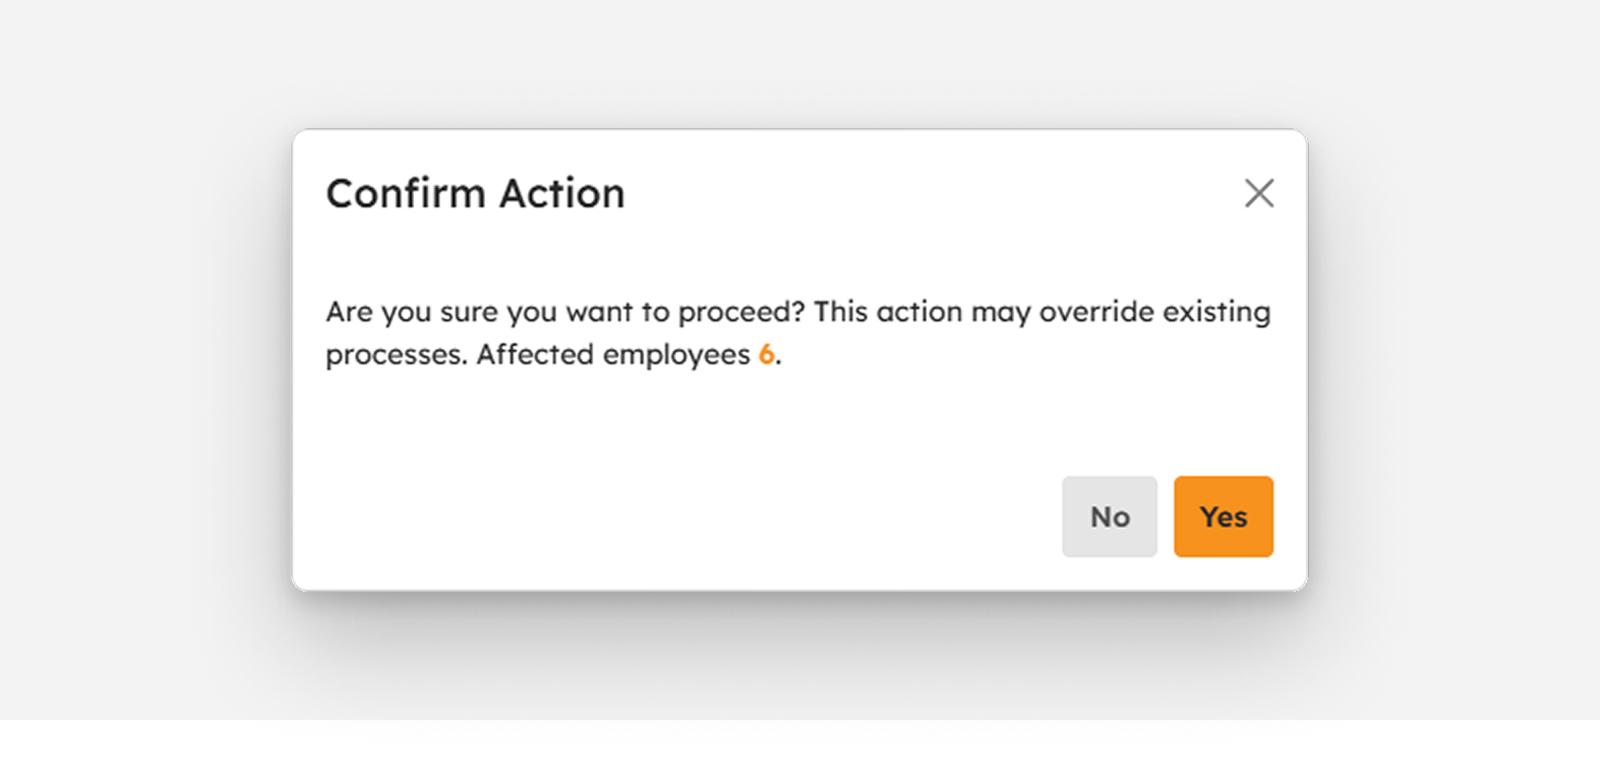
- Click the Approve All button.
-
A success notification will appear once the DTR is approved.
DTR successfully approved
Reset DTR
- Choose date range.
- Click the to reset a specific day or click the Reset to reset all DTR entries within the selected date range.
- Click the Save to save the DTR.
Edit DTR
- Choose date range.
- The user can add or remove entitlements, add remarks, or edit the Time In and Time Out.
- Click the Save to save the DTR.
View by Schedule Tab
The View by Schedule tab allows attendance records to be reviewed based on employees' assigned work schedules. This view provides filtering options for schedule type, department, project, location, and date range.
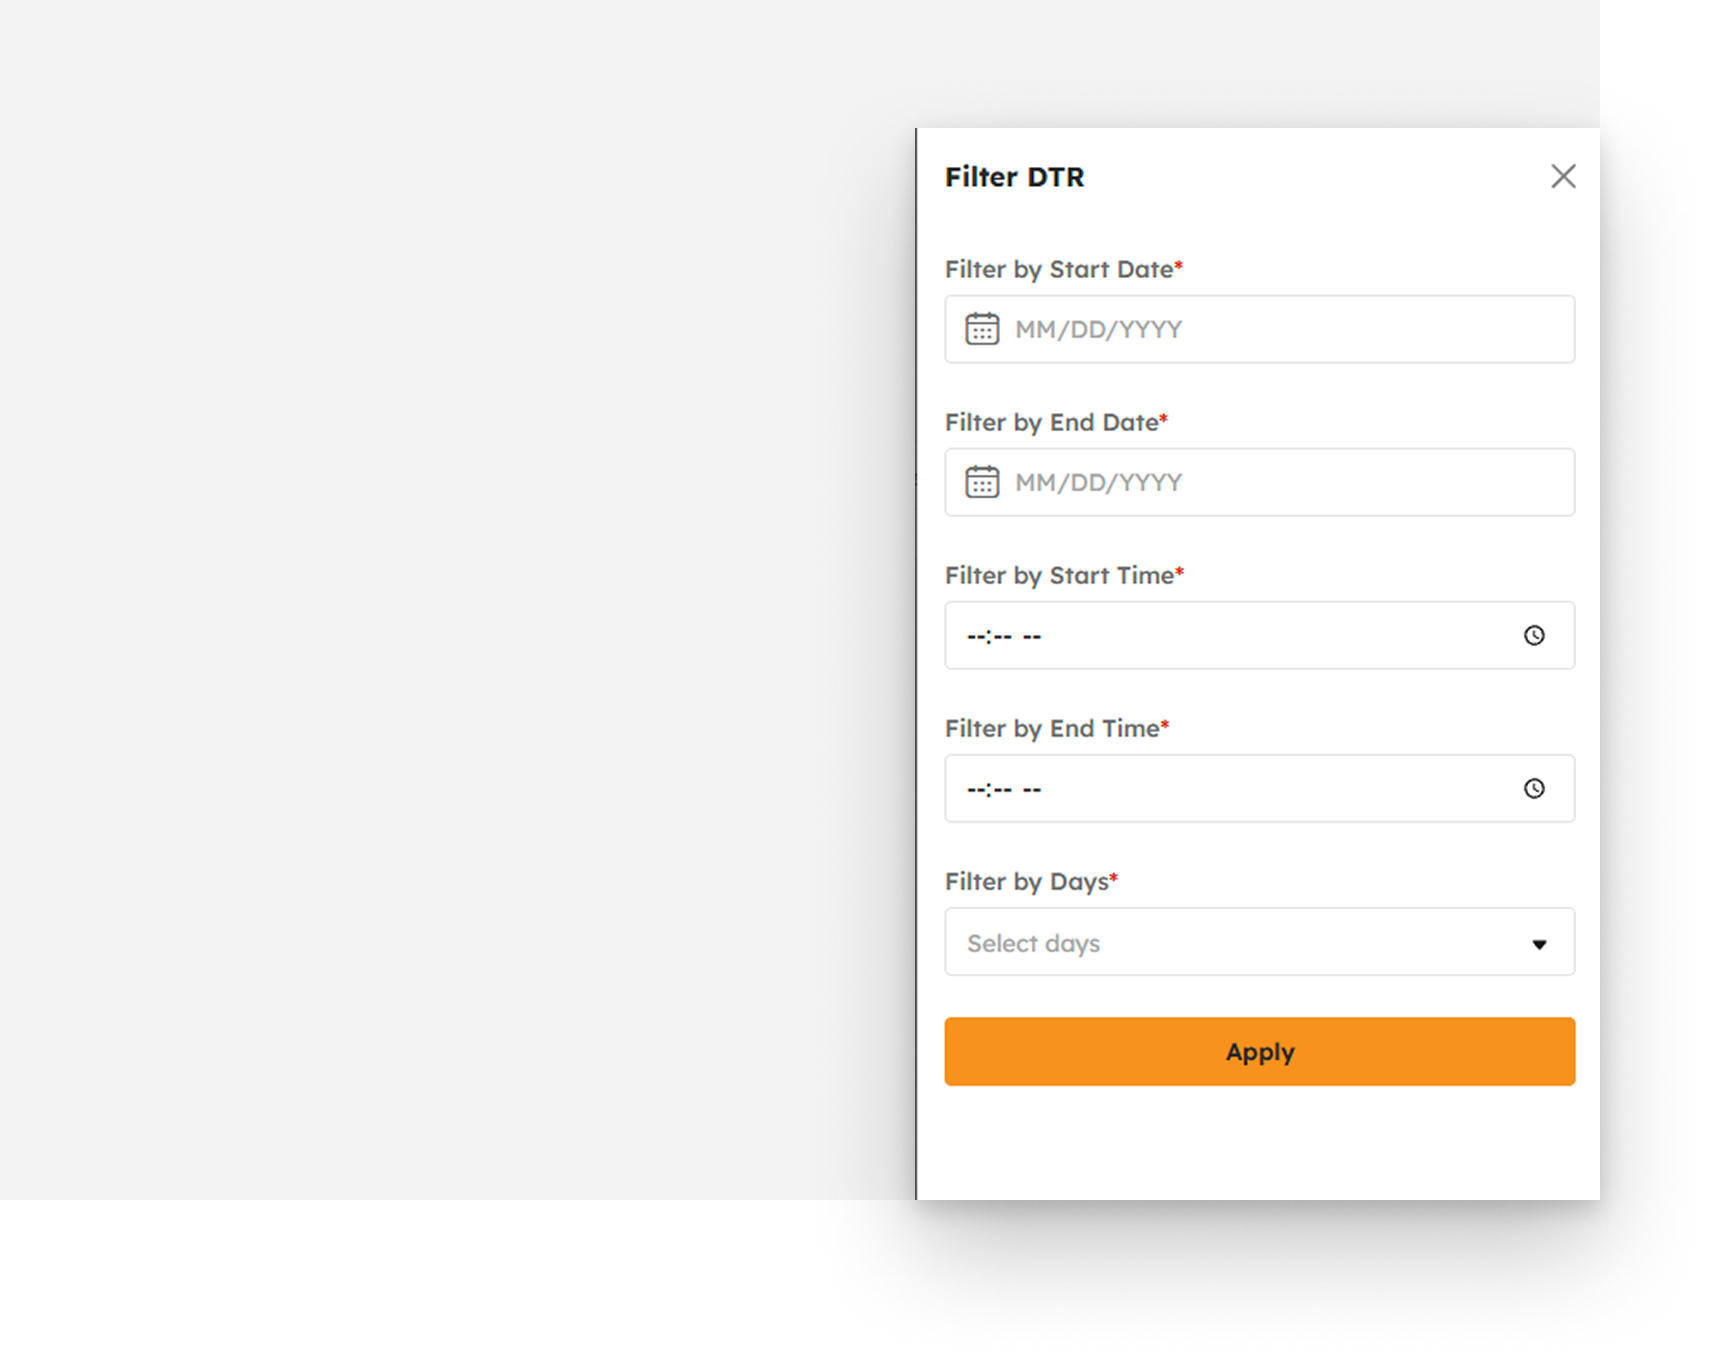
Filter Employees by Schedule
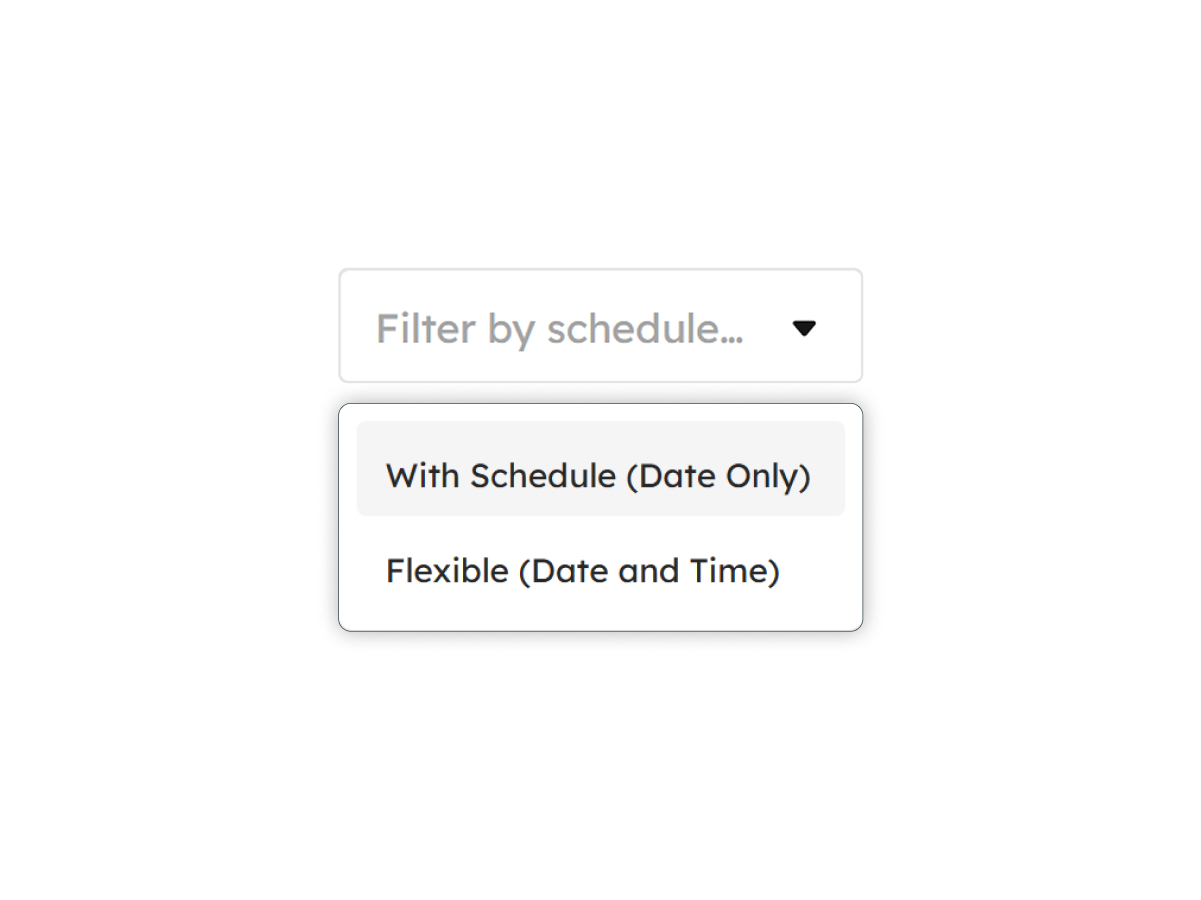
In the "With Schedule" filter, the Start Date and End Date fields are used to define the desired period. This allows the system to display attendance records for employees with fixed schedules within the specified date range, as shown in the image below.
Filter Employees by Department
The Department filter allows employees to be displayed according to their assigned department. Select the appropriate department from the available filter options to display matching employees.
Filter Employee by Project
The Project filter allows employees to be displayed according to their assigned project. Select the appropriate project from the available filter options to display matching employees.
Filter Employee by Location
The Location filter allows employees to be displayed according to their assigned work location. Select the appropriate location from the available filter options to display matching employees.
Filter Employees by Date Range
This feature enables users to filter employees' DTR based on a specified period by setting the Start Date and End Date.
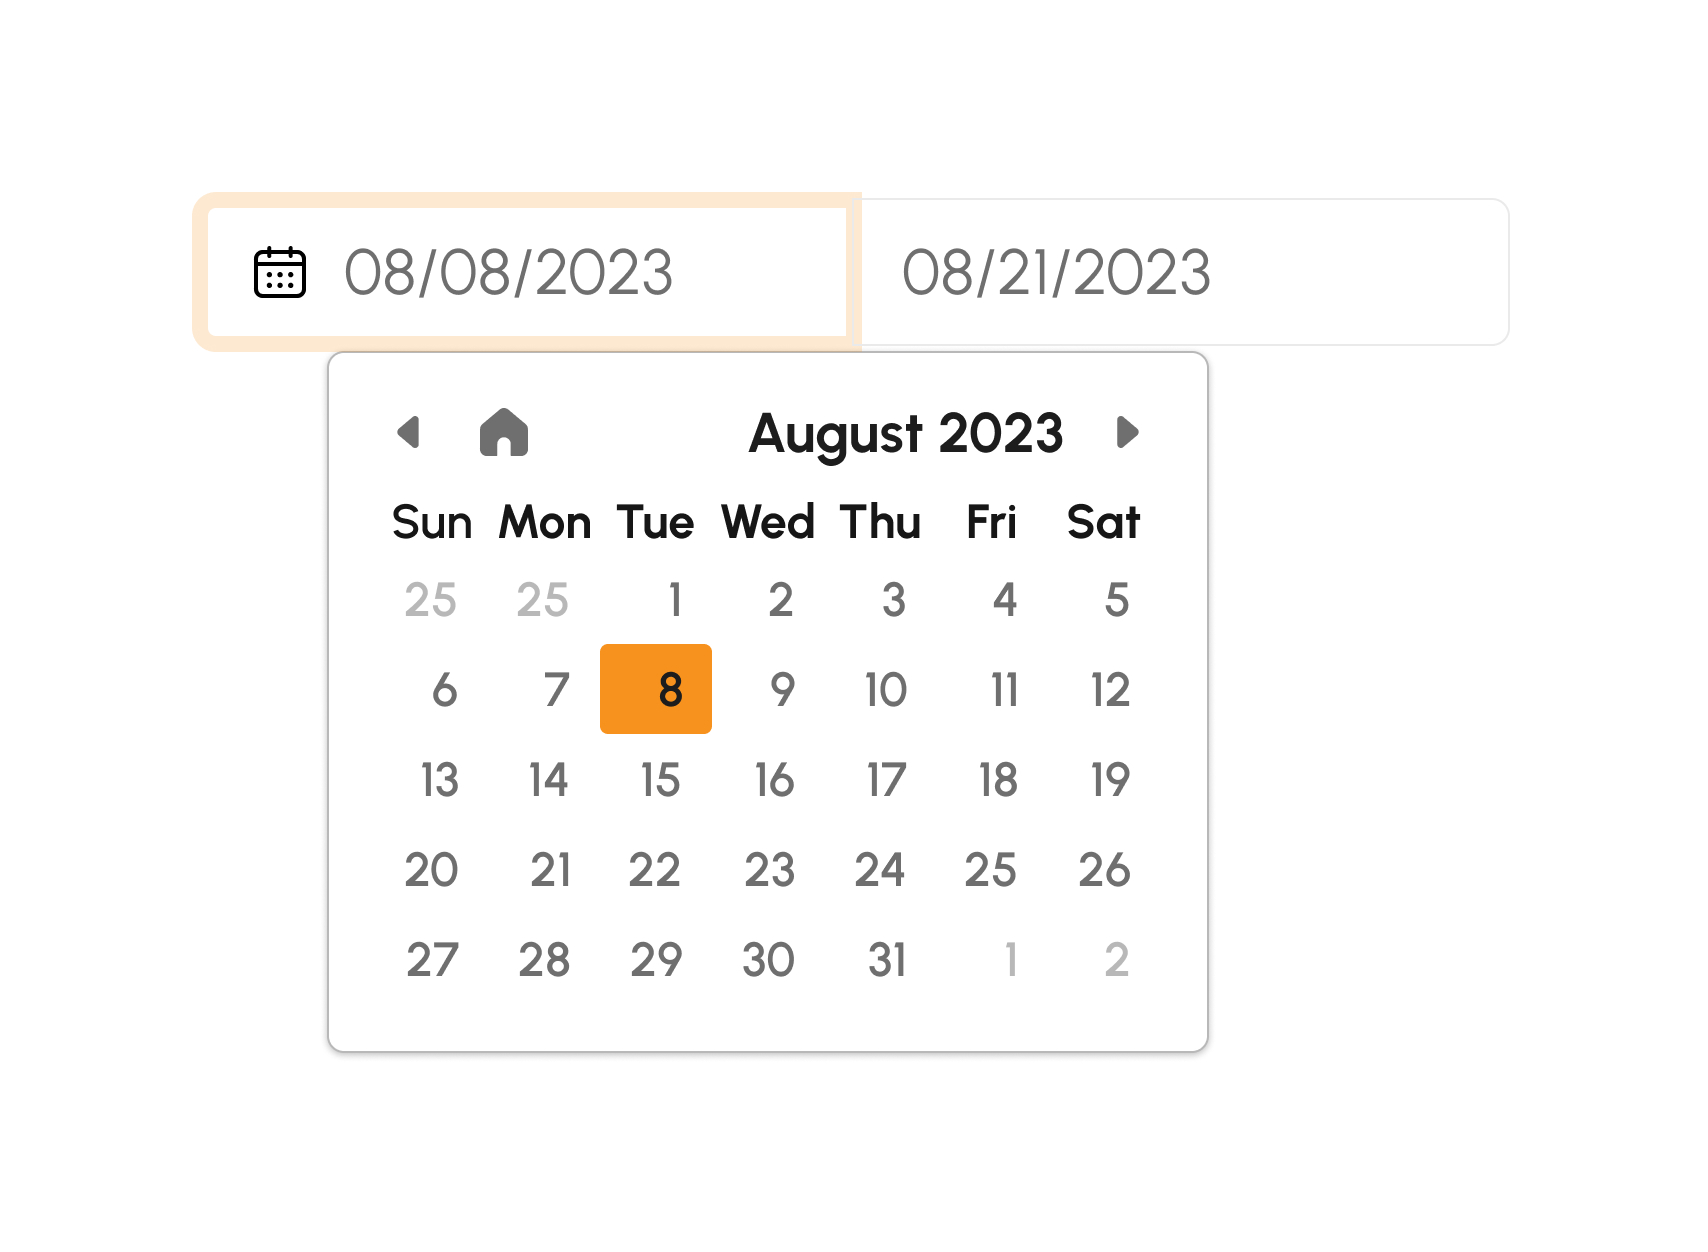
Filter Action Buttons
- Apply Filter. Applies the selected filter criteria and updates the DTR list to show matching records.
- Approve All DTRs. Approves all eligible DTR records currently displayed in the list based on the applied filters.
Approve All Time Logs
Use this option to approve all time logs for a selected employee within the displayed date range.
- Click the Approve All Time Logs button next to the employee record.
-
The Approve All Time Logs dialog box will appear, displaying a summary of the employee's time logs for the selected dates.
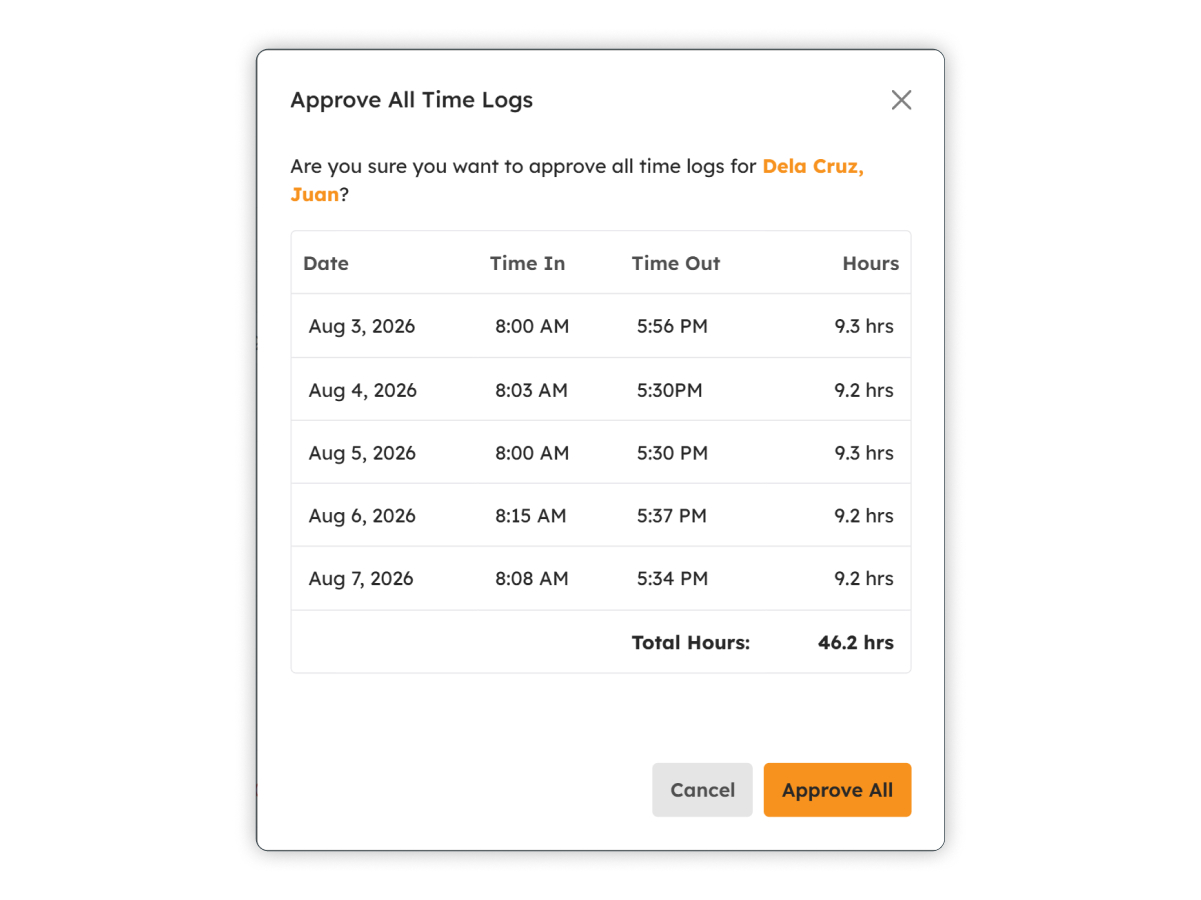
- Review the time log details.
- Click Approve All to approve all displayed time logs.
- Click Cancel to close the dialog without making any changes.
Approve a Specific Time Log
Use this option to review, edit, and approve an individual attendance record.
-
Click the Approve Attendance button beside the attendance record you want to review.
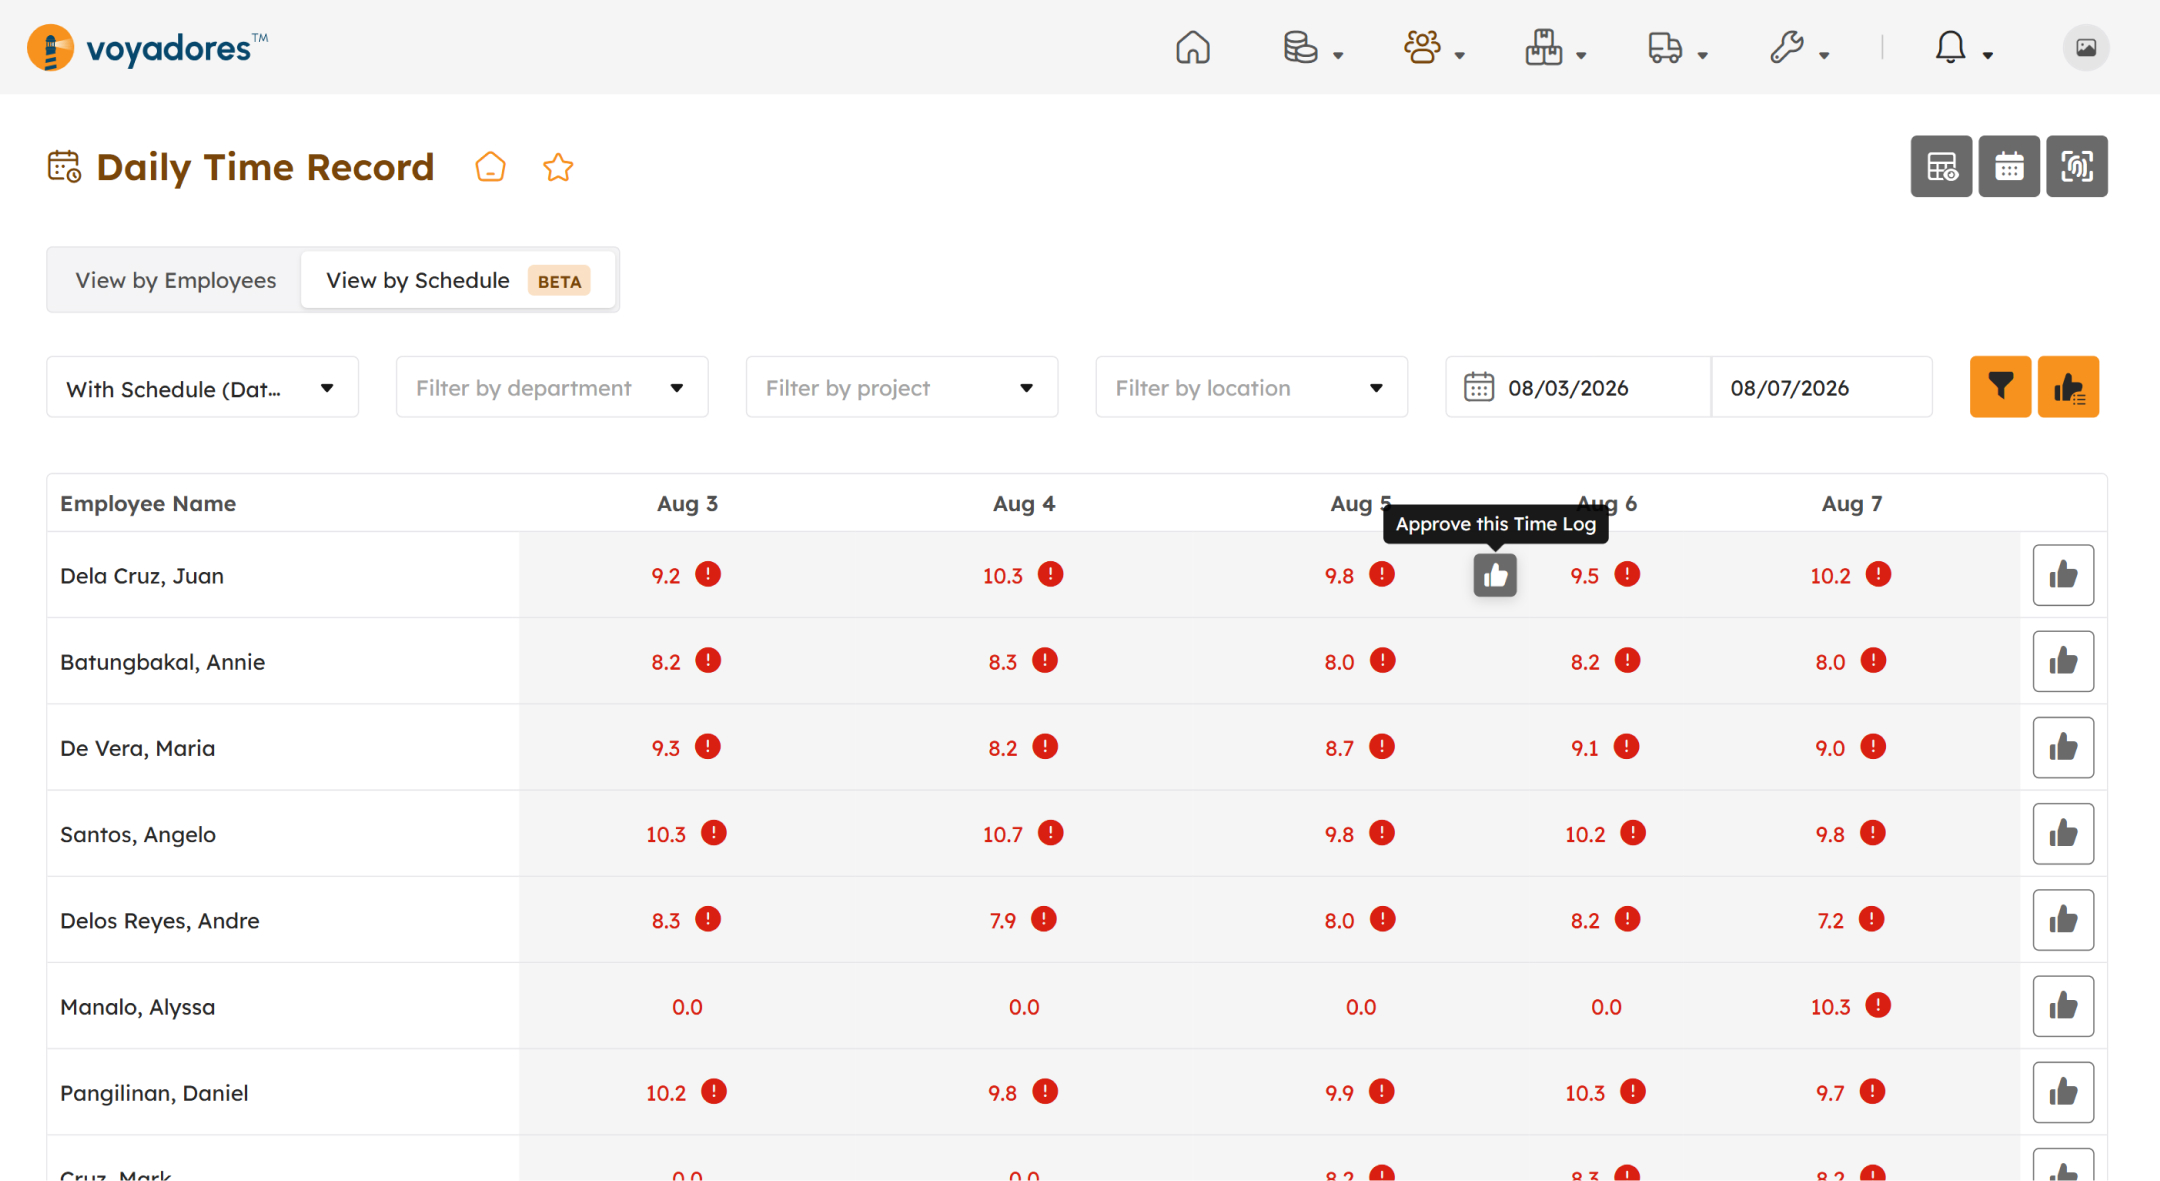
-
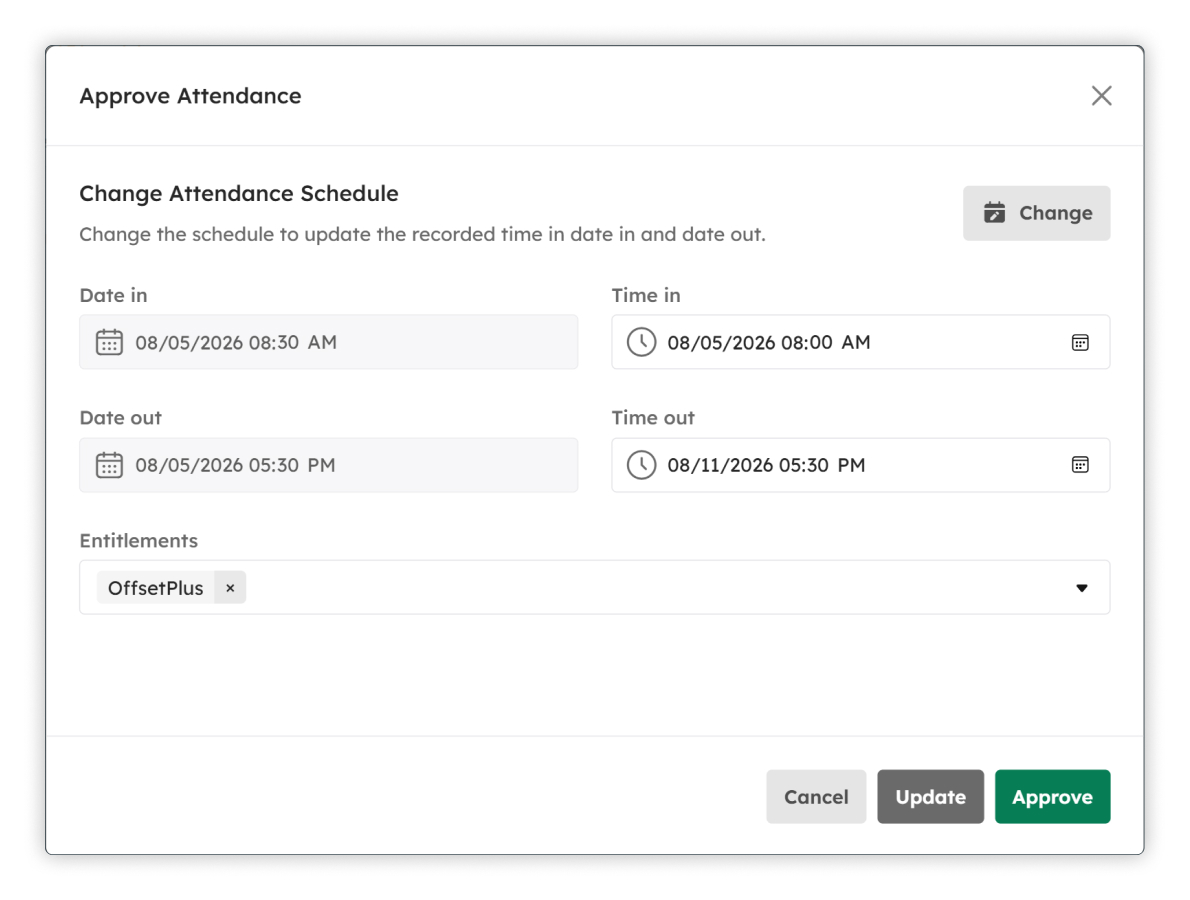
The Approve Attendance dialog box will appear.
-
The following fields are editable. Update any of the following information if necessary:
- Time in
- Time out
- Entitlements
- Click Update to save your changes.
- Click Approve to approve the attendance record.
- Click Cancel to close the dialog without approving the record.
Change an Attendance Schedule
Use this option to assign a different schedule to an attendance record.
-
Open the Approve Attendance dialog box.
-
Click Change to open the Change Attendance Schedule dialog box.
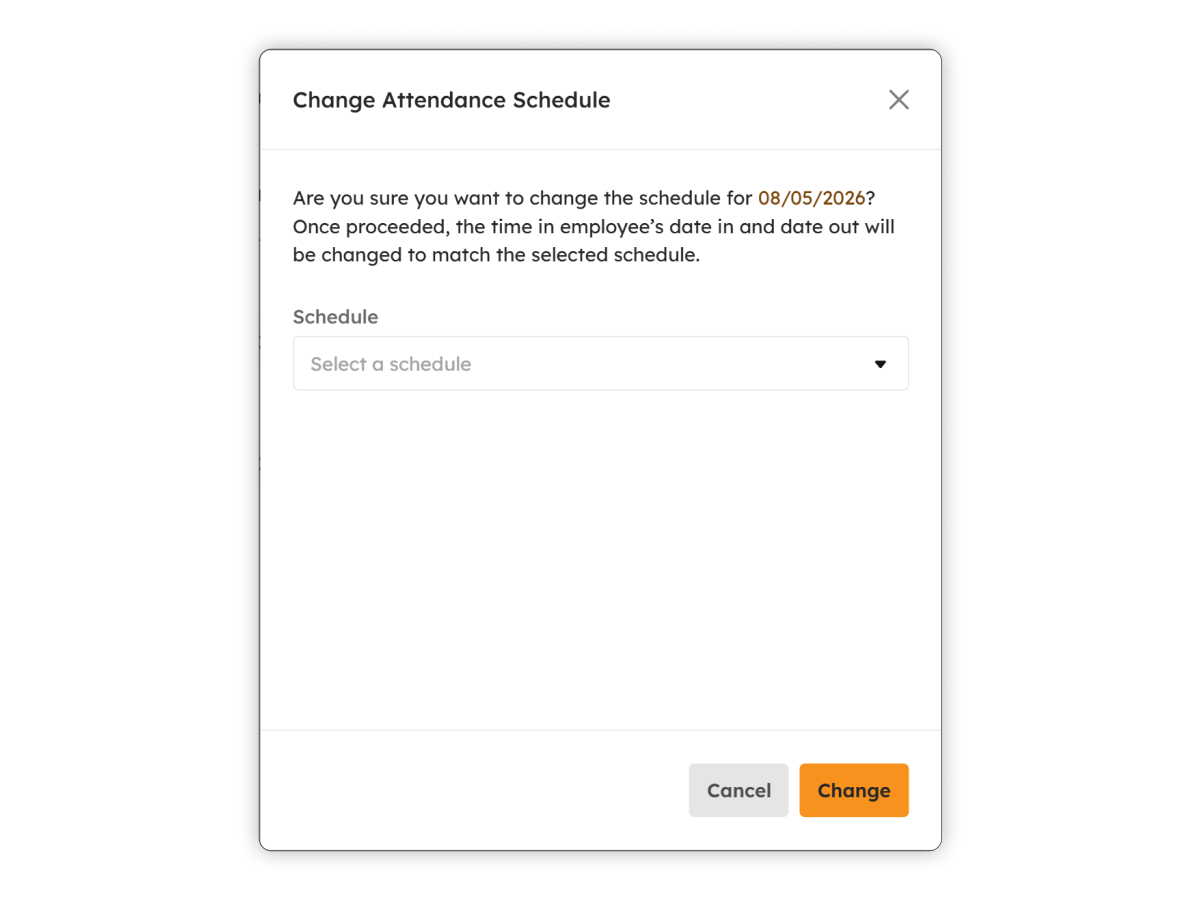
- Select the desired schedule from the Schedule drop-down list.
- Click Change to apply the selected schedule.
- Click Cancel to close the dialog without changing the schedule.
Import Attendance Summary
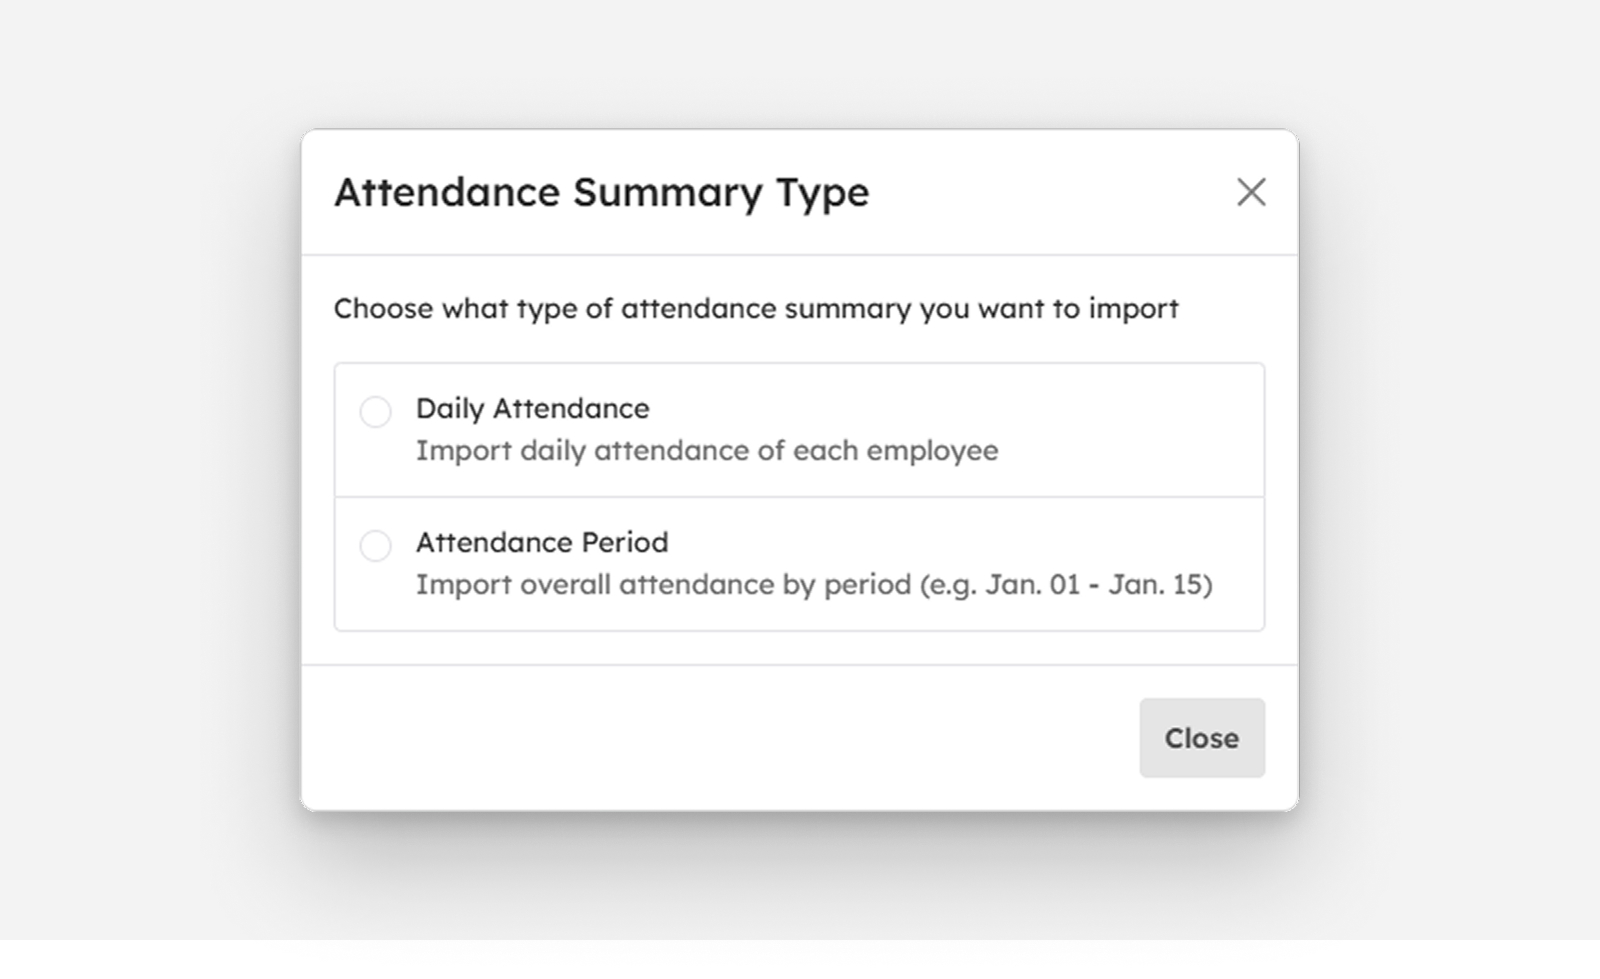
There are two types of Attendance Summary:
- Daily Attendance. Used to import the daily attendance records of each employee.
- Attendance Period. Used to import overall attendance for a specific period (e.g., January 01 to January 15).
- Click the import attendance button.
-
A table will appear. Select Daily Attendance.
-
The Import Daily Attendance Summary table will be displayed.
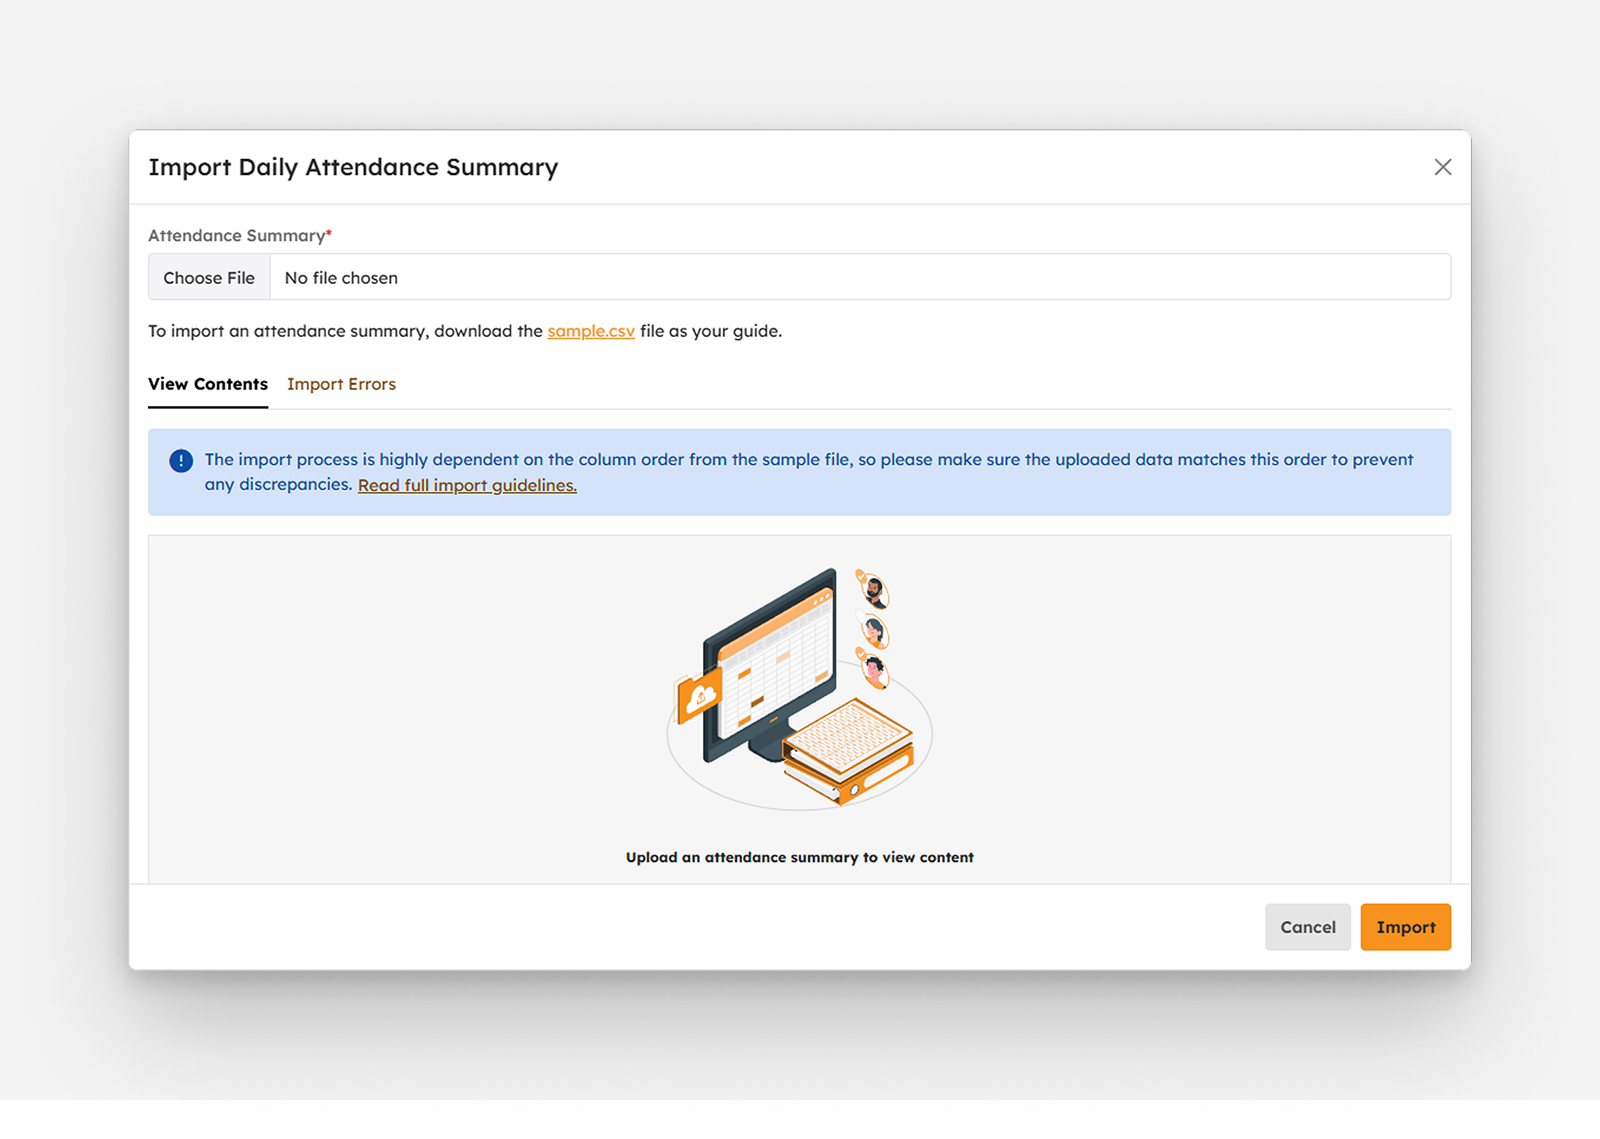
- Click Choose File to upload the attendance summary.
- Click the Import button to proceed.
-
A success notification will appear once the import is complete.
DTR successfully imported
Import Attendance Period
- Click the import attendance button.
-
A table will appear. Select Attendance Period.
-
The Import Attendance Period Summary table will be displayed.
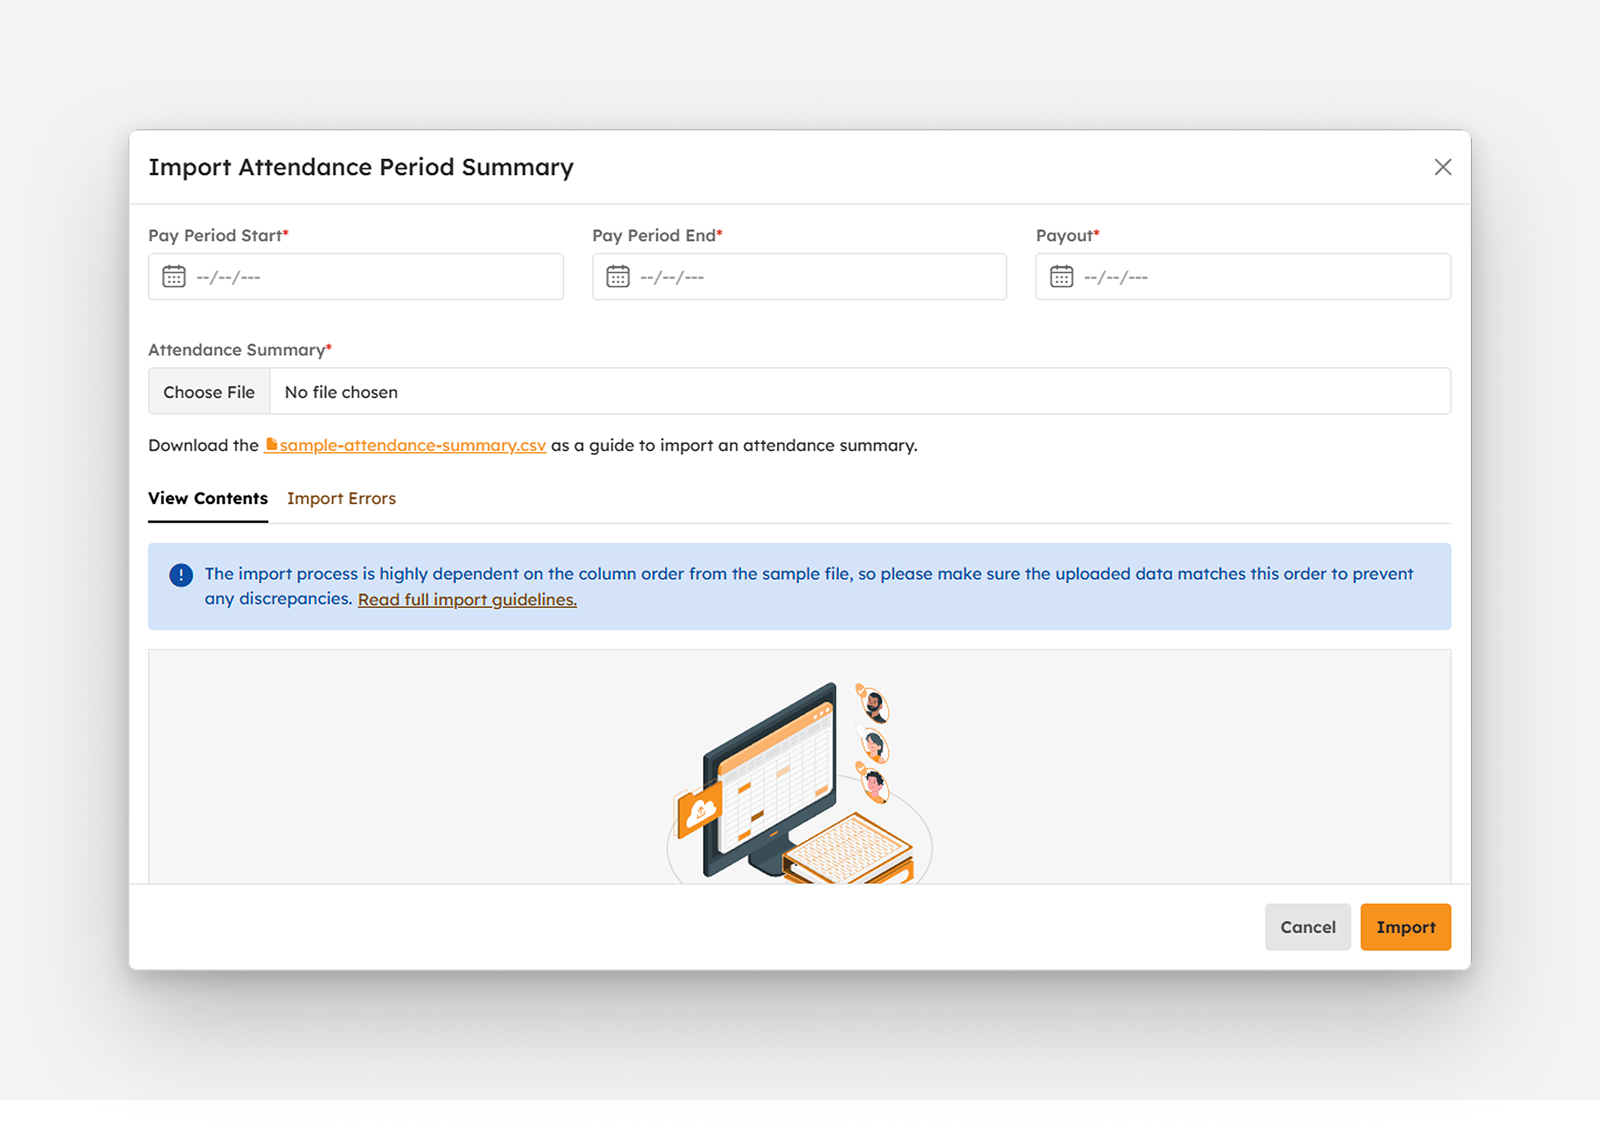
- The required details must be filled in, including the Pay Period Start, Pay Period End, and Payout. Afterward, the attendance summary file can be uploaded by selecting Choose File.
- Click the Import button to proceed.
-
A success notification will appear once the import is complete.
DTR successfully imported
Import Biometrics Data
- Click the import biometrics data button.
-
A table will appear.
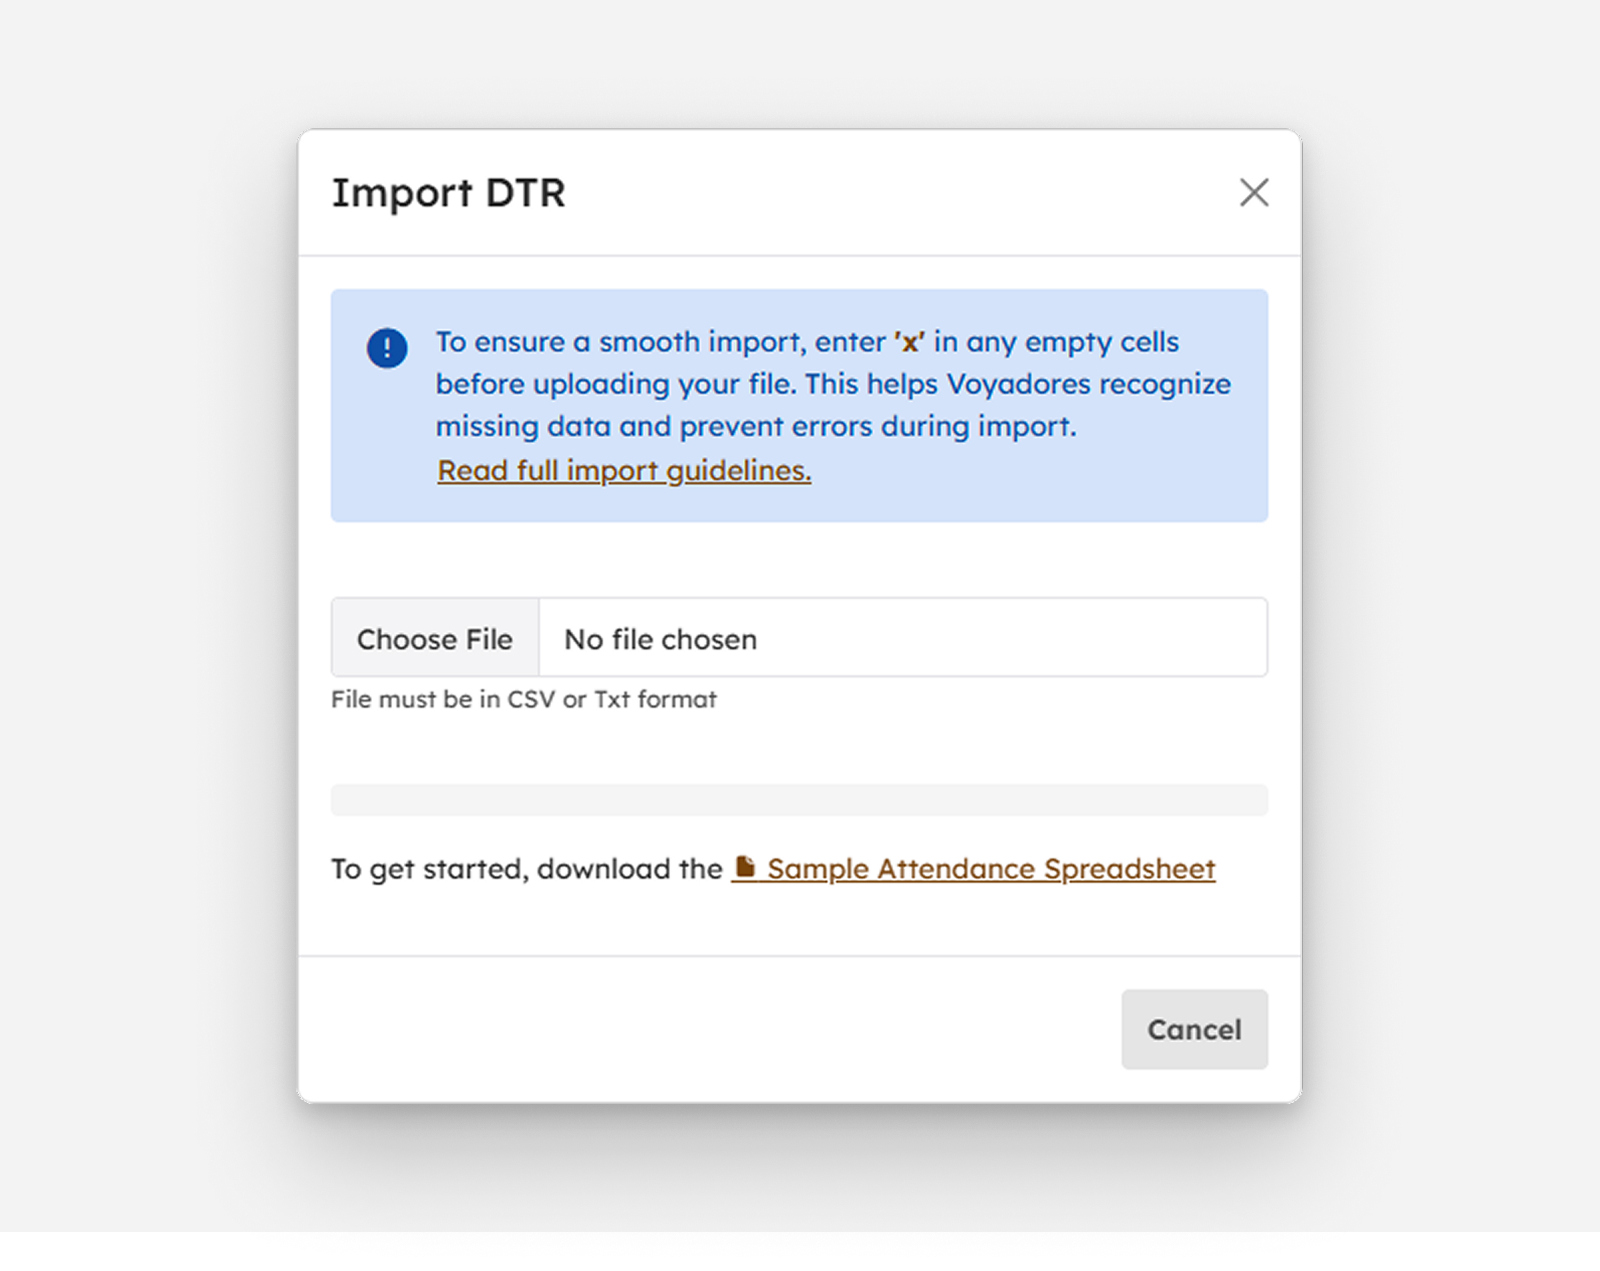
- Click Choose File to Import DTR.
- The upload biometric data table will be displayed.
- Click the Import button
-
A success notification will appear once the import is complete.
DTR successfully imported
Note
The approval type is not directly indicated or selectable in the current system interface. If a specific approval type is required, configuration or setup may be requested based on the organization's approval process.