Recruitment
Who can use this feature
Anyone with Administrator and HR Manager role can access all the Recruitment pages
Introduction to Recruitment Submodule
Start managing job postings, job applications, and employee onboarding using this feature. This tool allows users to post available jobs, so applicants can view the job details and apply, while HR personnel can manage the onboarding process of newly hired employees.
This functionality also enables the Human Resources (HR) representative to track and manage applications from job advertisements.
Definition of Terms
This section outlines the available pages under the Recruitment submodule as follows:
- Onboarding. This feature allows HR personnel to manage and monitor the onboarding process of newly hired employees, including the completion of required information, documents, employee schedule, statutory forms, and benefits and deductions.
- Job Postings. This feature allows users to post available jobs, so applicants can read job details and submit applications.
- Job Applications. This feature allows the Human Resource (HR) person to monitor and manage the applicants from job postings.
Roles and Permissions
The following table illustrates the roles and corresponding permissions for accessing pages and features within the Recruitment Submodule:
| Functions | Administrator | HR Manager | Payroll Manager | Employee |
|---|---|---|---|---|
| Onboarding | ||||
| Setup New | ||||
| Onboarding Steps | ||||
| Perform | ||||
| Cancel | ||||
| View | ||||
| Job Postings | ||||
| Create | ||||
| Edit | ||||
| Approve | ||||
| View | ||||
| Export | ||||
| Deactivate | ||||
| Job Applications | ||||
| View | ||||
| Accept | ||||
| Decline | ||||
Roles and Permissions
Note that users have the flexibility to enhance access control and refine user privileges by effortlessly adding and configuring additional roles and permissions. This aligns system functionality with the organizational structure and security requirements, ensuring that users are assigned appropriate levels of access and responsibilities.
To do so, contact [email protected]
Onboarding
Introduction to Onboarding
This feature allows HR personnel to manage the onboarding process of newly hired employees by completing required information, documents, employee schedules, statutory forms, and benefits and deductions.
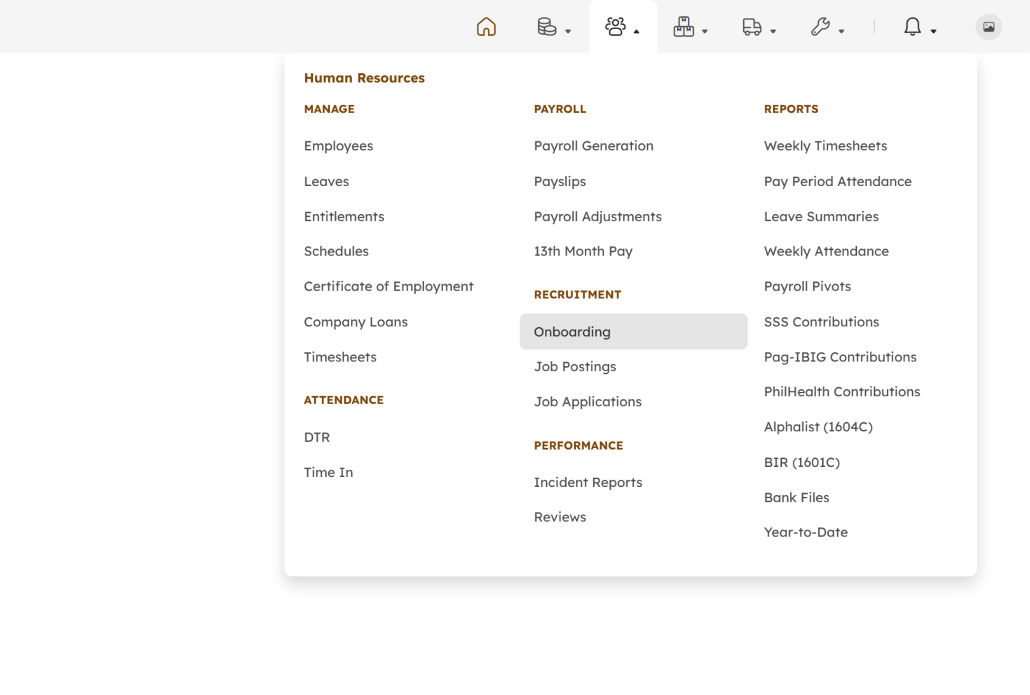
To access Onboarding, click the Human Resources Menu near the uppermost right side of the screen, after which a submenu will drop down, and then look for Onboarding under Recruitment.
Onboarding Page Features
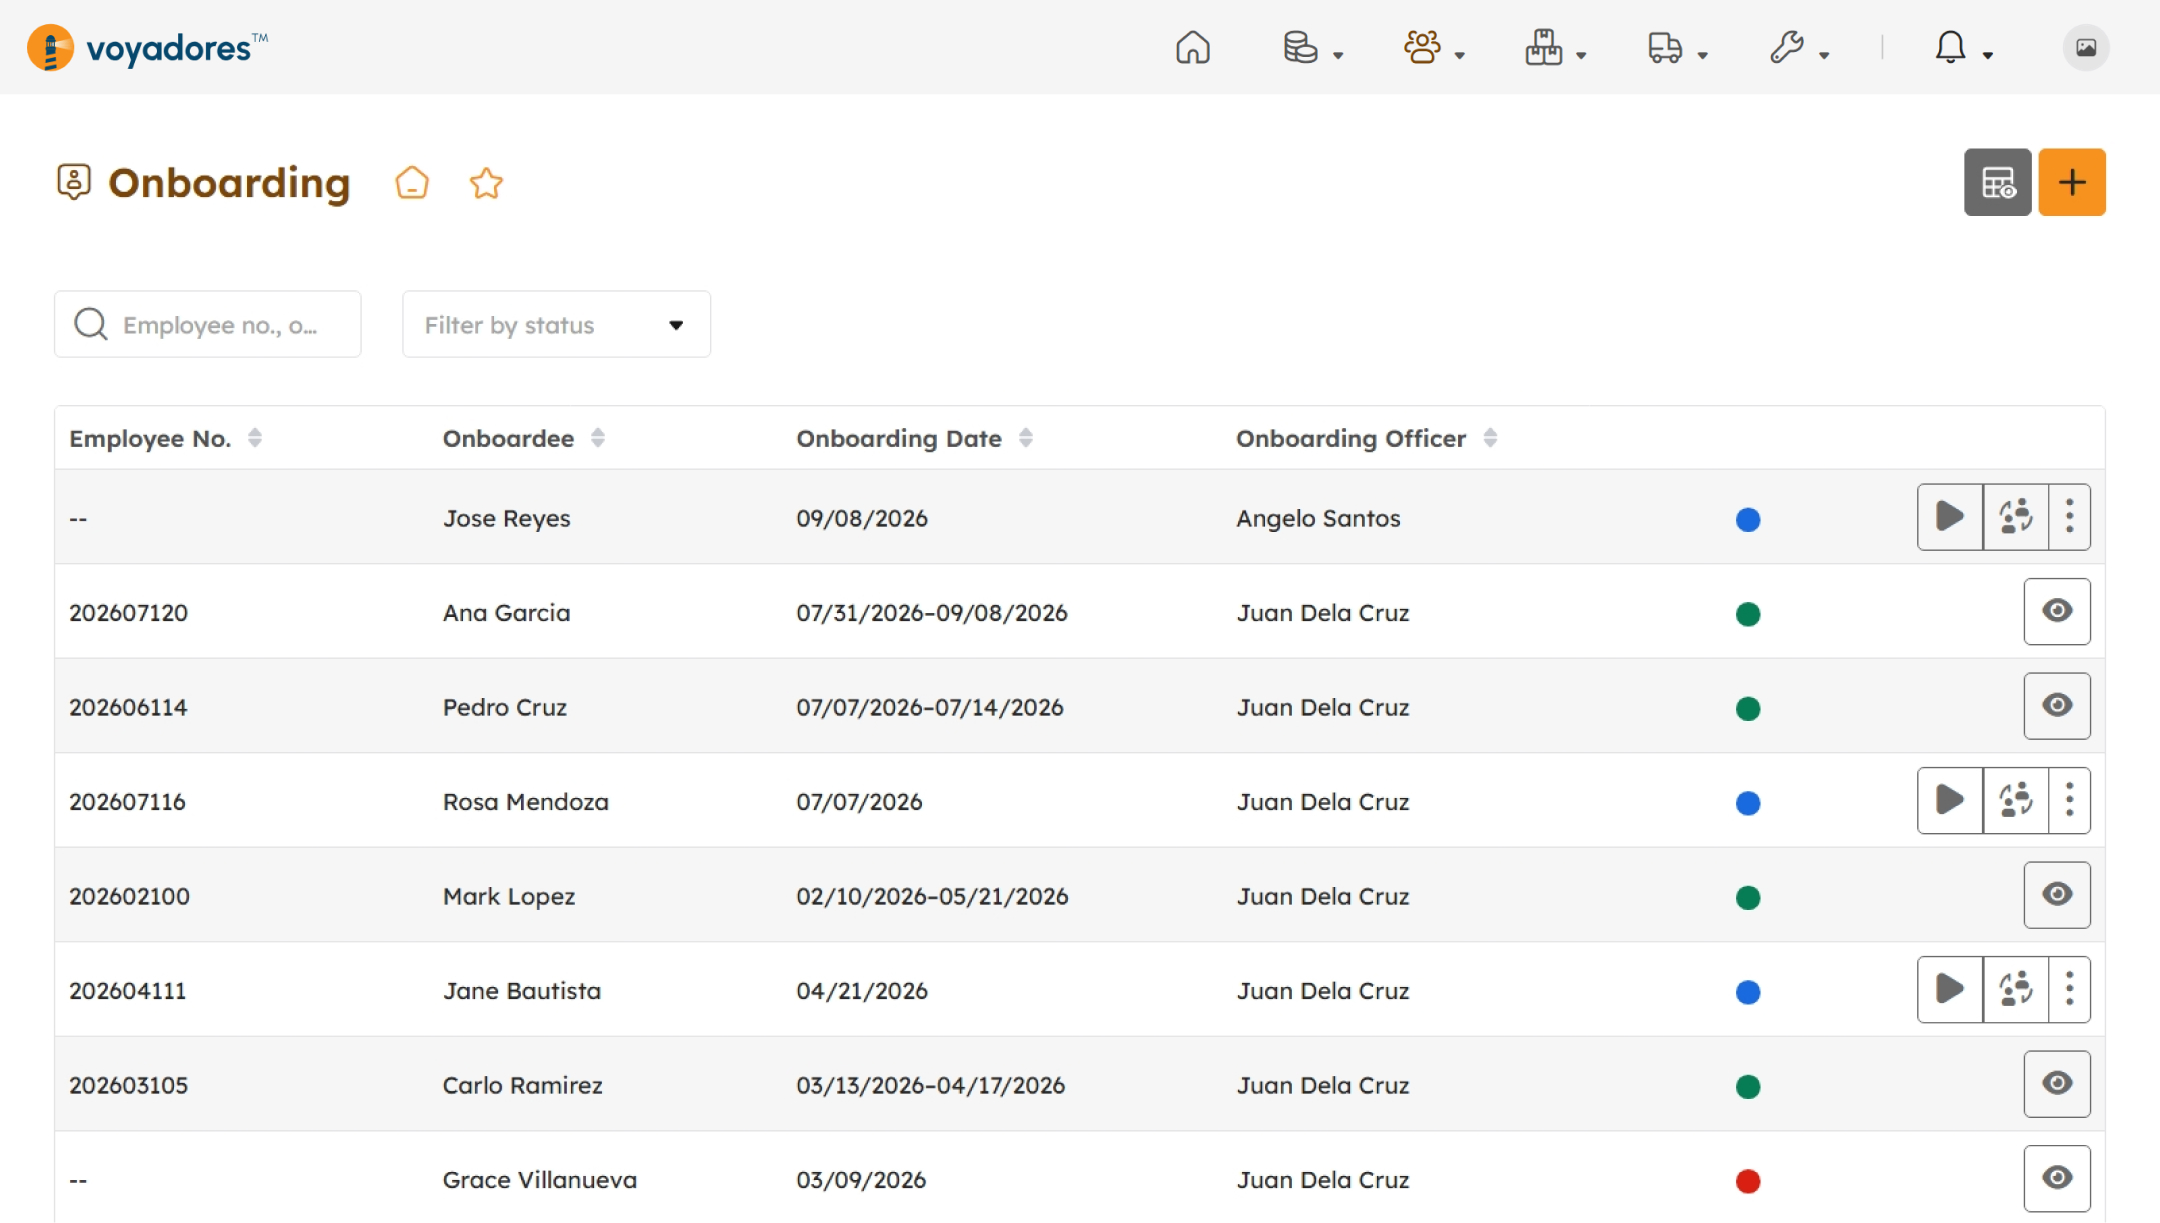
The snip below provides a high-level view of the Onboarding page along with its built-in features.
Onboarding Page Header Actions
- Set as Default Page
- Add to Quick Links
- Onboard Employee
- Preview Onboard Employee
Onboarding Summary Table
- Employee No. Unique employee number assigned to the onboardee.
- Onboardee Name of the employee undergoing the onboarding process.
- Onboarding Date Scheduled or actual date of the onboarding process.
- Onboarding Officer HR personnel assigned to manage the onboarding process.
- Status Displays the status of the onboarding process
-
Actions
- Perform Onboarding
- Reassign Onboarding Officer
- Cancel Onboarding
- View Onboarding
Search Onboarding
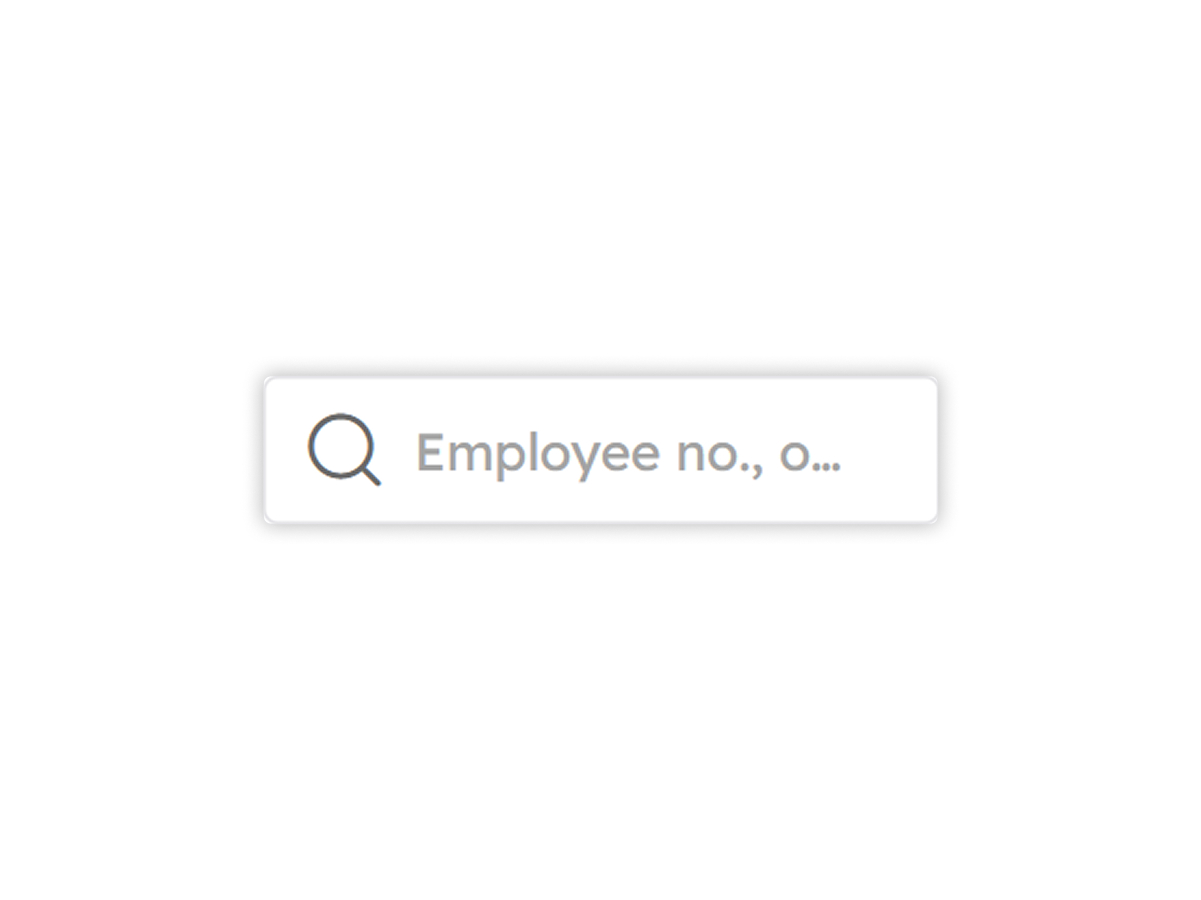
The user may filter the information by entering employee no., onboardee, or onboarding officer in the search bar.
Filter Onboarding
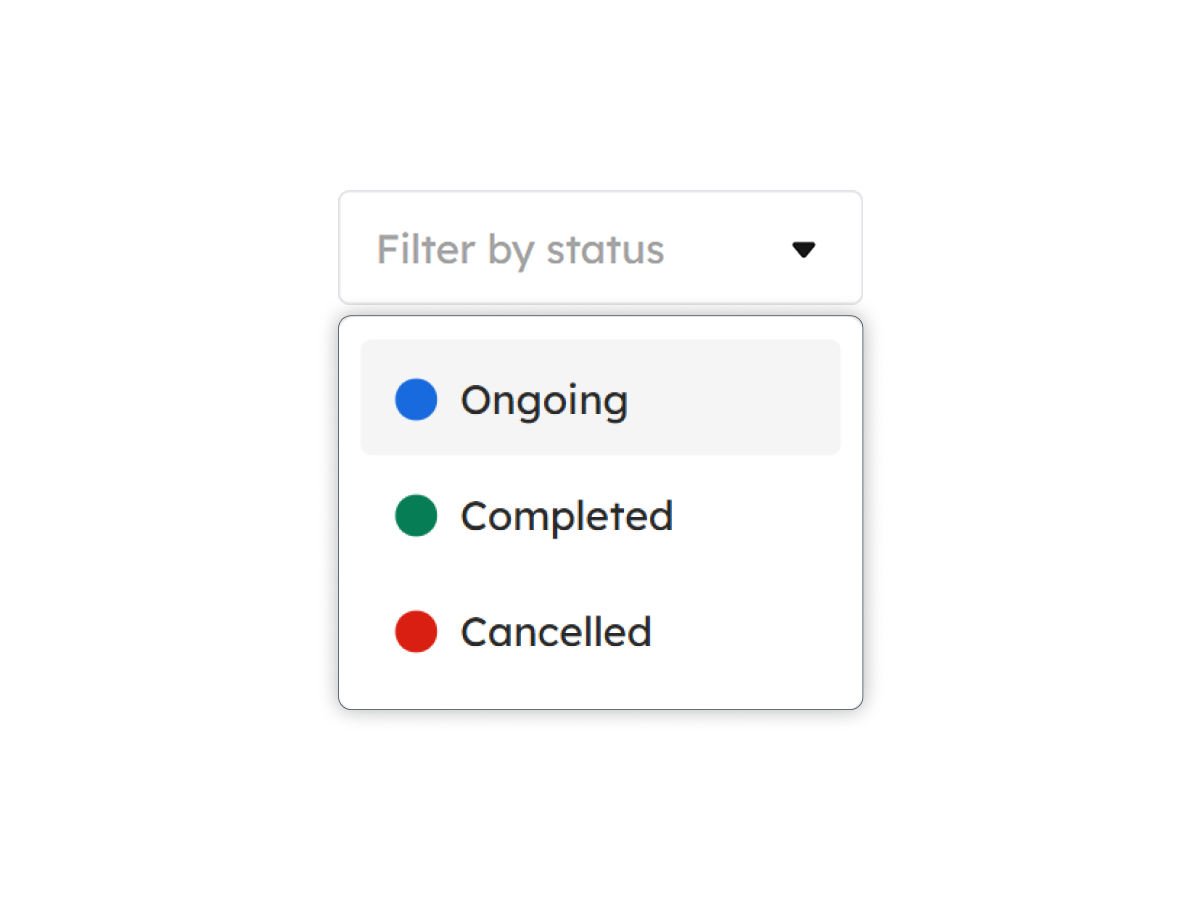
The user has three options to filter the onboarding information as shown in the snip below.
Onboarding Employee
This feature allows users to create and manage onboarding records.
To create an onboarding setup, the user must follow the following steps:
- Click the button located at the upper-right corner of the table.
- A modal will appear displaying the fields that need to be completed.
-
Enter the required employee and onboarding details.
-
Existing Employee
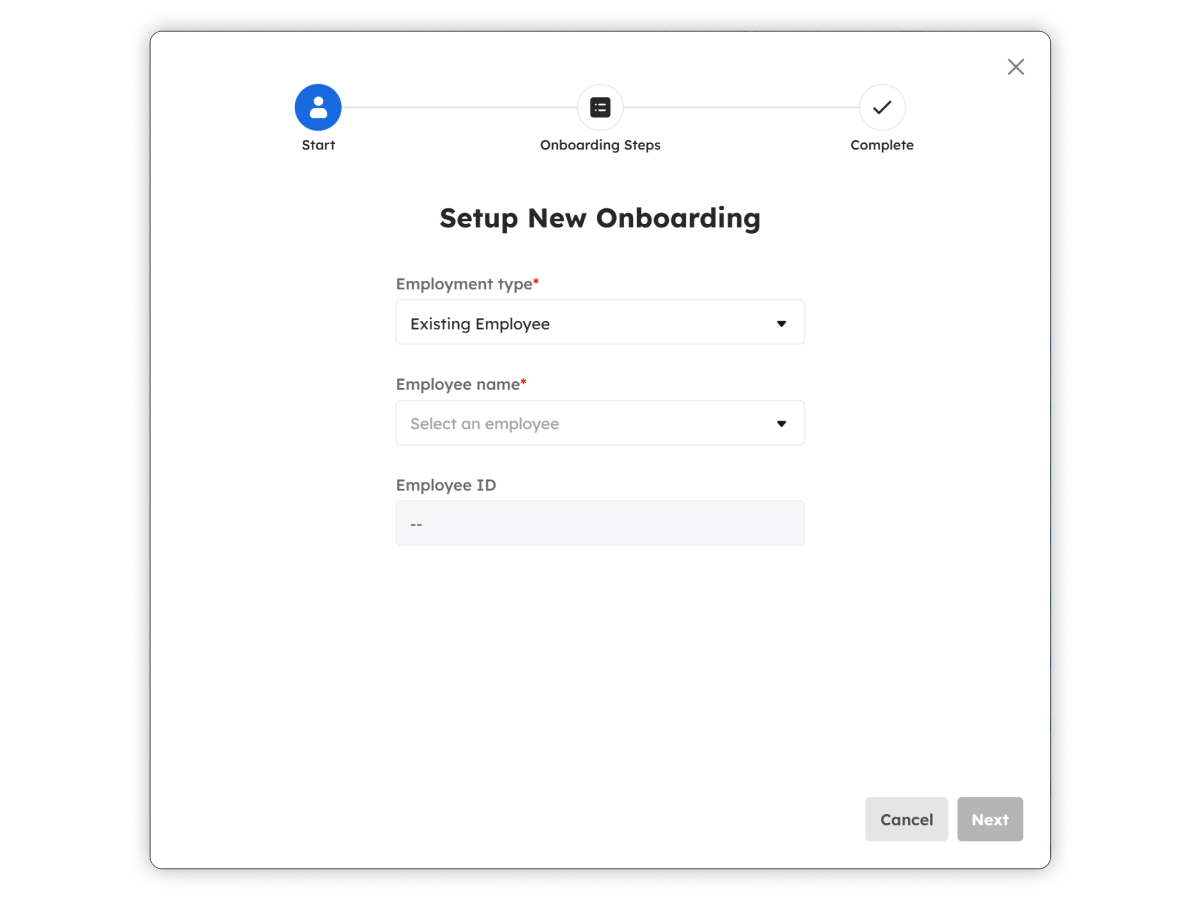
- Select Existing Employee on the employment type dropdown list.
- Select an employment name on the dropdown list.
- Employee ID will be automatically filled.
-
New Employee
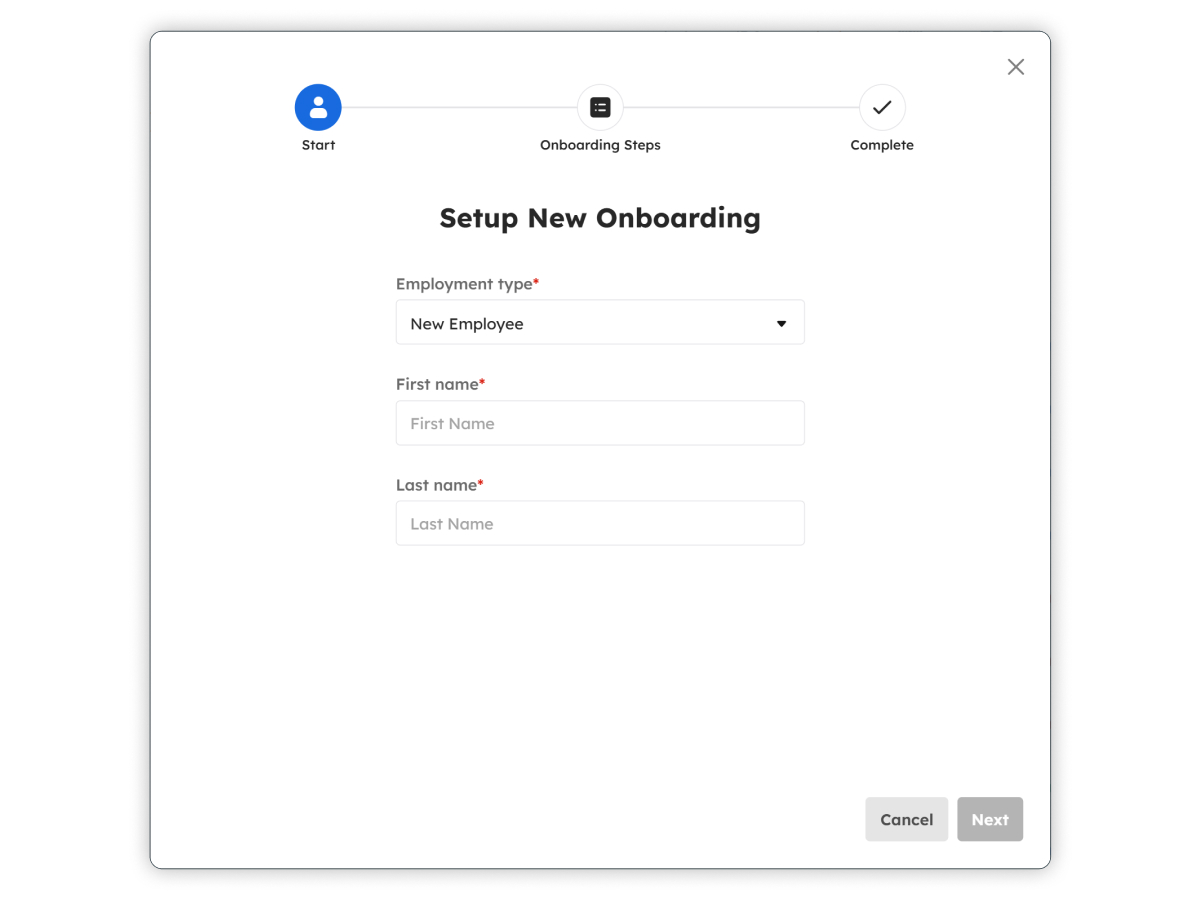
- Select New Employee on the employment type dropdown list.
- Enter first name of employee.
- Enter last name of employee.
-
Applicant
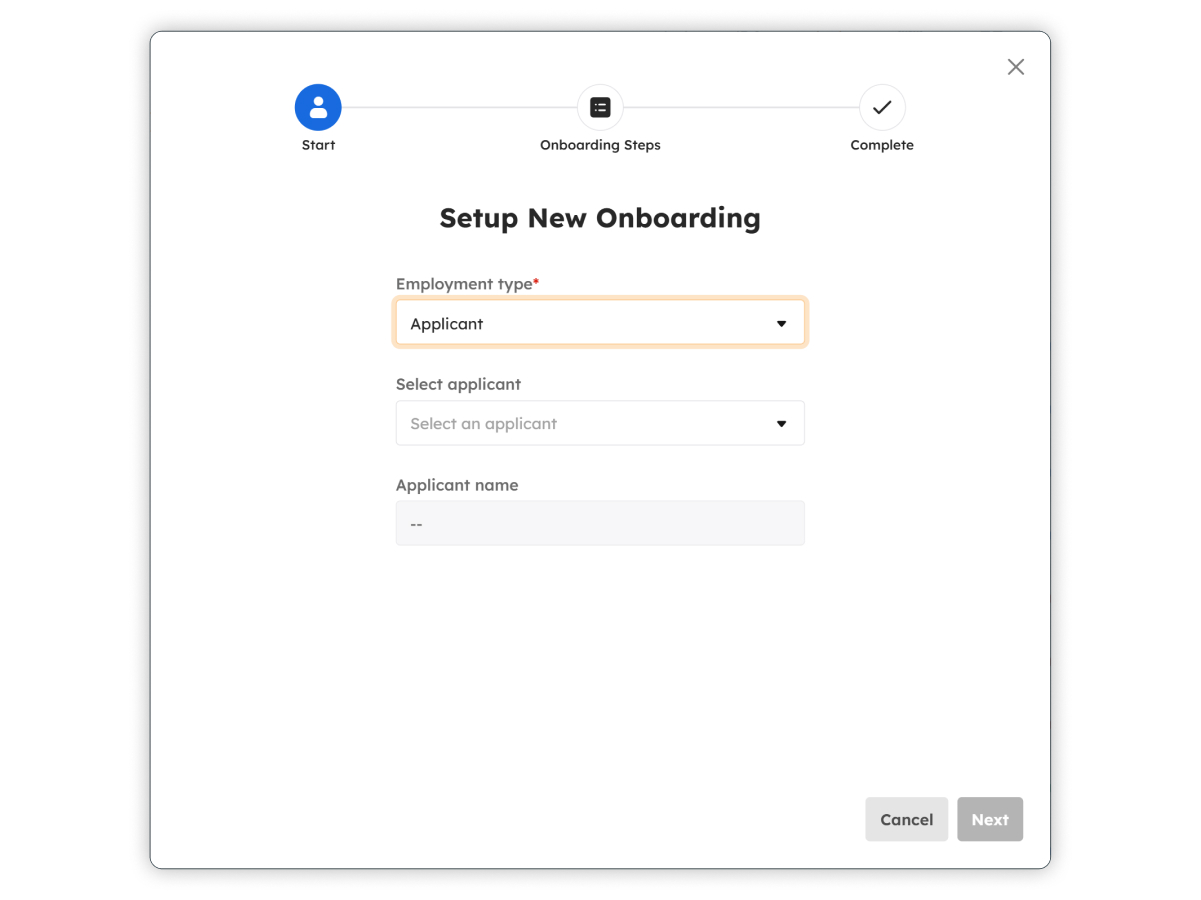
- Select Applicant on the employment type dropdown list.
- Select an applicant from the dropdown list.
- Applicant name field will be automatically filled.
-
Existing Employee
- Click to proceed to the next step.
-
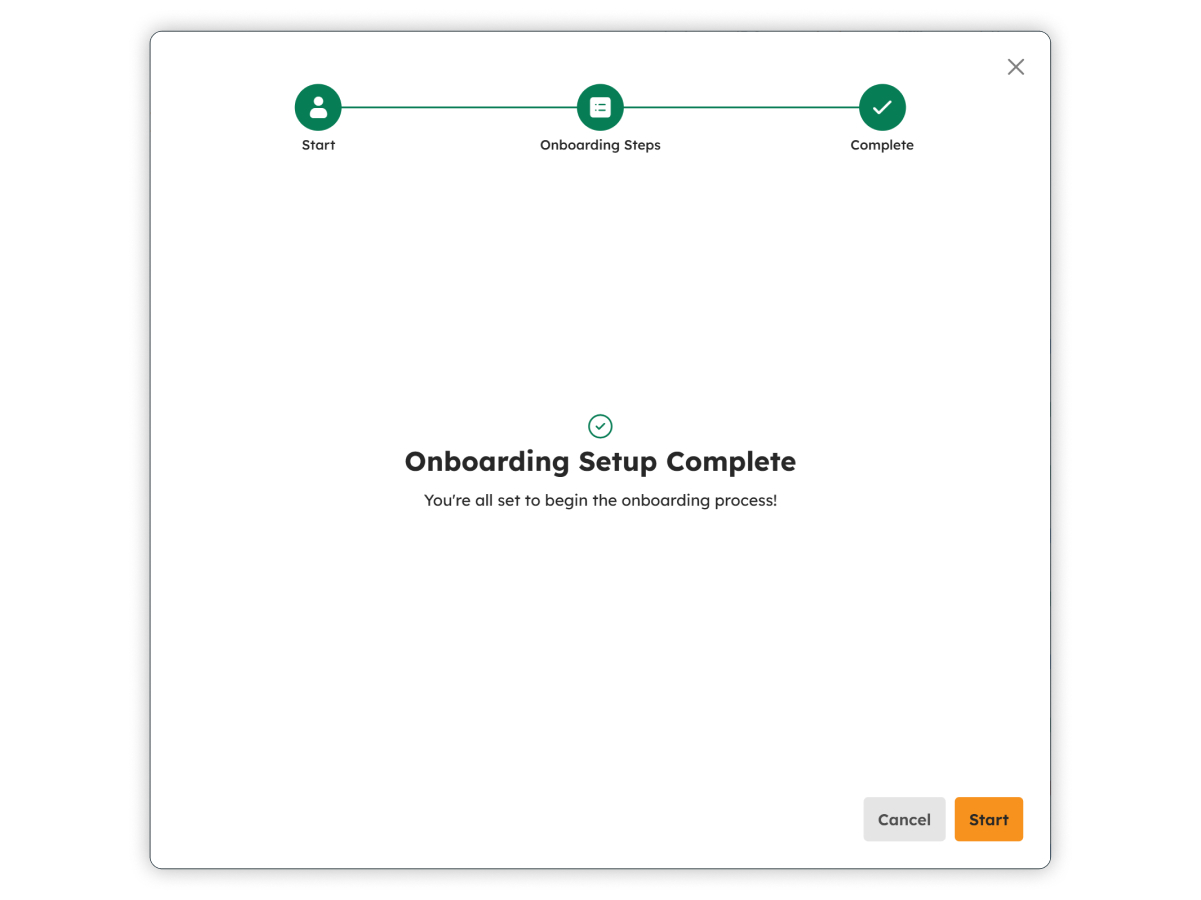
The next modal will display the list of mandatory onboarding steps.
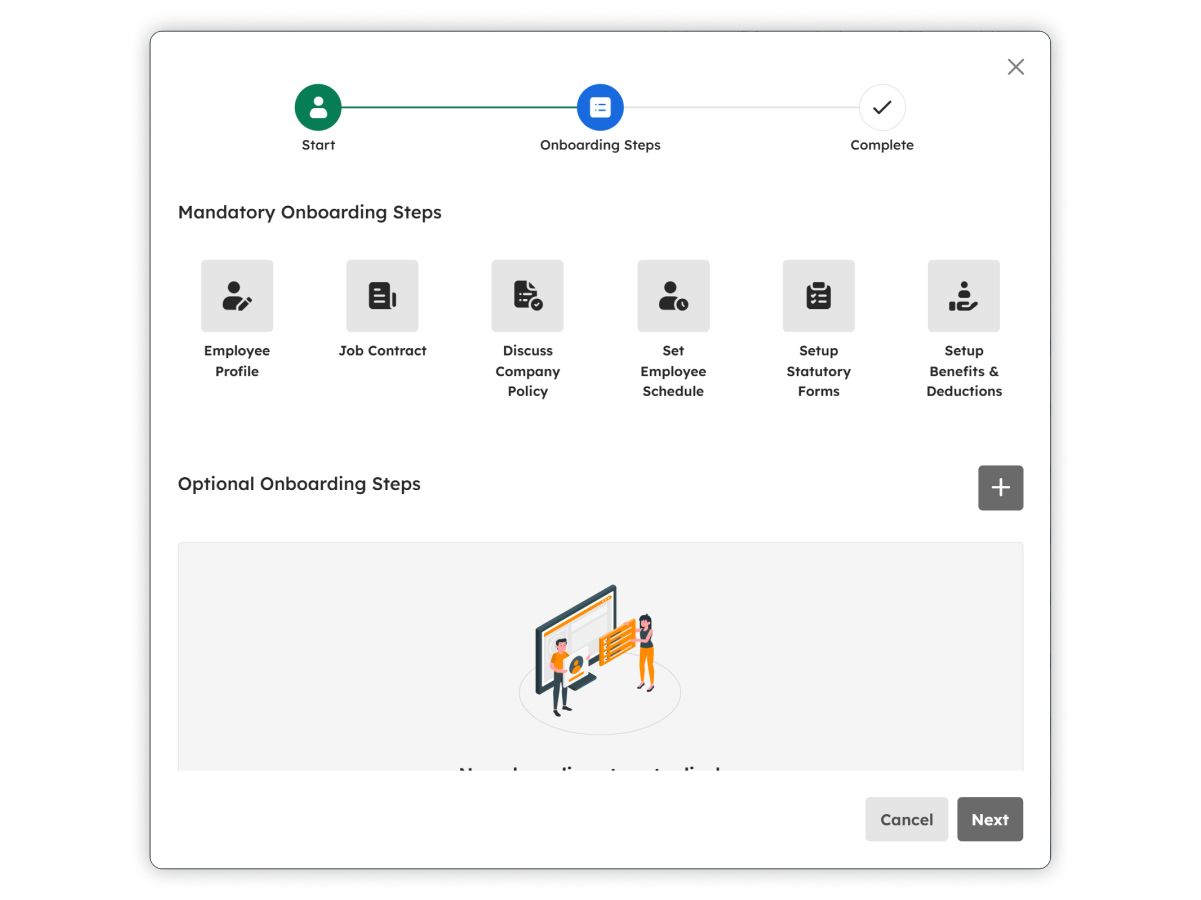
-
After clicking the button, the onboarding setup is completed.
Add an Additional Onboarding Step
Under the Onboarding Steps page, there is an option to add an optional step by clicking .
Add a Task Step
Creates a task that directs the employee to an external resource or requirement.
-
After the modal opens, select Task on the Step type dropdown list.
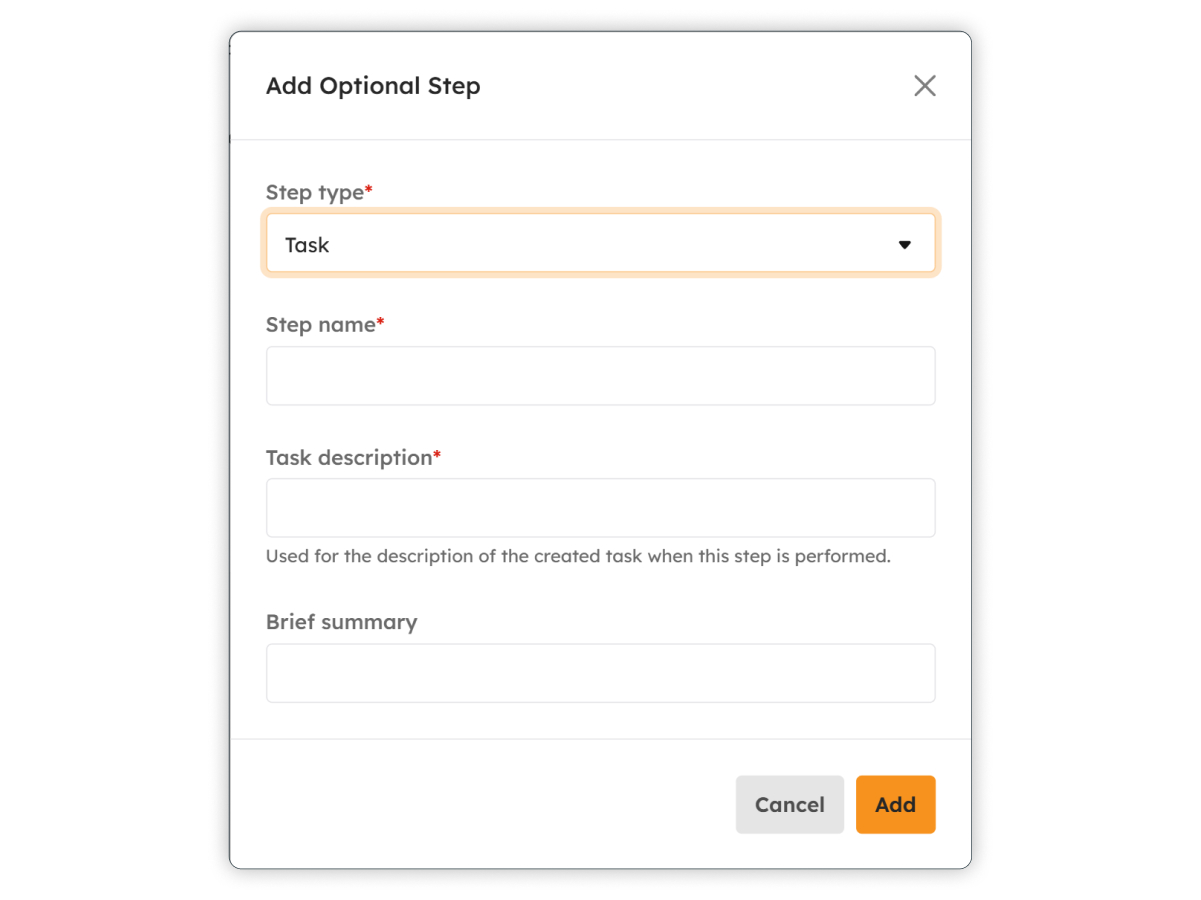
- Enter the step name.
- Enter the task description.
- Enter a brief summary of the task, if applicable.
- Click Add to add new step on the employee's onboarding process.
Add an Email Step
Creates an onboarding email with instructions, information, and attachments.
-
After the modal opens, select Email on the Step type dropdown list.
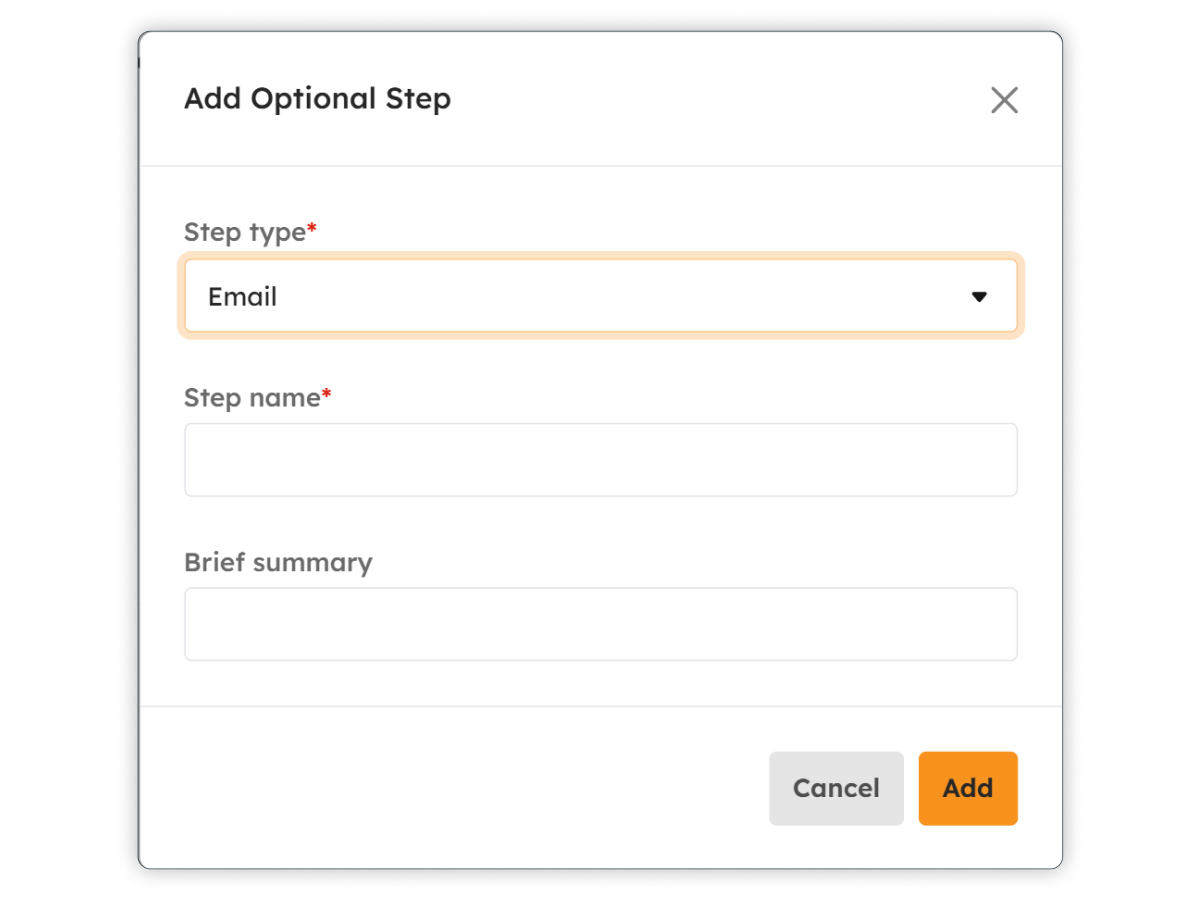
- Enter the step name.
- Enter a brief summary of the task, if applicable.
- Click Add to add new step on the employee's onboarding process.
Set Up the Optional Onboarding Step
The newly added optional onboarding step appears in the Optional Onboarding Steps section of the employee's onboarding modal.
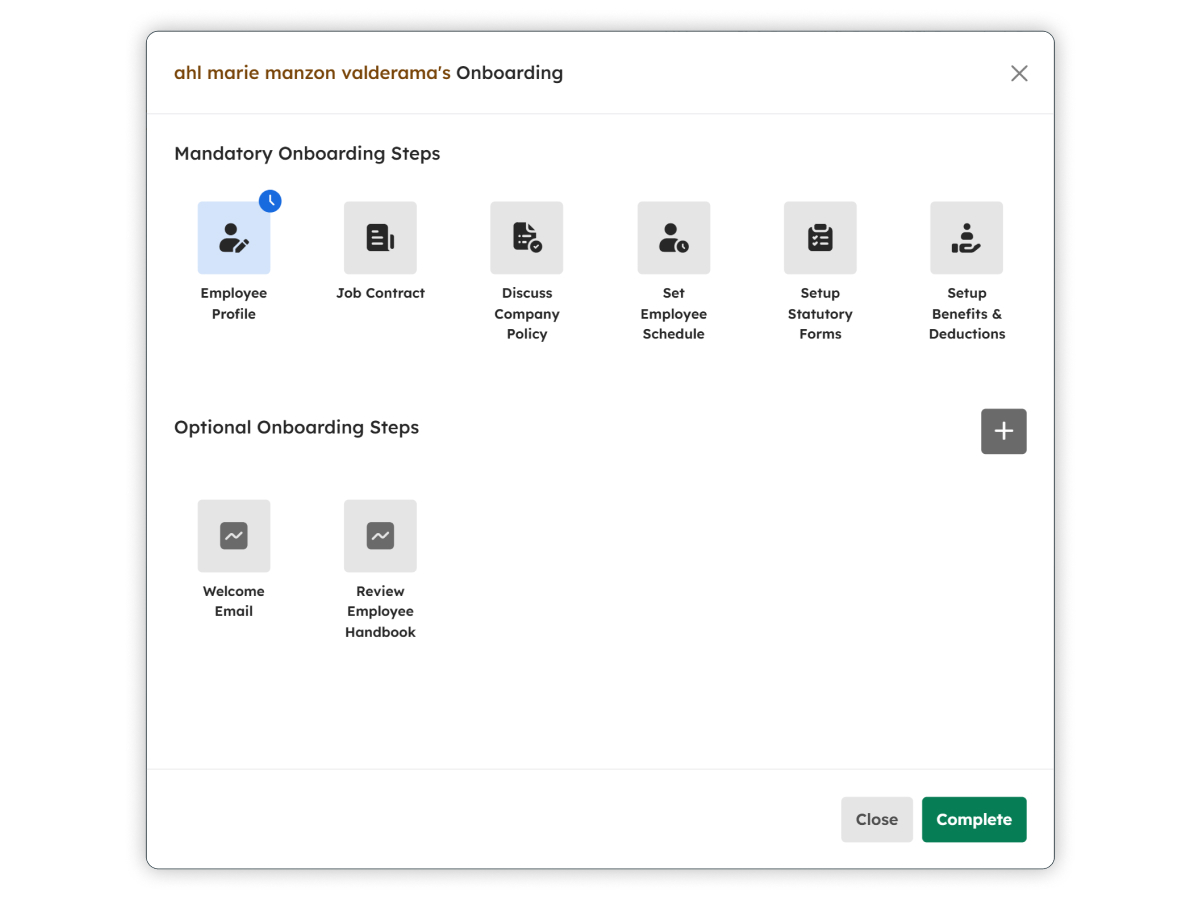
By clicking on the optional steps, the administrator can modify its details:
-
Task
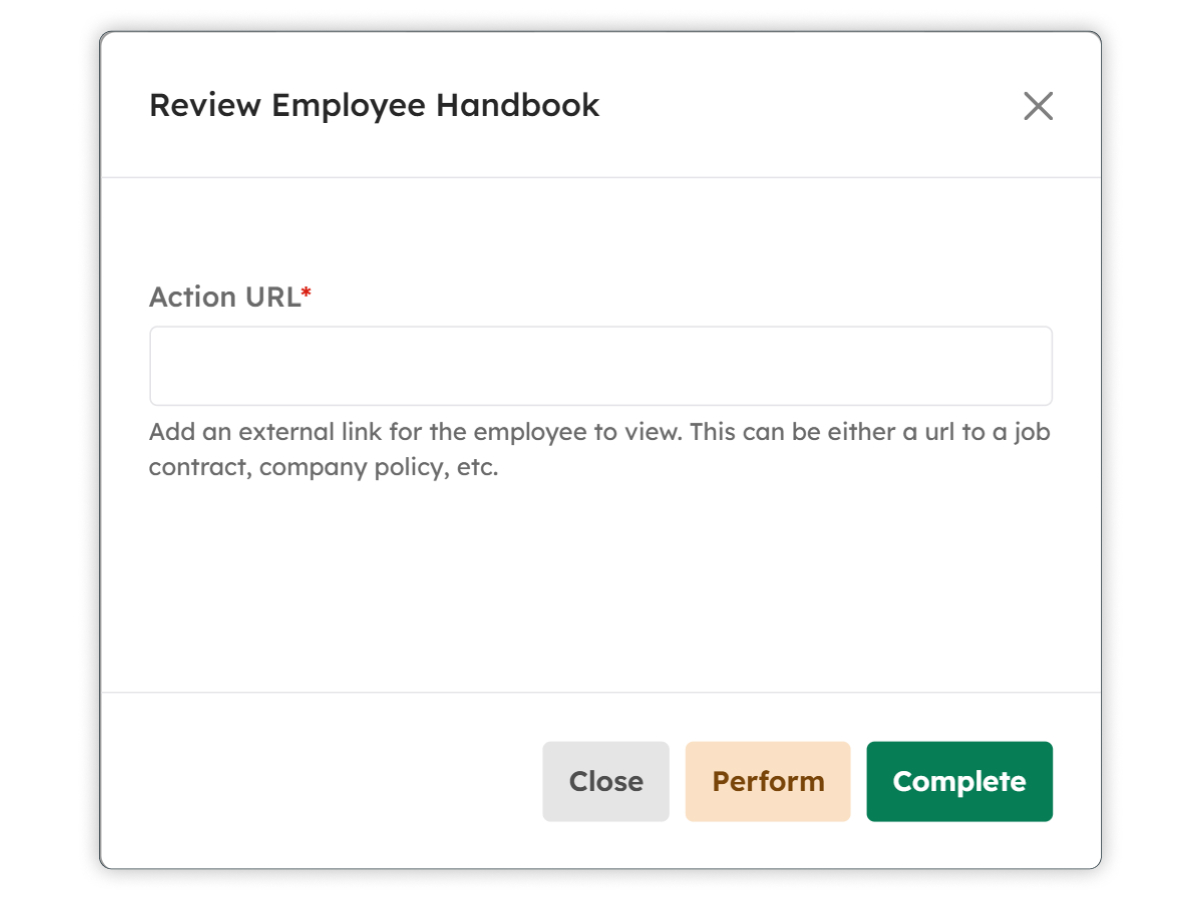
- Enter the Action URL.
- Add a link to a document, policy, training material, form, or other onboarding resource.
-
Email
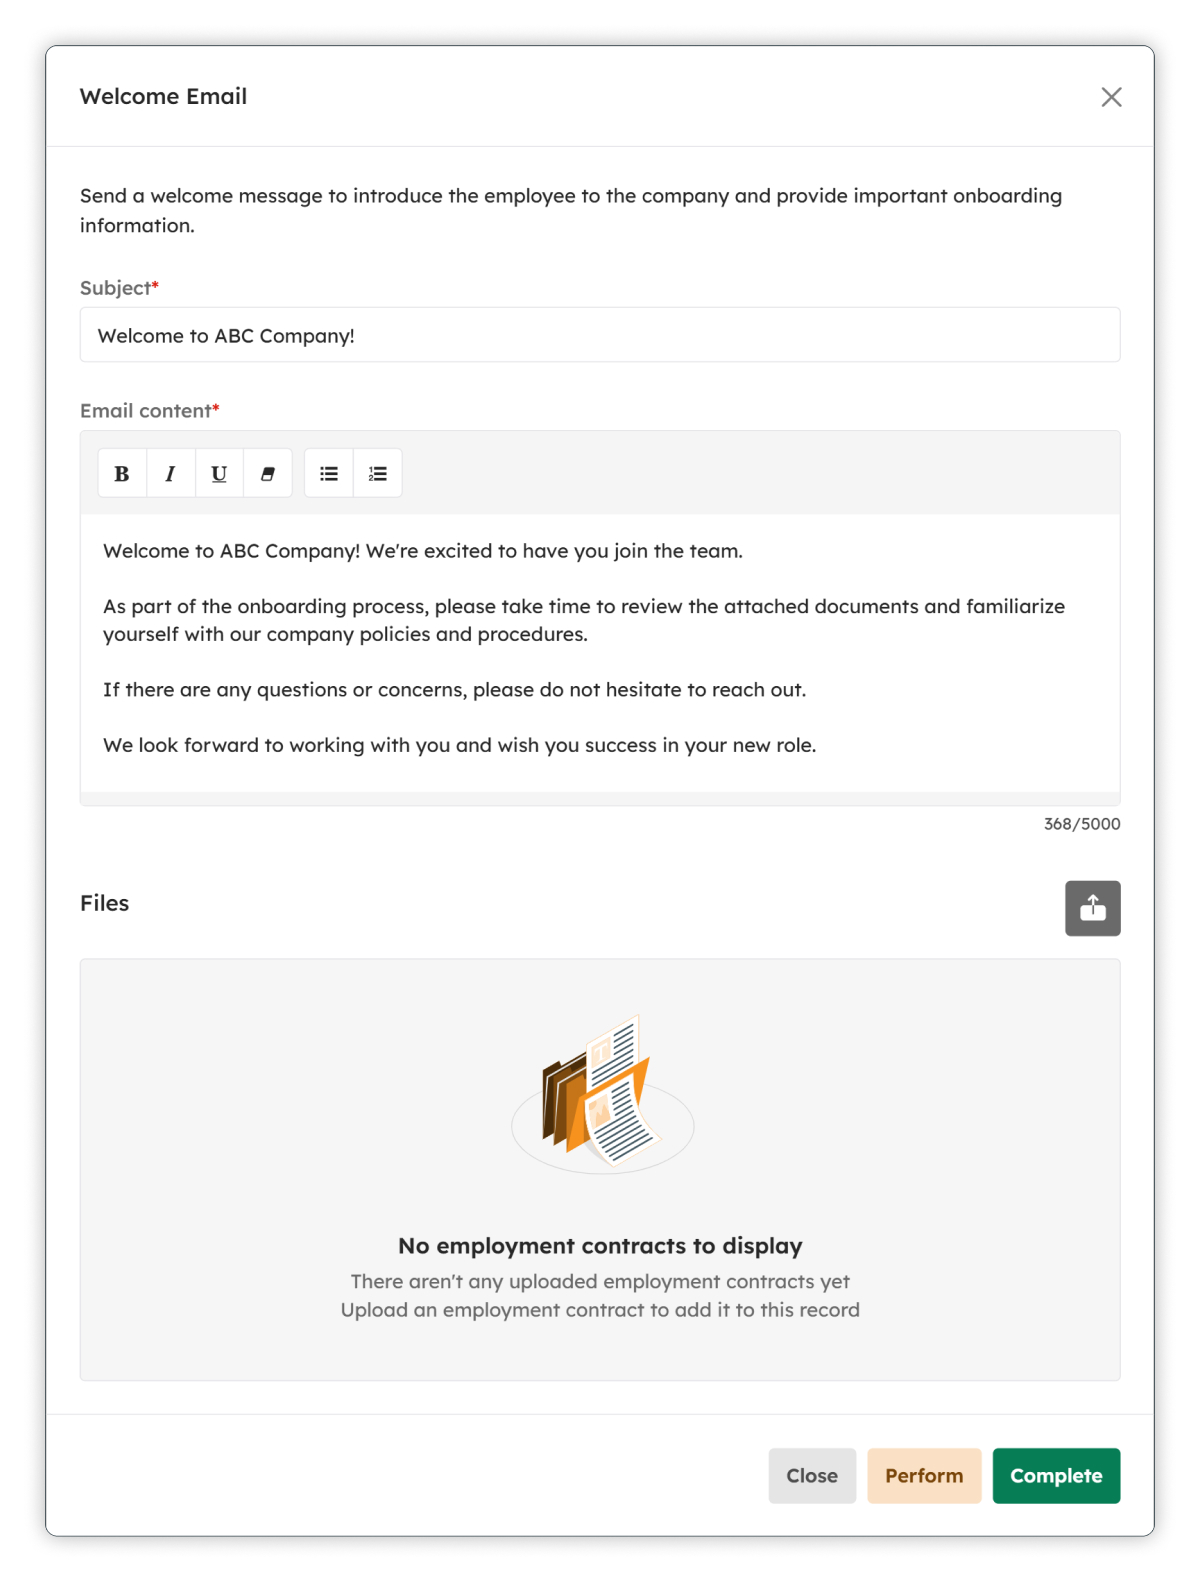
- Enter the Subject.
- Compose the Email Content.
- Upload supporting files, if applicable.
The user may click Close, Perform, or Complete based on their desired outcome.
Reassign Onboarding Officer
This feature allows users to perform the onboarding process by clicking .
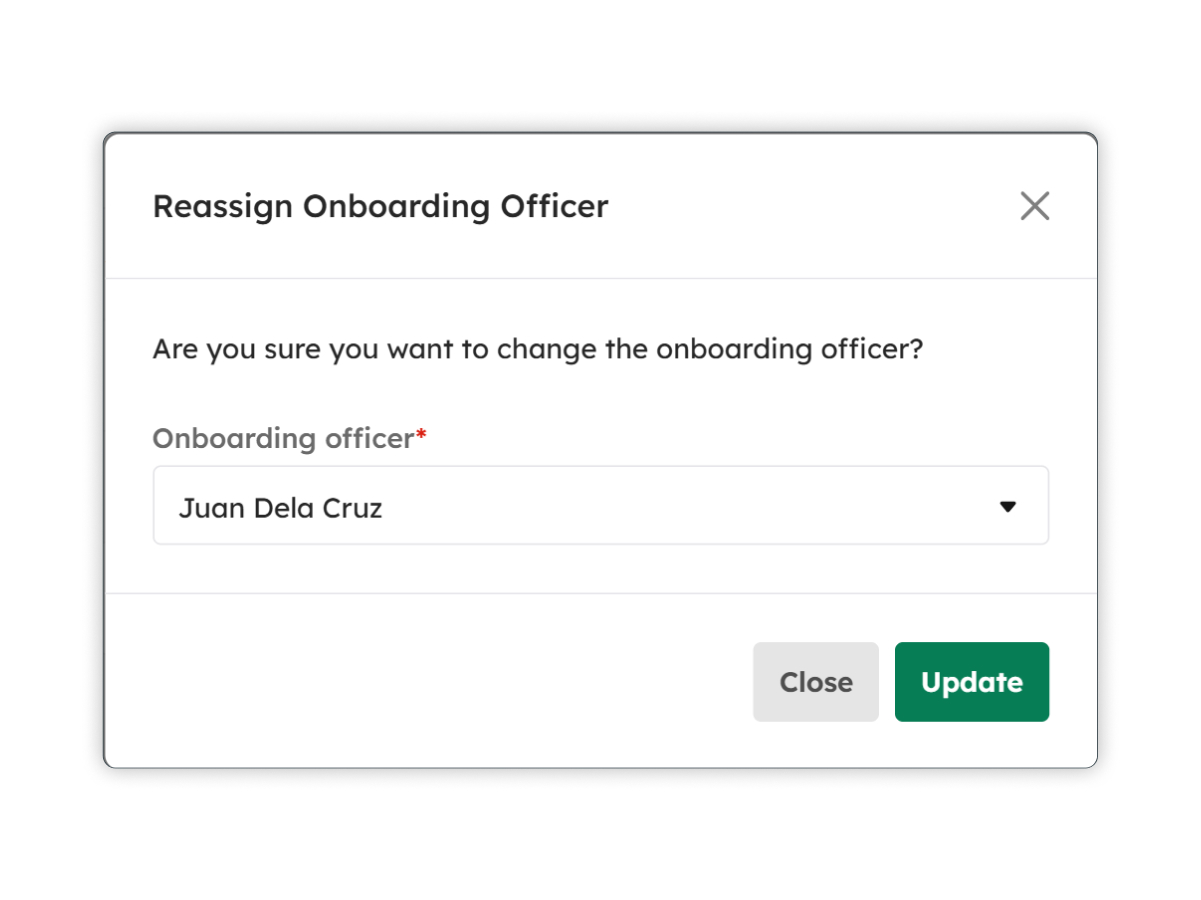
The user can complete the required onboarding steps and, once all mandatory steps have been completed, click the button to finalize the onboarding process.
Perform Onboarding
This feature allows users to reassign the onboarding officer by clicking .
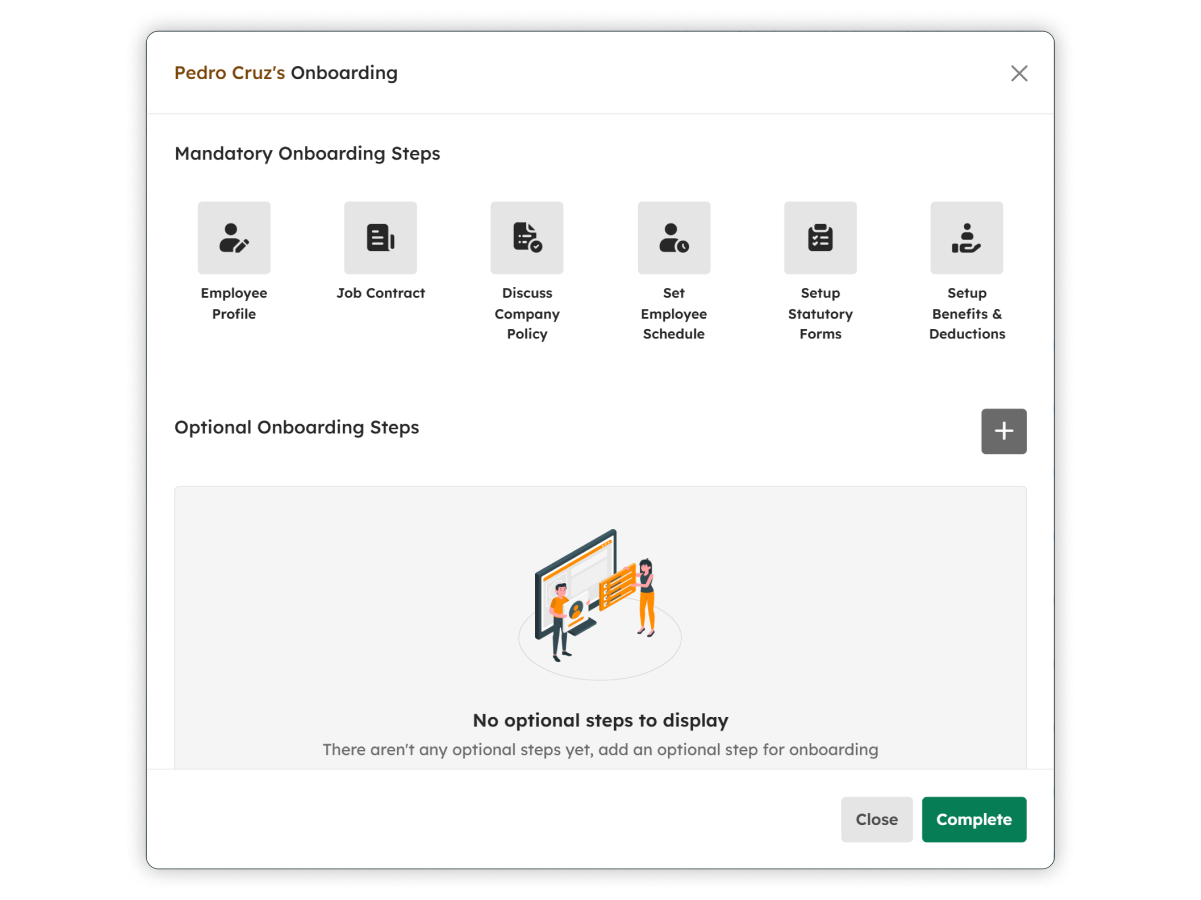
Simply select a new onboarding officer on the dropdown list then click button to save changes. Otherwise, click .
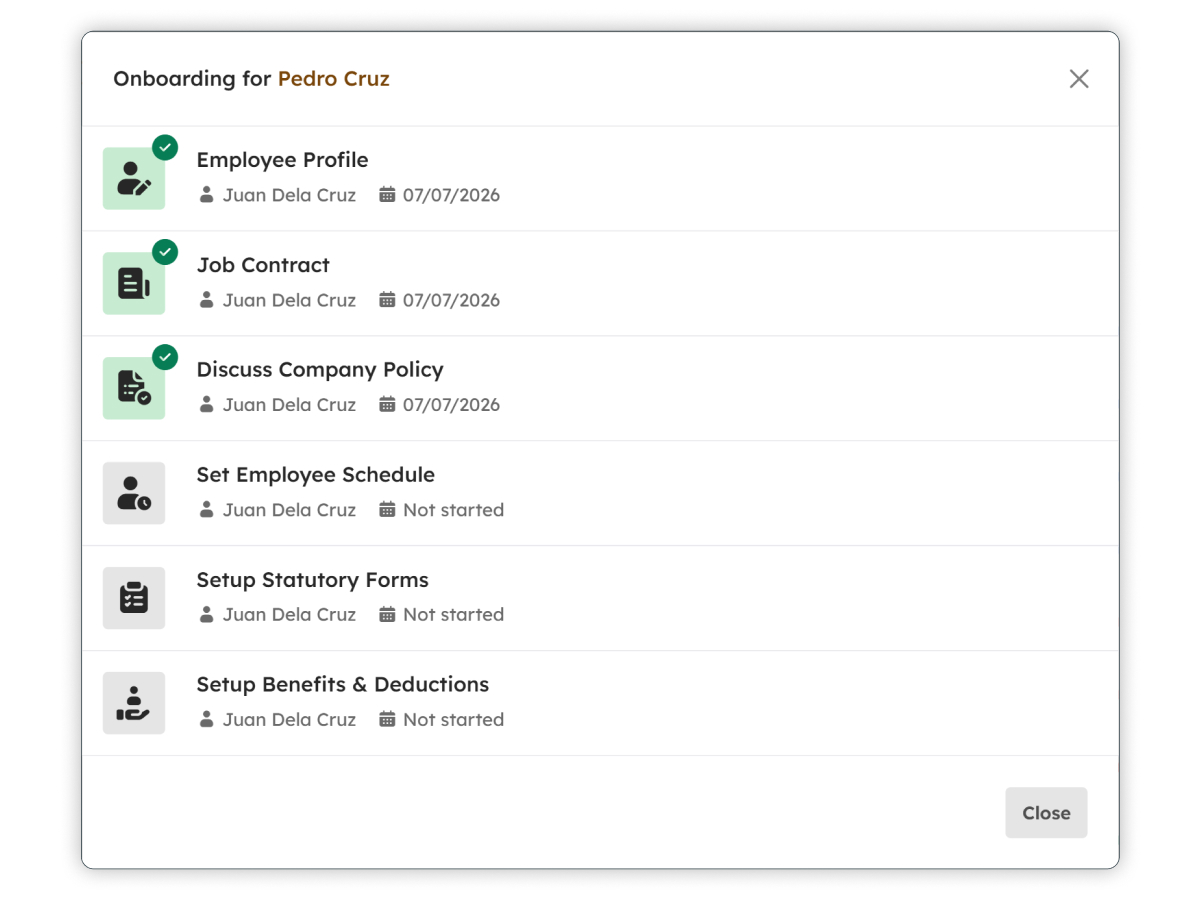
View Onboarding
To view the onboarding progress of a selected employee, click .
Cancel Onboarding
To cancel the onboarding progress of a selected employee, click .
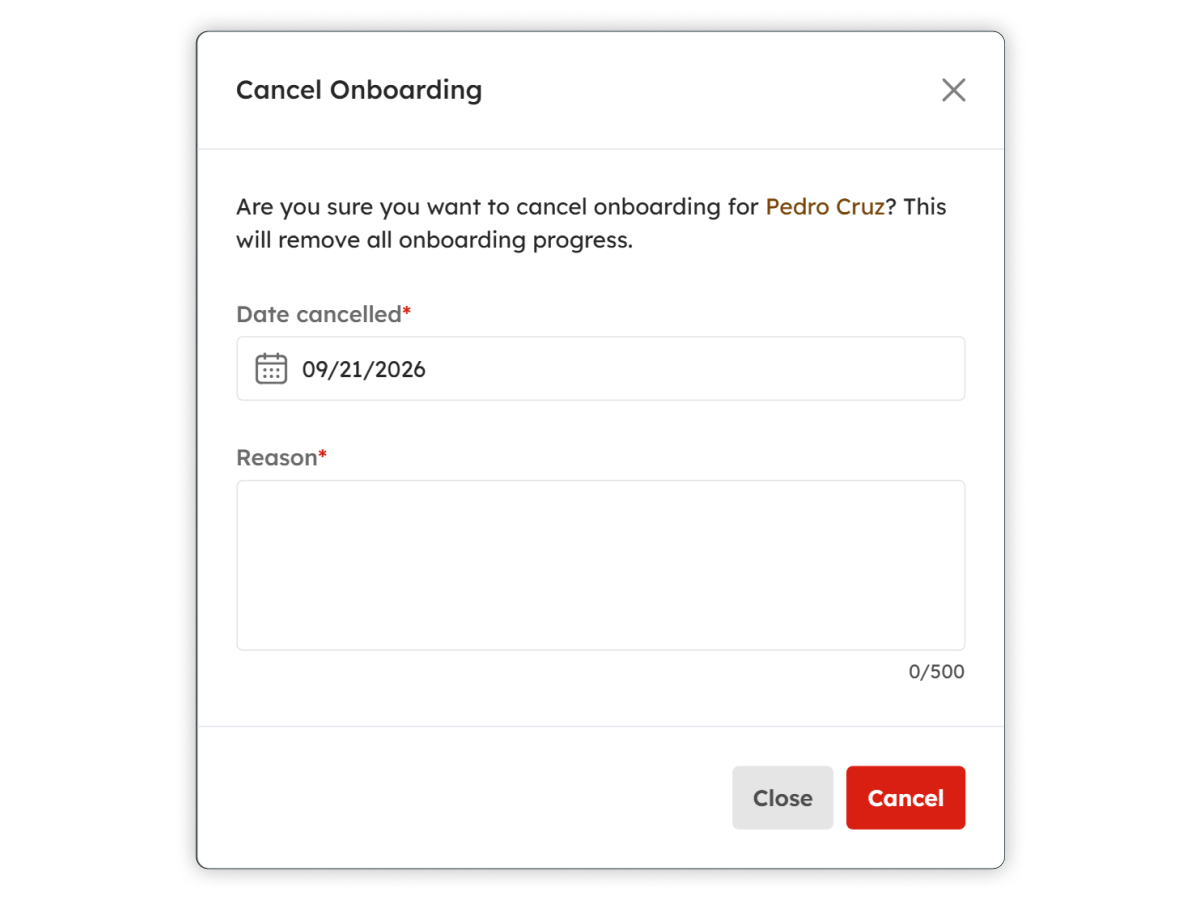
Once the modal appears, enter the date of cancellation and provide the reason on the textbox below before clicking button to save changes. Otherwise, click
Job Postings
Introduction to Job Postings
This feature allows users to post for available jobs so applicants can read job details and submit applications.
To access Job Postings, click the Human Resources Menu near the uppermost right side of the screen, after which a submenu will drop down, and then look for Job Postings under Recruitment.

Job Postings Features

Employees Page Header Actions
- Set as Default Page
- Add to Quick Links
- Create Job Post
- Export JSON
Job Postings Summary Table
The Job Postings Page Table consists of the following columns:
- Post Title
- Job Title
- Budget Salary Range (₱)
- Date Published
- Date Closed
- Applicants
- Status
-
Actions
- View Job Post
- Edit Job Post
- Publish Job Posting Externally
- Check Job Posting URL
- Deactivate Job Posting
Search and Filter

The user has three options to filter the job posting information. The user may filter the information by searching by job title, filter by status, or a combination of both.

Creating a Job Posting
This feature allows the user to do a job posting. To access this feature, the user can simply click the Create button located at the upper right before the table.
To create a job posting, the user must follow the following steps
- Click on the Create button located in the upper-right of the table.
-
After clicking the Create button, a modal will show fields that need to be filled in.

-
Provide the required details.
-
Job Post Details
- Post Title
- Job Title
- Start Date (determines the start date of the post to be shown on the site)
- End Date (determines the end date of the post to be shown on the site)
-
Salary Budget Range
- Minimum (₱)
- Maximum (₱)
- Show budget salary range (if applicable)
-
Job Positions
- Available job position
- Show available job positions (if applicable)
-
Other Details
- Responsibilities
- Qualifications
- Additional remarks
-
Job Post Details
- Click the Create button to save the entry. Otherwise, click Cancel button.
After saving the entry for the job posting, the information will be available in the table for additional actions. Saving the entry automatically publishes the post based on the start date.
Edit a Job Posting
The users can edit posted jobs by simply selecting the desired job posting and clicking the Edit Job Posting button at the rightmost of the job posting in the table.
To edit a job posting, the user must follow the following steps
- Click on the Edit button located in the rightmost of the record.
-
After clicking the Edit Job Posting button, a modal will show fields that need to be filled in.

-
Provide or modify the required details.
-
Job Post Details
- Post Title
- Job Title
- Start Date (determines the start date of the post to be shown on the site)
- End Date (determines the end date of the post to be shown on the site)
-
Salary Budget Range
- Minimum (₱)
- Maximum (₱)
- Show budget salary range (if applicable)
-
Job Positions
- Available job position
- Show available job positions (if applicable)
-
Other Details
- Responsibilities
- Qualifications
- Additional remarks
-
Job Post Details
- Click the Update button to save the entry. Otherwise, click Cancel button.
This option also allows the user to edit the job posting for corrections and other modifications to the content.
View a Job Posting
The users can view posted jobs by simply selecting the desired job posting and clicking the View Job Posting button in the rightmost part of the job posting in the table.
Clicking View Job Posting will show a page showing the post. This option also allows the user to preview the job posting and show how it looks on the site.

Publish a Job Posting Externally
The users can publish posted jobs externally by simply selecting the desired job posting and clicking the Publish Externally button in the rightmost part of the job posting in the table.
This option also allows the user to share the content on available social media sites like LinkedIn and Facebook. A URL is already available for sharing on other platforms.

Deactivate a Job Posting
The users can deactivate posted jobs by simply selecting the desired job posting and clicking the Deactivate Job Posting button in the rightmost part of the job posting in the table.
Clicking the Deactivate button will show a prompt confirming the action since this option automatically removes the selected job posting from the site.

Job Applications
Introduction to Job Applications
This feature allows the Human Resource (HR) person to monitor and manage the applicants from the job postings.
To access Job Applications, click the Human Resources Menu near the uppermost right side of the screen, after which a submenu will drop down, and then look for Job Applications under Recruitment.

Upon clicking the link, a page containing features and options regarding job applications will be loaded. Hence, the following features and options are available.
Job Applications Features
Provided below is a summary of the Job Applications page, showcasing its main features.

Job Applications Page Header Actions
- Set as Default Page
- Add to Quick Links
- Apply Job On Behalf Of Applicant
- Preview Job Applications
Job Applications Summary Table
- Applicant
- Job Position
- Interviewers
- Asking Salary
- Experience
- Education
- Status
-
Actions
- View Job Application
- Accept Job Application
- Decline Job Application
- Schedule Job Application
- Withdraw Job Application
Search and Filter
The user has three options to filter the job application information. The user may filter the information by searching by Applicant Name, filter by job application status, or a combination of both. To do this, follow the following steps:
Search by Applicant Name

- Click the Search by Applicant Name field
- Type in the name of the applicant to search
Search by Status

- Click on the Search by Status field
- Select the Status to search
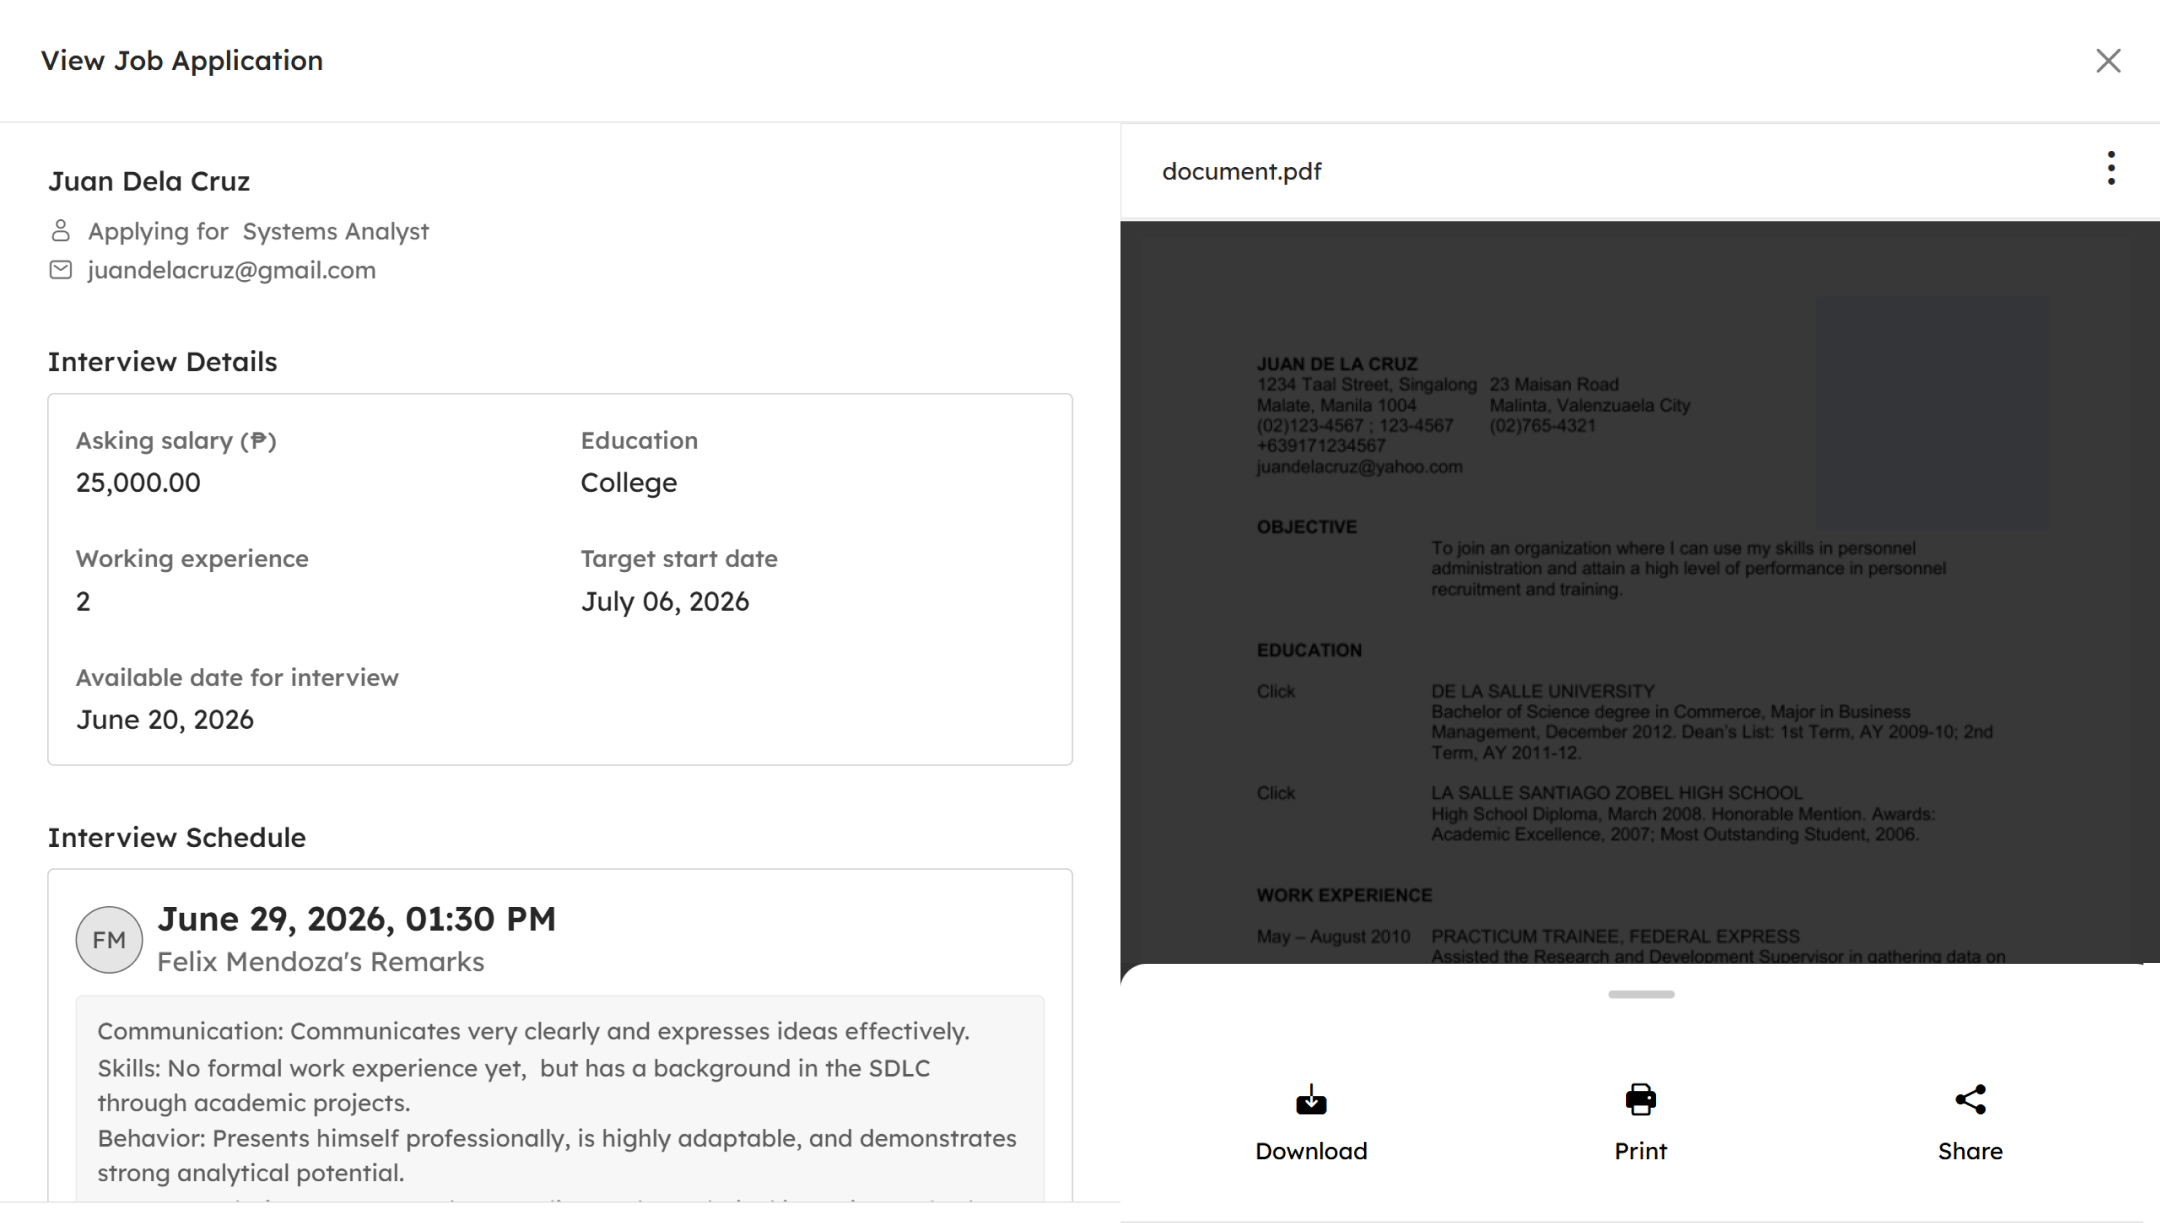
View a Job Application
The users can view posted jobs by selecting the desired job application and clicking the View Job Application button in the table's rightmost part of the job posting. A modal will appear containing information of the applicant. Information includes:
- Name
- E-mail Address
- Phone Number
- Download copy of the CV

To download, print, or share the attached document, simply click the button.
Accept a Job Application
The users can accept job applications by selecting the desired job application and clicking the Accept Job Application button in the table's rightmost part of the job posting. A prompt will appear to confirm the acceptance.

Click button to save changes. Otherwise, click .
Decline a Job Application
The users can decline job applications by selecting the desired job application and clicking the Decline Job Application button in the table's rightmost part of the job posting. A prompt will appear to confirm the action.

Click button to save changes. Otherwise, click .