Expense
Who can use this feature
Anyone with Administrator and Accounting Manager role can access all the Expense pages
Introduction to Expense Submodule
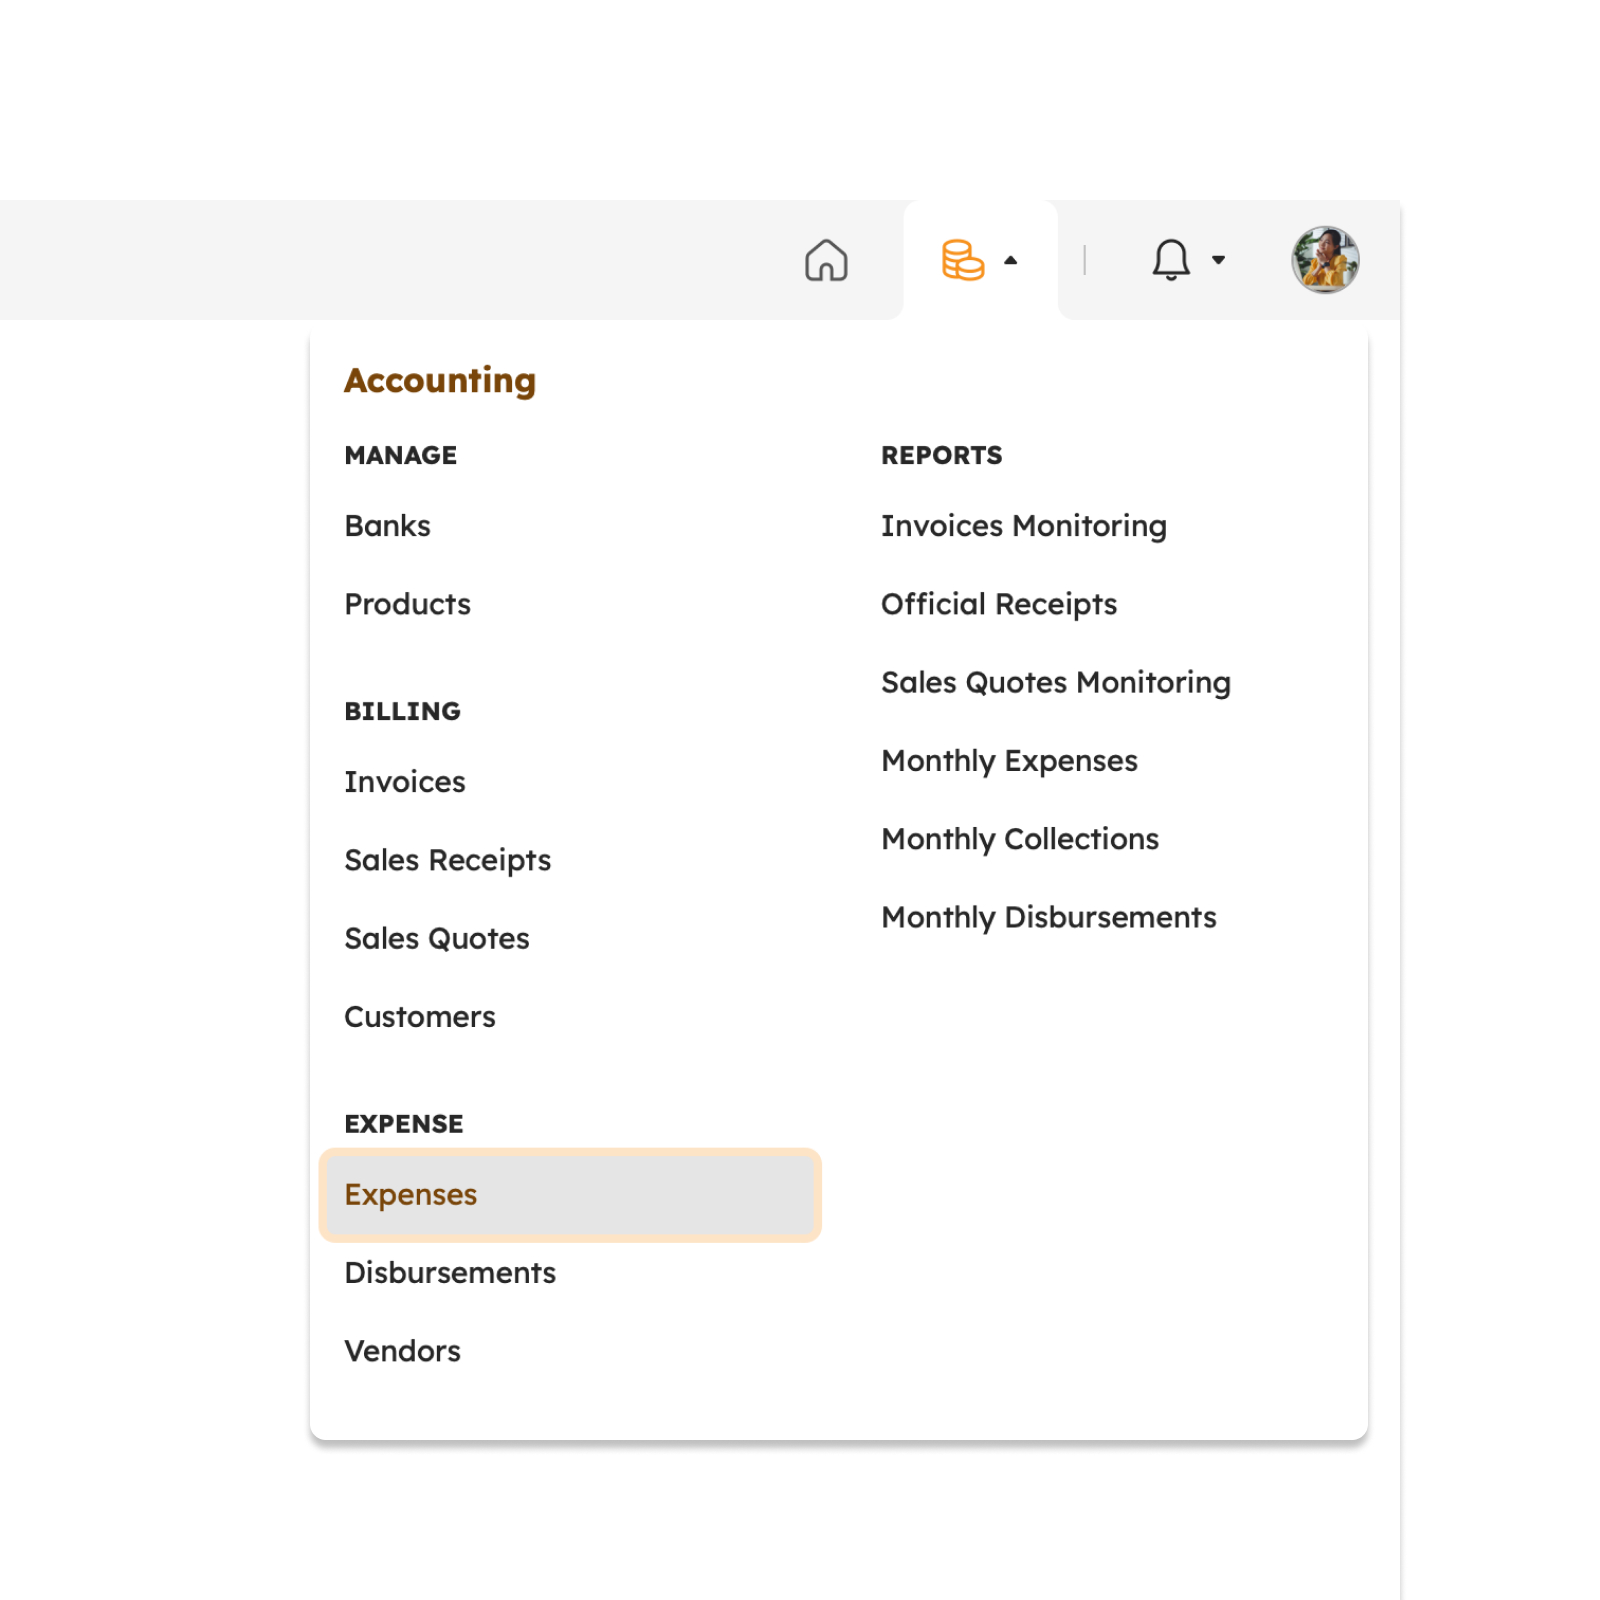
This submodule is designed to keep a record of expenses, whether for personal budgeting, corporate expense tracking, tax purposes, or other financial management needs. To access the Expense submodule, hover over the Accounting Module, and you will find the Expense submodule on the navigation bar along with its built-in pages.
Definition of Terms
This section elucidates the key pages under the Billing submodule:
- Expenses. This page is all about creating and keeping track of an expense item. Users can enter various types of expenses, such as travel expenses, office supplies, utilities, or employee reimbursements, into the ERP system.
- Expense Categories. Expenses can be categorized and tagged to allocate them to specific cost centers, projects, or departments, helping with cost tracking and budgeting. This page allows users to create their own customized expense categories based on their unique needs and priorities.
- Disbursements. This allows users to track and manage all financial disbursements made by an organization to various entities such as suppliers, employees, or service providers.
- Vendors. This page usually contains detailed information about each vendor, including their name, contact details, and location. This page also allows users to create and manage their own vendor directories.
Roles and Permissions
The table below shows the defined standard roles and permissions when accessing pages and features under the Expense submodule.
| Functions | Administrator | Accounting Manager | Accounting Staff | Employee |
|---|---|---|---|---|
| Expenses | ||||
| Create | ||||
| Import | ||||
| Edit | ||||
| View | ||||
| Void | ||||
| Search | ||||
| Filter by Employee | ||||
| Filter by Status | ||||
| Filter by Date | ||||
| Expense Categories | ||||
| Create | ||||
| Edit | ||||
| Activate/Deactivate | ||||
| Search | ||||
| Filter by Status | ||||
| Vendors | ||||
| Create | ||||
| Edit | ||||
| Activate/Deactivate | ||||
| Search | ||||
| Filter by Status | ||||
| Disbursements | ||||
| Create | ||||
| Edit | ||||
| View | ||||
| Download | ||||
| Approve | ||||
| Delete | ||||
| Disburse | ||||
| Search | ||||
| Filter by Status | ||||
Roles and Permissions
Enhance access control and refine user privileges by effortlessly adding and configuring additional roles and permissions. This aligns system functionality with the organizational structure and security requirements, ensuring that users are appropriately given levels of access and responsibilities.
To do so, contact [email protected]
Expenses
Introduction to Expenses
This page is dedicated to managing and tracking expenses incurred by a company, including date, amount, vendor, and purpose. It provides a clear and up-to-date view of the company's spending. This page also allows users to enter various types of expenses, such as travel expenses, office supplies, utility bills, and more.
To access the Expenses page, navigate to the Accounting Module and click “Expenses” under the Expense Submodule, as shown in the image below.
Expenses Page Features
Summary Table
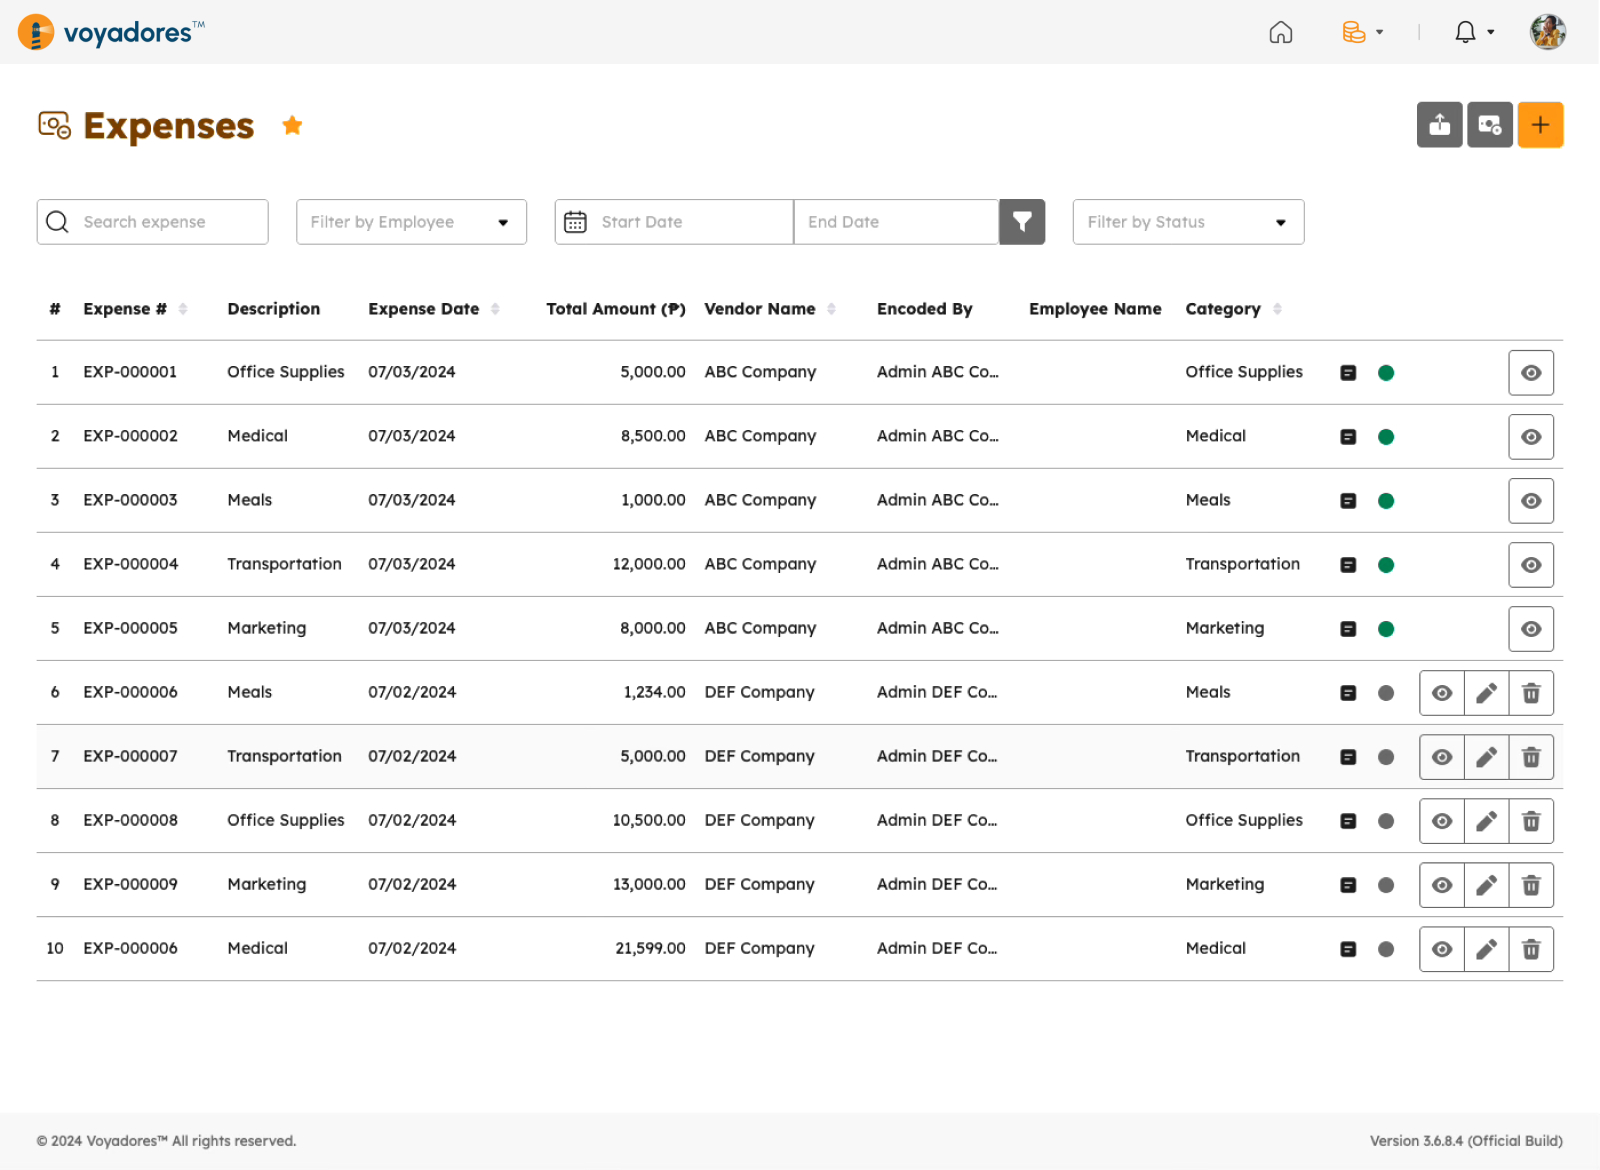
Upon clicking Expenses, the user will be redirected to the Expenses Page. This page has a table consisting of the following columns:
- #. Item number sequence for each listed expense item.
- Expense #. Displayed here is the auto-generated expense number upon creation.
- Expense Date. Displayed here is the date from when the expense item is created.
- Total Amount. The total amount of an expense item in monetary units.
- Vendor Name. Displayed here is the vendor name from whom the expense item is incurred.
- Encoded By. Displayed here is the name of the user who encodes the expense item.
- Employee Name. Displayed here is the name of the employee who is liable with the expense item.
- Category. Displayed here is the name of the Expense Category.
Here is an image of the table under the Expenses Page:
Searching items using the Expense Number
To search for an expense item using the Expense Number, follow the guide below:
-
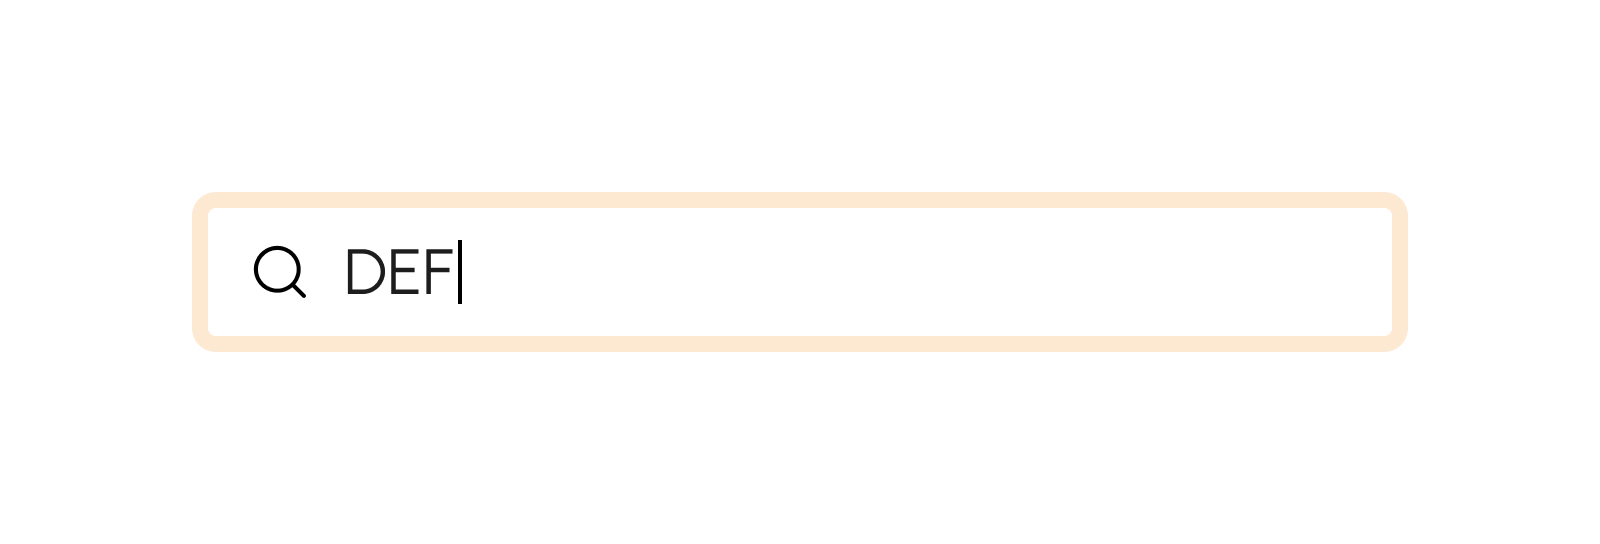
Click on the Search bar and begin typing the Expense number in the field.
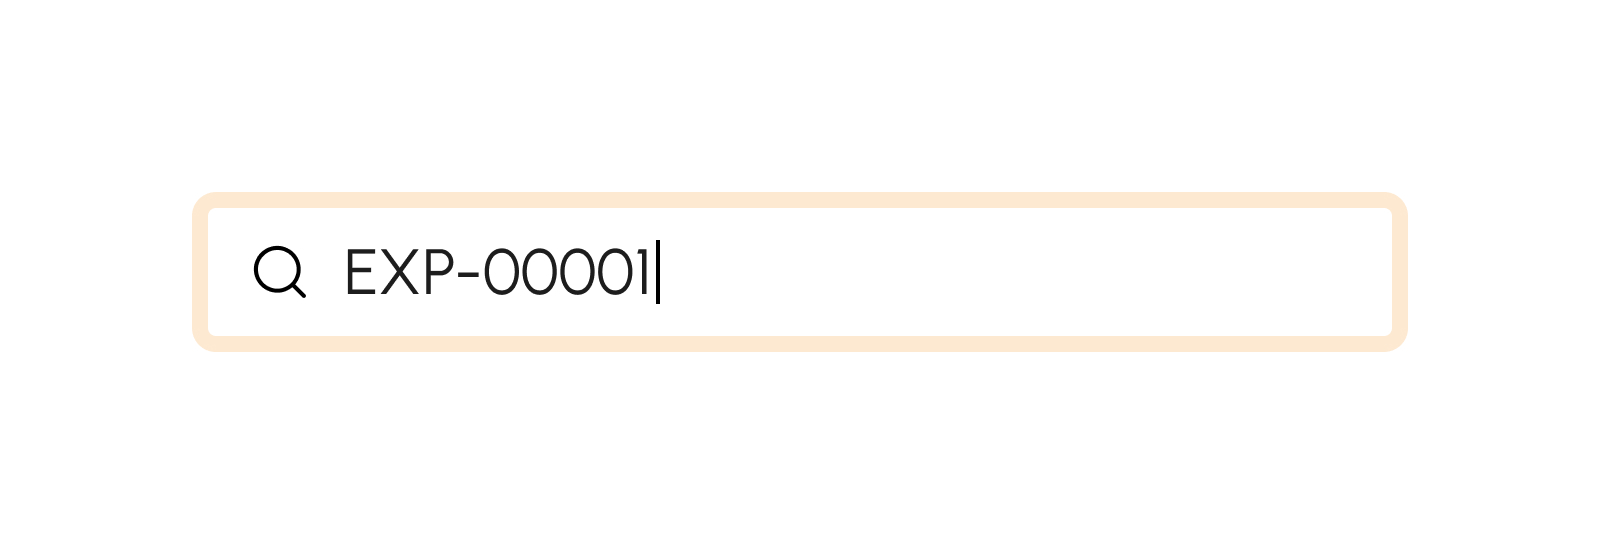
- Hit Enter for Windows or Return for MAC to trigger searching for an expense item using the Expense number.
- The page will display an expense item with the corresponding Expense number if available.
- Otherwise, an empty state will show, signifying that the Expense number is not available on the list.
Searching items using the Vendor Name
To search for an expense item using the Vendor Name, follow the guide below:
-
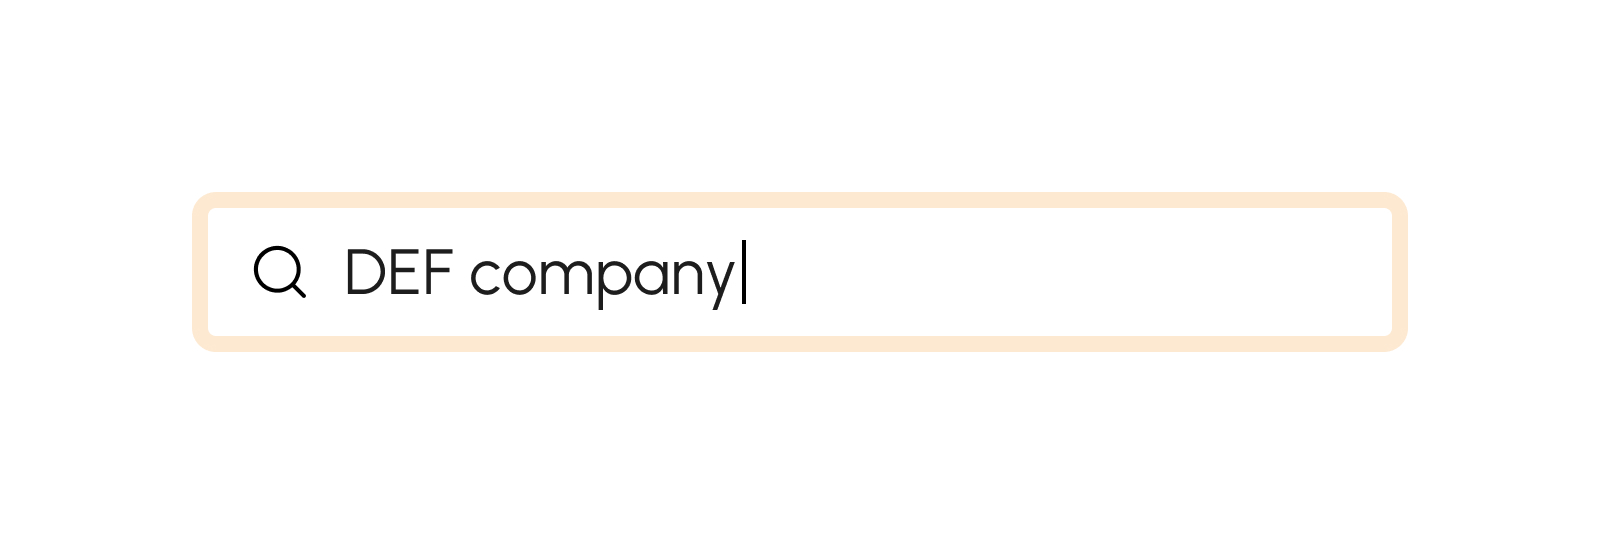
Click on the Search bar and begin typing the vendor's name in the field.
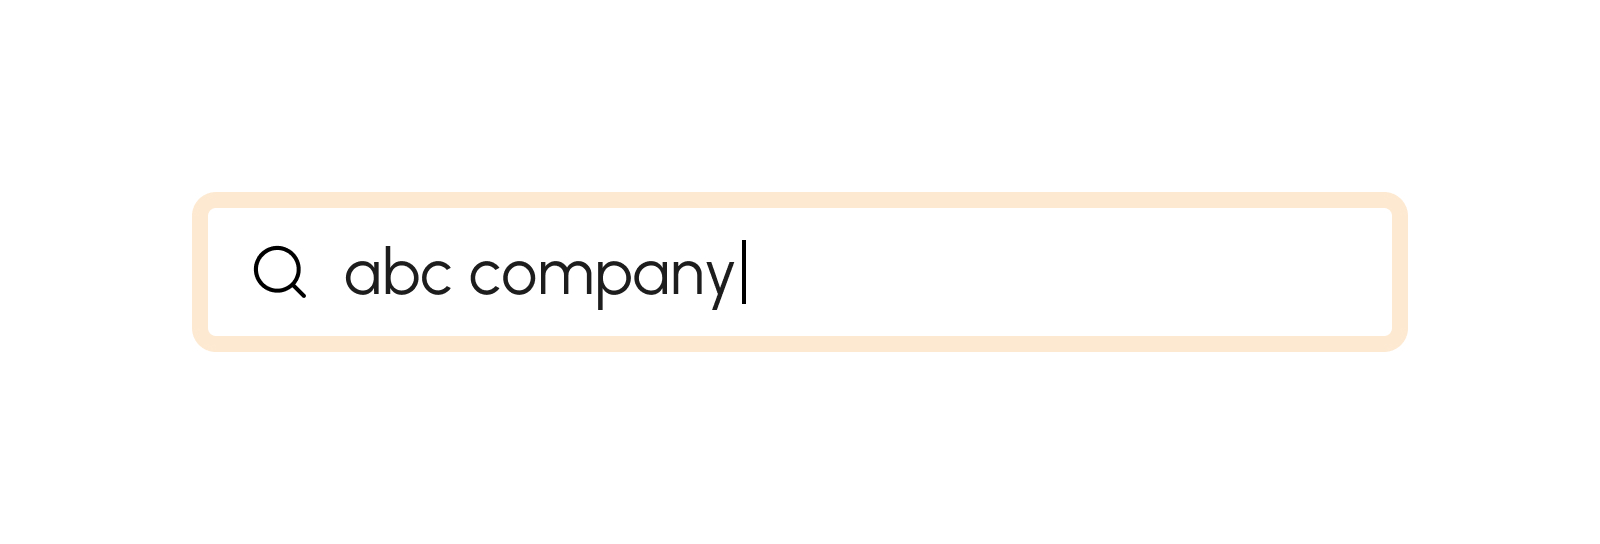
- Hit Enter for Windows or Return for MAC to trigger searching for an expense item using the Vendor's name.
- The page will display an expense item with the corresponding vendor name, if available.
- Otherwise, an empty state will show, signifying that an expense with the particular vendor name is not available on the list.
Filtering an Expense Item by Employee Name
To filter an expense item by Employee Name, follow the guide below:
-
Click on the Filter by Employee. The drop-down selection will display all active employee names to choose from.
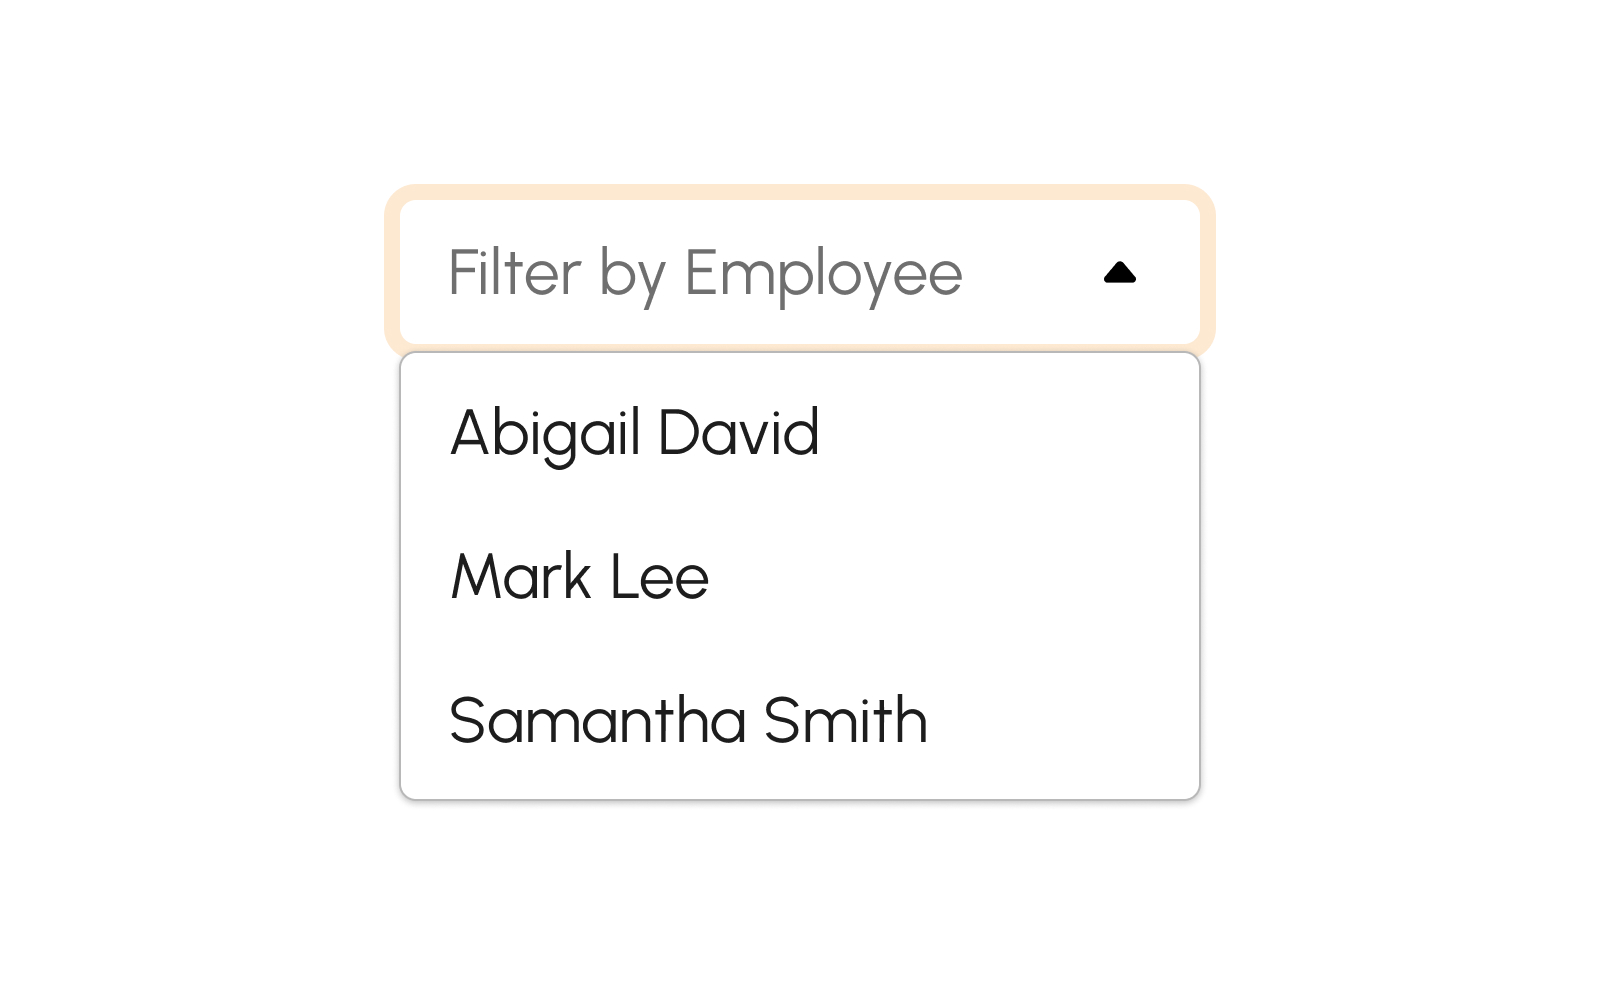
- Click from the selection of employee names to trigger filtering for an expense item using the name of an employee.
- The page will display an expense item with the corresponding employee name, if available.
- Otherwise, an empty state will show, signifying that an expense with the particular employee name is not available on the list.
Filtering an Expense Item using the Date Picker
To filter an expense item using the Date Picker, follow the guide below:
-
Click on the Date Picker fields and select a date range from and to.
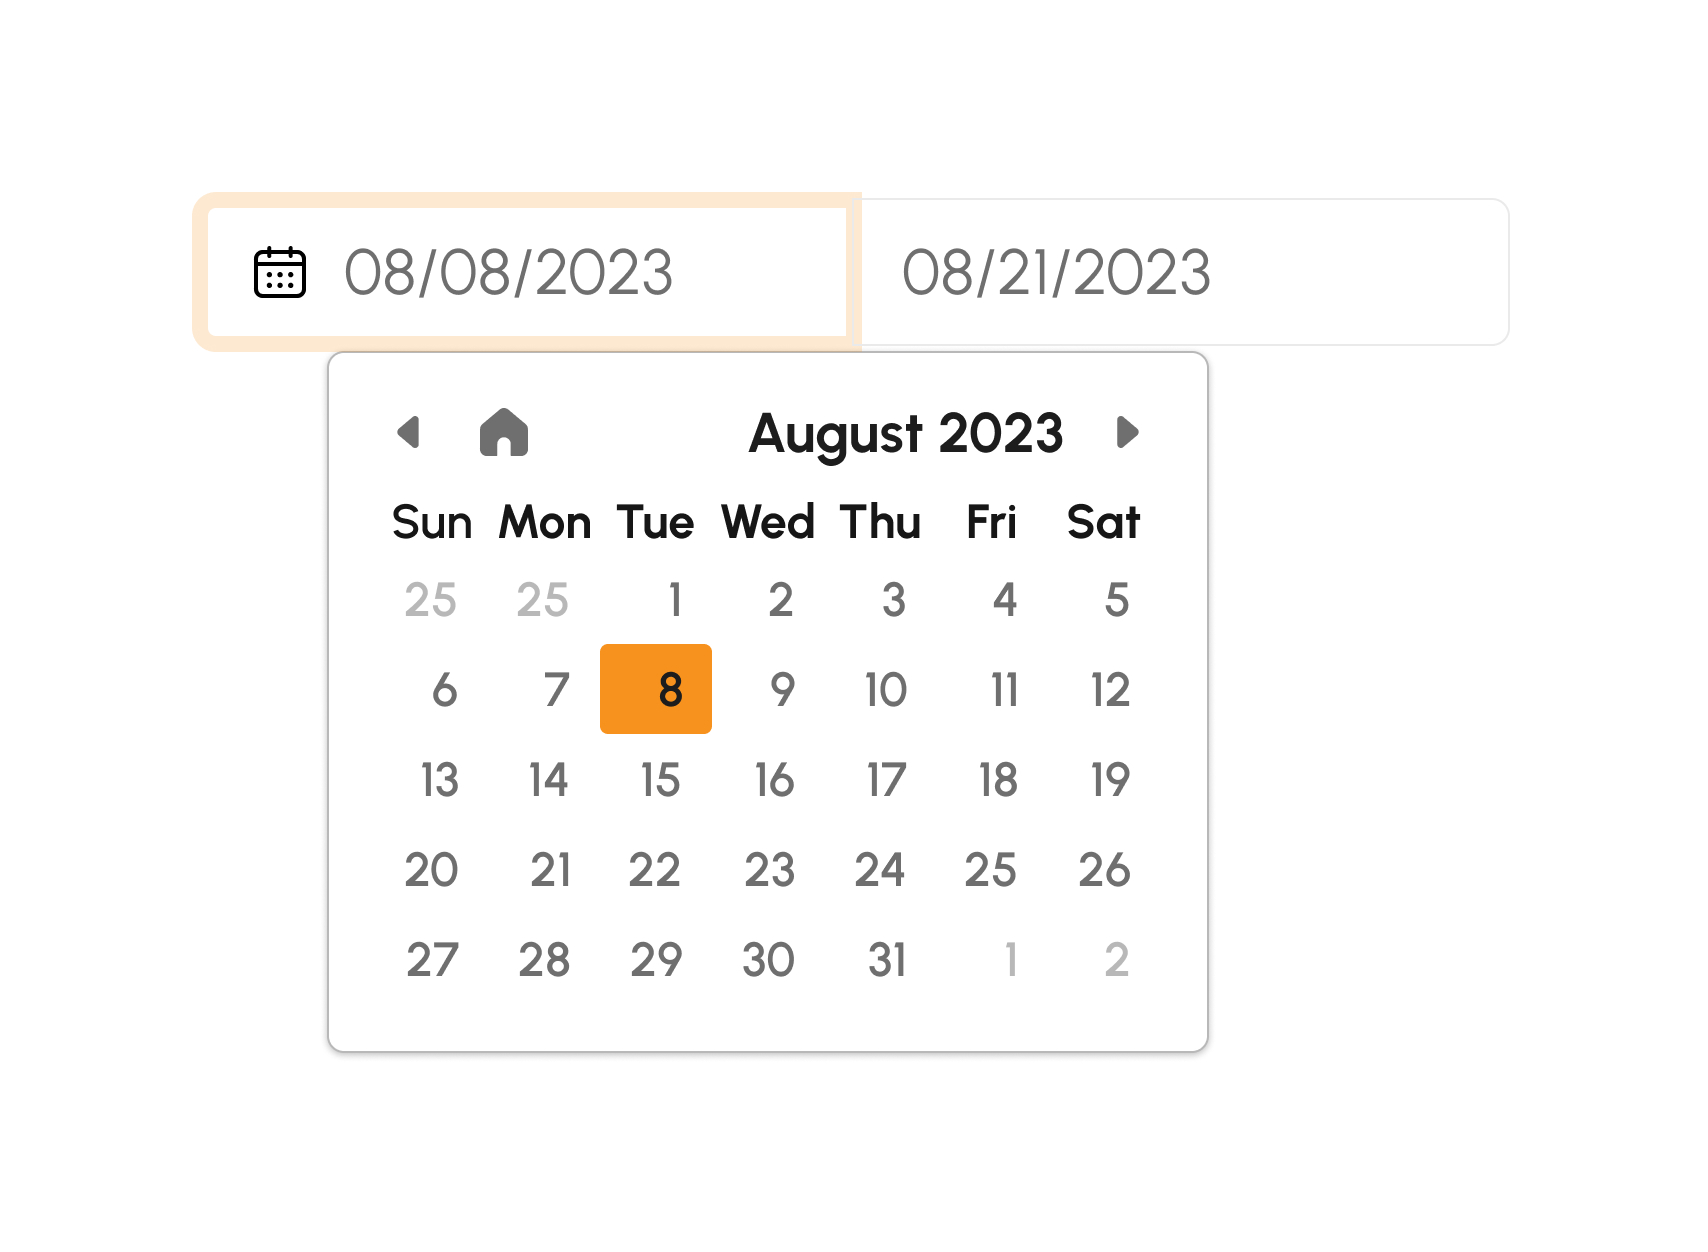
- Once dates are selected, the page will display an expense item according to the selected date range, if available.
- Otherwise, an empty state will show, signifying that an expense with the particular date range is not available on the list.
Filtering an Expense Item by Status
To filter an expense item by status, follow the guide below:
-
Click on Filter by Status. The drop-down selection will display all default statuses to choose from, as follows:
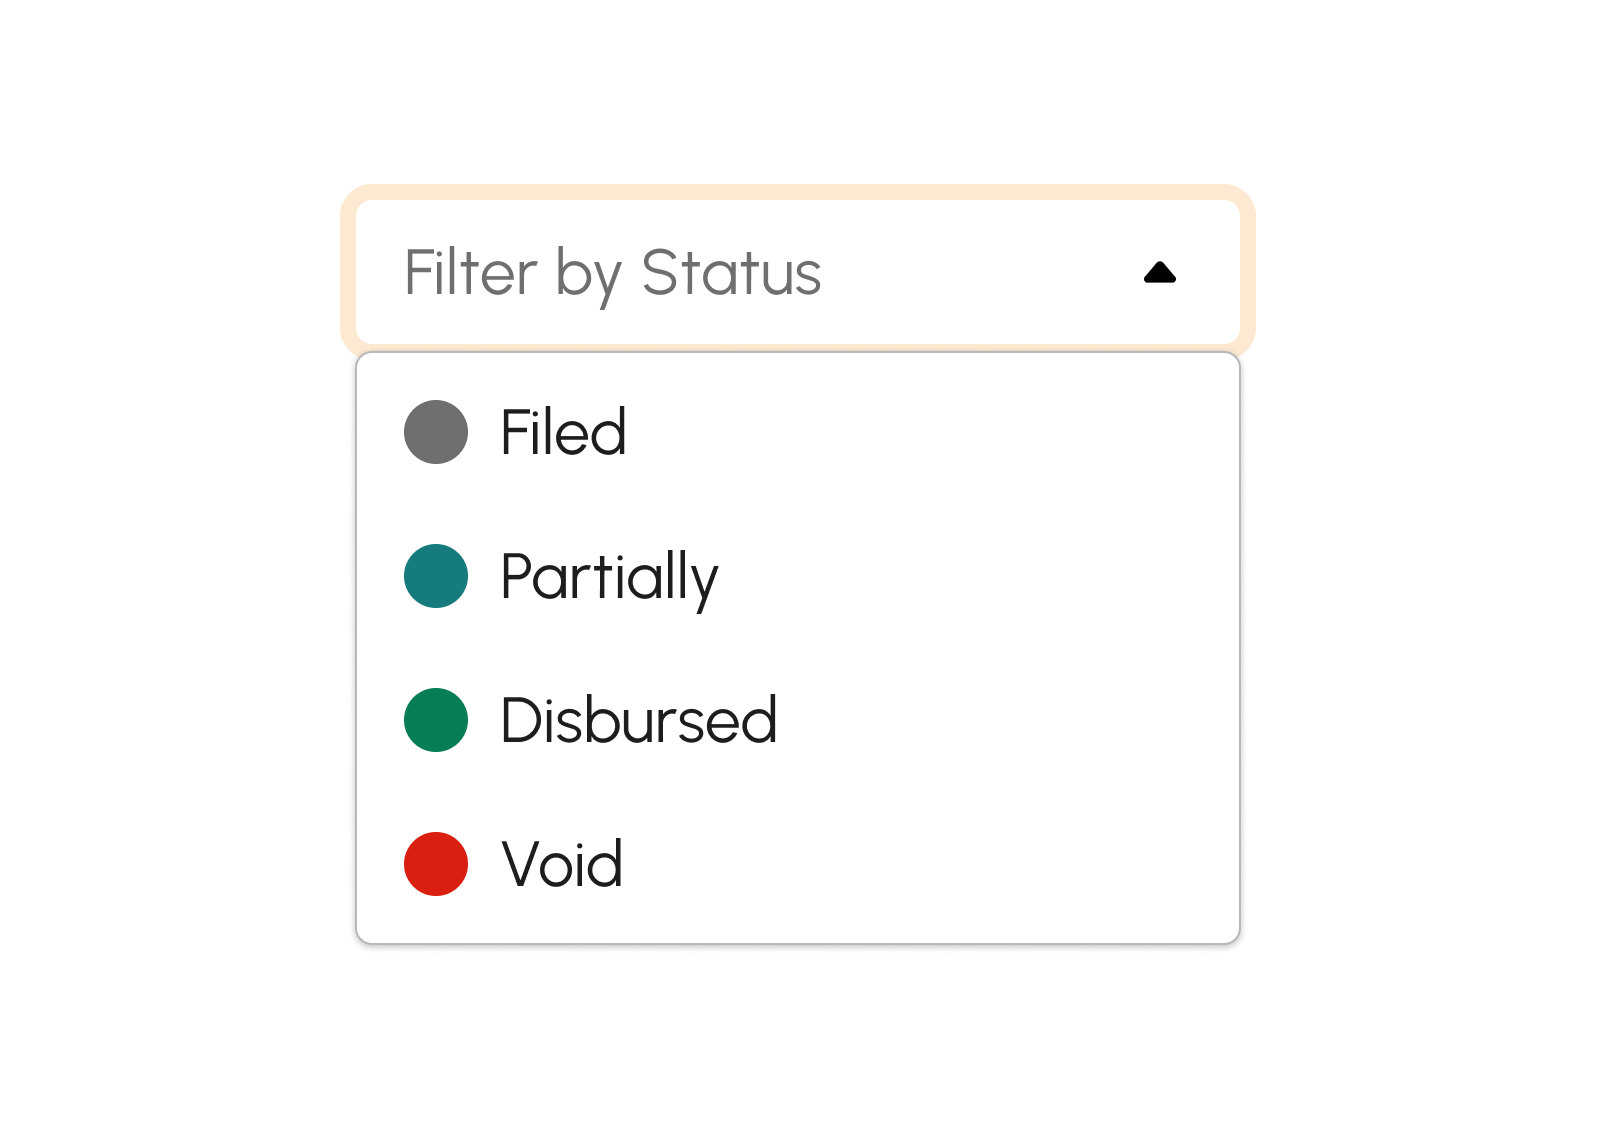
- Filed. For every newly created expense item, Filed status is the default.
- Partially Disbursed. This status signifies that the expense item is not yet fully disbursed.
- Disbursed. The expense item is fully disbursed.
- Void. The expense item is Void for some reason.
- Click a particular status from the selection to trigger filtering for an expense item.
- The page will display an expense item with the corresponding status, if available.
- Otherwise, an empty state will show, signifying that an expense with the particular status is not available on the list.
Creating an Expense Item
Creating an Expense item is subcategorized into three categories as follows:
Creating a Regular Expense Item
- Click the Add button. A modal will display upon clicking this button.
-
From the modal, fill in the required fields with an asterisk (*) as follows:
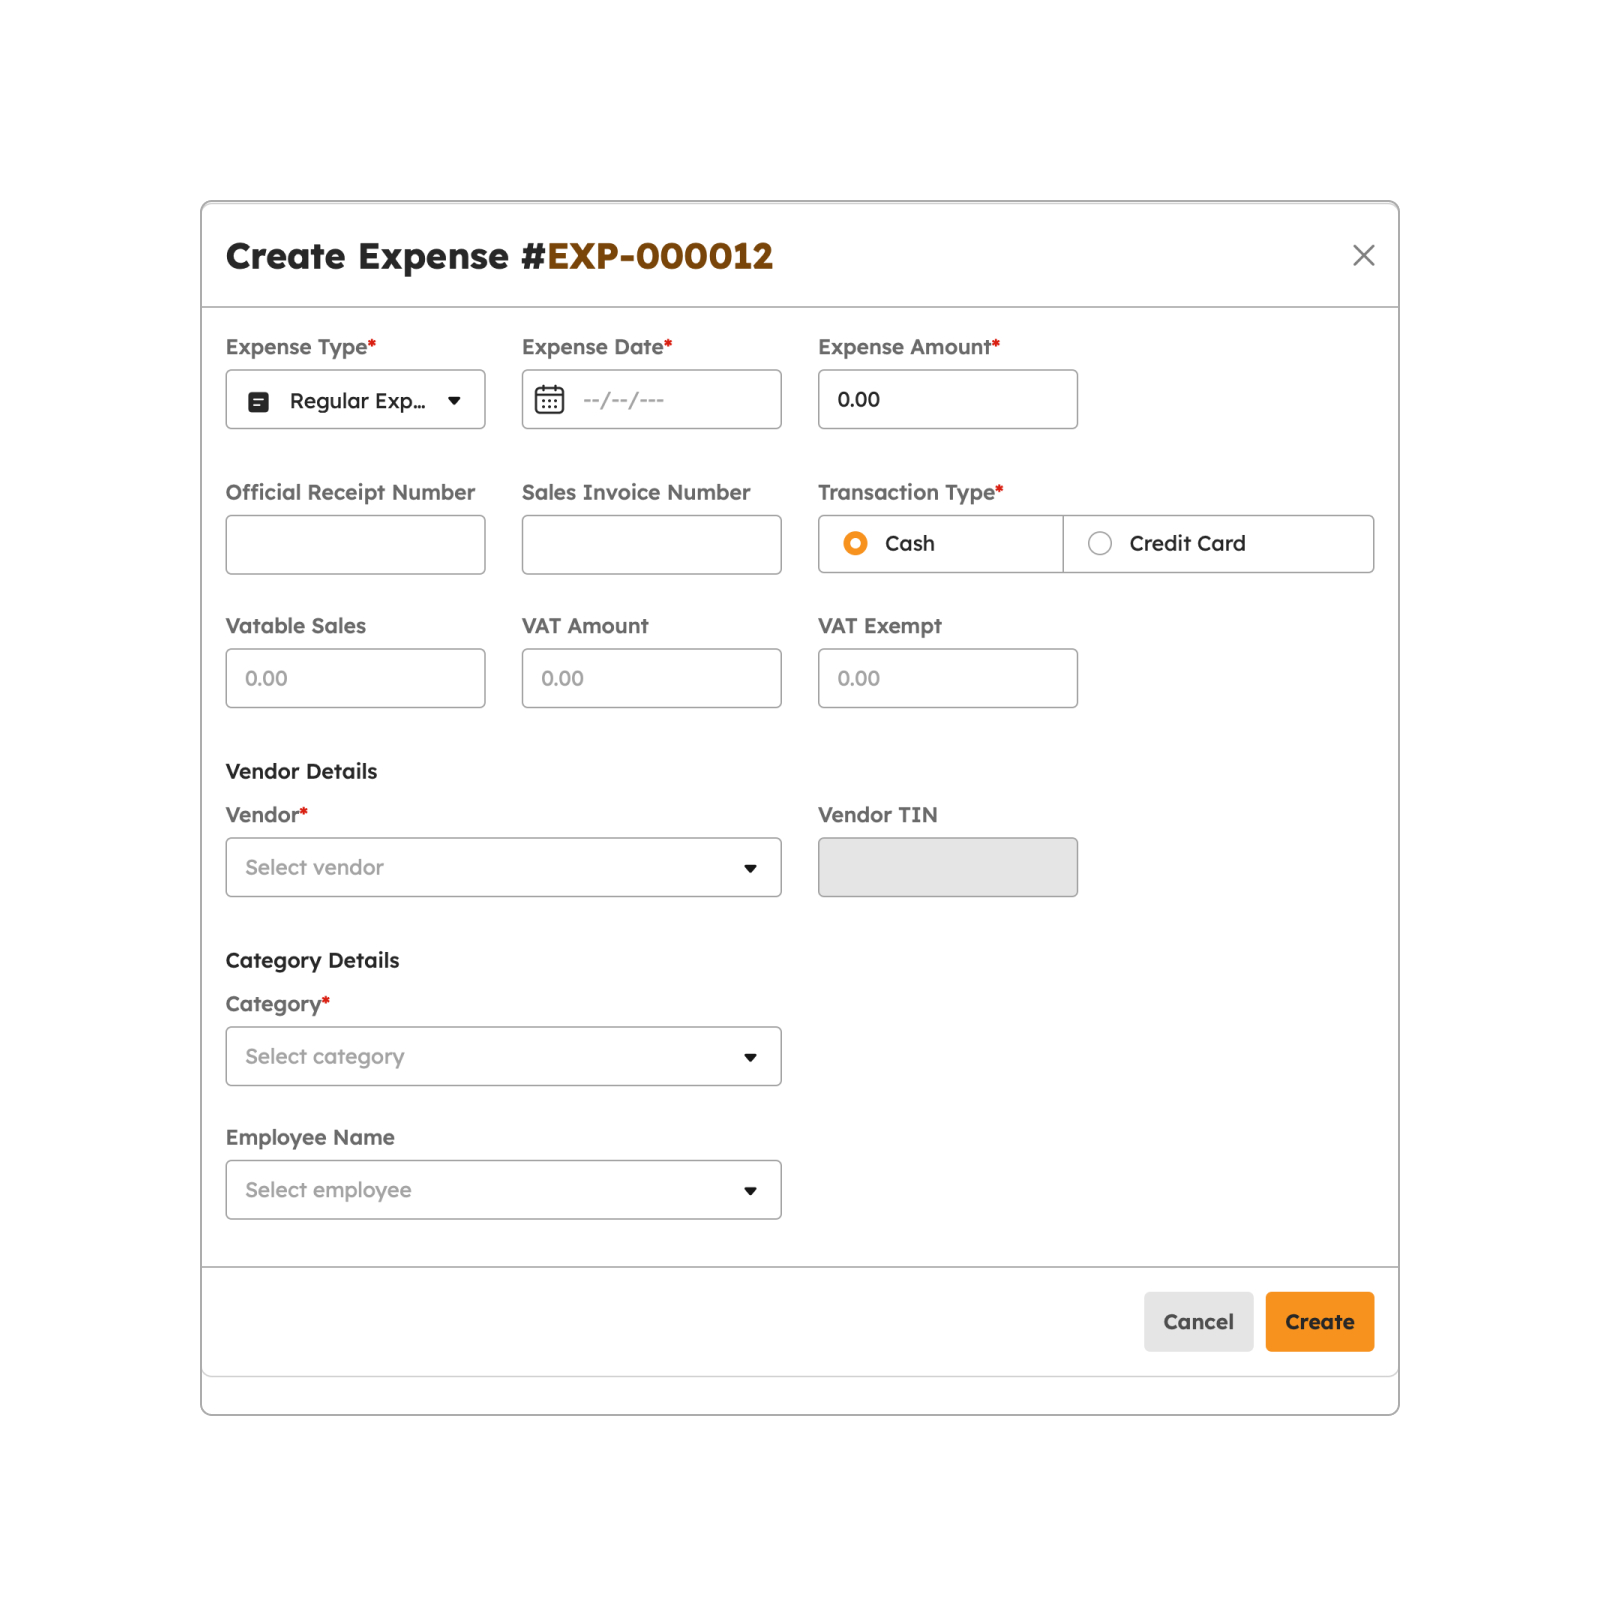
- Expense Type - The user may select the Regular Expense from the selection
- Expense Date
- Official Receipt Number
- Sales Invoice Number
- Transaction Type
- Vatable Sales
- VAT Amount
- VAT Exempt
- Expense Amount
- Vendor
- Vendor TIN
- Employee Name
- Expense Category
- Description
- Attachments
Note
Required fields with an asterisk (*) should not be empty. An error notification message will show if one of the required fields is empty. For numbers 3 and 4, either of the fields are required. If OR number is available, kindly input the OR number only, on the other hand, if SI number is available, the user may input the SI number only.
-
Once done filling in details on the required fields, click the Create button.

-
A successful notification will appear at the bottom-right of the screen if saving details of a new expense item is a success.
Expense successfully created
- Once saved, the expense item will be tagged as Filed.
- If the user chooses not to proceed with the creation of an expense item, the user may click the Cancel button.
Creating an Expense Group Item
To create an Expense Group item, follow the procedures below:
- Click the Add button. A modal will display upon clicking this button.
-
From the modal, fill in the required fields with an asterisk (*) as follows:
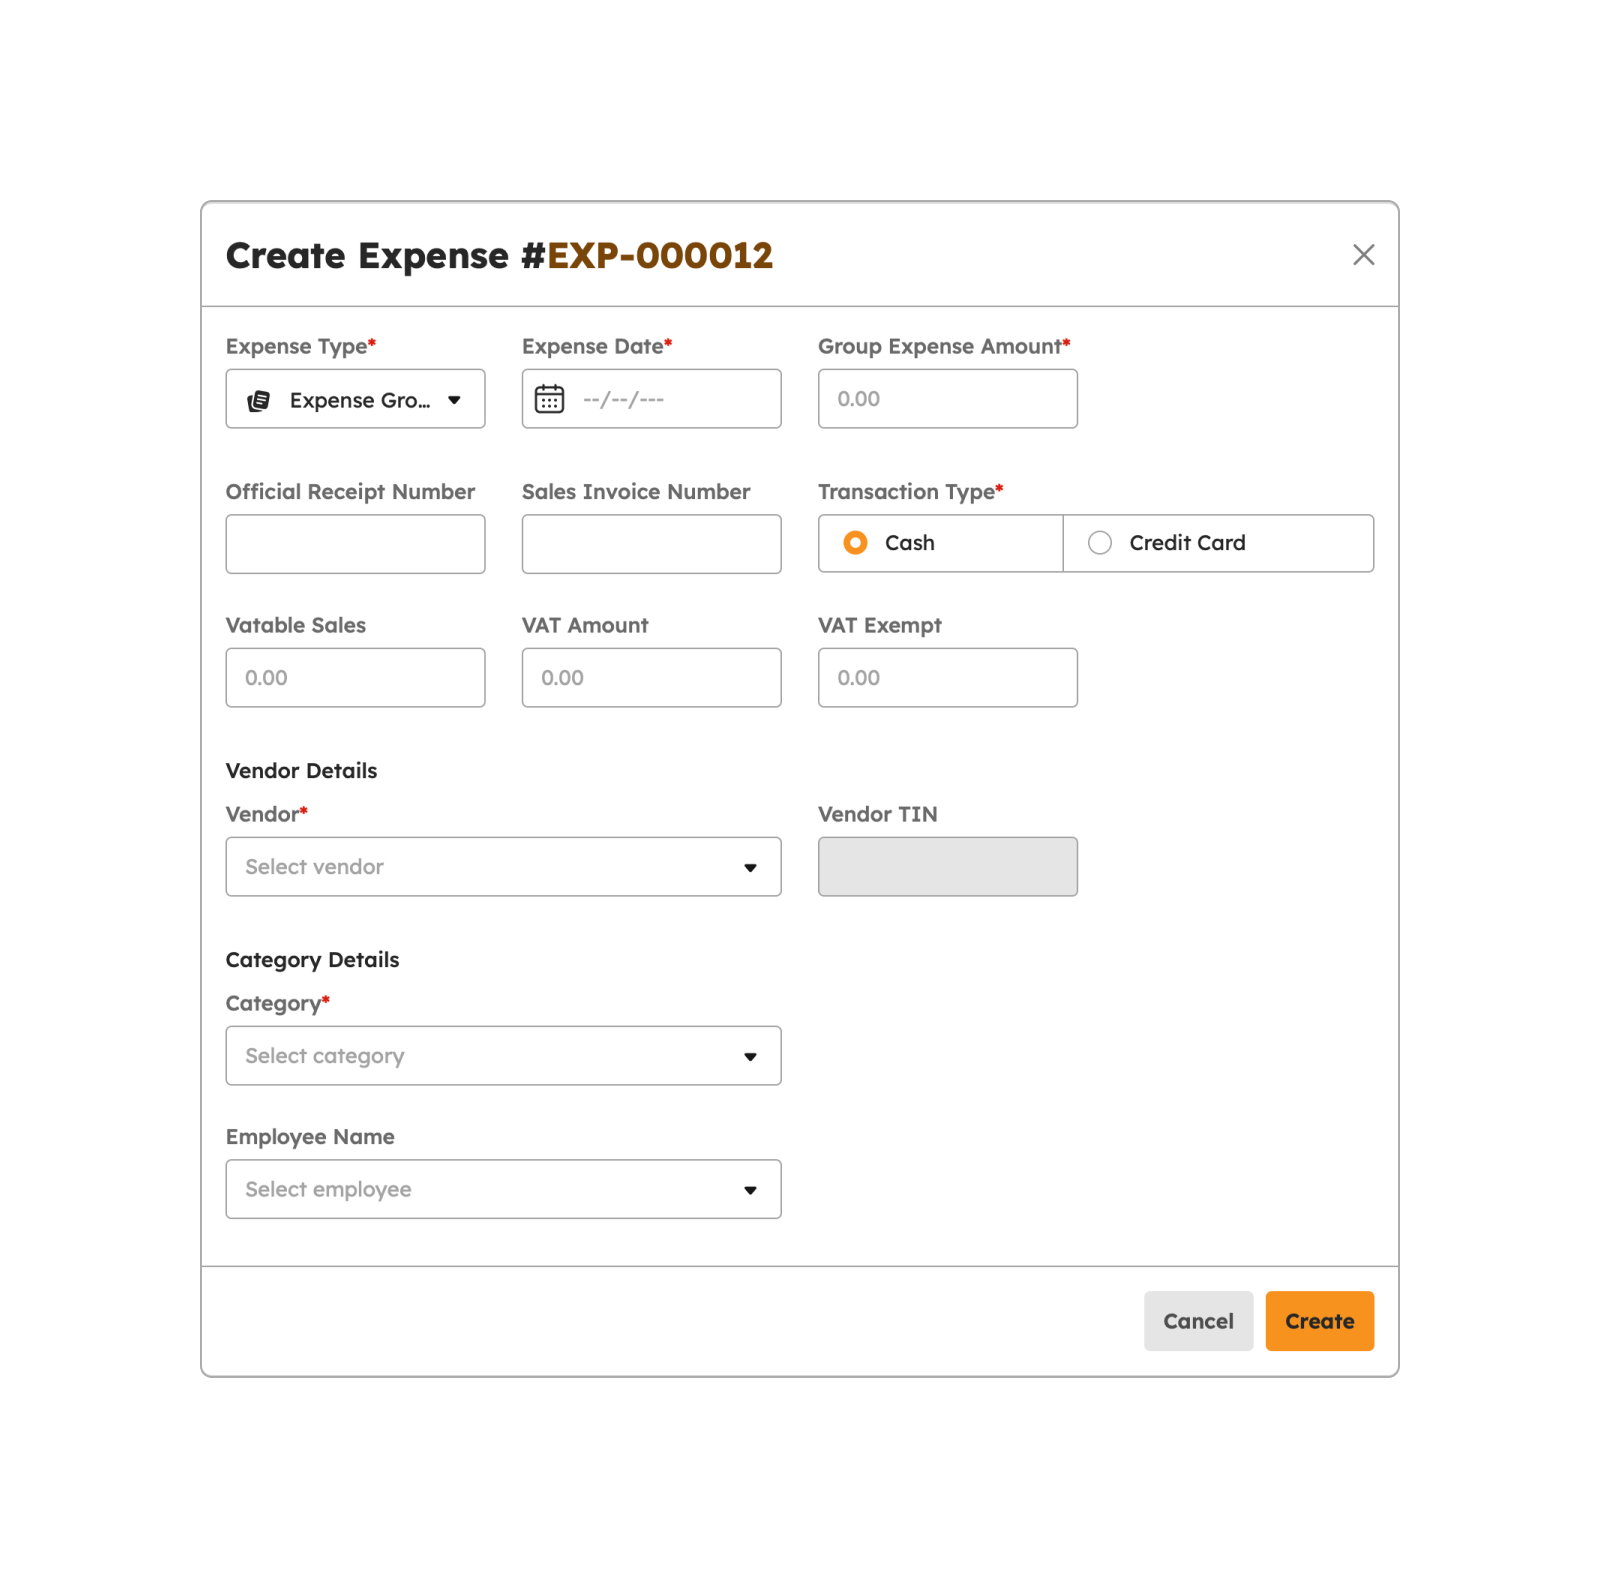
- Expense Type - The user may select the Regular Expense from the selection
- Expense Date
- Official Receipt Number
- Sales Invoice Number
- Transaction Type
- Vatable Sales
- VAT Amount
- VAT Exempt
- Group Expense Amount
- Vendor
- Vendor TIN
- Employee Name
- Expense Category
- Description
- Attachments
Note
Required fields with an asterisk (*) should not be empty. An error notification message will show if one of the required fields is empty. For numbers 3 and 4, either of the fields are required. If OR number is available, kindly input the OR number only, on the other hand, if SI number is available, the user may input the SI number only.
- Once done filling in details on the required fields, click the Create button.
-
A successful notification will appear at the bottom-right of the screen if saving details of a new expense item is a success.
Expense successfully created
- Once saved, the expense item will be tagged as Filed.
- If the user chooses not to proceed with the creation of an expense item, the user may click the Cancel button.
Creating a Sub-expense Item
A Sub-expense item is a more specific or detailed category of an expense within a broader category or expense account (Group Expense). To create a Sub-expense item, follow the procedures below:
- Click the Add button. A modal will display upon clicking this button.
-
From the modal, fill in the required fields with an asterisk (*) as follows:
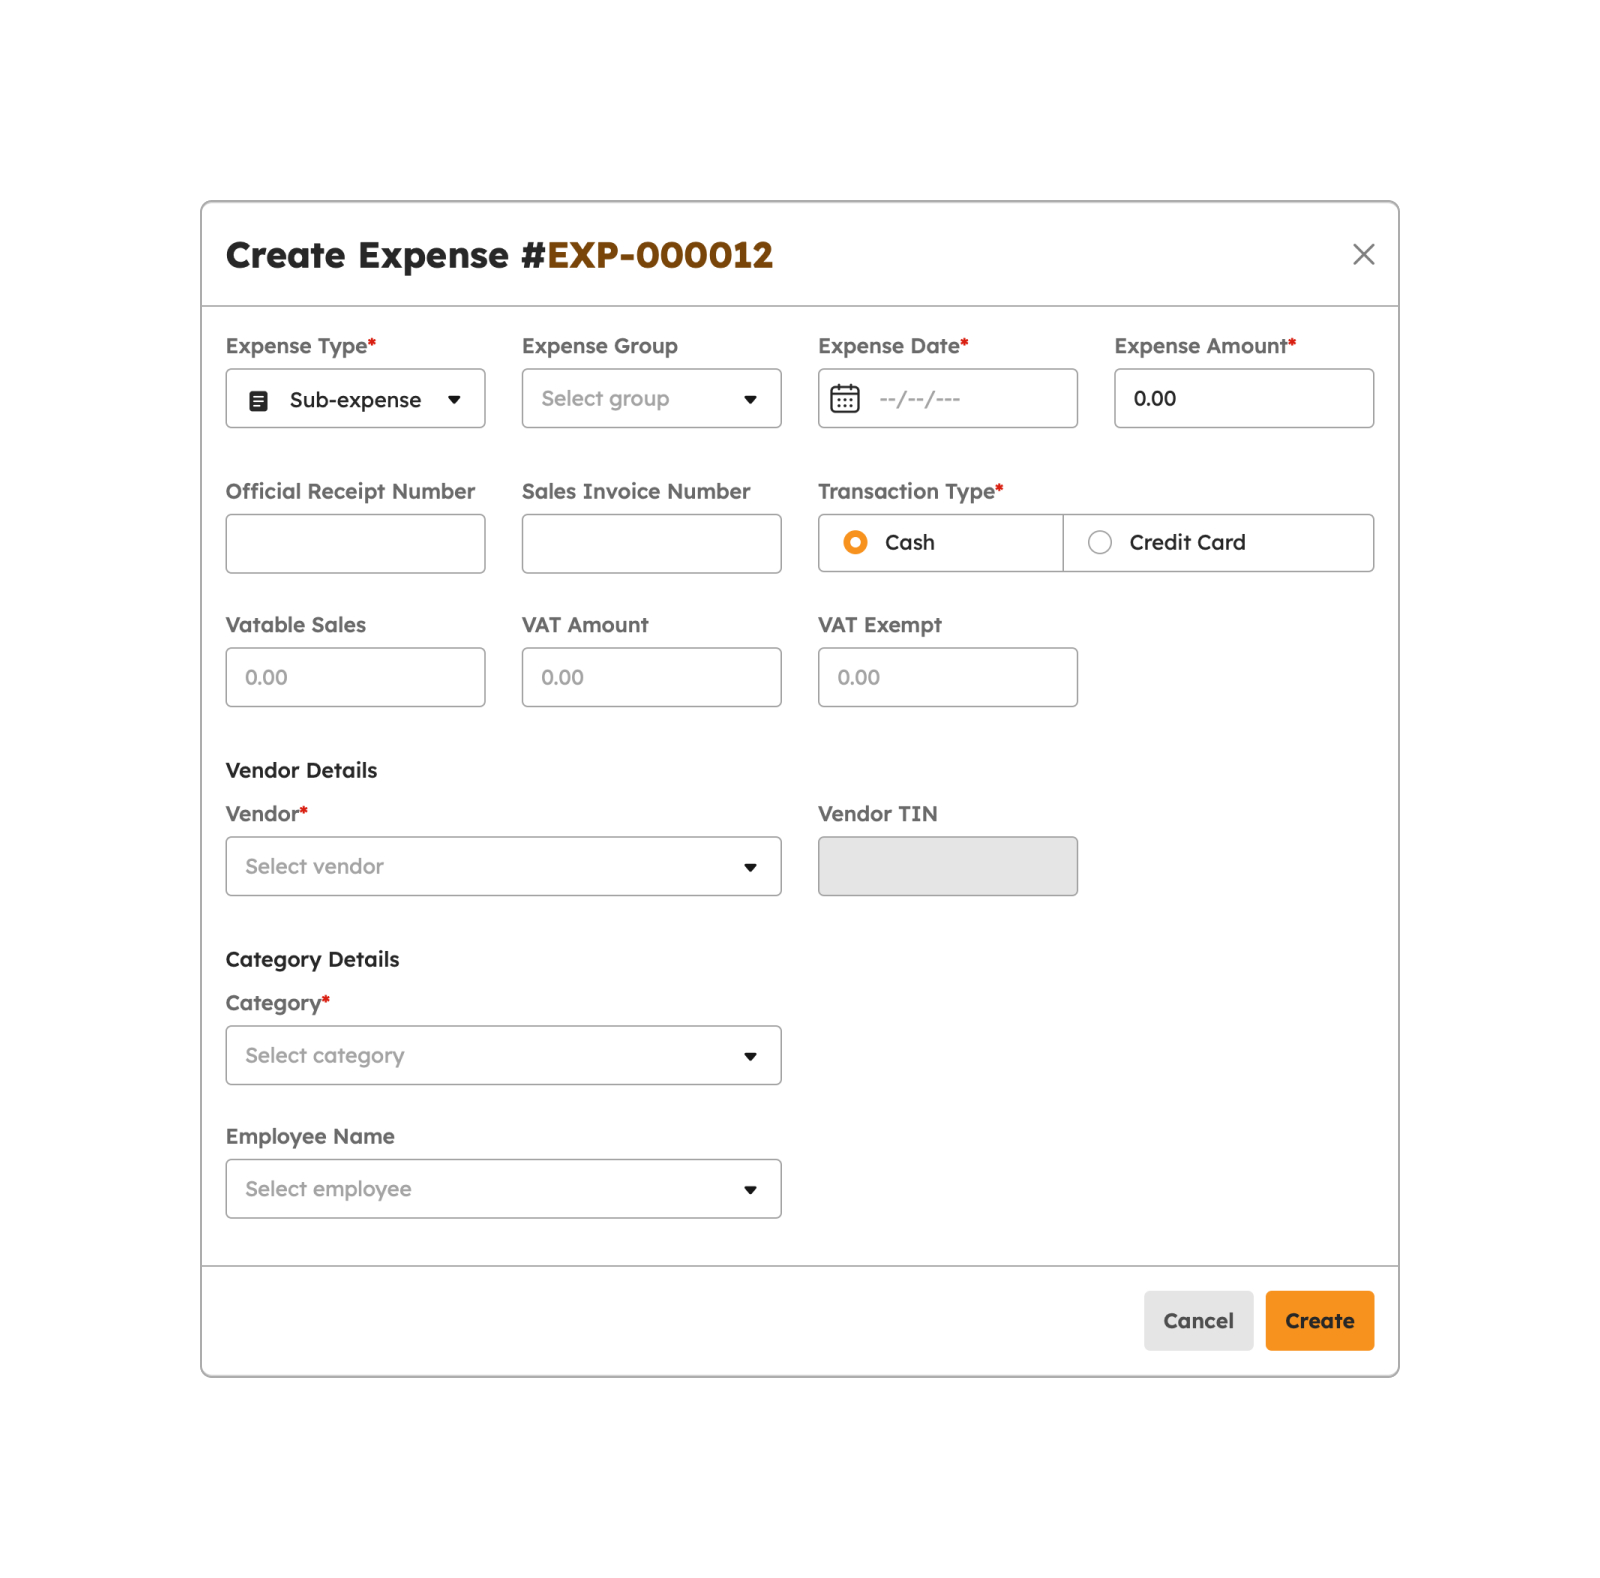
- Expense Type - The user may select the Regular Expense from the selection
- Expense Date - This field will show once the user will select the Sub-expense from the Expense Type drop-down field. All Expense Group items will be displayed here.
- Official Receipt Number
- Sales Invoice Number
- Transaction Type
- Vatable Sales
- VAT Amount
- VAT Exempt
- Group Expense Amount
- Vendor
- Vendor TIN
- Employee Name
- Expense Category
- Description
- Attachments
Note
Required fields with an asterisk (*) should not be empty. An error notification message will show if one of the required fields is empty. For numbers 3 and 4, either of the fields are required. If OR number is available, kindly input the OR number only, on the other hand, if SI number is available, the user may input the SI number only.
- Once done filling in details on the required fields, click the Create button.
-
A successful notification will appear at the bottom-right of the screen if saving details of a new expense item is a success.
Expense successfully created
- Once saved, the expense item will be tagged as Filed.
- If the user chooses not to proceed with the creation of an expense item, the user may click the Cancel button.
Editing an Expense Item
Users can only edit FILED expense items. To begin editing an expense item, follow the procedures below:
- Click the Edit Expense button. A modal will display upon clicking this button.
-
From the modal, fill in the required fields with an asterisk (*) as follows:
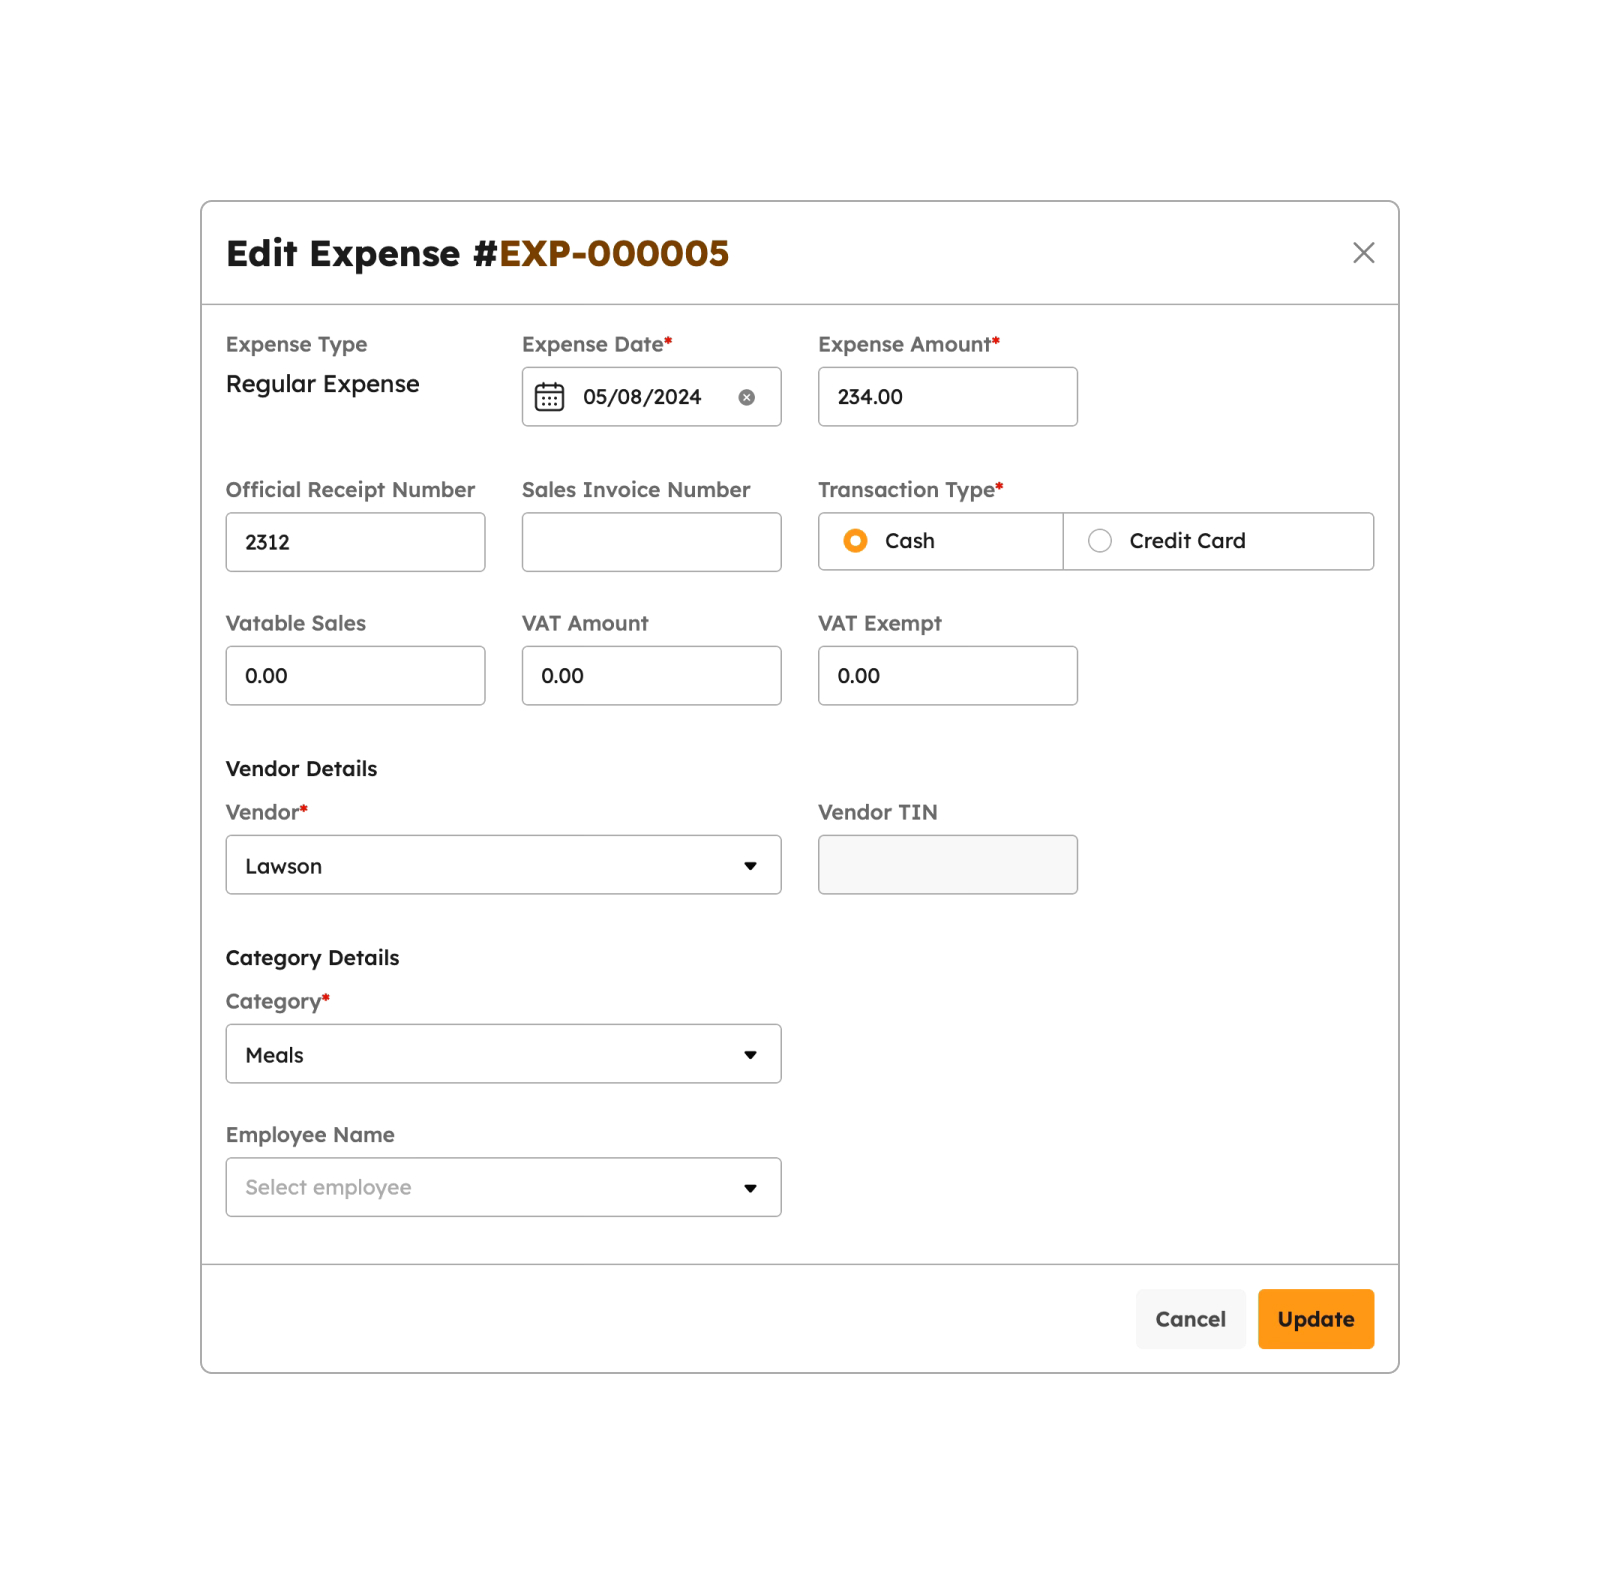
- Expense Type
- Expense Date
- Official Receipt Number
- Sales Invoice Number
- Transaction Type
- Vatable Sales
- VAT Amount
- VAT Exempt
- Group Expense Amount
- Vendor
- Vendor TIN
- Employee Name
- Expense Category
- Description
- Attachments
Note
Required fields with an asterisk (*) should not be empty. An error notification message will show if one of the required fields is empty. For numbers 3 and 4, either of the fields are required. If OR number is available, kindly input the OR number only, on the other hand, if SI number is available, the user may input the SI number only.
-
Once done filling in details on the required fields, click the Update button.
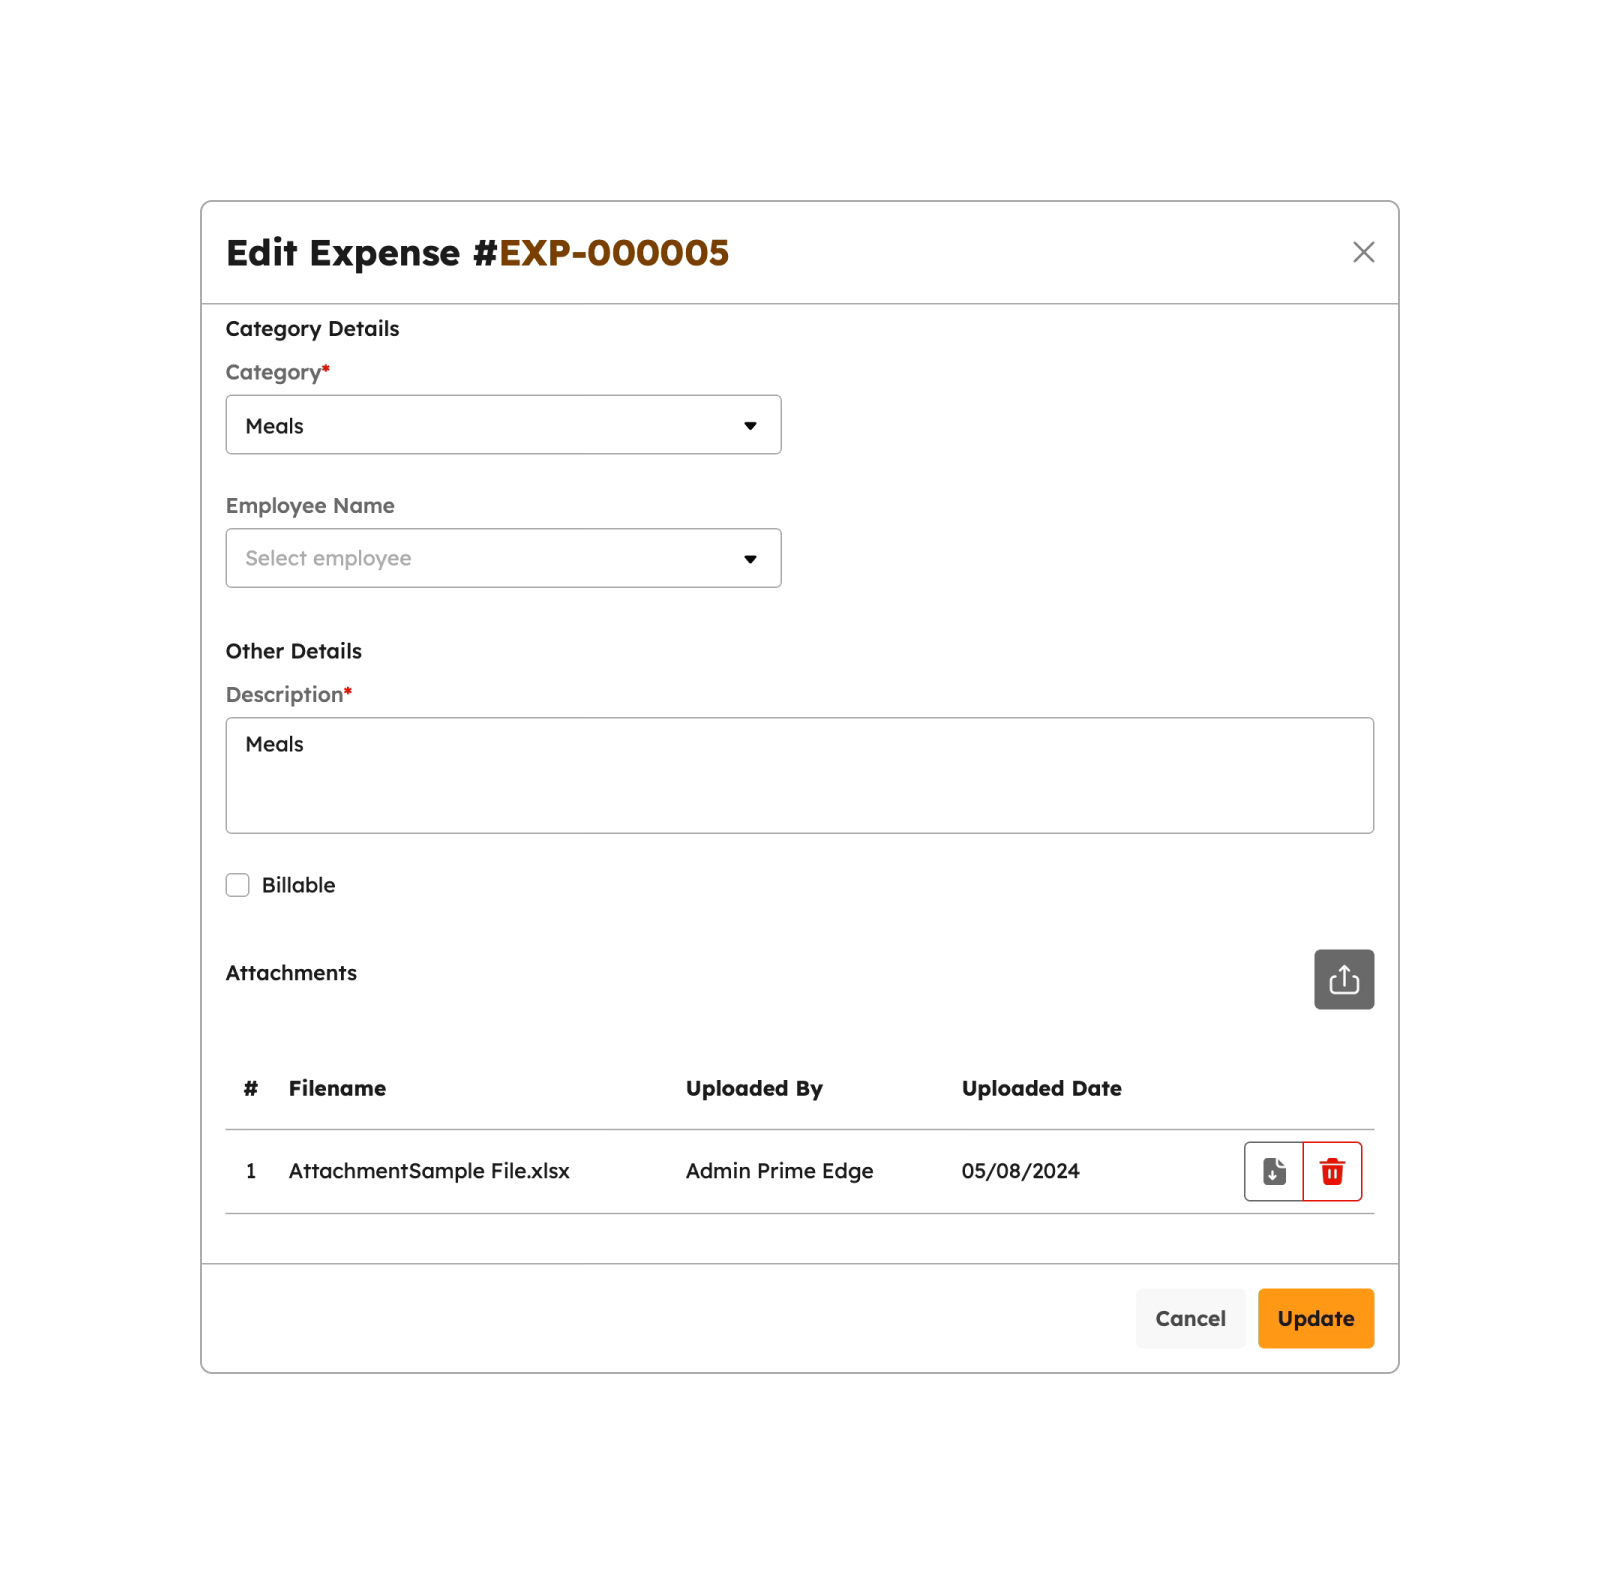
-
A successful notification will appear at the bottom-right of the screen if saving details of a new expense item is a success.
Expense successfully updated
- Once saved, the expense item will be tagged as Filed.
- If the user chooses not to proceed with the creation of an expense item, the user may click the Cancel button.
Importing Expense Items
In the event that the user wishes to create multiple expense items in a single instance, the user may use the Import Expense feature. To do so, follow procedures below:
- Click the Import Expense button to begin importing the expense items.
-
Upon clicking the Import button, a modal will display instructions on how to initiate the import as shown below:
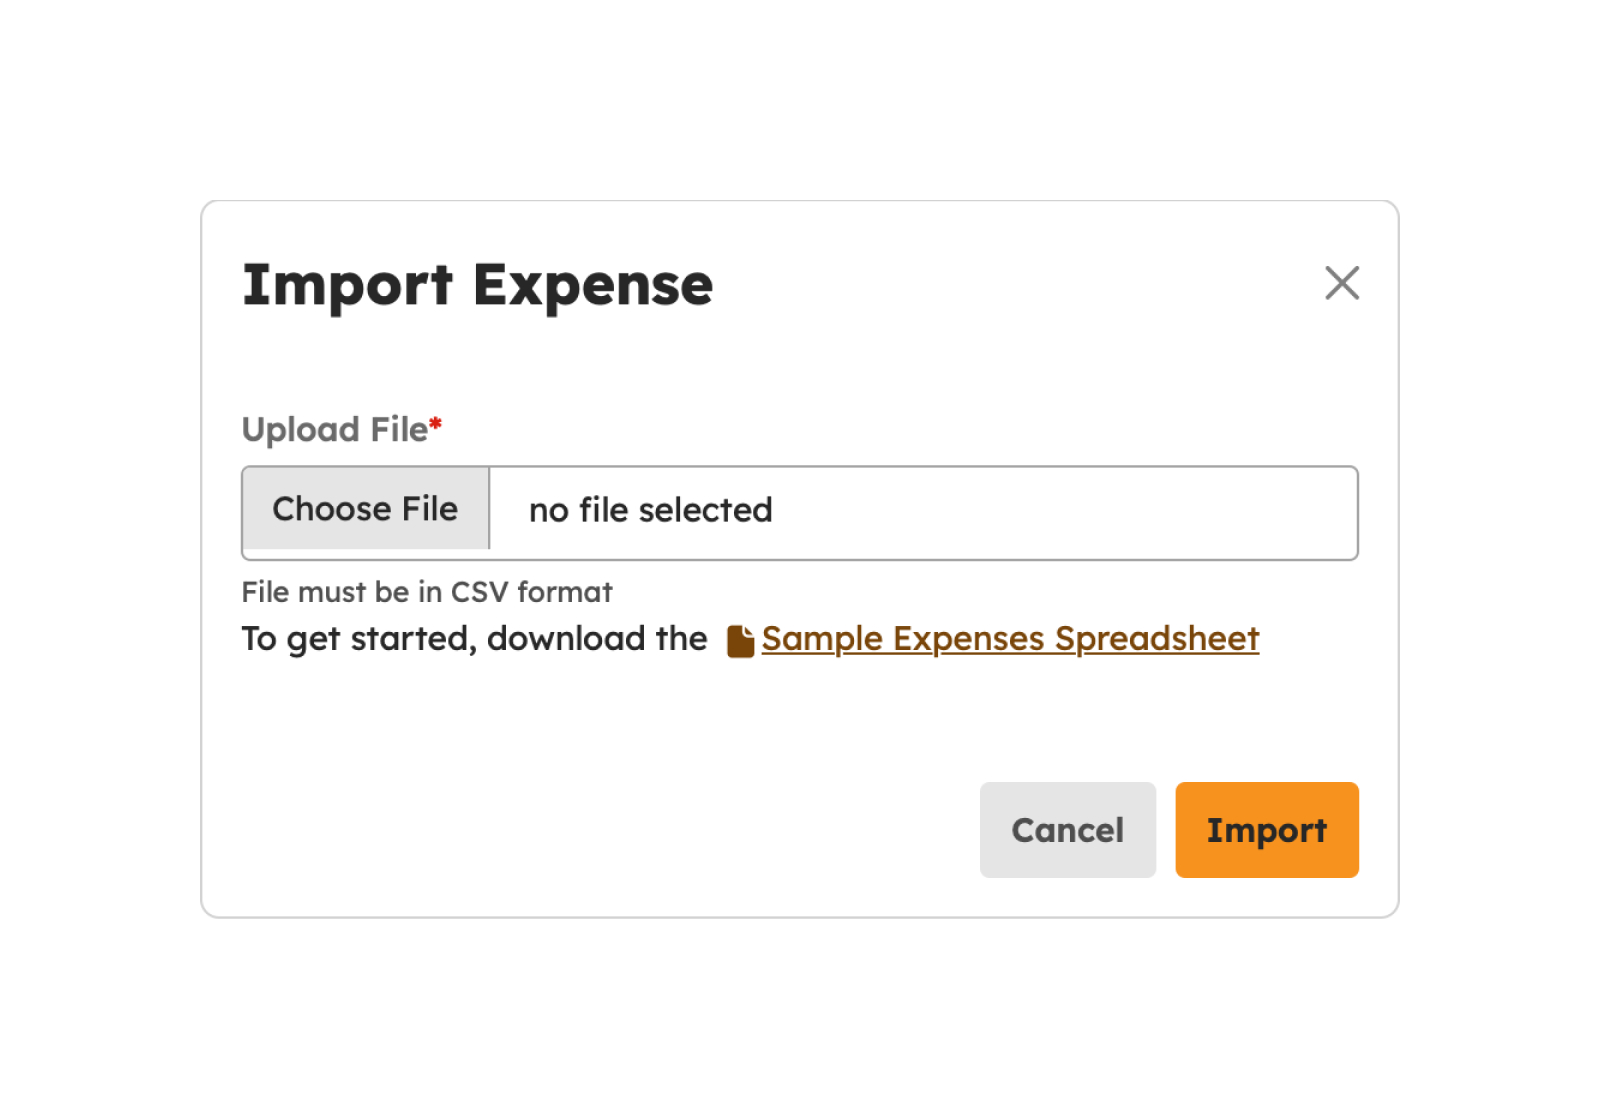
- Once done populating the CSV file for import, click the Import button.
- Otherwise, click the Cancel button if the user wishes not to continue importing the expense items.
-
If the importing of expense items is a success, a successful notification message will show at the bottom-right of the user's screen.
Expenses successfully imported
-
Otherwise, an error notification message will show.
Expenses failed to import
Viewing an Expense Item
To view an expense item, follow the procedures below:
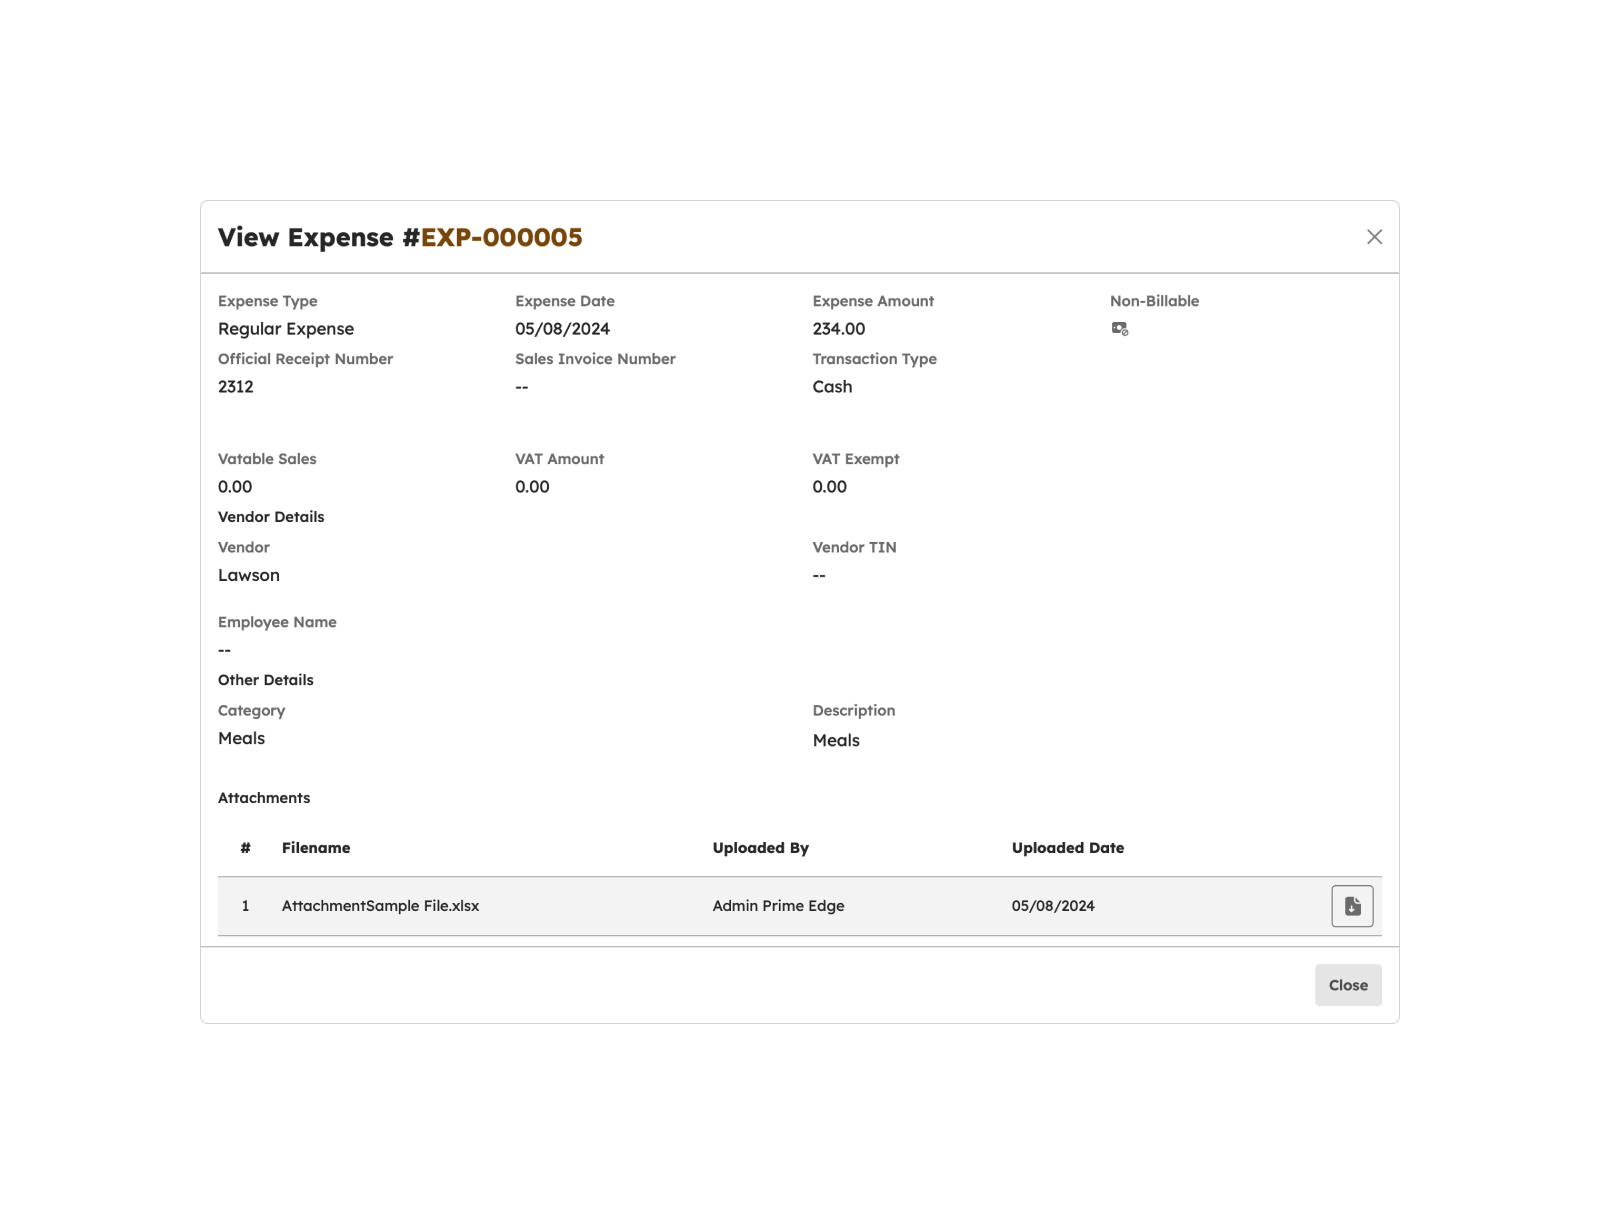
- Click the View button to view the expense details.
- Upon clicking the View icon, a modal will appear displaying the details of an expense item.
- Once done viewing the expense item, click the Close button to hide the modal.
Deleting an Expense Item
If the user wants the expense deleted for any reason, the user may follow the procedures below:
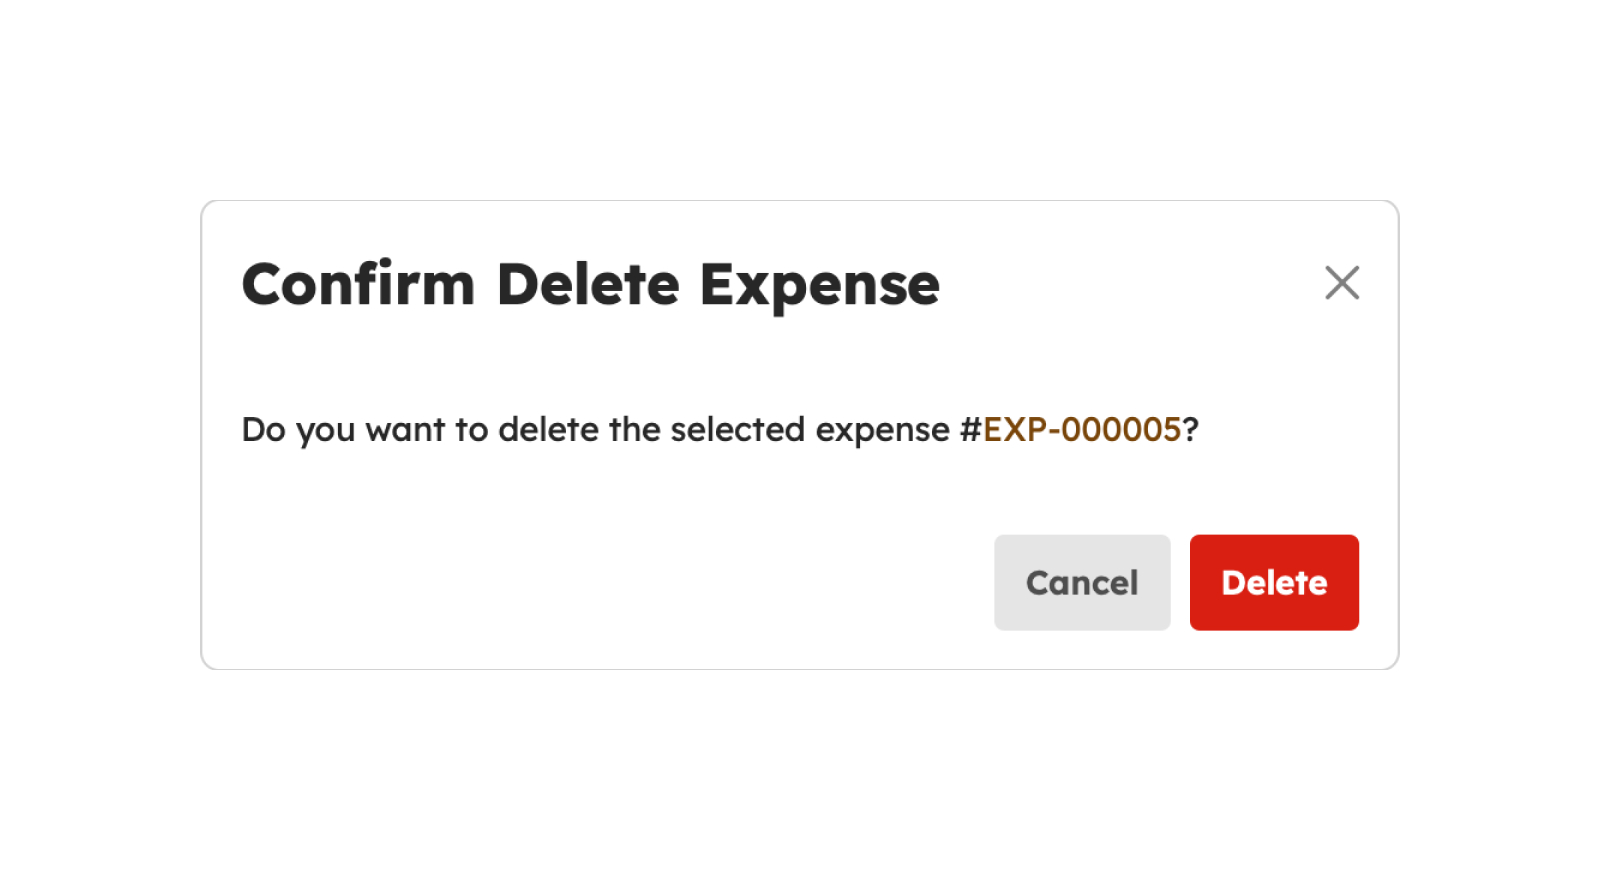
- Click on the Delete button.
- Upon clicking Delete, a confirmation modal will display.
- From the modal, click the Delete button to successfully delete the expense item.
-
A successful notification message will show.
Expense successfully deleted
- Otherwise, click the Cancel button to close the modal.
Void an Expense
If for some reason the user wants the expense to become void, the user may follow the procedures below:
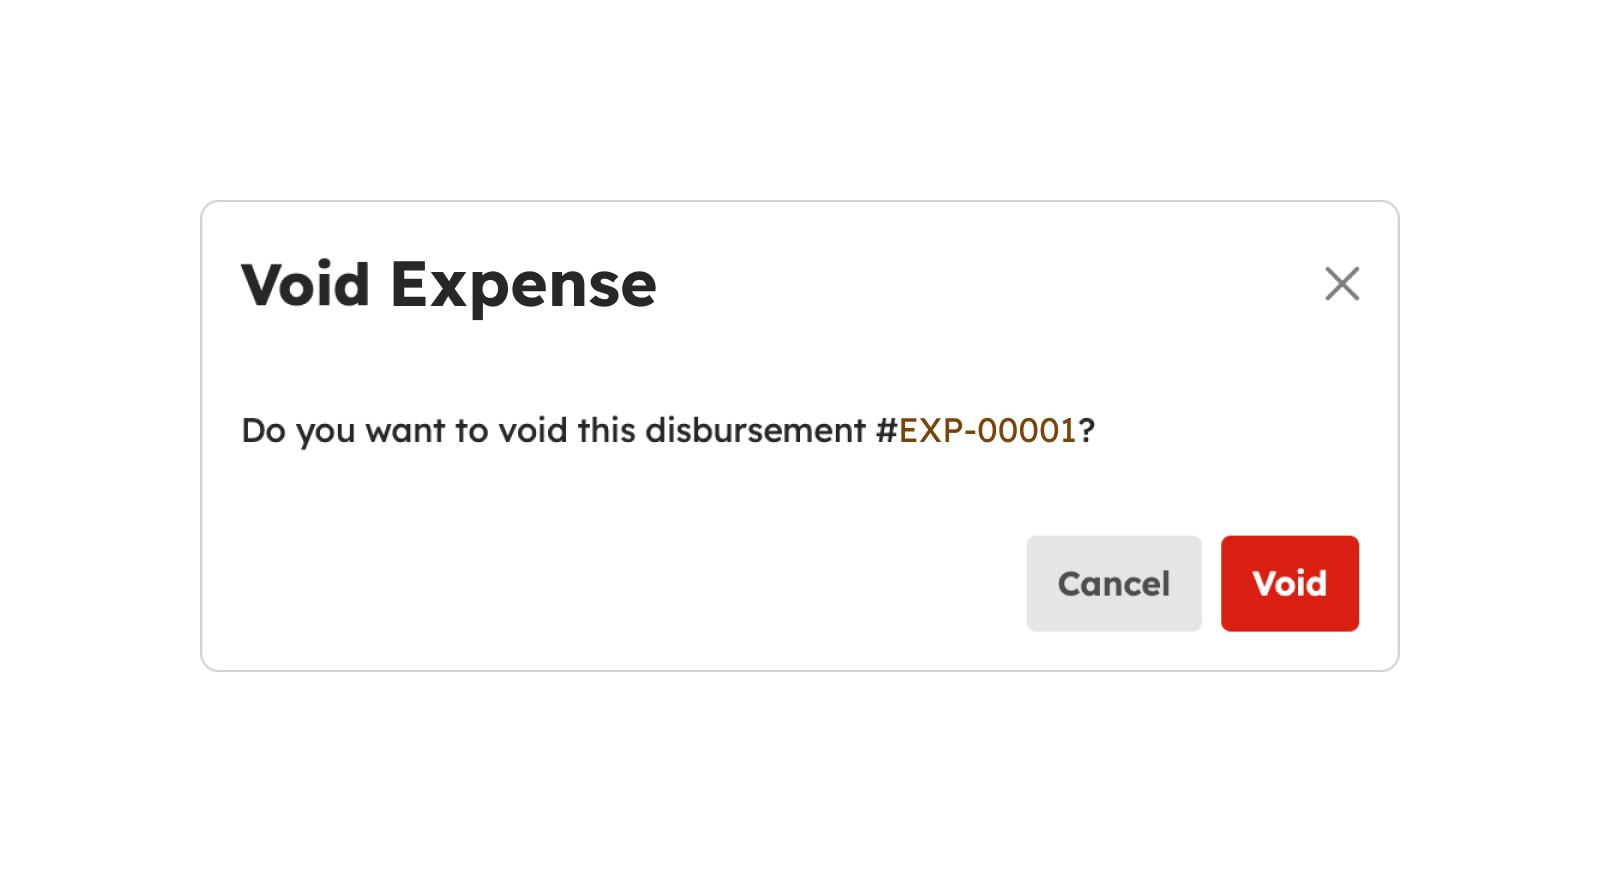
- Click on the Void button.
- Upon clicking Void, a confirmation modal will display.
- From the modal, click Void button to successfully Void the expense item.
-
A successful notification message will show.
Expense successfully void
- Otherwise, click the Cancel button to close the modal.
Load More Expenses
To verify if there are more than 20 expenses created, click the Load More button to display other expense since the default item number displayed in the screen is from count 1-20.
Expense Categories
Introduction to Expense Categories
Expenses are typically categorized for accounting purposes. Common categories include operating expenses, capital expenses, employee expenses, and more. This helps in budgeting and financial analysis and this page allows users to execute the mentioned objectives. To access the Expense Categories page, click the Manage Expense Categories button.
Expense Categories Features
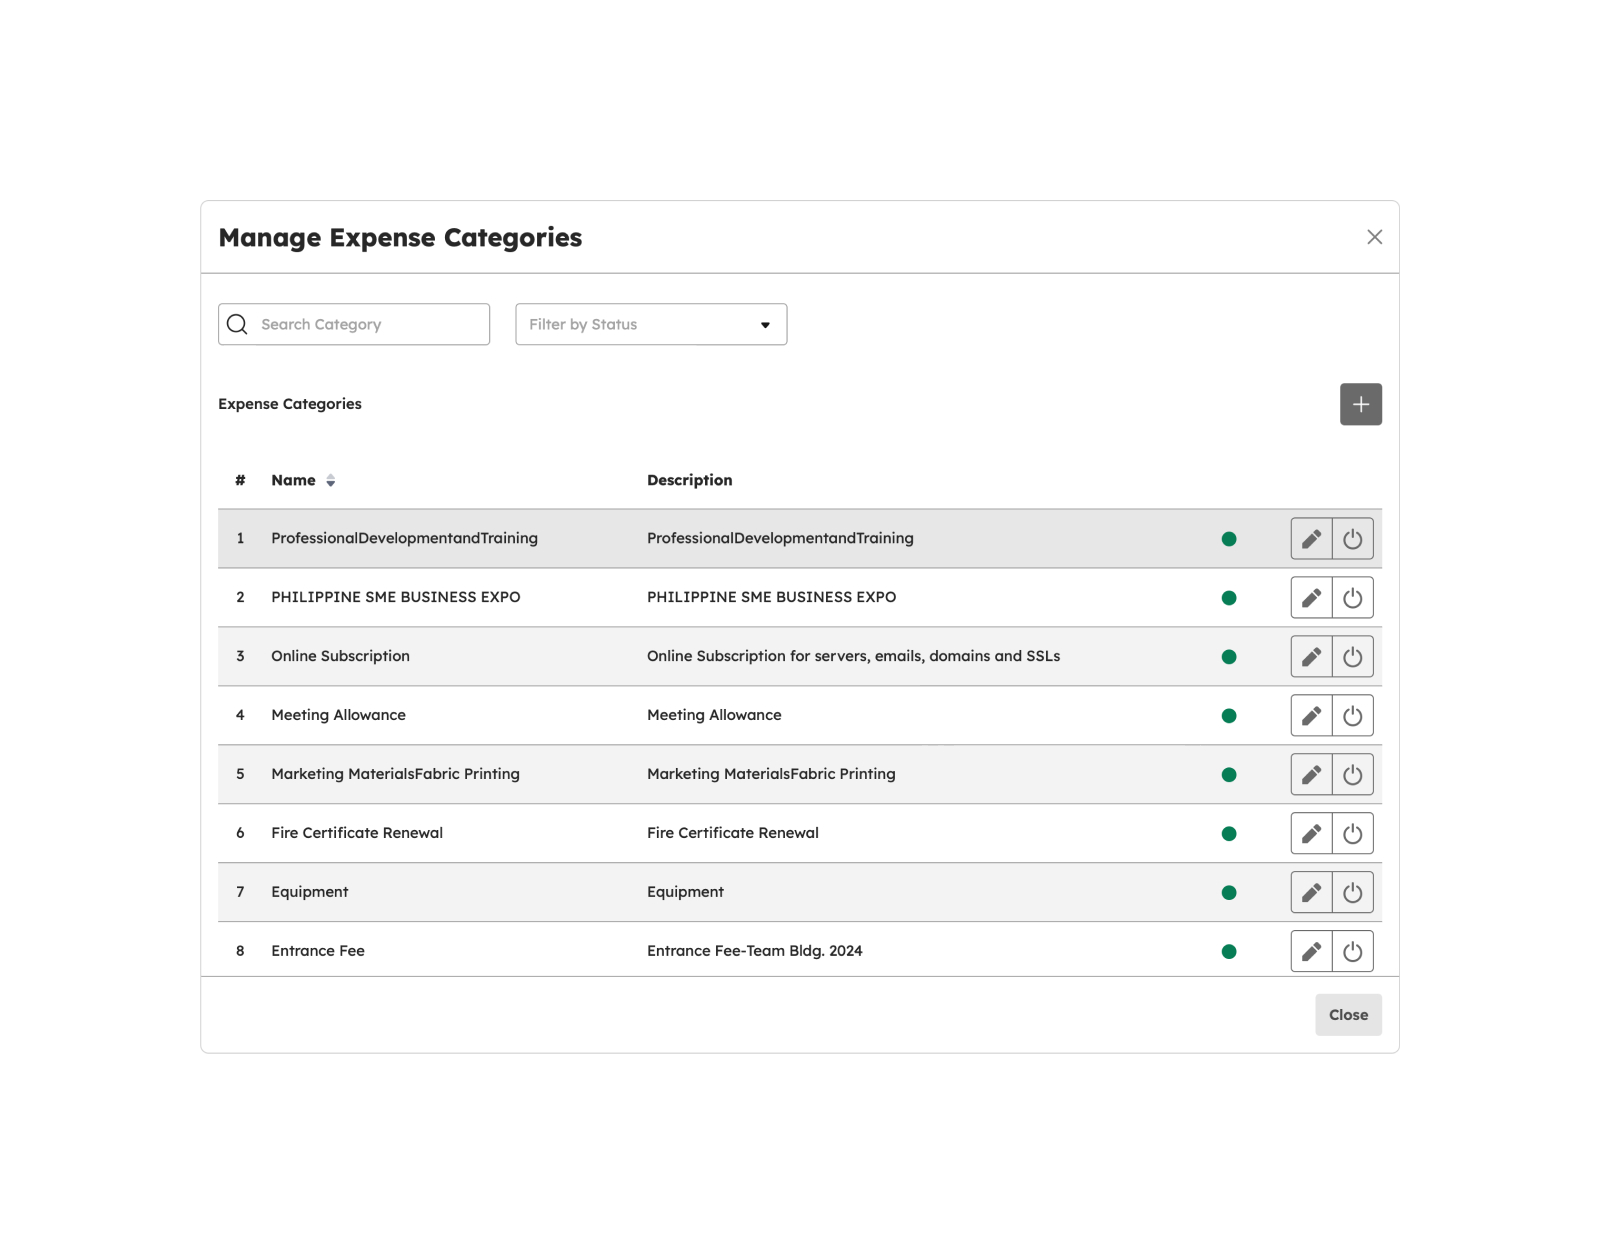
Summary Table
Upon clicking the Expense Categories button, a modal will display the Expense Categories. This modal has a table consisting of the following columns:
- #. Item number sequence for each listed expense category.
- Code. Displayed here is the code or the generic term for each category.
- Description. Displayed here is the full description of the expense category.
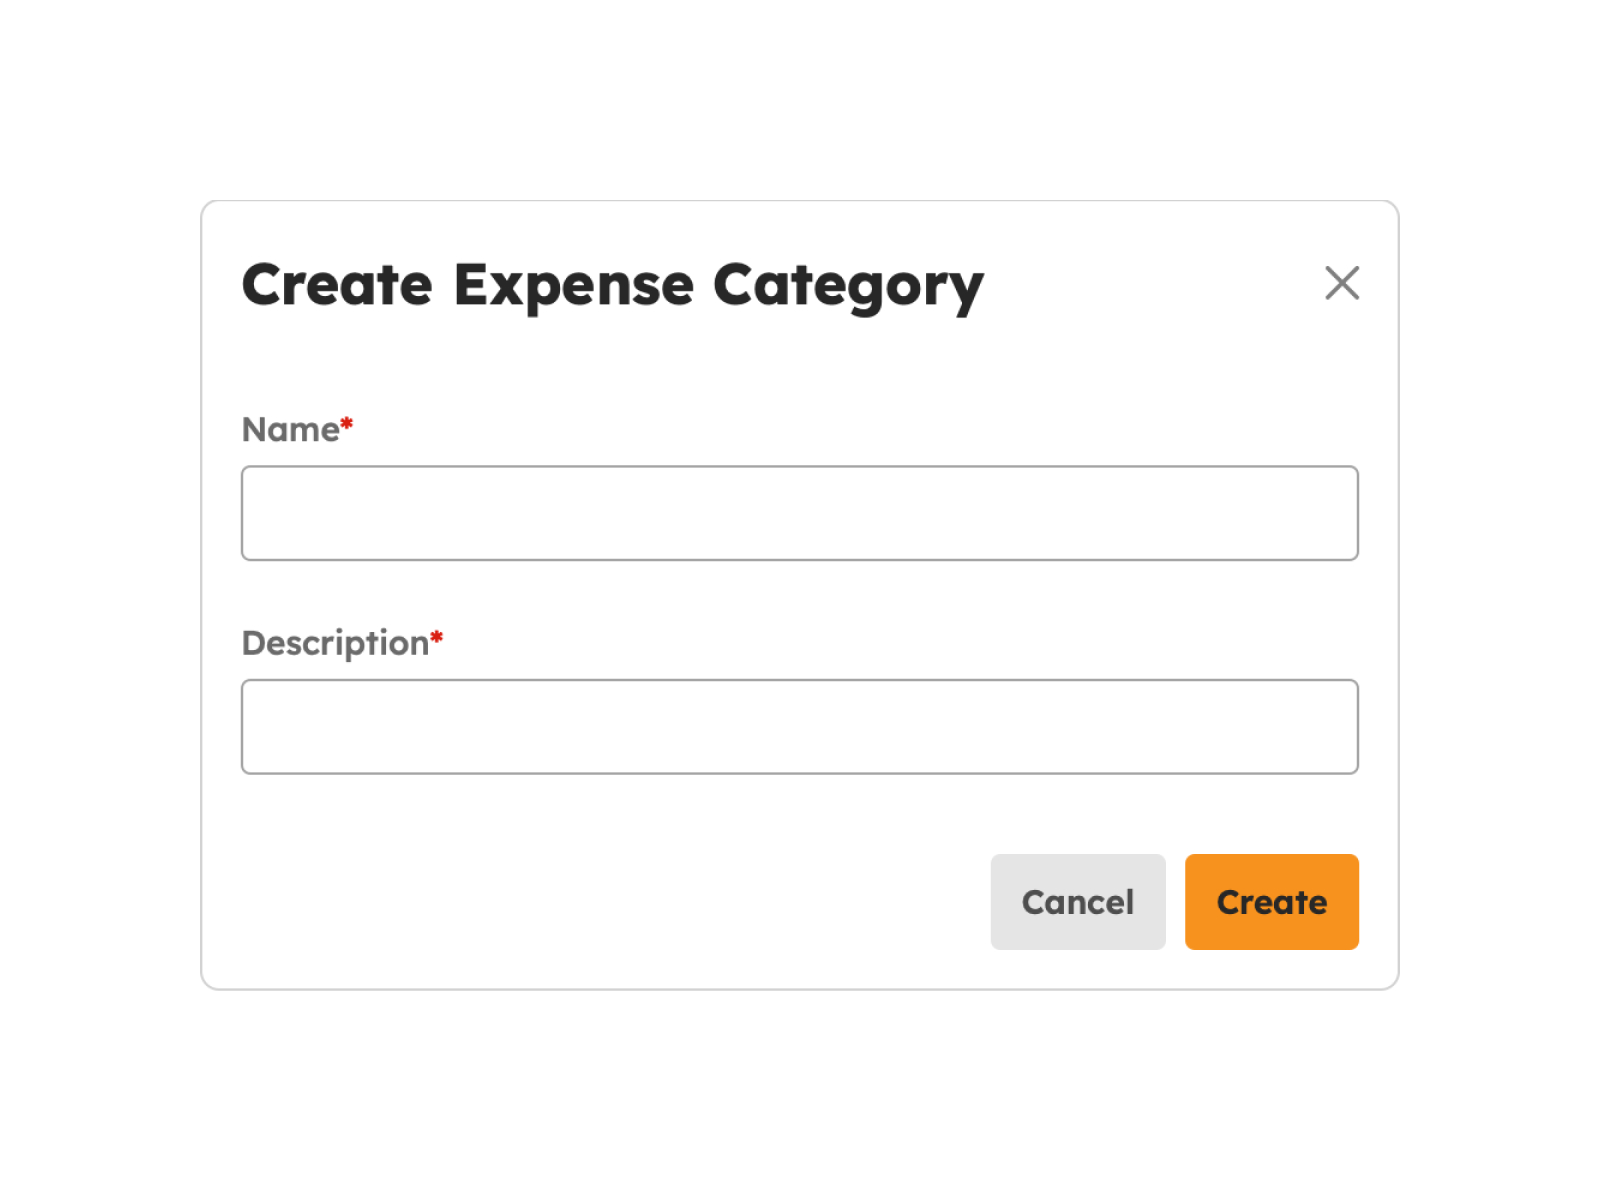
Creating an Expense Category
To create an expense category, follow the procedures below:
-
Click the Create button. A modal will display upon clicking this button.
-
From the modal, fill in the required fields with an asterisk (*) as follows:
- Code
- Description
Note
Required fields with an asterisk (*) should not be empty. An error notification message will show if one of the required fields is empty.
- Once done filling-in details in the required fields, click the Create button.
-
A successful notification will appear at the bottom-right of the screen if saving details of a newly created expense category is a success.
Expense category successfully created
- Once saved, the expense item will be tagged as Active.
- If the user chooses not to proceed with the creation of an expense category, the user may click the Cancel button.
Editing an Expense Category
- Click the Edit button. A modal will display upon clicking this button.
-
From the modal, fill in the required fields with an asterisk (*) as follows:
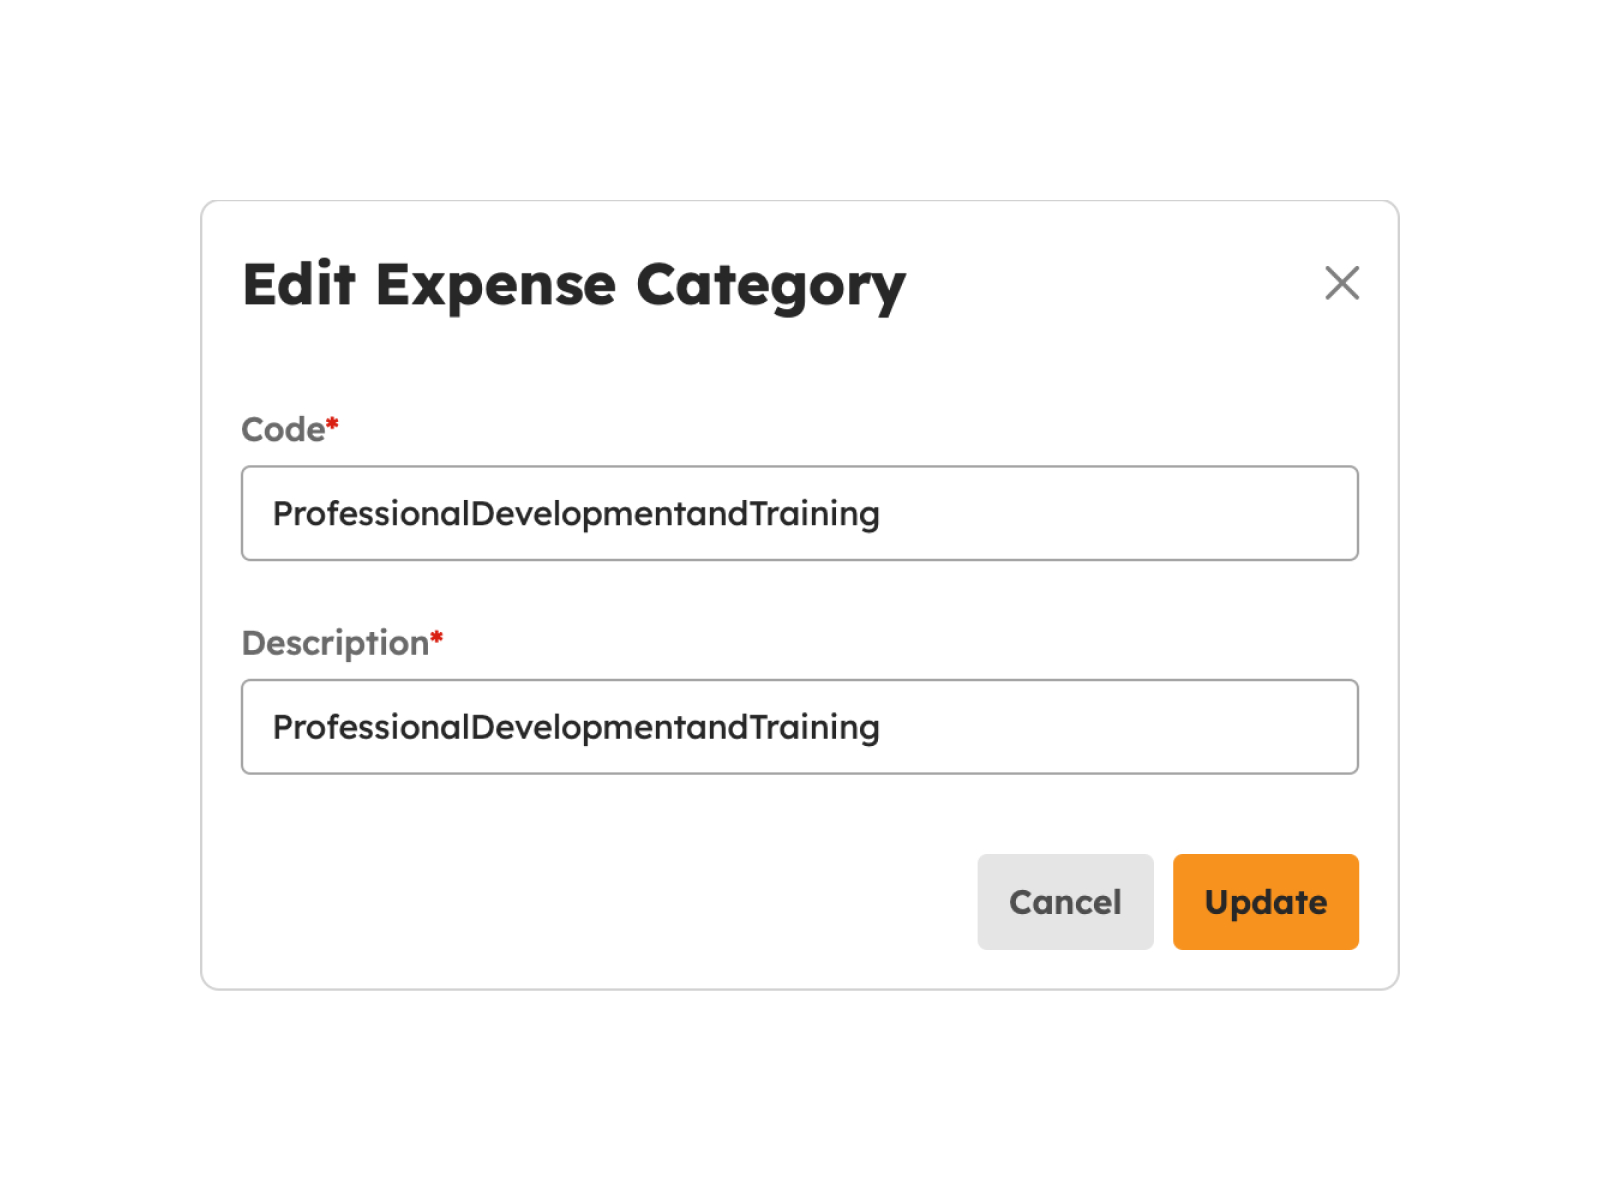
- Code
- Description
Note
Required fields with an asterisk (*) should not be empty. An error notification message will show if one of the required fields is empty.
- Once done filling-in details in the required fields, click the Update button.
-
A successful notification will appear at the bottom-right of the screen if updating details of an expense category is a success
Expense category successfully updated
- If the user chooses not to proceed with the update of an expense category, the user may click the Cancel button.
Searching an Expense Category by Code
To search for an expense category by Code, follow the guide below:

- Click on the Search bar and begin typing the Code of the expense category on the field.
- Hit Enter for Windows or Return for MAC to trigger searching for an expense category using the Code.
- The page will display an expense category with the corresponding code, if available.
- Otherwise, an empty state will show, signifying that the expense category is not available on the list.
Searching an Expense Category by Description
To search for an expense category by Description, follow the guide below:

- Click on the Search bar and begin typing the Description of the expense category on the field.
- Hit Enter for Windows or Return for MAC to trigger searching for an expense category using the description.
- The page will display an expense category with the corresponding description, if available.
- Otherwise, an empty state will show, signifying that the expense category is not available on the list.
Filtering an Expense Category by Status
To filter an expense category by status, follow the guide below:

-
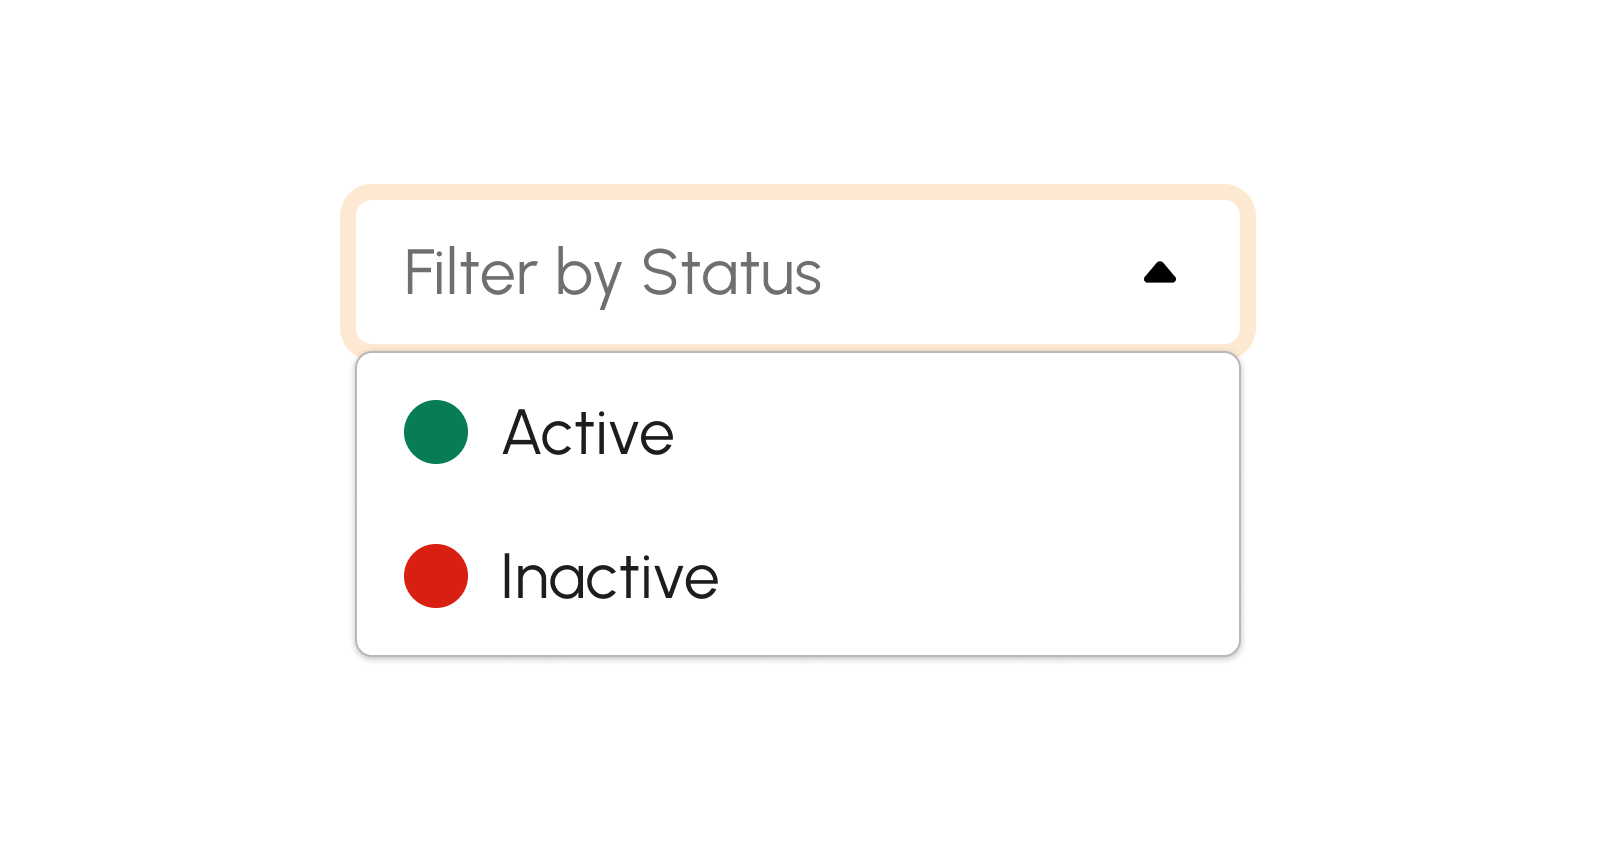
Click on Filter by Status. The drop-down selection will display all default statuses to choose from, as follows:
- Active. Indicates that the expense category is active.
- Inactive. Indicates that the expense category is inactive.
- Click a particular status from the selection to trigger filtering for an expense category.
- The page will display an expense category with the corresponding status, if available.
- Otherwise, an empty state will show, signifying that the expense category with the corresponding status is not available on the list.
Deactivating an Expense Category
If for some reason the user wants to deactivate the expense category, the user may follow the procedures below:
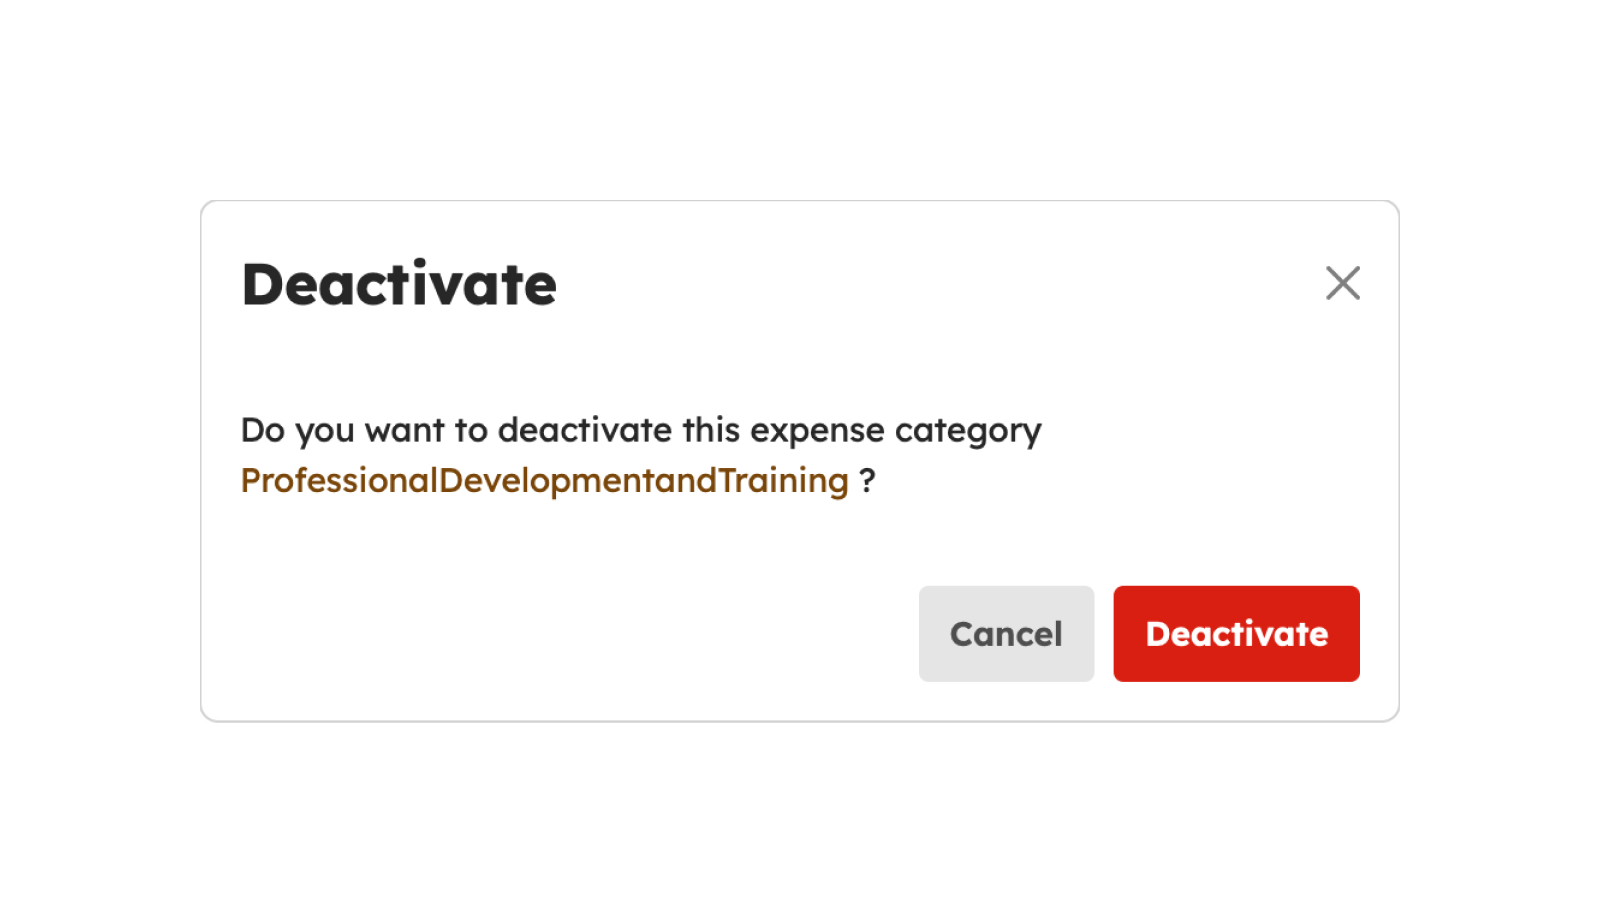
- Click on the Deactivate button.
- Upon clicking Deactivate button, a confirmation modal will display.
- From the modal, click Deactivate button to successfully Deactivate the expense category.
-
A successful notification message will show:
Expense category successfully deactivated
- Otherwise, click the Cancel button to close the modal.
Activating an Expense Category
If for some reason the user wanted to activate the expense category, the user may follow the procedures below:
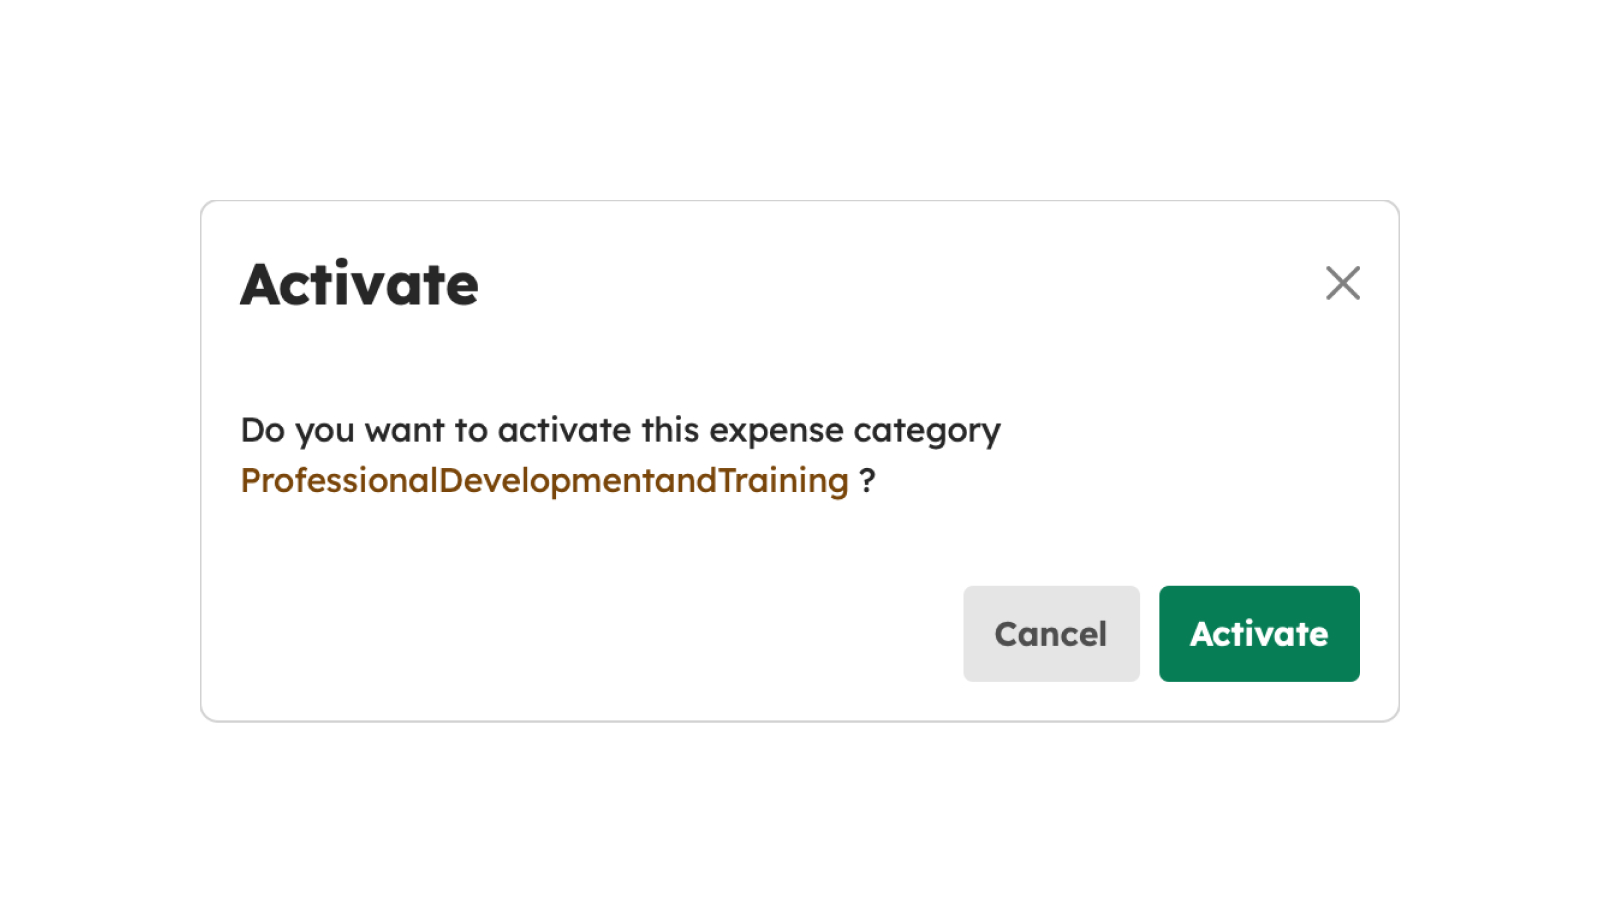
- Click on the Activate button.
- Upon clicking Activate button, a confirmation modal will display.
- From the modal, click Activate button to successfully Activate the expense category.
-
A successful notification message will show:
Expense category successfully activated
- Otherwise, click the Cancel button to close the modal.
How to Load More Expense Categories
If there are more than 20 Expense Categories on the list, click the Load More button to display other categories since the default item number displayed on the screen is from count 1-20.
Vendors
Introduction to Vendors Page
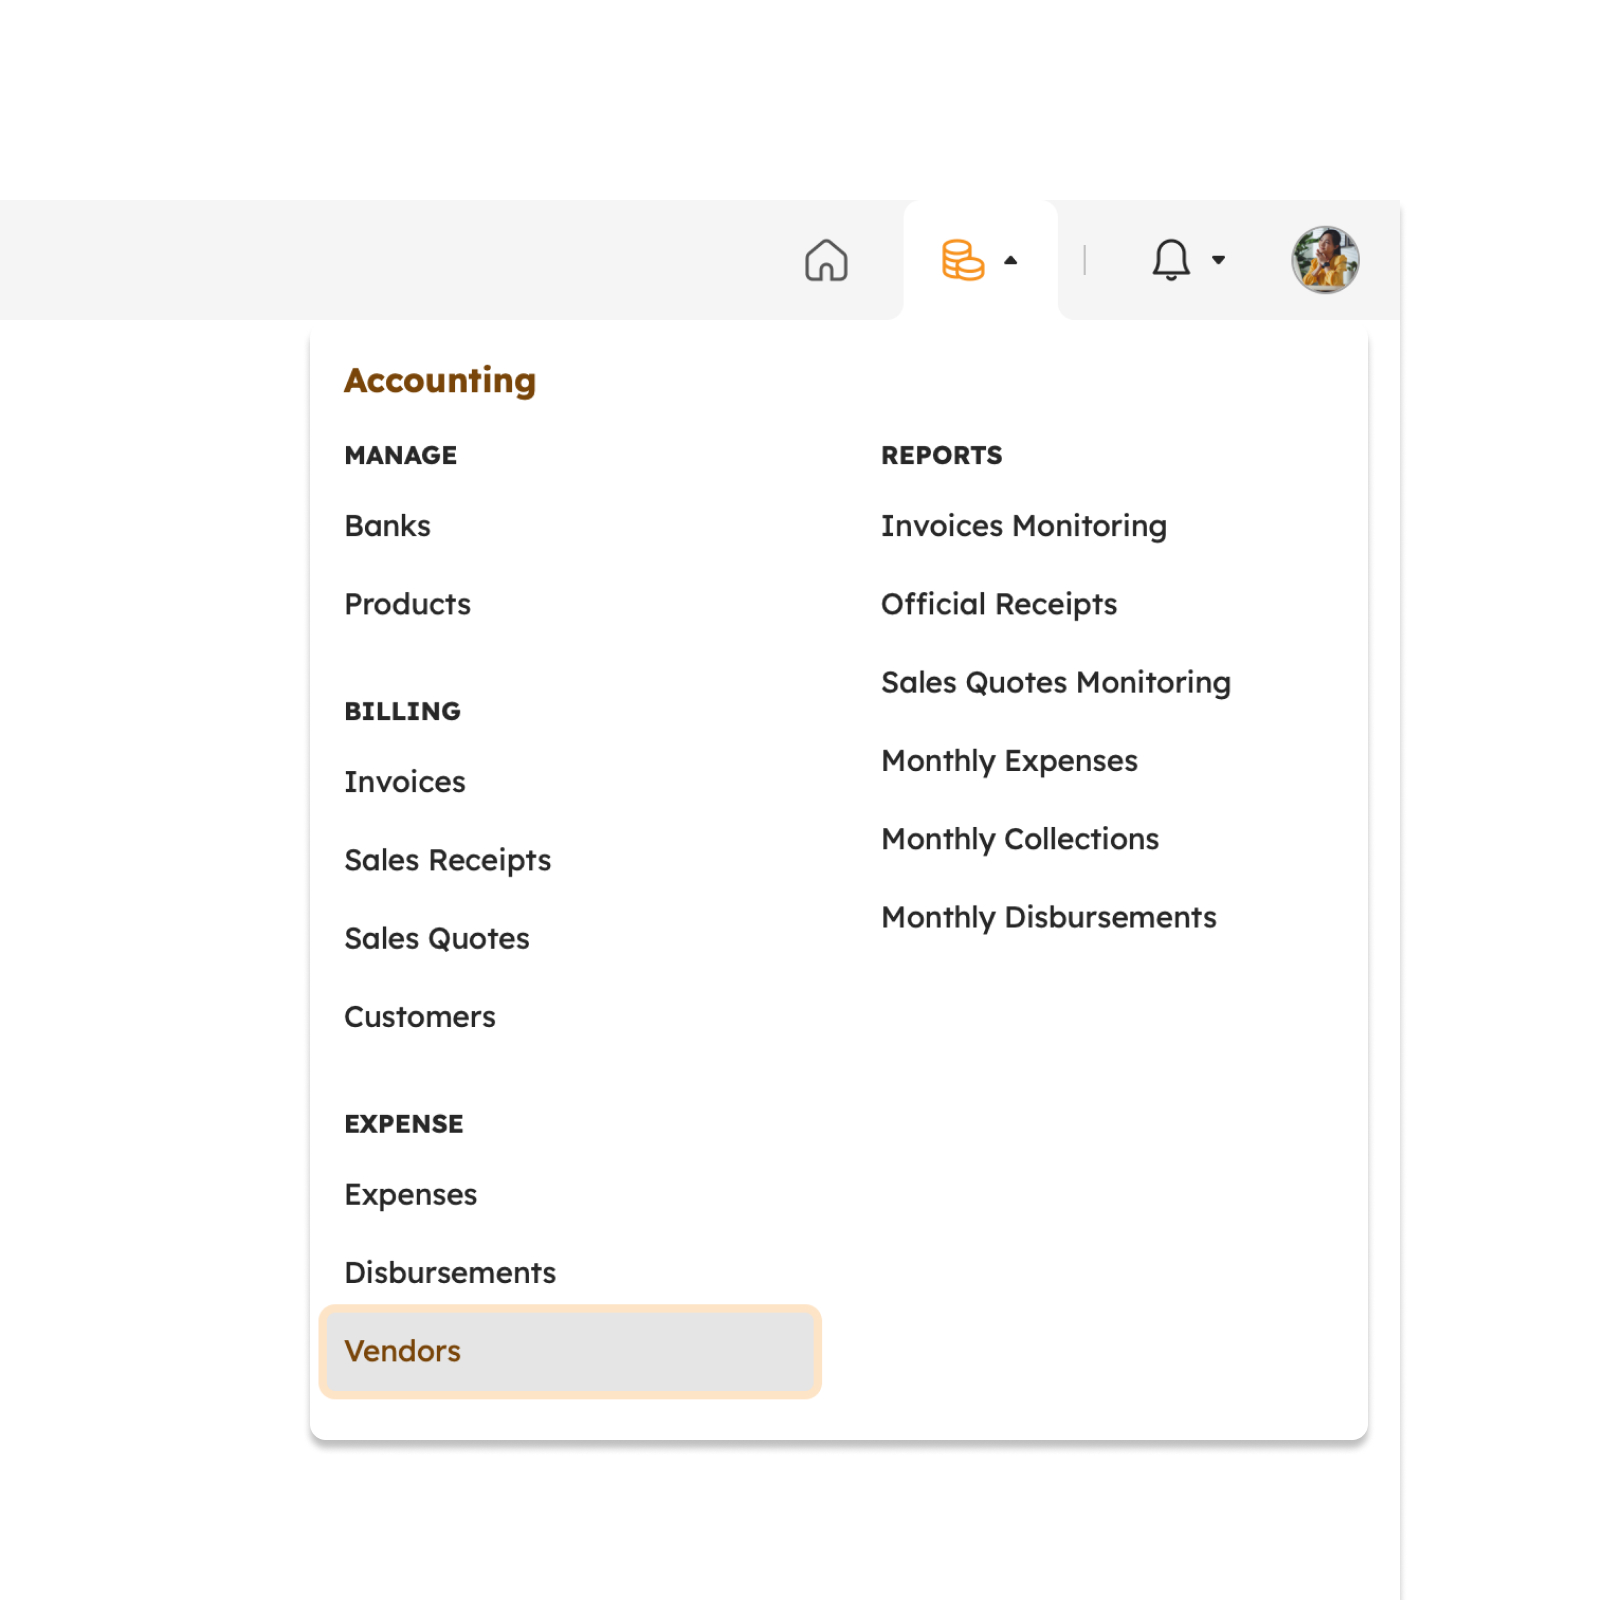
The Vendors page typically displays essential information about the vendor, such as their name, address, contact details, and tax identification number. This information is crucial for accounting purposes such as tracking payment history. The Vendors page is different from the Customers page found in the Voyadores Accounting module. The Vendors page lists all directories where an organization acquires services or products, on the other hand, the Customers page lists all client directories where an organization offers services or products. To access the Vendors page, hover over the Accounting Module and click “Vendors”.
Vendors Page Features
Summary Table
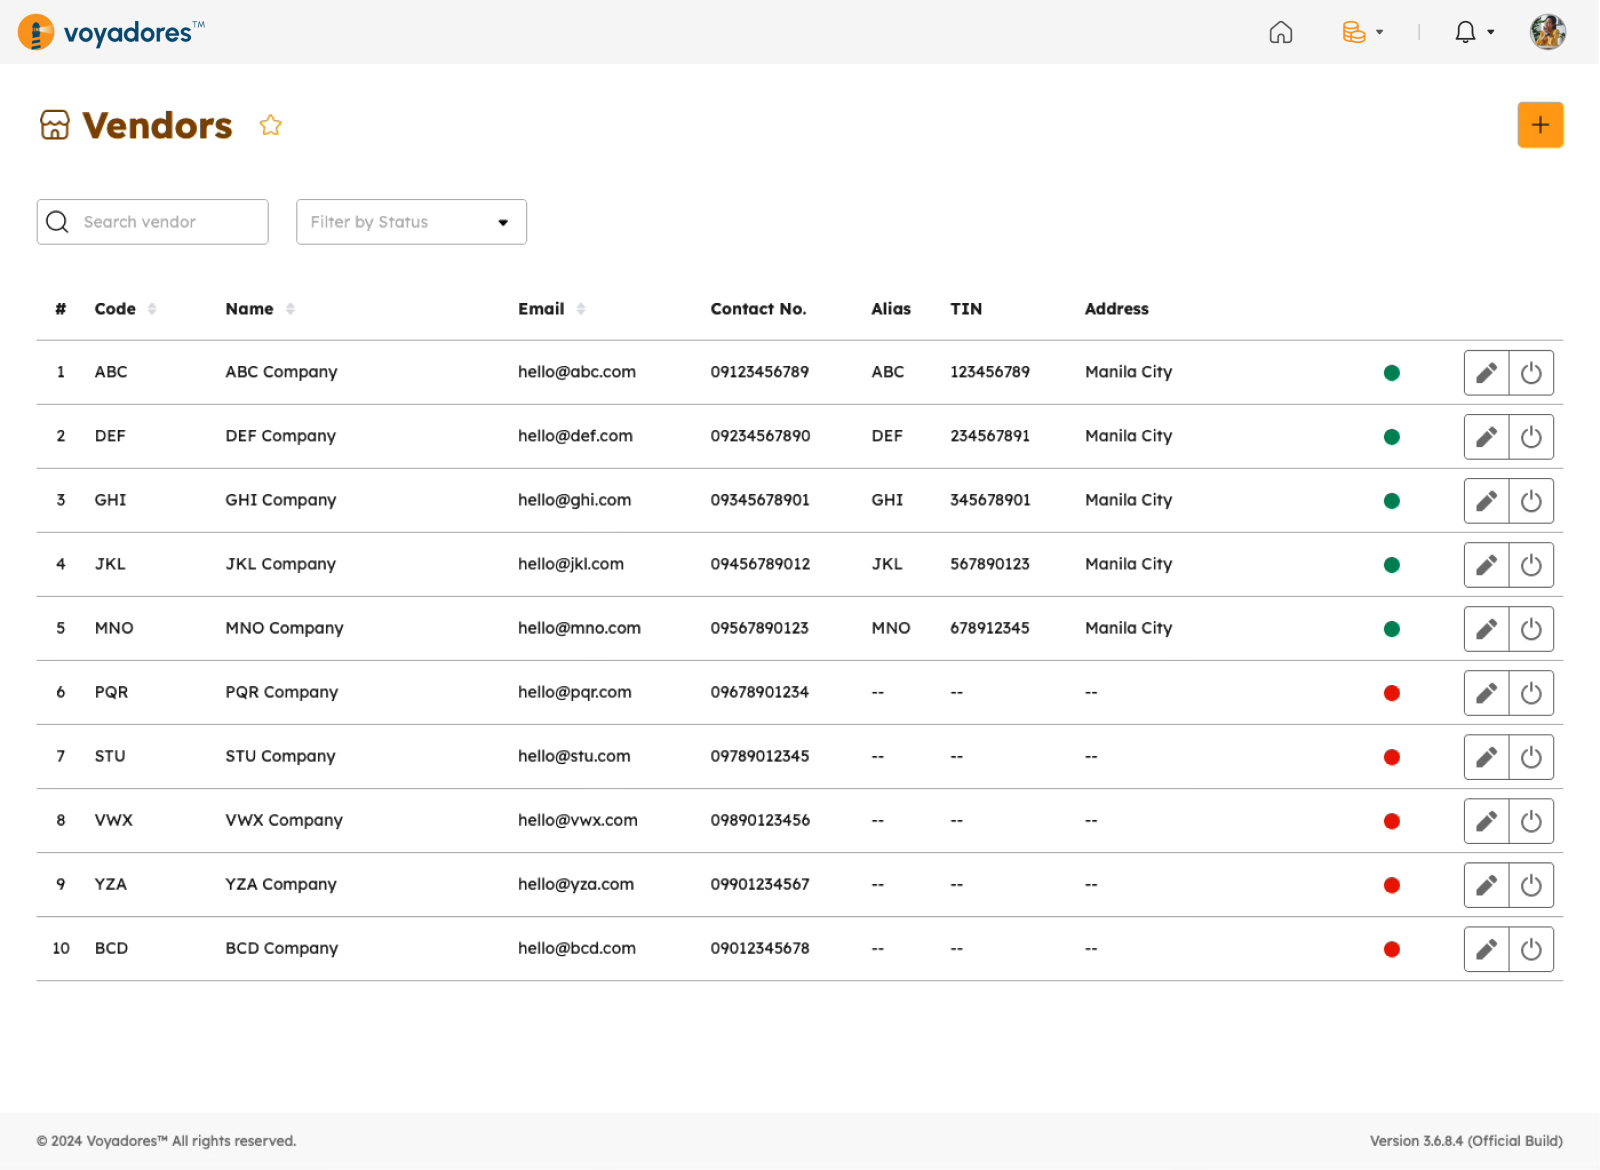
Upon clicking Vendors, the user will be redirected to the Vendors page. This page has a table consisting of the following columns:
- #. Item number sequence for each listed vendor.
- Name. Displayed here is the vendor's name.
- Description. Displayed here is the full description of the expense category.
- Email. Displayed here is the vendor's email address
- Contact No. Displayed here is the vendor's contact number.
- Alias. Displayed here is the vendor's Alias name, for example: the vendor's name is Philippine Seven Corporation the alias name would be 7-Eleven.
- TIN. Displayed here is the vendor's TIN number.
- Address. Displayed here is the vendor's address.
Here is an image of the table under the Vendors page:
Creating Vendor Directories
To create vendor directories, follow the procedures below:
- Click the Add Vendor button. A modal will display upon clicking this button.
-
From the modal, fill in the required fields with an asterisk (*) as follows:
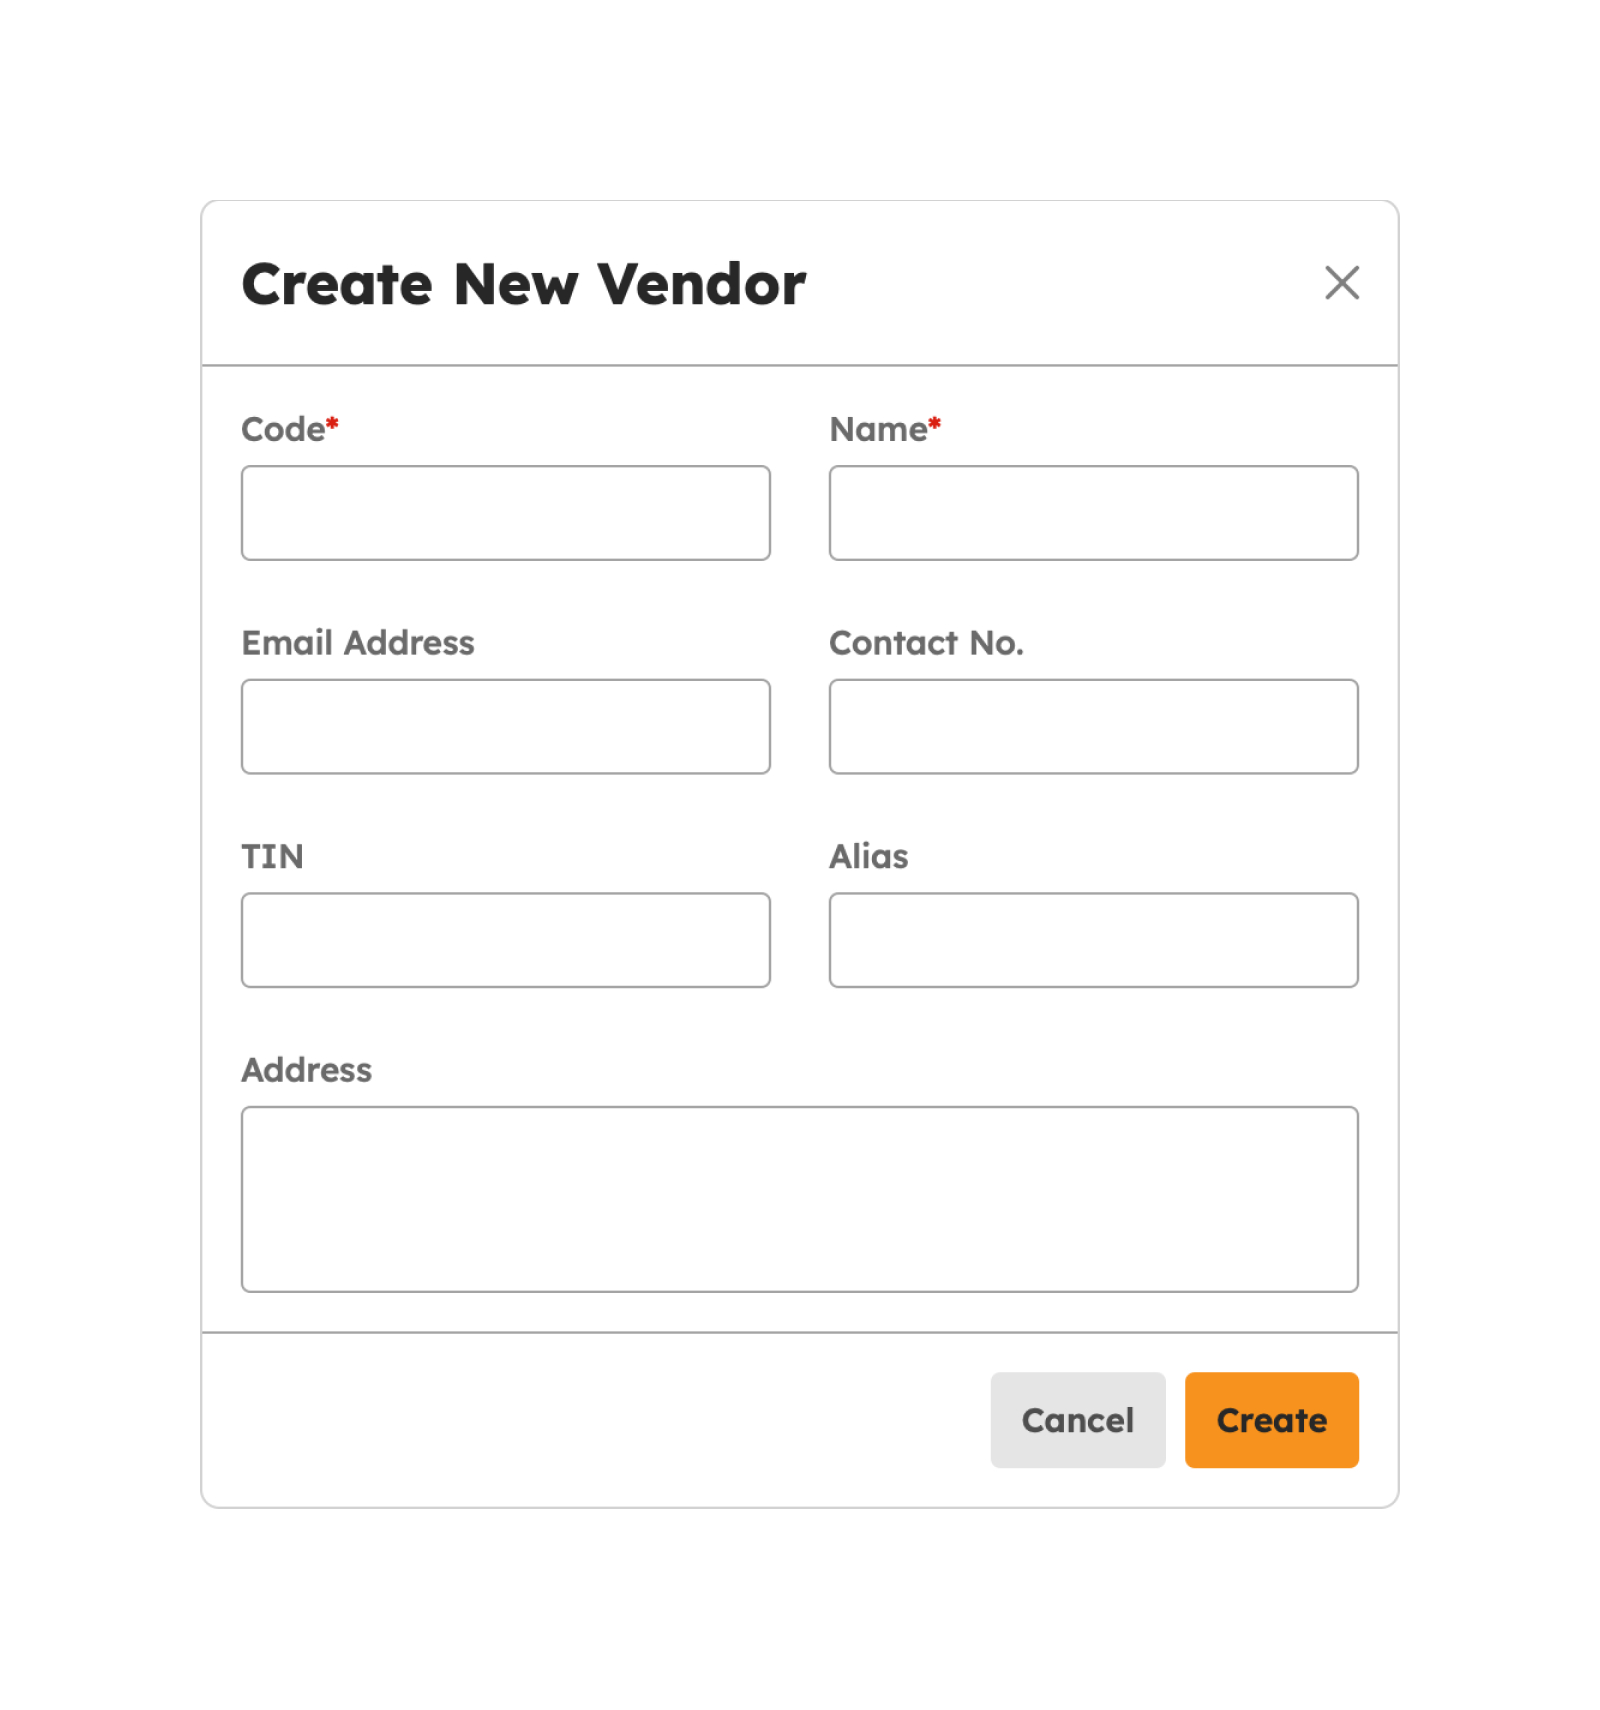
- Code
- Name
- Email Address
- Contact No.
- TIN
- Alias
- Address
Note
Required fields with an asterisk (*) should not be empty. An error notification message will show if one of the required fields is empty.
- Once done filling in details on the required fields, click the Save button.
-
A successful notification will appear at the bottom-right of the screen if saving details of a newly created vendor directory is a success:
Vendor successfully created
- Once saved, the new vendor directory will be tagged as Active.
- If the user chooses not to proceed with the creation of a vendor directory, the user may click the Cancel button.
Editing Vendor Directories
To edit the details of vendor directories, follow the procedures below:
-
Click the Edit button. A modal will display upon clicking this button.

-
From the modal, fill in the required fields with an asterisk (*) as follows:
- Code
- Name
- Email Address
- Contact No.
- TIN
- Alias
- Address
Note
Required fields with an asterisk (*) should not be empty. An error notification message will show if one of the required fields is empty.
- Once done filling in details on the required fields, click the Update button.
-
A successful notification will appear at the bottom-right of the screen if updating the details of a newly created vendor directory is a success:
Vendor successfully updated
- Once saved, the new vendor directory will be tagged as Active.
- If the user chooses not to proceed with the update of a vendor directory, the user may click the Cancel button.
Searching Vendors by Name
To search for vendors by Name, follow the guide below:
- Click on the Search bar and begin typing the name of the vendor in the field.
- Hit Enter for Windows or Return for MAC to trigger searching using the vendor's name.
- The page will display a vendor directory with the corresponding name, if available.
- Otherwise, an empty state will show, signifying that the vendor is unavailable on the list.
Searching Vendors by Alias
To search for vendors by Alias, follow the guide below:
- Click on the Search bar and begin typing the Alias of the vendor in the field.
- Hit Enter for Windows or Return for MAC to trigger searching using the vendor's name.
- The page will display a vendor directory with the corresponding alias, if available.
- Otherwise, an empty state will show, signifying that the vendor is unavailable on the list.
Filtering Vendors by Status
To filter for vendors by status, follow the guide below:
-
Click on Filter by Status.
The drop-down selection will display all default statuses to choose from, as follows:
- Active. Indicates that the vendor is an active directory
- Inactive. Indicates that the vendors is an inactive directory
- Click a particular status from the selection to trigger filtering for vendors by status.
- The page will display a vendor directory with the corresponding status, if available.
- Otherwise, an empty state will show, signifying that the vendor with the particulate status is unavailable on the list.
Deactivating a Vendor
If for some reason the user wants to deactivate the vendor directory, the user may follow the procedures below:
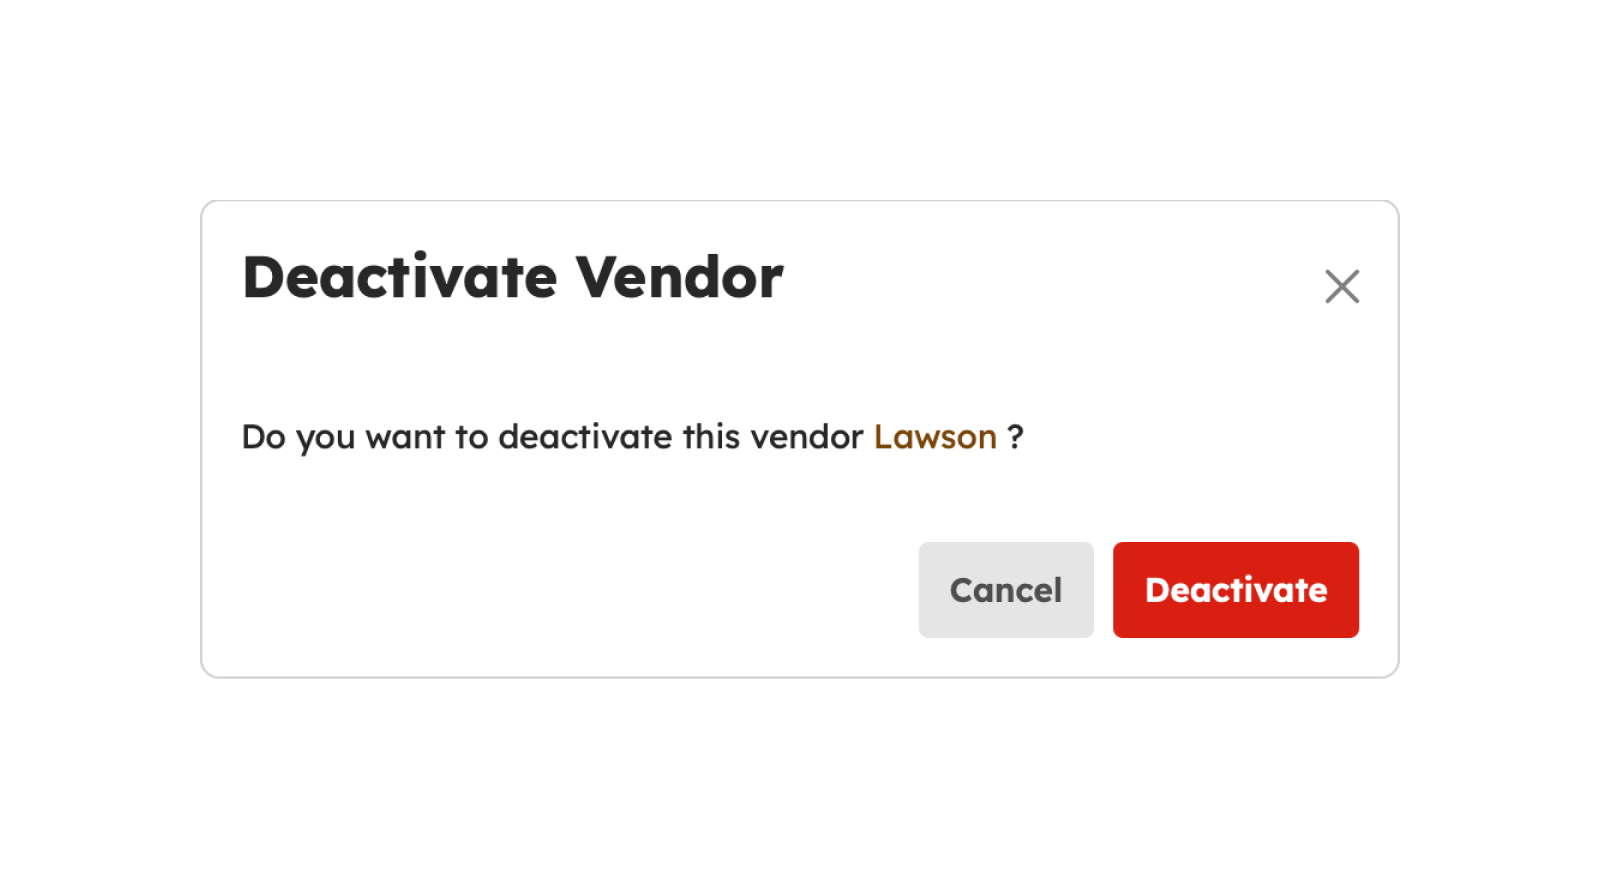
- Click on the Deactivate button.
- Upon clicking the Deactivate button, a confirmation modal will display.
- From the modal, click the Deactivate button to successfully Deactivate the vendor directory.
-
A successful notification message will show:
Vendor successfully deactivated
- Otherwise, click the Cancel button to close the modal.
Activating a Vendor
If for some reason the user wants to activate the vendor directory, the user may follow the procedures below:
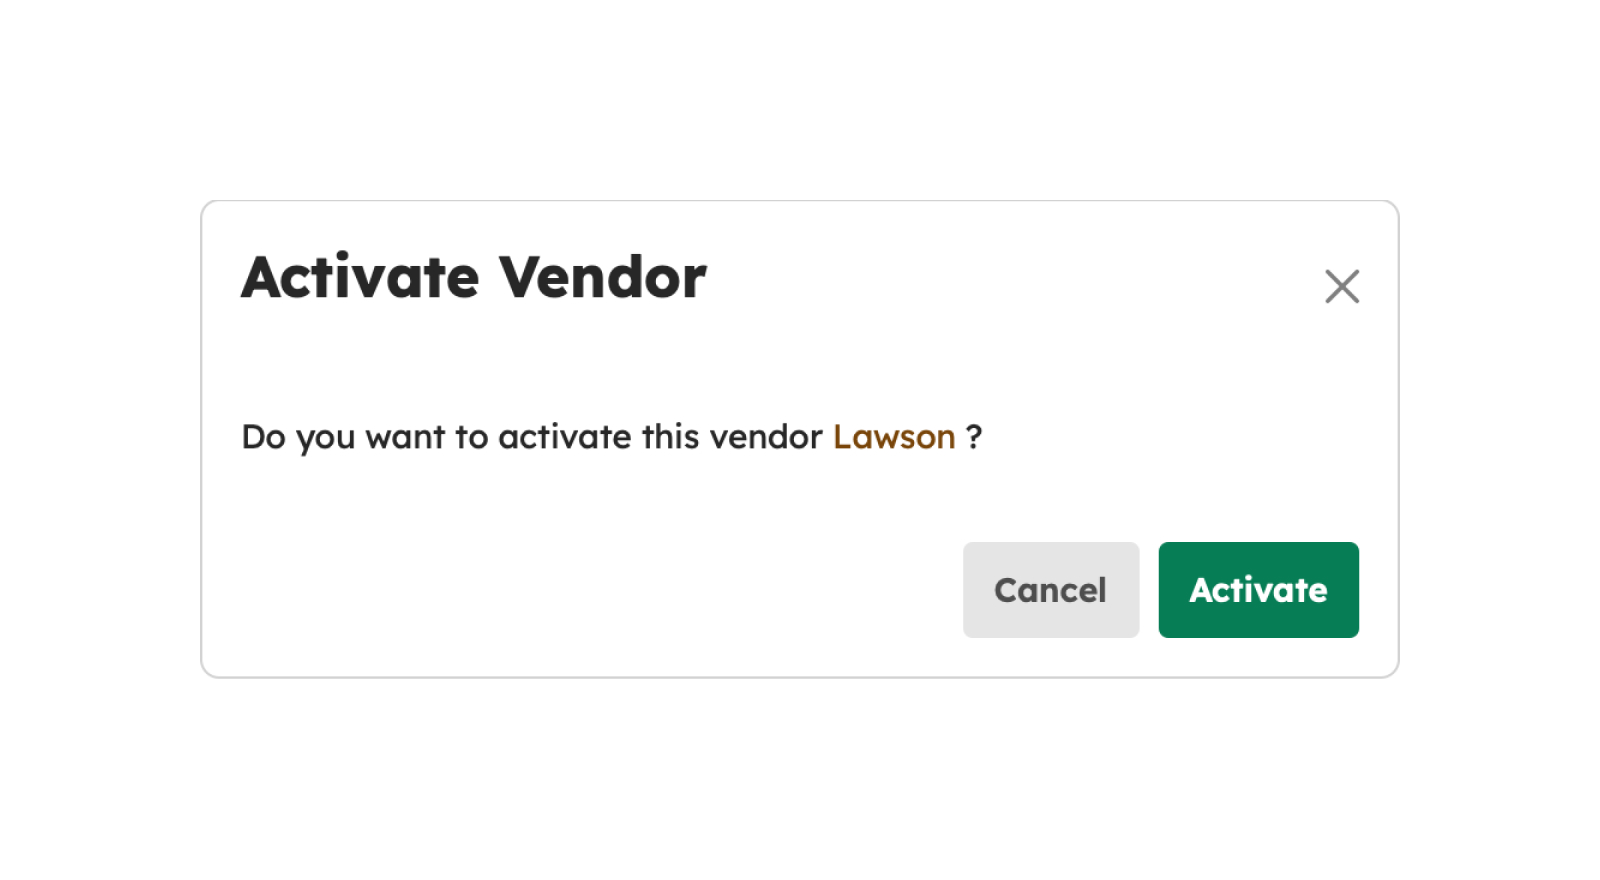
- Click on the Activate button.
- Upon clicking the Activate button, a confirmation modal will display.
- From the modal, click the Activate button to successfully Activate the vendor directory.
-
A successful notification message will show:
Vendor successfully activated
- Otherwise, click the Cancel button to close the modal.
How to Load More Vendors
If there are more than 20 vendors on the list, click the Load More button to display other vendors since the default item number displayed on the screen is from count 1-20.
Disbursements
Introduction to Disbursements Page
This page is dedicated to managing disbursements from Vendor payments, Employee Expenses, Bank Payments, and others. This page also allows designated individuals to review and approve payments before they are processed. This helps ensure that payments are made in compliance with company policies and controls.
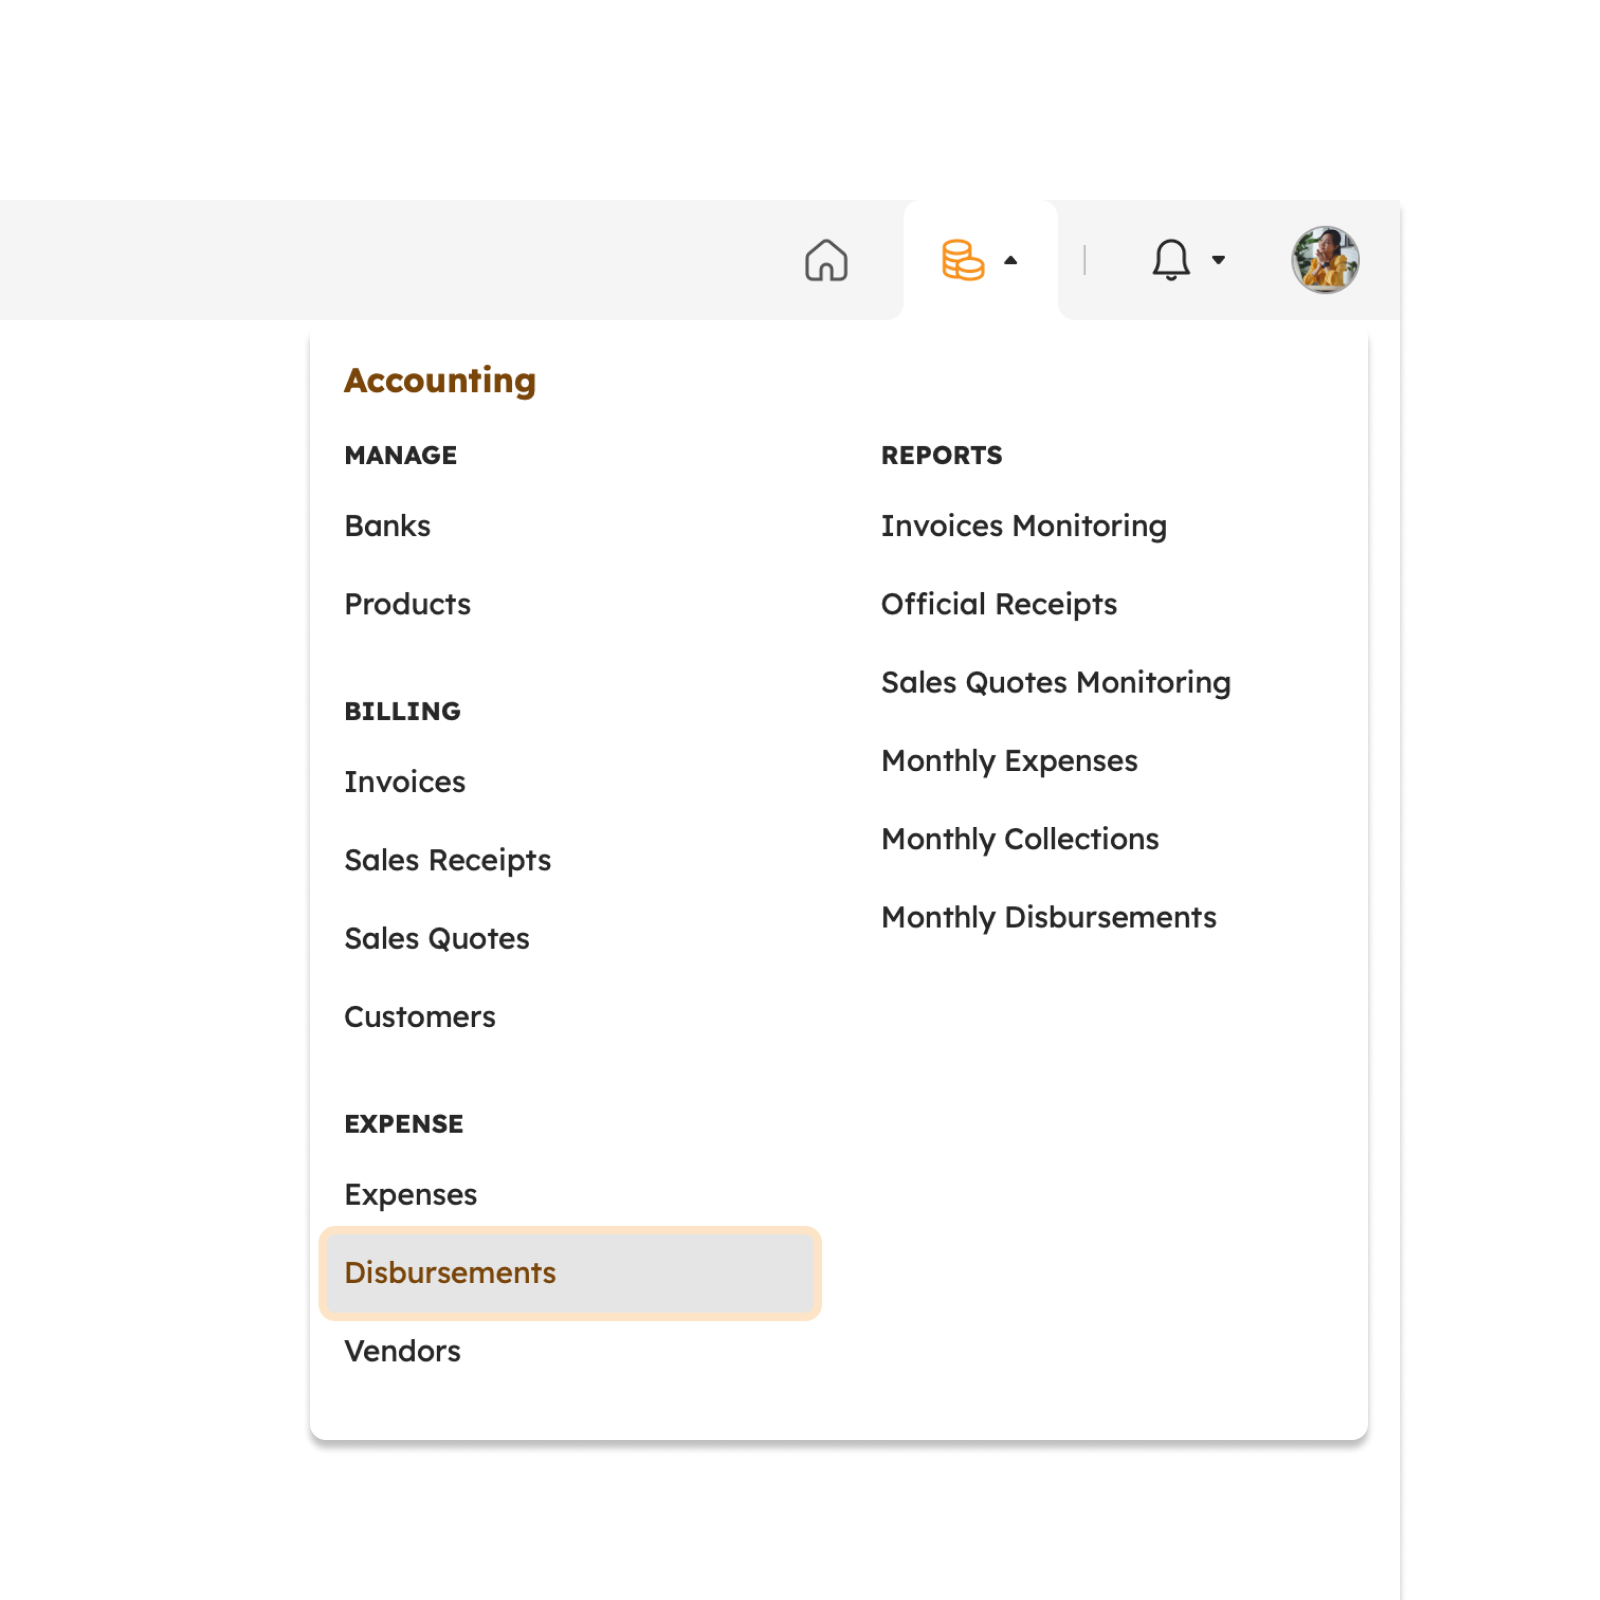
To access the Disbursements page, hover over the Accounting Module and click “Disbursements”.
Features in Disbursements Page
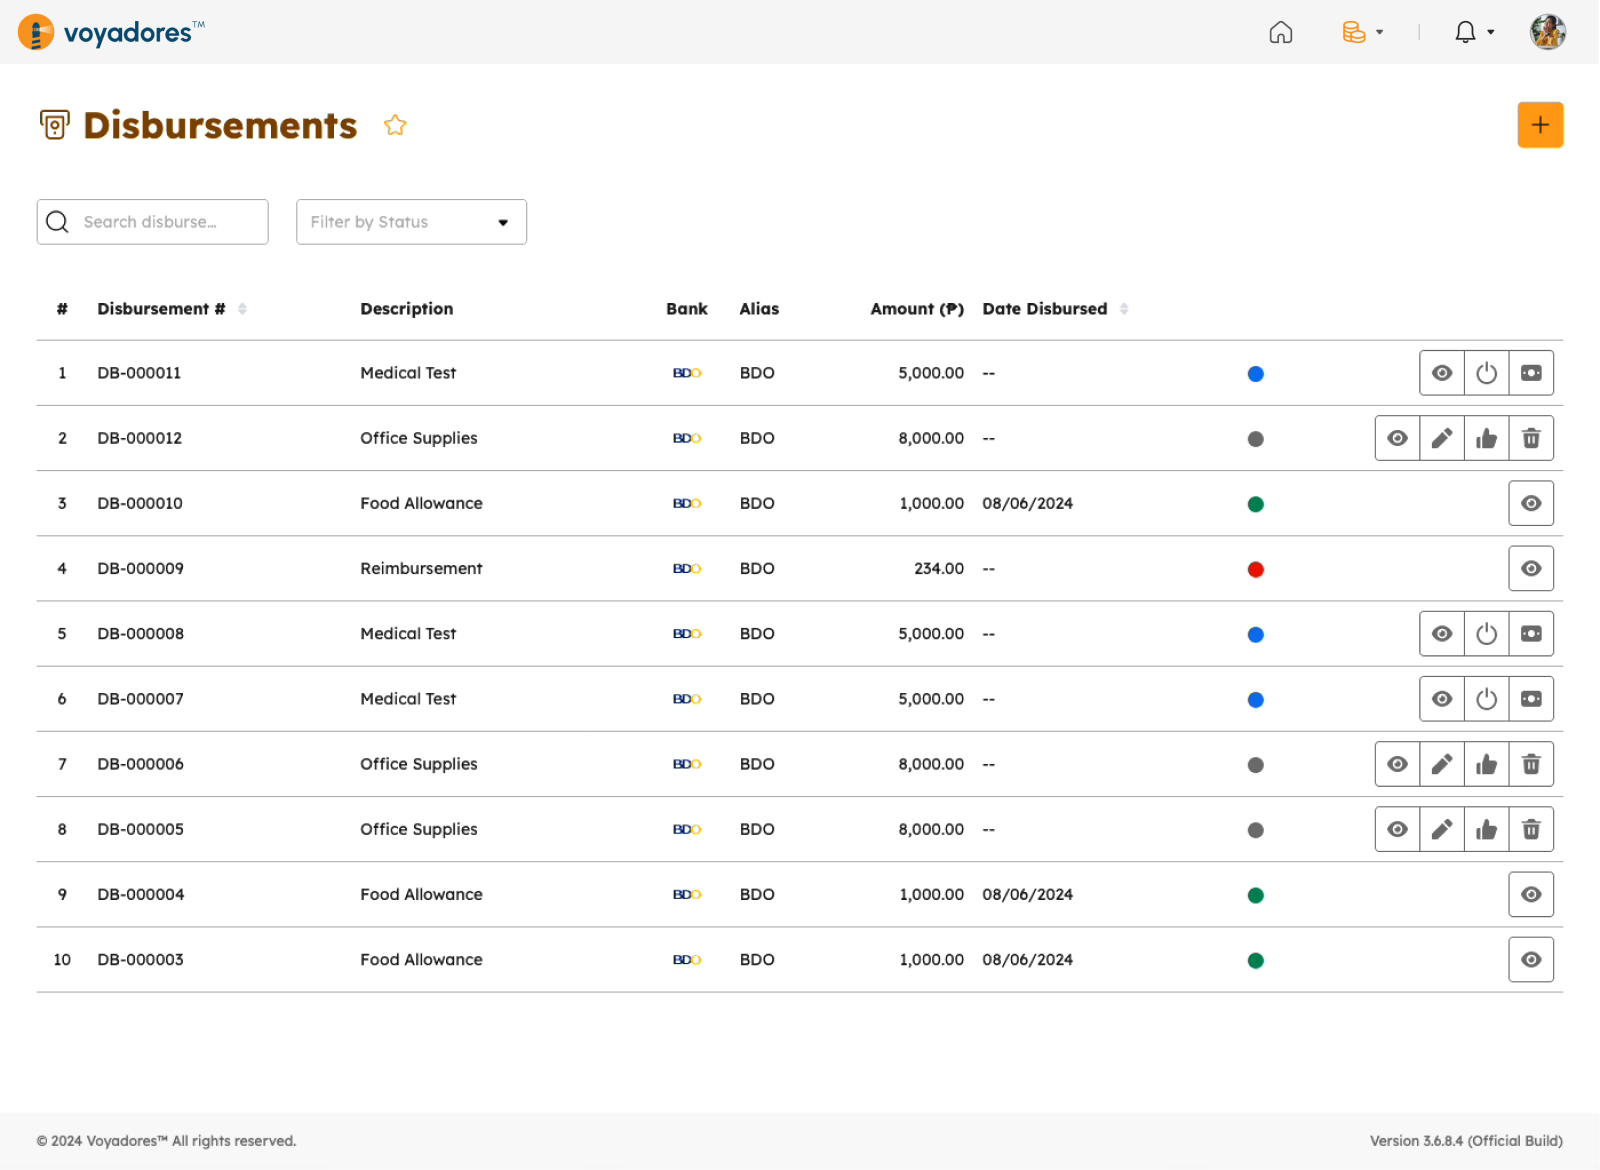
The image below is a high-level view of Disbursement page along with its built-in features.
Summary Table
Upon clicking Disbursements, the user will be redirected to the Disbursements Page. This page has a table consisting of the following columns:
- #. Item number sequence for each listed disbursement.
- Disbursement #. Displayed here is the auto-generated disbursement number upon creation.
- Description. Displayed here is the description of the disbursement item.
- Bank. Displayed here is the name of the bank where the disbursement amount should be reflected.
- Alias. The Bank alias where the disbursement amount should be reflected.
- Amount. The total amount of a disbursement item.
- Date Disbursed. Displayed here is the disbursement date of an item.
Search by Customer Name
To search for specific Customer, enter the Customer Name in the Search Bar, as shown in the image below:

Create a Disbursement Item
To create a Disbursement item, follow the procedures below:
- Click the Create Disbursement button. A modal will display upon clicking this button.
-
From the modal, fill in the required fields with an asterisk (*) as follows:

- Disbursement Type
- Amount
- Amount
- Payment Type
- Bank
- Description
- Expenses. This section lets users select and filter all created expense item to include on the disbursement item. Users also have the ability to delete the selected expense item.
Note
Required fields with an asterisk (*) should not be empty. An error notification message will show if one of the required fields is empty.
- Once done filling in details on the required fields, click the Create button.
-
A successful notification will appear at the bottom-right of the screen if saving details of a new disbursement item is a success:
Disbursement successfully created
- Once saved, the disbursement item will be tagged as Created.
- If the user chooses not to proceed with the creation of a disbursement item, the user may click the Cancel button
Editing a Disbursement Item
Users can only edit a disbursement item under CREATED status. To begin editing a disbursement item, follow the procedures below:
- Click the Edit Disbursement button. A modal will display upon clicking this button.
-
From the modal, fill in the required fields with an asterisk (*) as follows:
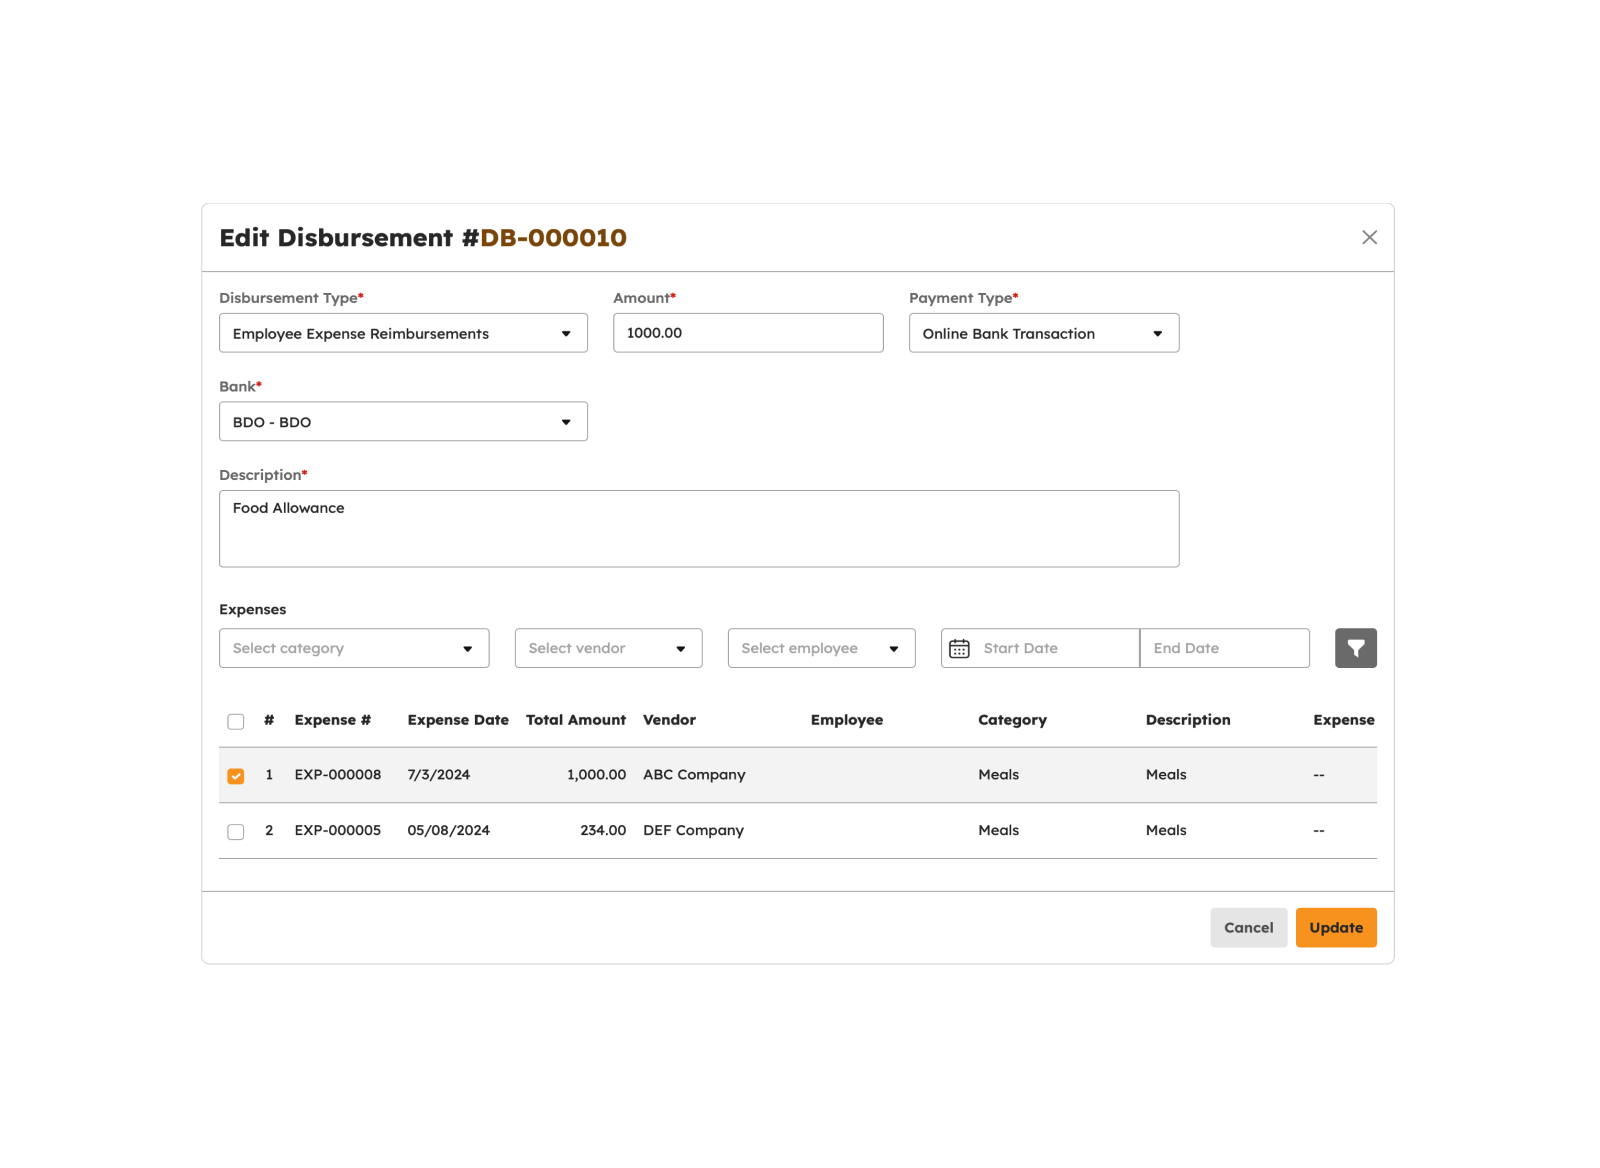
- Disbursement Type
- Amount
- Amount
- Payment Type
- Bank
- Description
- Expenses. This section lets users select and filter all created expense item to include on the disbursement item. Users also have the ability to delete the selected expense item.
Note
Required fields with an asterisk (*) should not be empty. An error notification message will show if one of the required fields is empty.
- Once done filling in details on the required fields, click the Update button.
-
A successful notification will appear at the bottom-right of the screen if updating details of a new disbursement item is a success:
Disbursement successfully updated
- Once saved, the disbursement item will be tagged as Created.
- If the user chooses not to proceed updating of a disbursement item, the user may click the Cancel button
Viewing a Disbursement Item
To view a disbursement item, follow the procedures below:
- Click on the View Disbursement button to view the disbursement details.
- Upon clicking the View icon, a modal will appear displaying the details of the disbursement item.
- Once done viewing the disbursement item, click the Close button to hide the modal.
Searching items using the Disbursement Number
To begin searching for a disbursement item, follow the guide below:

- Click on the Search bar and begin typing the disbursement number in the field.
- Hit Enter for Windows or Return for MAC to trigger searching the disbursement item.
- The page will display the disbursement item with the corresponding disbursement number, if available.
- Otherwise, an empty state will show, signifying that the disbursement number is not available on the list.
Filtering a Disbursement Item by Status
To filter a disbursement item by status, follow the guide below:

-
Click on Filter by Status. The drop-down selection will display all default statuses to choose from, as follows:
- Created. For every newly created disbursement item, Created status is the default.
- Approved. This status signifies that the disbursement item is approved but not yet disbursed.
- Disbursed. The disbursement item is disbursed.
- Click a particular status from the selection to trigger filtering for a disbursement item.
- The page will display the disbursement item with the corresponding status, if available.
- Otherwise, an empty state will show, signifying that the disbursement is not available on the list.
Deleting a Disbursement Item
Deletion of a disbursement item is only applicable if the disbursement item status is “Created”. To delete a disbursement item, follow the procedures below:
- Click on the Delete button.
-
Upon clicking Delete, a confirmation modal will display.
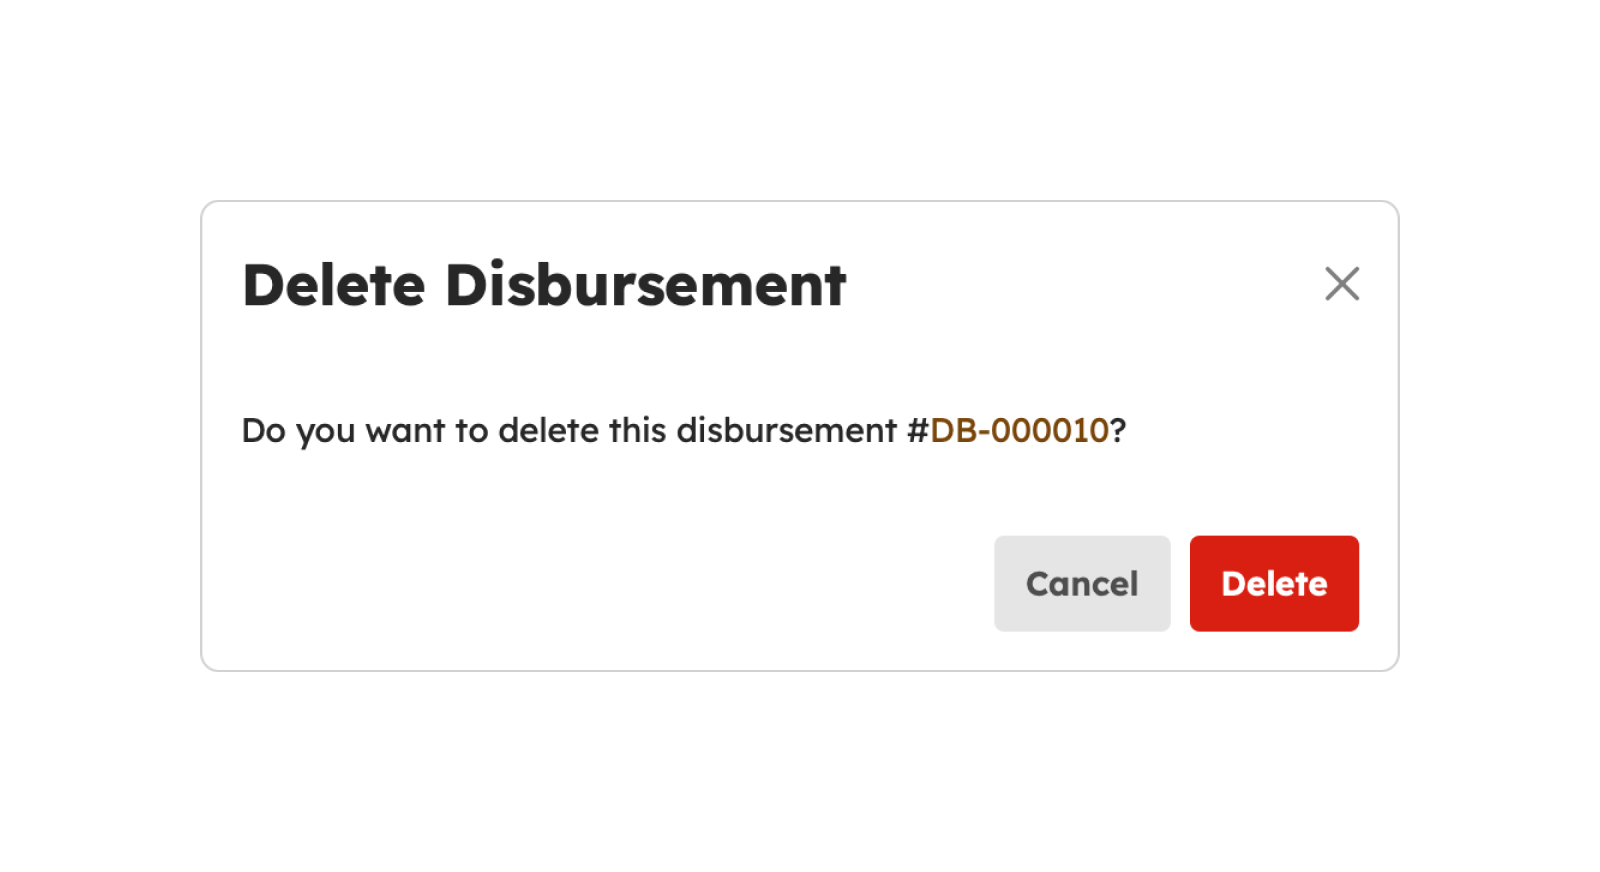
- Click Delete from the modal to successfully delete the disbursement item.
-
A successful notification message will show:
Disbursement successfully deleted
- Otherwise, click the Close button to close the modal.
Load More
If you wish to check for more than 20 disbursements, you can click the Load More button. This will display additional disbursements beyond the initial 20 displayed on the screen.